How to Program a Laser Cutting Machine with LightBurn

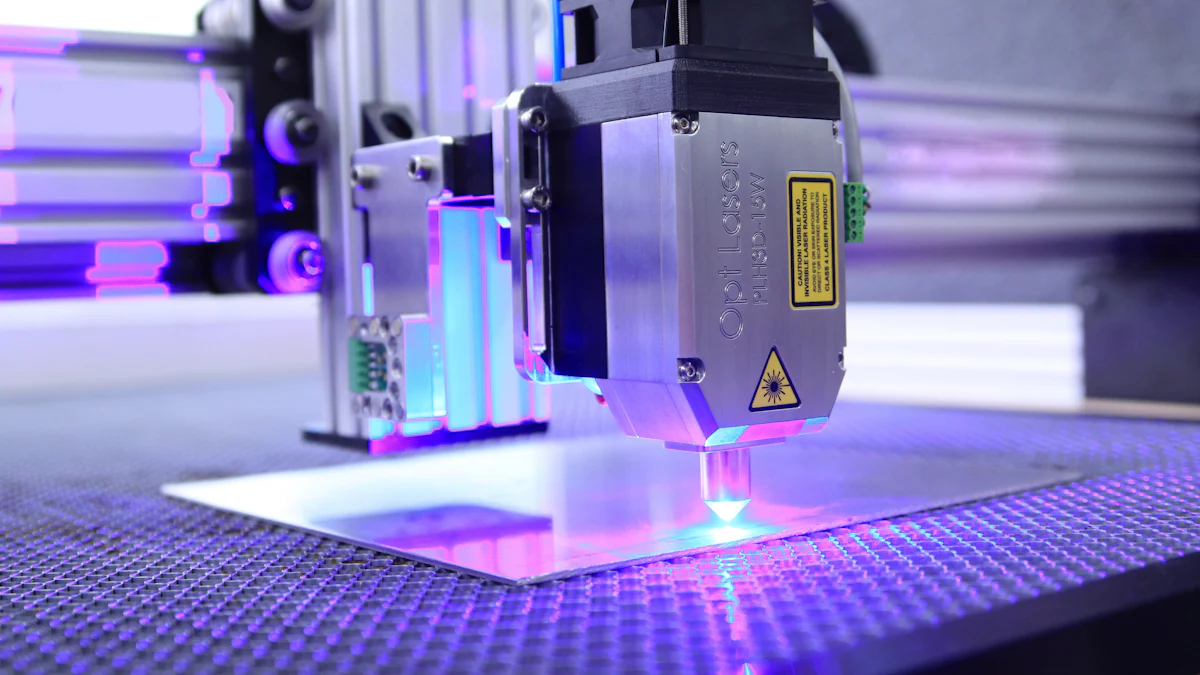
LightBurn stands out as a powerful and intuitive software designed to simplify how to program a laser cutting machine. Its user-friendly interface allows you to create, edit, and manage laser projects with ease. Whether you're a beginner exploring creative hobbies or a professional handling intricate designs, LightBurn adapts to your needs. Unlike other software, it supports a wide range of laser machines, ensuring compatibility and flexibility. Frequent updates and active community support make it a reliable choice. With features like image tracing and advanced customization, LightBurn empowers you to bring your ideas to life efficiently.
Getting Started with LightBurn
Installation and System Requirements
Minimum and Recommended System Requirements for LightBurn
Before installing LightBurn, ensure your computer meets the necessary system requirements. This step guarantees smooth operation and prevents performance issues. The software supports both macOS and Windows operating systems, making it accessible to a wide range of users.
Here are the minimum and recommended specifications:
-
Minimum Requirements:
- Operating System: Windows 7 or macOS 10.11
- Processor: 1 GHz or faster
- RAM: 2 GB
- Storage: 50 MB of free disk space
- Display: 1024 x 768 resolution
-
Recommended Requirements:
- Operating System: Windows 10 or macOS 10.15 and above
- Processor: Multi-core processor (2 GHz or faster)
- RAM: 4 GB or more
- Storage: 100 MB of free disk space
- Display: 1920 x 1080 resolution or higher
Meeting the recommended specifications ensures optimal performance, especially when working on complex designs or large projects.
Step-by-Step Guide to Downloading and Installing LightBurn
Follow these steps to install LightBurn on your computer:
- Visit the Official Website: Go to the official LightBurn website and navigate to the download section.
- Choose Your Operating System: Select the version compatible with your system (Windows, macOS, or Linux).
- Download the Installer:
- For Windows: Download the
.exefile. - For macOS: Download the
.dmgfile. - For Linux: Download the AppImage file.
- For Windows: Download the
- Run the Installer:
- On Windows: Double-click the
.exefile and follow the on-screen instructions. - On macOS: Drag the LightBurn icon into the Applications folder, then open it from there.
- On Linux: Make the AppImage file executable by running
chmod +x <filename>in the terminal, then execute the file.
- On Windows: Double-click the
- Complete the Setup: Launch the software and follow any additional prompts to finalize the installation.
Once installed, you can start exploring the features of this versatile laser software.
Initial Setup and Connecting Your Laser Cutter
How to Connect Your Laser Cutting Machine to LightBurn
Connecting your laser cutter to LightBurn is a straightforward process. Begin by ensuring your machine is compatible with the software. LightBurn supports a wide range of laser cutters, including diode, CO2, and fiber lasers.
Here’s how to establish the connection:
- Power On Your Laser Cutter: Turn on the machine and ensure it is ready for operation.
- Connect via USB or Network:
- For USB: Plug the USB cable into your computer and the laser cutter.
- For Network: Ensure both devices are on the same network and note the IP address of your laser cutter.
- Launch LightBurn: Open the software and navigate to the "Devices" tab.
- Add Your Device:
- Click "Find My Laser" to let LightBurn automatically detect your machine.
- If detection fails, manually add the device by selecting the type, connection method, and dimensions of your laser cutter.
- Test the Connection: Use the "Move" tab in LightBurn to send basic commands and confirm communication.
Configuring Device Settings and Ensuring Proper Communication
After connecting your laser cutter, configure the device settings to ensure seamless communication. This step optimizes the interaction between the software and your machine.
- Access Device Settings: In LightBurn, go to the "Edit" menu and select "Device Settings."
- Set Machine Parameters:
- Input the correct bed size (width and height) of your laser cutter.
- Choose the origin point (usually the bottom-left corner).
- Adjust Communication Settings:
- For USB: Verify the correct COM port is selected.
- For Network: Enter the IP address of your laser cutter.
- Save the Configuration: Click "OK" to save your settings.
- Run a Connection Test: Use the "Frame" button to outline the cutting area and confirm the setup.
Proper configuration ensures that your laser cutter responds accurately to commands from LightBurn, allowing you to focus on creating and cutting designs.
Understanding the LightBurn Interface
Overview of the User Interface
Key sections of the interface (e.g., design workspace, toolbar, layers panel)
When you open LightBurn, the interface greets you with a clean and organized layout. Each section serves a specific purpose, helping you manage your laser cutting projects efficiently. Familiarizing yourself with these sections will make your workflow smoother.
- Design Workspace: This is the central area where you create and edit your designs. It displays your project in a grid format, allowing precise alignment and positioning. You can zoom in or out to focus on details or view the entire design.
- Toolbar: Located at the top, the toolbar provides quick access to essential tools like selection, drawing shapes, and adding text. These tools simplify the process of creating and modifying designs.
- Layers Panel: Found on the right side, the layers panel helps you organize your project. You can assign different settings, such as speed and power, to each layer. This feature is especially useful for complex designs requiring multiple passes or varied cutting depths.
Understanding these sections will give you better control over your projects and improve your overall experience with LightBurn.
Explanation of essential tools and their functions
LightBurn offers a variety of tools designed to enhance your creative process. Knowing how to use these tools will help you unlock the software's full potential.
- Selection Tool: Use this tool to select and move objects within the workspace. It also allows you to resize or rotate elements with ease.
- Shape Tools: These tools let you draw basic shapes like rectangles, circles, and polygons. They are perfect for creating simple designs or adding geometric elements to your project.
- Text Tool: This tool enables you to add text to your design. You can customize the font, size, and alignment to match your vision.
- Node Editing Tool: Use this tool to modify individual points on a shape or path. It’s ideal for fine-tuning curves or adjusting intricate details.
- Zoom and Pan Tools: These tools help you navigate the workspace. Zoom in to focus on specific areas or pan across the design to view different sections.
Mastering these tools will make designing in LightBurn more intuitive and enjoyable.
Customizing the Interface
Adjusting the layout to suit your workflow
LightBurn allows you to customize the interface to match your preferences. Tailoring the layout can improve your efficiency and make the software more comfortable to use.
- Rearrange Panels: Drag and drop panels like the layers panel or the cuts/layers tab to new positions. Arrange them in a way that feels natural to your workflow.
- Resize Sections: Adjust the size of different sections by clicking and dragging the edges. For example, you can enlarge the design workspace for better visibility or shrink the layers panel if you don’t need it often.
- Save Your Layout: Once you’ve arranged the interface to your liking, save the layout. This ensures that your preferred setup loads every time you open LightBurn.
Customizing the layout helps you focus on the features you use most, reducing distractions and improving productivity.
Tips for navigating the interface efficiently
Efficient navigation is key to making the most of LightBurn’s features. These tips will help you work faster and more effectively.
- Use Keyboard Shortcuts: LightBurn supports various shortcuts for common actions. For example, press
Ctrl + Zto undo changes orCtrl + CandCtrl + Vto copy and paste elements. - Enable Snap Options: Turn on snapping to align objects precisely. This feature ensures that shapes and text line up perfectly with the grid or other elements.
- Organize Layers: Name your layers clearly and group related elements together. This makes it easier to manage complex designs with multiple settings.
- Preview Your Design: Use the preview button to see how your project will look when cut or engraved. This step helps you catch errors before running the laser.
By applying these tips, you’ll navigate LightBurn with confidence and complete your projects more efficiently.
Creating and Importing Designs
Creating Designs in LightBurn
Using built-in design tools to create shapes and patterns
LightBurn provides a robust set of design tools that allow you to create shapes and patterns directly within the software. These tools eliminate the need for external design programs, streamlining your workflow. You can draw basic shapes like rectangles, circles, and polygons with just a few clicks. The software also includes advanced features like node editing, which lets you adjust individual points on a shape for precise customization.
To create patterns, use the array tool. This feature duplicates shapes in a grid or circular arrangement, making it easy to design repetitive patterns for engraving or cutting. For example, you can create a honeycomb pattern by drawing a single hexagon and using the array tool to replicate it across the workspace. These built-in tools empower you to design efficiently without relying on additional software.
Adding text and customizing fonts
Adding text to your designs is simple with LightBurn’s text tool. You can type directly onto the design workspace and customize the text to fit your project. The software supports a wide range of fonts, including those installed on your computer. Adjust the size, alignment, and spacing to achieve the desired look.
LightBurn also allows you to manipulate text creatively. You can curve text along a path, align it to specific shapes, or convert it into editable nodes for further customization. This flexibility makes it ideal for projects like personalized engravings or intricate signage. By combining text with shapes and patterns, you can create unique designs tailored to your needs.
Importing External Files
Supported file formats for importing designs
LightBurn supports a variety of file formats, making it compatible with most design software. You can import vector files like AI, SVG, DXF, and PDF, as well as raster images such as BMP, JPEG, and PNG. This versatility ensures that you can work with designs created in other programs or sourced from online libraries.
When importing files, LightBurn retains the original quality and structure of the design. Vector files remain scalable without losing detail, while raster images can be adjusted for resolution and contrast. This compatibility makes LightBurn a comprehensive laser engraving software for users who work with diverse file types.
Tips for preparing external files for laser cutting
Before importing external files, ensure they are optimized for laser cutting. For vector files, simplify the design by removing unnecessary nodes or overlapping paths. This reduces processing time and improves cutting accuracy. Use clean, closed paths for shapes to avoid incomplete cuts.
For raster images, adjust the resolution to match the requirements of your laser cutter. High-resolution images may slow down the engraving process, while low-resolution images can result in poor-quality output. Convert images to grayscale if you plan to engrave them, as this helps the software interpret shading and depth more effectively.
By preparing your files properly, you can achieve better results and minimize errors during the cutting or engraving process.
Optimizing Designs for Laser Cutting
Adjusting design dimensions and alignment
Properly sizing and aligning your design is crucial for successful laser cutting. LightBurn makes this process straightforward with its measurement and alignment tools. Use the scale tool to adjust the dimensions of your design to fit the material you’re working with. The software displays measurements in real-time, ensuring accuracy.
For alignment, use the snapping feature to position elements precisely on the grid. You can also align objects relative to each other using the alignment toolbar. For example, center a logo within a frame or evenly distribute shapes across the workspace. These tools help you create balanced and professional-looking designs.
Simplifying complex designs for better cutting results
Complex designs with intricate details can pose challenges for laser cutting. Simplify these designs to improve cutting performance and reduce the risk of errors. In LightBurn, use the node editing tool to remove unnecessary points or smooth out curves. This reduces the complexity of the design without compromising its overall appearance.
Another useful feature is the optimization settings. LightBurn allows you to adjust the cutting order, minimize travel moves, and group similar elements. These settings enhance efficiency and ensure that the laser cutter follows a logical path. Simplifying your designs not only saves time but also extends the lifespan of your laser cutter by reducing wear and tear.
Configuring Laser Settings
Adjusting Power and Speed
How to set power and speed for different materials
Setting the correct power and speed is essential for achieving precision and maintaining the quality of your laser cutting projects. These two parameters directly influence how the laser interacts with the material, affecting the depth of cuts, engraving clarity, and overall performance.
To set the power and speed effectively:
- Understand Material Properties: Different materials respond uniquely to laser energy. For example:
- Wood requires moderate power and slower speed for clean cuts.
- Acrylic benefits from higher power and medium speed to prevent melting.
- Paper or thin fabrics need low power and high speed to avoid burning.
- Start with a Test Cut: Use a small sample of your material to test various power and speed combinations. This helps you identify the optimal settings without wasting resources.
- Adjust Gradually: Begin with lower power and higher speed. Gradually increase the power or reduce the speed until you achieve the desired result.
For most materials, middle-range power and speed often yield the best results. Research on laser processing, such as studies on AlSi7Mg0.6 alloy, highlights that moderate settings improve precision and reduce defects like uneven edges or excessive heat marks.
Understanding the relationship between power, speed, and material type
Power and speed work together to determine how the laser interacts with the material. Power controls the intensity of the laser beam, while speed dictates how quickly the laser moves across the surface. The balance between these two factors is critical for achieving high-quality results.
- High Power + Low Speed: This combination cuts deeper but may cause charring or melting, especially on delicate materials.
- Low Power + High Speed: This setup works well for engraving or cutting thin materials but may fail to penetrate thicker surfaces.
- Moderate Power + Moderate Speed: This balance often delivers the best performance, ensuring clean cuts and preserving material integrity.
For example, scientific findings on laser processing reveal that middle power and speed levels enhance mechanical properties and improve cutting precision. By understanding this relationship, you can tailor your settings to match the material type and project requirements.
Other Key Settings
Configuring line thickness and fill options
Line thickness and fill options play a significant role in determining the visual quality of your laser-cut designs. These settings control how the laser traces lines and fills shapes, impacting both aesthetics and functionality.
-
Line Thickness:
- Use thinner lines for intricate details or fine engravings.
- Opt for thicker lines when cutting structural elements or bold designs.
- Adjust the line thickness in LightBurn by selecting the object and modifying the "Line Width" parameter in the settings panel.
-
Fill Options:
- Choose "Fill" for engraving solid areas. This setting directs the laser to move back and forth, creating a filled appearance.
- Use "Line + Fill" for designs requiring both outlines and filled sections.
- Experiment with fill density to control the shading and texture of engraved areas.
Properly configuring these options ensures that your designs maintain their intended appearance while optimizing the laser's performance.
Using layers to manage multiple settings in a single project
LightBurn’s layer system allows you to assign different settings to various parts of your design. This feature is invaluable for projects involving multiple materials or complex designs requiring varied power and speed configurations.
Here’s how to use layers effectively:
-
Assign Layers:
- Select an object in your design and assign it to a specific layer using the "Cuts/Layers" panel.
- Each layer can have unique settings for power, speed, line thickness, and fill options.
-
Organize by Function:
- Use separate layers for cutting, engraving, and scoring. For example, assign a red layer for cuts and a blue layer for engravings.
- Group similar elements, such as text or patterns, into the same layer for easier management.
-
Preview and Adjust:
- Use the preview tool to visualize how each layer will be processed.
- Make adjustments to ensure that the laser follows the correct sequence and applies the appropriate settings.
By leveraging layers, you can streamline your workflow and achieve consistent, high-quality results across all parts of your project.
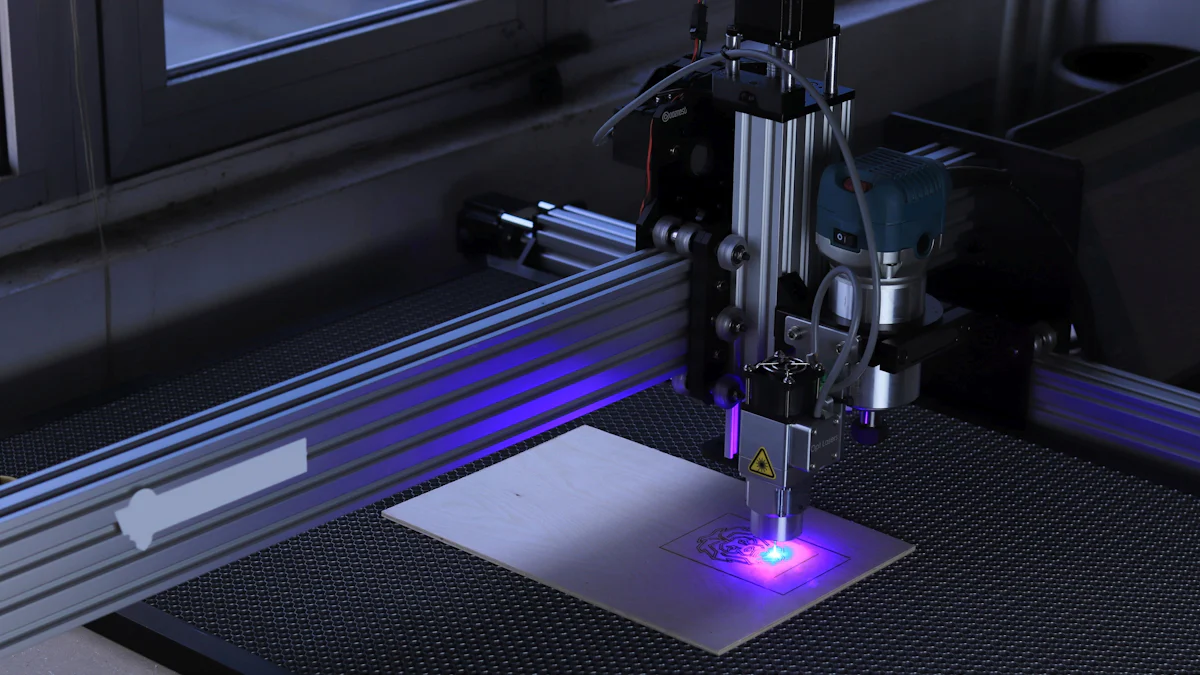
Running a Test Cut
Preparing for a Test Cut
Setting up the material and securing it on the laser bed
Before running a test cut, you need to prepare your material properly. Start by selecting a material that matches your project requirements. Ensure the material is clean and free of dust or debris, as these can interfere with the laser's precision.
Place the material flat on the laser bed. Align it with the grid or guides on the bed to ensure accurate positioning. Use clamps, magnets, or adhesive tape to secure the material firmly. This prevents movement during the cutting process, which could lead to misaligned cuts or errors. Double-check that the material lies completely flat, as uneven surfaces can affect the laser's focus and cutting quality.
Selecting a small test design for calibration
Choose a simple design for your test cut. A small shape, such as a square, circle, or star, works well for calibration. These shapes allow you to evaluate the laser's performance without wasting material. Avoid intricate designs at this stage, as they can complicate the testing process.
Load the test design into LightBurn and position it on the workspace to match the material's placement on the laser bed. Set the power, speed, and other parameters based on the material type. If you're unsure about the settings, refer to a material guide or start with conservative values. Running a test cut with a small design helps you fine-tune the settings before committing to a full project.
Performing the Test Cut
Monitoring the laser during the test cut
Stay attentive while the laser performs the test cut. Watch the process closely to ensure everything runs smoothly. Look for signs of issues, such as excessive smoke, burning, or incomplete cuts. If you notice any problems, pause the operation immediately to prevent damage to the material or the machine.
Keep an eye on the laser's movement and the material's reaction. Ensure the laser follows the intended path without skipping or stalling. Proper ventilation is essential during this step. Turn on the exhaust system or open a window to remove fumes and maintain a safe working environment.
Evaluating the results and making necessary adjustments
Once the test cut finishes, inspect the results carefully. Check the edges of the cut for smoothness and precision. Look for signs of charring, melting, or incomplete cuts. If the design includes engraving, examine the depth and clarity of the engraved areas.
Based on your observations, adjust the laser settings as needed. For example:
- If the cut is too shallow: Increase the power or reduce the speed.
- If the edges show excessive burning: Lower the power or increase the speed.
- If the engraving lacks detail: Adjust the resolution or focus.
Run additional test cuts if necessary to refine the settings. This iterative process ensures that your laser cutter performs optimally for your specific material and design. Taking the time to perfect the settings during the test phase saves you from costly mistakes later in the project.
Advanced Features and Tips
Using Layers and Multi-Pass Cutting
How to assign different settings to layers for complex projects
LightBurn’s layer system is a powerful tool for managing intricate designs. By assigning different settings to layers, you can handle complex projects with precision and efficiency. Each layer allows you to customize parameters like power, speed, and line thickness. This flexibility ensures that every part of your design receives the appropriate treatment.
To assign settings to layers:
- Select an Object: Click on the element in your design that requires specific settings.
- Assign a Layer: Use the "Cuts/Layers" panel to assign the object to a layer. Each layer is color-coded for easy identification.
- Adjust Settings: Modify the power, speed, and other parameters for the selected layer. For example, set a higher power for cutting and a lower power for engraving.
- Organize Layers: Group similar elements into the same layer. For instance, place all text in one layer and all shapes in another.
This method streamlines your workflow and ensures consistent results. It also reduces errors by keeping settings organized and easy to manage.
When and how to use multi-pass cutting for thicker materials
Multi-pass cutting is essential when working with thick or dense materials. Instead of cutting through the material in one go, the laser makes multiple passes at lower power. This approach minimizes heat buildup, reduces charring, and improves the overall quality of the cut.
Follow these steps to use multi-pass cutting effectively:
- Enable Multi-Pass: In the "Cuts/Layers" panel, select the layer for cutting and enable the multi-pass option.
- Set the Number of Passes: Choose the number of passes based on the material's thickness. Start with two or three passes and adjust as needed.
- Lower the Power: Reduce the laser power for each pass to prevent overheating. For example, use 50% power instead of 100%.
- Test the Settings: Run a test cut on a scrap piece of the material. Evaluate the results and make adjustments if necessary.
Multi-pass cutting ensures cleaner edges and enhances safety by reducing the risk of fire or damage to the material.
Troubleshooting Common Issues
Resolving connectivity problems with the laser cutter
Connectivity issues can disrupt your workflow, but most problems are easy to fix. Start by checking the basics. Ensure the laser cutter is powered on and properly connected to your computer via USB or network.
If the issue persists:
- Verify the Connection: Check the USB cable for damage or try a different port. For network connections, confirm that both devices are on the same network and the IP address is correct.
- Update Drivers: Install the latest drivers for your laser cutter. Outdated drivers often cause communication errors.
- Restart Devices: Restart both the laser cutter and your computer. This simple step resolves many connectivity problems.
- Check LightBurn Settings: Open the "Devices" tab in LightBurn and ensure the correct device is selected. Reconfigure the settings if necessary.
By addressing these steps, you can restore communication and get back to your project quickly.
Fixing design errors and optimizing cutting performance
Design errors can lead to poor cutting results, but LightBurn offers tools to help you fix them. Start by reviewing your design for overlapping paths, open shapes, or unnecessary nodes. These issues often cause incomplete cuts or misaligned engravings.
To optimize your design:
- Use Node Editing: Select the node editing tool to adjust individual points on a shape. Remove extra nodes or close open paths for a cleaner design.
- Simplify Complex Shapes: Break down intricate designs into simpler components. This reduces processing time and improves accuracy.
- Preview the Design: Use the preview feature to simulate the cutting process. Look for potential errors and make corrections before running the laser.
Optimizing your design not only enhances cutting performance but also extends the lifespan of your laser cutter by reducing wear and tear.
Additional Tips for Success
Regular maintenance of your laser cutter
Maintaining your laser cutter is crucial for consistent performance and safety. Regular upkeep prevents malfunctions and extends the machine’s lifespan. Follow these maintenance tips:
- Clean the Optics: Wipe the laser lens and mirrors with a soft, lint-free cloth. Dust and debris can affect the laser’s focus and power.
- Check the Cooling System: Ensure the cooling system is functioning properly. Overheating can damage the laser tube and other components.
- Inspect the Belts and Rails: Look for signs of wear or misalignment. Tighten loose belts and lubricate the rails to ensure smooth movement.
- Test the Laser Alignment: Periodically check the alignment of the laser beam. Misalignment reduces cutting precision and can damage the machine.
By performing regular maintenance, you can avoid costly repairs and ensure your projects run smoothly.
Experimenting with different materials and settings
Experimentation is key to mastering laser cutting. Testing various materials and settings helps you discover new possibilities and refine your skills. Start with small samples of different materials, such as wood, acrylic, or fabric. Observe how each material reacts to changes in power, speed, and focus.
Keep a record of your findings. Note the optimal settings for each material and use this information for future projects. Experimenting also allows you to explore creative techniques, like engraving textures or combining materials for unique effects.
"At HPC Laser, we understand the importance of reliable, user-friendly, and powerful software to complement our range of laser cutting machines."
LightBurn’s advanced features make it an excellent tool for experimentation. By pushing the boundaries of what your laser cutter can do, you’ll unlock its full potential and elevate your projects.
Laser Comparison: How LightBurn Stands Out
Comparing LightBurn to Other Software
LightBurn vs. Adobe Illustrator and CorelDRAW for advanced design control
When it comes to advanced design control, LightBurn, Adobe Illustrator, and CorelDRAW each bring unique strengths to the table. However, LightBurn excels in areas tailored specifically for laser cutting and engraving. Unlike Illustrator and CorelDRAW, which are primarily graphic design tools, LightBurn integrates design creation with laser-specific features. This all-in-one approach eliminates the need to switch between multiple programs, saving you time and effort.
LightBurn allows you to create and edit designs directly within the software. It supports vector formats like AI, SVG, and DXF, making it compatible with files from Illustrator and CorelDRAW. While Illustrator and CorelDRAW offer unparalleled precision for complex graphics, they lack built-in laser optimization tools. LightBurn bridges this gap by providing features like path optimization, multi-layer management, and real-time previews of laser operations.
For professionals handling intricate projects, Illustrator and CorelDRAW may still be preferred for their advanced graphic capabilities. However, if your focus is on laser cutting, LightBurn’s intuitive interface and laser-specific tools make it a more efficient choice. You can achieve high-quality results without the steep learning curve associated with mastering traditional graphic design software.
LightBurn vs. Inkscape and GIMP for budget-friendly options
If you’re looking for cost-effective solutions, LightBurn, Inkscape, and GIMP are popular choices. Inkscape and GIMP are free, open-source programs that provide basic design tools. They are ideal for hobbyists or those just starting with laser cutting. However, their functionality is limited when compared to LightBurn’s comprehensive feature set.
LightBurn stands out by combining affordability with versatility. While it requires a one-time purchase, it offers a robust suite of tools designed specifically for laser cutting and engraving. Inkscape and GIMP, on the other hand, require additional plugins or workarounds to prepare designs for laser machines. This extra step can complicate your workflow and increase the chances of errors.
Another advantage of LightBurn is its active user community and frequent updates. These resources ensure you have access to the latest features and troubleshooting support. In contrast, Inkscape and GIMP rely heavily on community forums for guidance, which may not always provide timely or accurate solutions. If you value ease of use and reliability, LightBurn offers a better balance of cost and functionality.
Use Cases for LightBurn
Why LightBurn is ideal for beginners and hobbyists
LightBurn’s user-friendly design makes it an excellent choice for beginners and hobbyists. The software simplifies the process of creating and managing laser projects, even if you have no prior experience. Its intuitive interface organizes tools and features in a way that feels approachable, allowing you to focus on your creativity rather than technical complexities.
For hobbyists, LightBurn provides built-in design tools that eliminate the need for external software. You can draw shapes, add text, and customize patterns directly within the program. The software also supports a wide range of file formats, so you can easily import designs from other sources. Features like snapping and alignment tools help you achieve professional-looking results without advanced skills.
LightBurn’s affordability further enhances its appeal for hobbyists. You get access to powerful features without the recurring costs associated with subscription-based software. Whether you’re creating personalized gifts, decorative items, or small-scale projects, LightBurn empowers you to bring your ideas to life with minimal hassle.
How LightBurn performs in professional and complex projects
For professionals, LightBurn offers the precision and flexibility needed to handle complex projects. The software supports advanced features like multi-pass cutting, layer management, and path optimization. These tools allow you to tackle intricate designs with confidence, ensuring high-quality results every time.
LightBurn’s compatibility with various laser types, including diode, CO2, and fiber lasers, makes it versatile for different industries. Whether you’re engraving detailed artwork or cutting thick materials, the software adapts to your needs. Its ability to manage multiple layers with unique settings streamlines workflows for projects requiring varied power and speed configurations.
Another standout feature is LightBurn’s real-time preview function. This tool lets you visualize how your design will look when processed by the laser, reducing the risk of errors. Professionals also benefit from LightBurn’s active community and extensive documentation, which provide valuable insights and troubleshooting tips. If you’re managing large-scale or intricate projects, LightBurn delivers the reliability and performance you need to succeed.
Learning how to program a laser cutting machine with LightBurn unlocks a world of creative possibilities. By following the steps outlined in this guide, you can confidently set up your machine, create intricate designs, and optimize settings for various applications. LightBurn’s ease of use, robust features, and compatibility make it an excellent choice for small businesses and hobbyists alike. Its pricing offers the best value for those seeking professional results without complexity. Whether for personal projects or business applications, LightBurn adapts to your needs. Explore its features, experiment with materials, and discover the best use cases for your goals.
FAQ
How do I create and edit designs in LightBurn?
LightBurn provides a range of tools to help you create and edit designs directly within the software. You can draw shapes, add text, and even use advanced features like node editing to fine-tune your designs. If you need guidance on using these tools, visit the LightBurn forum. The forum connects you with LightBurn staff and experienced users who can provide tips and solutions. For additional support, you can also email the LightBurn team.
What file formats does LightBurn support for importing designs?
LightBurn supports a variety of file formats, making it compatible with most design software. You can import vector files such as AI, SVG, DXF, and PDF. For raster images, formats like BMP, JPEG, and PNG are supported. This flexibility ensures you can work with designs from other programs or online sources without compatibility issues.
How do I optimize my designs for laser cutting?
To optimize your designs, focus on simplifying complex shapes and ensuring clean paths. Use LightBurn’s node editing tool to remove unnecessary points and close open paths. Adjust the dimensions and alignment of your design to fit the material you’re working with. Preview your design in LightBurn to identify potential errors before running the laser.
What are the best settings for cutting different materials?
The best settings depend on the material type. For example, wood often requires moderate power and slower speed, while acrylic benefits from higher power and medium speed. Always start with a test cut to determine the optimal power and speed for your material. LightBurn allows you to adjust these settings easily, ensuring precision and quality.
Can I use LightBurn for industrial applications?
Yes, LightBurn is suitable for both hobbyists and professionals, including those working on industrial applications. Its advanced features, such as multi-pass cutting and layer management, make it ideal for handling complex projects. Whether you’re creating prototypes, signage, or intricate designs, LightBurn adapts to meet the demands of industrial workflows.
How does LightBurn compare to other laser cutting software?
LightBurn stands out for its user-friendly interface and laser-specific features. Unlike general graphic design software like Adobe Illustrator or CorelDRAW, LightBurn integrates design creation with laser optimization tools. It also offers better compatibility and affordability compared to free options like Inkscape and GIMP, which often require additional plugins for laser cutting.
What should I do if my laser cutter won’t connect to LightBurn?
Start by checking the basics. Ensure your laser cutter is powered on and properly connected via USB or network. Verify that the correct device is selected in LightBurn’s "Devices" tab. If the issue persists, update your drivers or restart both the laser cutter and your computer. For further assistance, consult the LightBurn forum or contact their support team.
How can I improve the quality of my laser cuts?
Improving cut quality involves fine-tuning your laser settings and maintaining your machine. Use the correct power and speed for your material. Ensure the laser lens and mirrors are clean, and check the alignment of the laser beam. Simplify your designs to reduce processing time and minimize errors. Regular maintenance of your laser cutter also plays a key role in achieving consistent results.
Is LightBurn suitable for beginners?
Yes, LightBurn is an excellent choice for beginners. Its intuitive interface and built-in design tools make it easy to learn and use. You can create shapes, add text, and manage layers without needing prior experience. The software also offers extensive documentation and community support to help you get started.
Where can I find more information about LightBurn’s features?
For detailed information about LightBurn’s tools and features, visit the LightBurn forum. The forum provides a platform to discuss questions with other users and LightBurn staff. You can also email the support team for personalized assistance. These resources ensure you have access to the help you need to make the most of the software.
See Also
Maximizing Efficiency with Your Laser Cutting Machine
Understanding the Operation of CNC Laser Cutters
Guide to Metal Cutting Using Desktop CNC Machines