How to Program Laser Cutting Machine in 10 Steps

Mastering how to program a laser cutting machine is essential for achieving precision and efficiency in manufacturing. By learning how to program a laser cutting machine, you can significantly reduce production costs by up to 40% and decrease automotive part production time by 60%. These machines operate at high speeds, making them perfect for meeting tight deadlines and handling large-volume production. Understanding the power consumption of different laser cutters also aids in effectively managing energy costs. With the right approach, you can harness the full potential of laser cutting technology to enhance productivity and quality.
Laser Cutting Basics
Understanding the fundamentals of laser cutting is crucial for anyone looking to harness the full potential of this technology. Laser cutting machines are high-precision tools that utilize a concentrated laser beam to cut, etch, or engrave various materials. These machines are renowned for their versatility and efficiency, making them indispensable in numerous industries.
What is a Laser Cutting Machine?
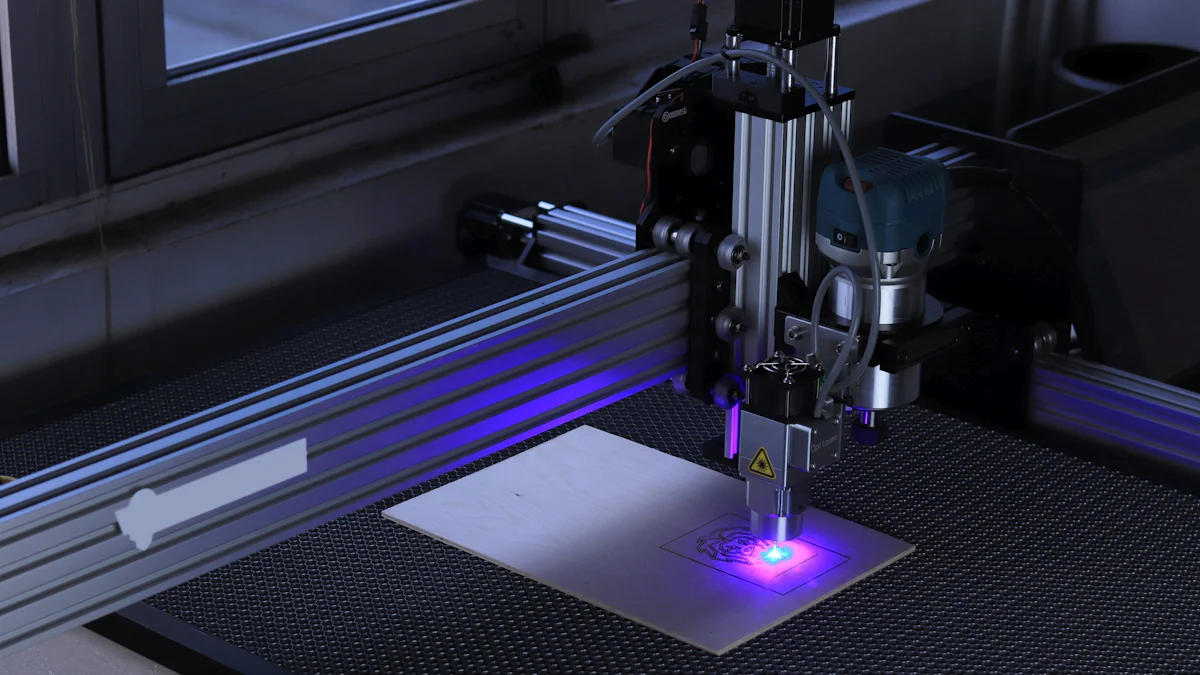
A laser cutting machine is a device that uses a focused laser beam to cut through materials with precision. The laser beam, generated inside the machine, is directed onto the material, where it melts, burns, or vaporizes the material away, leaving a clean edge. This process allows for intricate designs and minimal material waste. You can use laser cutting machines on a variety of materials, including metals, wood, and plastics. Their ability to produce detailed cuts and engravings makes them ideal for both industrial applications and creative projects.
Types of Laser Cutting Machines
Laser cutting machines come in several types, each suited for different applications:
-
CO2 Laser Cutters: These are the most common type of laser cutters. They use carbon dioxide gas to create the laser beam. CO2 laser cutters are versatile and can handle a wide range of materials, such as wood, plastic, metal, and glass. Their adaptability makes them popular in both industrial and artistic settings.
-
Fiber Laser Cutters: These machines use a solid-state laser source and are known for their efficiency and precision. Fiber lasers are particularly effective for cutting metals, including steel and aluminum. They offer high-speed cutting capabilities and are often used in industries requiring precise metalwork.
-
Tube Laser Cutting Machines: These specialized machines are designed for cutting tubes and pipes. They provide precise cuts and are commonly used in industries like automotive and construction, where tubular components are prevalent.
Each type of laser cutter has its unique advantages, and selecting the right one depends on your specific needs and the materials you plan to work with. By understanding these basics, you can make informed decisions and optimize your laser cutting projects.
Understanding Laser Cutter Components
To effectively program a laser cutter, you must first understand its key components. Each part plays a crucial role in the machine's operation, ensuring precision and efficiency in cutting tasks.
Key Parts of a Laser Cutter
A laser cutter consists of several essential components:
-
Laser Source: This is the heart of the machine, generating the laser beam used for cutting. The type of laser source, such as CO2 or fiber, determines the materials you can cut and the precision you can achieve.
-
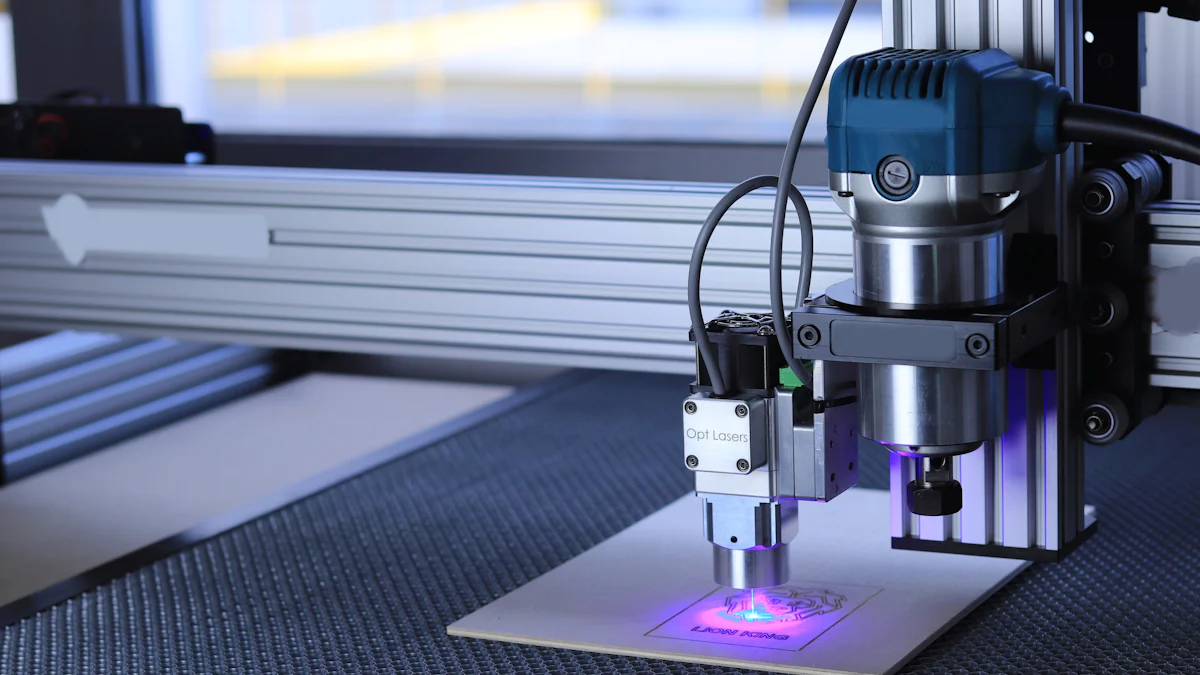
Laser Head: The laser head directs the laser beam onto the material. It contains lenses and mirrors that focus the beam to a fine point, allowing for precise cuts.
-
Control System: This component acts as the brain of the laser cutter. It interprets design files and controls the movement of the laser head, ensuring accurate execution of the cutting path.
-
Work Table: The work table supports the material being cut. It often includes a grid or honeycomb structure to minimize contact with the material, reducing the risk of damage.
-
Cooling System: Laser cutters generate heat during operation. The cooling system prevents overheating, maintaining optimal performance and extending the machine's lifespan.
-
Exhaust System: This system removes fumes and debris produced during cutting, ensuring a clean working environment and protecting the machine's components.
How Each Component Functions
Understanding how each component functions will help you optimize your laser cutting process:
-
Laser Source: By adjusting the power settings, you can control the intensity of the laser beam. This is crucial for cutting different materials and achieving the desired cut quality.
-
Laser Head: Proper alignment and maintenance of the laser head ensure that the beam remains focused. This precision is vital for intricate designs and minimizing material waste.
-
Control System: You input design files into the control system, which then guides the laser head along the specified path. Familiarity with this system allows you to make adjustments for improved accuracy.
-
Work Table: Securely placing materials on the work table prevents movement during cutting. This stability is essential for maintaining the integrity of the design.
-
Cooling System: Regular checks of the cooling system prevent overheating. Consistent cooling ensures that the laser cutter operates efficiently and safely.
-
Exhaust System: Keeping the exhaust system clear of obstructions maintains air quality and prevents damage to the machine. This system is vital for both safety and performance.
Expert Testimony:
IVYCNC, a leader in laser cutting solutions, emphasizes the importance of balancing power, speed, and focal point. They state, "The quality of your laser cut depends heavily on finding the perfect balance between power, speed, and focal point. Proper parameter selection can improve cut quality by up to 40% and reduce material waste significantly."
By understanding these components and their functions, you can enhance your laser cutting skills and achieve superior results.
Preparing the Laser Cutting Machine
Before you begin using a laser cutter, it's crucial to prepare the machine properly. This preparation ensures that the cutting process runs smoothly and efficiently, minimizing errors and maximizing output quality. Let's explore the initial setup procedures and the importance of calibration and testing.
Initial Setup Procedures
-
Material Preparation: Start by selecting the appropriate material for your project. Different materials require different settings, so knowing what you're working with is essential. Whether you're using wood, metal, or plastic, ensure the material is clean and free from any debris that could interfere with the cutting process.
-
Machine Inspection: Check the laser cutter for any visible signs of wear or damage. Inspect the laser head, lenses, and mirrors to ensure they are clean and properly aligned. A well-maintained machine reduces the risk of errors during operation.
-
Software Configuration: Load the design file into the laser cutter's control system. Make sure the file is compatible with the machine and that all design elements are correctly formatted. This step is crucial for ensuring that the laser cutter follows the intended path accurately.
-
Safety Measures: Implement necessary safety precautions. Ensure that the exhaust system is functioning to remove fumes and debris. Wear protective gear, such as safety glasses, to protect yourself from laser exposure.
Calibration and Testing
-
Calibrating the Laser: Adjust the laser cutter's settings to match the material's requirements. This includes setting the power, speed, and focal point. Proper calibration is vital for achieving precise cuts and reducing material waste. As IVYCNC highlights, finding the perfect balance between these parameters can significantly enhance cut quality.
-
Test Cuts: Perform test cuts on a scrap piece of the same material. This allows you to verify that the settings are correct and make any necessary adjustments before starting the actual project. Testing helps prevent costly mistakes and ensures that the final product meets your expectations.
-
Tube Laser Cutting Considerations: If you're using a tube laser cutting machine, pay special attention to the alignment and positioning of the tubes. Proper setup is essential for achieving accurate cuts and maintaining the integrity of the design.
By following these initial setup procedures and calibration steps, you can optimize your laser cutting process. This preparation not only enhances the quality of your work but also extends the lifespan of your laser cutter, ensuring reliable performance for future projects.
Creating and Importing Design Files for Laser Cutting
Design files serve as the blueprint for your laser cutting projects. Creating and importing design files correctly ensures that your laser cutter executes the desired cuts with precision. Let's explore the software options available for design creation and the process of importing these files into your machine.
Software for Design Creation
To create design files for laser cutting, you need specialized graphic design software. Here are some popular options:
-
Adobe Illustrator: This powerful software is widely used for creating high-quality vector designs. It offers a range of tools that allow you to craft intricate patterns and detailed artwork suitable for laser cutting.
-
Inkscape: If you're looking for a free alternative, Inkscape is an excellent choice. As an open-source graphic design software, it provides many features similar to Adobe Illustrator, making it ideal for beginners and professionals alike.
-
CorelDRAW: Known for its extensive toolset, CorelDRAW is another great option for creating vector-based designs. Its user-friendly interface and robust features make it a favorite among designers.
-
CAD Software: For engineering, architecture, and manufacturing projects, CAD software is essential. It allows you to create precise vector-based designs that are crucial for technical applications like tube laser cutting.
When choosing software, consider your specific needs and the complexity of your projects. Each software has unique features that cater to different design requirements.
Importing Files to the Machine
Once you've created your design, the next step is to import the file into your laser cutter. This process involves a few key steps:
-
File Format Compatibility: Ensure your design file is in a format compatible with your laser cutter. Common formats include .dxf, .dwg, .ai, and .eps. For instance, SendCutSend requires these formats for importing designs.
-
Transfer the File: Use a USB drive, network connection, or direct cable to transfer the design file to the laser cutter's control system. Follow the manufacturer's instructions for your specific machine model.
-
Load the Design: Access the control system's interface and load the design file. Verify that the file appears correctly on the display, ensuring all elements are intact.
-
Adjust Settings: Before starting the cutting process, adjust the machine settings to match the design's requirements. This includes setting the power, speed, and focus according to the material and design complexity.
By following these steps, you can seamlessly integrate your design files into the laser cutting process. Proper file management and machine setup are crucial for achieving accurate and high-quality cuts.
Configuring Laser Cutting Settings
Configuring laser settings is a crucial step in ensuring that your laser cutter performs optimally. By adjusting the power, speed, focus, and resolution, you can achieve precise cuts and enhance the quality of your projects. Let's delve into how you can fine-tune these settings for the best results.
Adjusting Power and Speed
Power and speed settings directly influence the quality and efficiency of your laser cutting process. Here's how you can adjust them effectively:
-
Determine Material Requirements: Different materials require specific power and speed settings. For instance, metals often need higher power compared to wood or plastic. Understanding these requirements helps you set the laser cutter appropriately.
-
Set Laser Power: Adjust the laser power to match the material's thickness and density. Higher power is necessary for thicker materials, while lower power suffices for thinner ones. This adjustment ensures clean cuts without excessive burning or melting.
-
Adjust Cutting Speed: The cutting speed affects the precision and quality of the cut. Slower speeds allow for more detailed cuts, while faster speeds are suitable for simpler designs. Balance speed with power to achieve the desired outcome.
-
Consider Pulse Width: Some laser cutters allow you to adjust the pulse width, which impacts the energy delivered to the material. A shorter pulse width can enhance precision, especially for intricate designs.
-
Test and Refine: Perform test cuts on scrap material to fine-tune the power and speed settings. This practice helps you identify the optimal configuration for your specific project.
Tip: Reflectivity of materials can affect power consumption. Metals with high reflectivity may require adjustments to the power settings to ensure efficient cutting.
Setting Up Focus and Resolution
Focus and resolution settings play a vital role in achieving high-quality cuts and engravings. Here's how you can set them up:
-
Adjust Focus: Proper focus ensures that the laser beam is concentrated on a small spot, enhancing precision. Use the laser cutter's focus adjustment feature to align the beam accurately with the material's surface.
-
Set Resolution: Resolution, often measured in dots per inch (DPI), determines the detail level in your cuts and engravings. Higher resolution settings produce finer details but may increase cutting time. Choose a resolution that balances detail with efficiency.
-
Consider Beam Quality: The precision of your cuts depends on the beam quality. Ensure that the laser cutter's optics are clean and well-maintained to maintain optimal beam quality.
-
Use Gas Assist: For certain materials, using gas assist can improve cutting quality by removing debris and cooling the material. This technique is especially useful in tube laser cutting, where precision is paramount.
-
Monitor and Adjust: Continuously monitor the cutting process and make adjustments as needed. Small tweaks to focus and resolution can significantly impact the final product's quality.
By carefully configuring these laser cutting settings, you can enhance the performance of your laser cutter and achieve superior results. Remember, each project may require unique adjustments, so take the time to experiment and refine your settings.
Loading Materials for the Laser Cutting Process
Properly loading and fixturing material is a crucial step in the laser cutting process. This ensures that the laser cutter operates efficiently and produces high-quality results. Let's explore how to choose the right material and place it correctly for optimal performance.
Choosing the Right Material
Selecting the appropriate material is the first step in material preparation. Different projects require different materials, and each material has unique properties that affect the cutting process. Here’s how you can make the right choice:
-
Identify Project Requirements: Determine the specific needs of your project. Consider factors like durability, flexibility, and aesthetic appeal. For instance, metals like steel or aluminum are ideal for structural components, while acrylics work well for decorative pieces.
-
Understand Material Properties: Each material reacts differently to the laser beam. Metals may require higher power settings, while plastics might need lower power to prevent melting. Knowing these properties helps you adjust the laser cutter settings accordingly.
-
Consider Material Thickness: The thickness of the material influences the power and speed settings. Thicker materials need more power and slower speeds for precise cuts. Always check the manufacturer's guidelines for recommended settings based on material thickness.
-
Evaluate Cost and Availability: Balance quality with cost-effectiveness. Choose materials that fit your budget without compromising on quality. Ensure that the material is readily available to avoid delays in your project timeline.
Proper Material Placement
Once you've chosen the right material, proper placement on the laser cutter's work table is essential. Follow these steps to ensure accurate and efficient cutting:
-
Clean the Work Table: Before placing the material, ensure the work table is clean and free from debris. A clean surface prevents imperfections in the cut and protects the material from damage.
-
Align the Material: Position the material correctly on the work table. Use alignment guides or rulers to ensure it is straight and centered. Proper alignment is crucial for maintaining the integrity of the design.
-
Secure the Material: Use clamps or fixtures to hold the material in place. This prevents movement during the cutting process, which can lead to errors and wasted material. Ensure that the clamps do not obstruct the laser path.
-
Check for Obstructions: Verify that there are no obstructions in the laser path. This includes ensuring that the laser head can move freely across the material without hitting any fixtures or clamps.
-
Perform a Dry Run: Conduct a dry run without the laser to check the movement of the laser head. This helps identify any potential issues with placement or alignment before starting the actual cutting process.
By carefully selecting and placing your materials, you can optimize the laser cutting process. This attention to detail not only improves the quality of your cuts but also enhances the efficiency and longevity of your laser cutter.
Running the Laser Cutting Program
Running the cutting program is an exciting step in the laser cutting process. It brings your designs to life with precision and efficiency. Here’s how you can start the cutting process and troubleshoot common issues to ensure smooth operation.
Starting the Cutting Process
-
Verify Settings: Before you begin, double-check all the settings on your laser cutter. Ensure that the power, speed, and focus are correctly configured for the material you are using. This step is crucial for achieving the desired cut quality.
-
Position the Material: Place the material securely on the work table. Use clamps or fixtures to prevent any movement during the cutting process. Proper placement ensures that the laser follows the intended path accurately.
-
Initiate the Program: Load the design file into the laser cutter's control system. Once everything is set, start the cutting program. The laser cutter will follow the programmed path, cutting or engraving the material as specified.
-
Monitor the Process: Keep an eye on the laser cutting process. Watch for any signs of irregularities, such as excessive smoke or sparks. Monitoring helps you catch potential issues early and make necessary adjustments.
-
Enjoy the Results: As the laser cutter completes the task, you’ll see your design come to life. The precision and detail achieved through laser cutting can be incredibly satisfying. Jeff Solomon, a laser cutting enthusiast, shares, “The laser cutter inherently makes crafts look super finished. Hope you give it a try too.”
Troubleshooting Common Issues
-
Inconsistent Cuts: If you notice uneven cuts, check the alignment of the laser head. Misalignment can cause the beam to lose focus, affecting the cut quality. Recalibrate the laser cutter to resolve this issue.
-
Material Not Cutting Through: When the material doesn’t cut through completely, increase the laser power or slow down the cutting speed. Different materials require specific settings, so adjust accordingly.
-
Excessive Burning or Melting: If the material shows signs of burning or melting, reduce the laser power or increase the cutting speed. This adjustment helps achieve cleaner cuts without damaging the material.
-
Laser Cutter Stopping Mid-Process: A sudden stop might indicate a software glitch or an issue with the control system. Restart the machine and reload the design file. Ensure that all connections are secure.
-
Tube Laser Cutting Specifics: For tube laser cutting, ensure that the tubes are properly aligned and secured. Misalignment can lead to inaccurate cuts and wasted material.
By understanding these steps and troubleshooting tips, you can effectively manage the laser cutting process. This knowledge empowers you to create high-quality projects with confidence and precision.
Monitoring the Laser Cutting Process
Monitoring the laser cutting process is crucial for ensuring that your projects meet the desired quality and precision. By keeping a close eye on the operation, you can quickly identify and address any issues that may arise.
Observing the Cutting Operation
You should always observe the cutting operation closely. This practice helps you detect any irregularities early. Watch the laser cutter as it moves along the material. Look for signs of misalignment or unexpected pauses. These could indicate potential problems.
-
Check the Laser Beam: Ensure the laser beam maintains a consistent focus. A focused beam ensures clean cuts. If you notice any deviation, pause the operation and adjust the focus.
-
Listen for Unusual Sounds: Pay attention to the sounds during cutting. Unusual noises might signal mechanical issues. Address these promptly to avoid damage.
-
Monitor the First Few Cuts: During the initial cuts, observe the results carefully. This step helps you verify that the settings are correct. Make adjustments if necessary to improve the outcome.
Ensuring Quality and Precision
Quality and precision are paramount in laser cutting. You must ensure that each cut meets the project's specifications.
-
Inspect the Edges: After cutting, examine the edges of the material. They should be smooth and free from burrs. Rough edges may indicate incorrect settings or a dull laser.
-
Measure the Dimensions: Use precise measuring tools to check the dimensions of the cut pieces. Ensure they match the design specifications. Accurate measurements confirm the precision of the laser cutter.
-
Evaluate the Finish: Look at the surface finish of the cut material. A clean finish reflects proper laser settings. Adjust the power and speed if the finish is unsatisfactory.
-
Consider Tube Laser Cutting: For tube laser cutting, pay special attention to the alignment and positioning. Proper setup ensures accurate cuts and maintains the integrity of the design.
By diligently monitoring the laser cutting process, you can achieve high-quality results. This attention to detail not only enhances the final product but also extends the lifespan of your equipment.
Unloading and Cleaning the Laser Cutter
After completing a laser cutting project, you must carefully unload the finished pieces and clean the machine. This process ensures the longevity of your equipment and maintains the quality of future projects.
Safely Removing Finished Pieces
-
Turn Off the Machine: Before you begin unloading, ensure the laser cutter is turned off. This step prevents accidental activation and ensures your safety.
-
Open the Work Area: Gently open the laser cutter's work area. Be cautious of any residual heat from the cutting process.
-
Remove the Material: Carefully lift the material from the work table. Use gloves if necessary to protect your hands from sharp edges or hot surfaces.
-
Inspect the Pieces: Examine the finished pieces for any defects or incomplete cuts. This inspection helps you identify any adjustments needed for future projects.
-
Organize the Parts: Place the finished pieces in a designated area. Organizing them prevents loss and makes it easier to proceed with any additional processing or assembly.
Cleaning the Machine
-
Clear Debris: Remove any leftover material or debris from the work table. A clean surface ensures accurate cuts in future projects.
-
Clean the Lenses and Mirrors: Dust and residue can accumulate on the lenses and mirrors during cutting. Use a soft cloth and appropriate cleaning solution to gently wipe these components. Regular cleaning prevents power loss and potential damage.
-
Check the Exhaust System: Ensure the exhaust system is free from obstructions. A clear exhaust system maintains air quality and protects the machine's components.
-
Inspect the Cooling System: Verify that the cooling system is functioning properly. Regular checks prevent overheating and extend the machine's lifespan.
-
Maintain the Tube Laser Cutting Equipment: If you use tube laser cutting, pay special attention to the alignment and condition of the tubes. Proper maintenance ensures precise cuts and prolongs the equipment's life.
By following these steps for unloading parts and cleaning up, you maintain the efficiency and reliability of your laser cutter. Regular maintenance not only enhances the quality of your work but also ensures the safety and longevity of your equipment.
Safety and Maintenance Tips for Laser Cutting
Ensuring safety and maintaining your laser cutter are essential practices that enhance both performance and longevity. By following these guidelines, you can create a safe working environment and keep your machine in top condition.
Essential Safety Precautions
-
Wear Protective Gear: Always wear safety glasses to protect your eyes from laser exposure. Gloves can also safeguard your hands from sharp edges and hot surfaces.
-
Ensure Proper Ventilation: Operate the laser cutter in a well-ventilated area. This practice helps disperse fumes and smoke generated during cutting, maintaining air quality.
-
Check the Exhaust System: Regularly inspect the exhaust system to ensure it functions correctly. A clear exhaust system prevents the buildup of harmful fumes and debris.
-
Avoid Flammable Materials: Keep flammable materials away from the laser cutter. This precaution reduces the risk of fire hazards during operation.
-
Emergency Stop Button: Familiarize yourself with the emergency stop button. Knowing how to quickly halt the machine can prevent accidents and damage.
Safety Tip: "Regular maintenance helps identify and address potential issues before they become safety hazards, ensuring safe working conditions and minimizing the risk of accidents or injuries."
Regular Maintenance Practices
-
Routine Inspections: Conduct regular inspections of the laser cutter. Check for signs of wear or damage, especially on consumable parts like lenses and mirrors.
-
Clean the Optics: Dust and residue can accumulate on the optics, affecting performance. Use a soft cloth and appropriate cleaning solution to keep lenses and mirrors clean.
-
Lubricate Moving Parts: Apply lubricant to moving parts to reduce friction and wear. This practice ensures smooth operation and extends the machine's lifespan.
-
Monitor the Cooling System: Ensure the cooling system functions properly to prevent overheating. Regular checks help maintain optimal performance.
-
Upgrade When Necessary: Consider timely upgrades to improve machine efficiency. Investing in a modern, energy-efficient laser system can result in long-term savings on electricity bills.
Maintenance Insight: "Keeping up with preventive maintenance activities will extend the longevity of your CO₂ laser engraver machine, particularly the consumable parts."
By adhering to these safety and maintenance tips, you can ensure that your laser cutter operates safely and efficiently. Regular care not only enhances the quality of your projects but also contributes to the machine's durability and reliability.
You have now explored the essential steps to program a laser cutter effectively. From understanding the basics to mastering tube laser cutting, each step equips you with the knowledge needed for precision and efficiency. Practice these steps regularly to enhance your skills and achieve optimal results. Remember, consistent practice leads to mastery. Embrace the learning process and continue to refine your techniques. With dedication, you will unlock the full potential of laser cutting technology, creating high-quality projects with confidence.
FAQ
What is laser cutting?
Laser cutting is a technology that uses a focused laser beam to cut, engrave, or etch materials with high precision. The laser melts, burns, or vaporizes the material, leaving a clean edge. This process is widely used in industries for its accuracy and efficiency.
How does a laser cutter work?
A laser cutter works by directing a high-powered laser beam onto the material. The laser's energy heats the material, causing it to melt or vaporize. The machine's control system guides the laser along a predetermined path, creating precise cuts or engravings.
What materials can be cut with a laser cutter?
You can cut a variety of materials with a laser cutter, including metals, wood, plastics, and fabrics. Each material requires specific settings for optimal results. Metals often need higher power, while plastics require lower power to prevent melting.
What is tube laser cutting?
Tube laser cutting is a specialized process designed for cutting tubes and pipes. It provides precise cuts and is commonly used in industries like automotive and construction. Proper alignment and setup are crucial for achieving accurate results.
How do I choose the right laser cutter for my needs?
Consider the materials you plan to work with and the complexity of your projects. Different laser cutters, such as CO2 or fiber lasers, offer unique advantages. Evaluate factors like power, speed, and cost to make an informed decision.
What safety precautions should I take when using a laser cutter?
Always wear safety glasses to protect your eyes from laser exposure. Ensure proper ventilation to disperse fumes and smoke. Familiarize yourself with the emergency stop button to quickly halt the machine if needed.
How do I maintain my laser cutter?
Regular maintenance includes cleaning the lenses and mirrors, checking the exhaust system, and lubricating moving parts. Routine inspections help identify potential issues early, ensuring the machine operates efficiently and safely.
Can I use a laser cutter for engraving?
Yes, laser cutters are excellent for engraving. You can create detailed designs on various materials, such as wood, glass, and metal. Adjust the power and speed settings to achieve the desired depth and clarity.
What are common issues with laser cutting, and how can I troubleshoot them?
Common issues include inconsistent cuts, material not cutting through, and excessive burning. Check the alignment of the laser head and adjust the power and speed settings. Perform test cuts to refine the settings for optimal results.
How can I improve the quality of my laser cuts?
To improve cut quality, ensure the laser beam is properly focused and the material is securely placed. Adjust the power, speed, and focus settings according to the material's properties. Regular maintenance of the machine also enhances performance.
See Also
Maximizing Efficiency With Your Laser Cutting Machine
Understanding The Functionality Of CNC Laser Cutters
A Comprehensive Guide To Operating Hair Cutting Tools