How to Make a Laser Paper Cutting Machine Work Best

Optimizing a laser paper cutting machine is essential for achieving precision, speed, and high-quality results. If you're wondering how to make a laser paper cutting machine, you must focus on key factors like preparation, machine settings, and troubleshooting techniques. Regular maintenance, such as cleaning the laser lens and mirrors, keeps the machine efficient. Properly adjusting laser power and speed prevents burning or tearing. Selecting the right paper type also plays a critical role in achieving clean cuts. By mastering these elements, you can enhance the machine's performance and create flawless designs with ease.
Preparing Your Laser Cutting Machine and Materials
To achieve the best results with your laser cutting paper projects, preparation is key. Properly maintaining your machine, selecting the right materials, and creating a safe workspace will set the foundation for clean and precise cuts.
Cleaning and Maintaining the Machine
A well-maintained laser cutting machine ensures consistent performance and extends its lifespan. Regular cleaning and alignment are essential steps you should never skip.
Regular cleaning of the laser lens and mirrors
Dust and debris can accumulate on the laser lens and mirrors, reducing the efficiency of the laser beam. Use a soft, lint-free cloth and a cleaning solution designed for optics to gently wipe these components. Perform this task frequently, especially after extended use, to maintain optimal cut quality.
Ensuring proper alignment of the laser beam
Misalignment of the laser beam can lead to uneven cuts or incomplete designs. Check the alignment by running a simple test pattern on scrap material. If the cuts appear inconsistent, adjust the mirrors and laser head until the beam is perfectly centered. This step ensures precision when working with intricate designs.
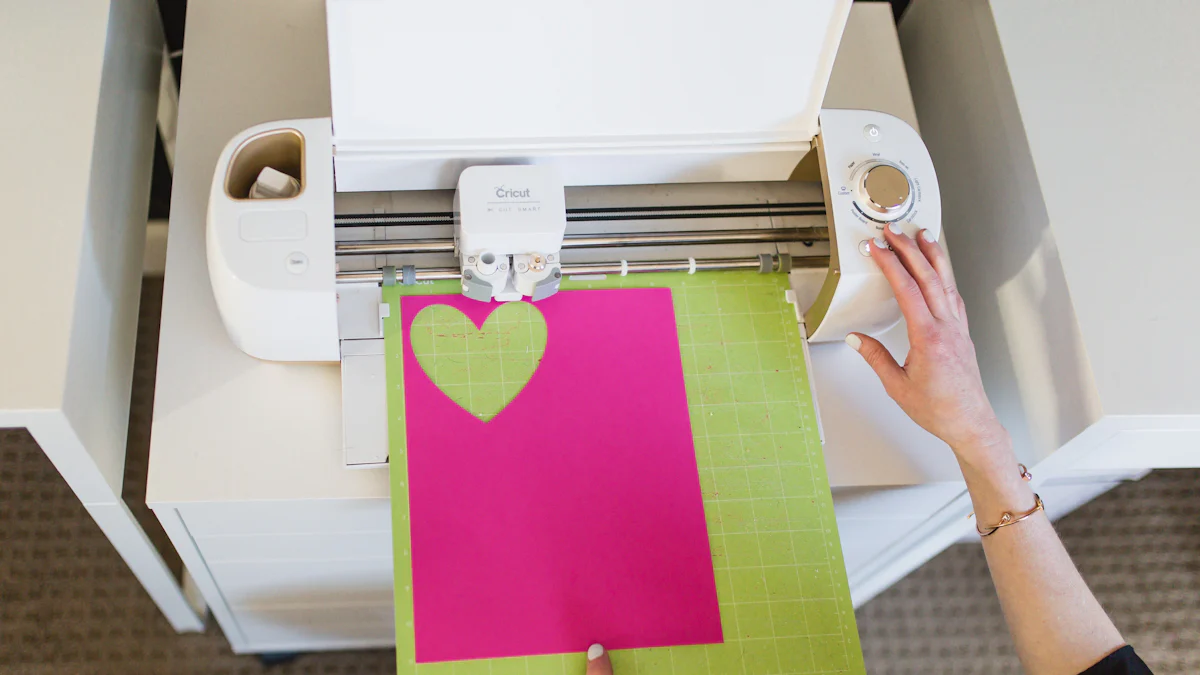
Choosing the Right Paper for Laser Cutting
The type of paper you use significantly impacts the outcome of your project. Not all papers are suitable for laser cutting, so choose wisely.
Selecting paper types suitable for laser cutting
Opt for high-quality paper specifically designed for laser cutting. Papers with consistent thickness and density produce cleaner cuts. Lightweight cardstock, construction paper, and specialty laser engraving paper are excellent choices for most projects. These materials handle the heat of the laser well and minimize the risk of burning.
Avoiding coated or metallic papers that can reflect the laser
Coated or metallic papers may reflect the laser beam, causing uneven cuts or even damaging the machine. Stick to uncoated papers to ensure safety and achieve better results. If you’re unsure about a specific paper type, test it on a small section before starting your main project.
Setting Up a Safe and Stable Workspace
A stable and safe workspace enhances both the quality of your cuts and your overall experience. Pay attention to ventilation and material stability.
Ensuring proper ventilation to handle fumes
Laser cutting paper generates fumes and small particles that can affect air quality. Set up your machine in a well-ventilated area or use an exhaust system to remove smoke and debris. Proper ventilation not only protects your health but also prevents residue from settling on the paper, which can impact cut quality.
Securing the paper to prevent movement during cutting
Movement during cutting can ruin your design. Use masking tape or a vacuum box to hold the paper securely in place. A vacuum box stabilizes the material and removes debris simultaneously, ensuring clean and precise cuts. This simple step can make a significant difference in the final result.
By following these preparation steps, you’ll create the ideal conditions for your laser cutting paper projects. A clean machine, the right materials, and a stable workspace will help you achieve professional-grade results every time.
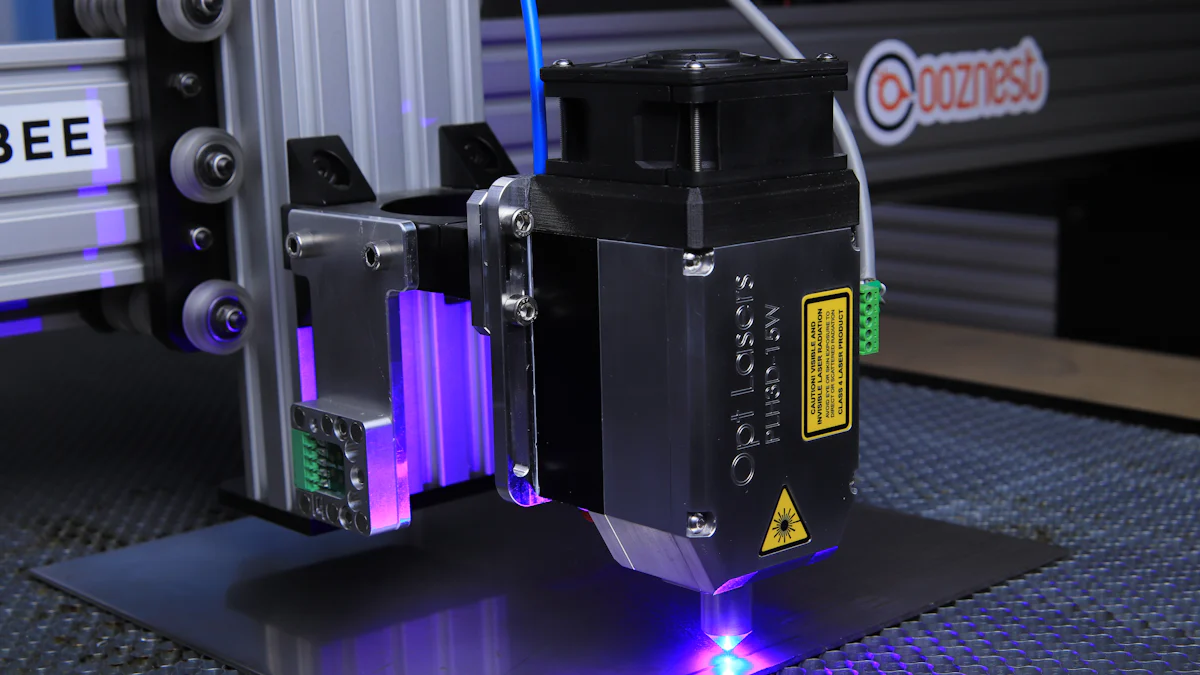
Optimizing Machine Settings for Laser Cutting Paper
Fine-tuning your laser cutting settings is essential for achieving clean, precise cuts on paper. By adjusting power, speed, and focus, you can prevent common issues like burning or tearing. Incorporating tools like air assist and vacuum support further enhances the quality of your results.
Adjusting Laser Power and Speed
The right combination of laser power and speed determines how effectively your machine cuts paper. Incorrect settings can lead to scorched edges or incomplete cuts.
Using lower power settings (5%-20%) to prevent burning
Paper is a delicate material that requires low power to avoid burning. Set your laser power between 5% and 20%, depending on the thickness of the paper. For standard paper in the 80–100 gsm range, a power level of around 10–15 W works well. Lower power minimizes heat exposure, ensuring clean edges without discoloration.
Increasing speed (100-500 mm/s) to reduce prolonged exposure to the laser
High-speed settings reduce the time the laser stays in contact with the paper, preventing overheating. Speeds between 100 and 500 mm/s are ideal for most projects. For intricate designs, you may need to lower the speed slightly to maintain precision. Always test different speed levels on scrap paper to find the best balance for your design.
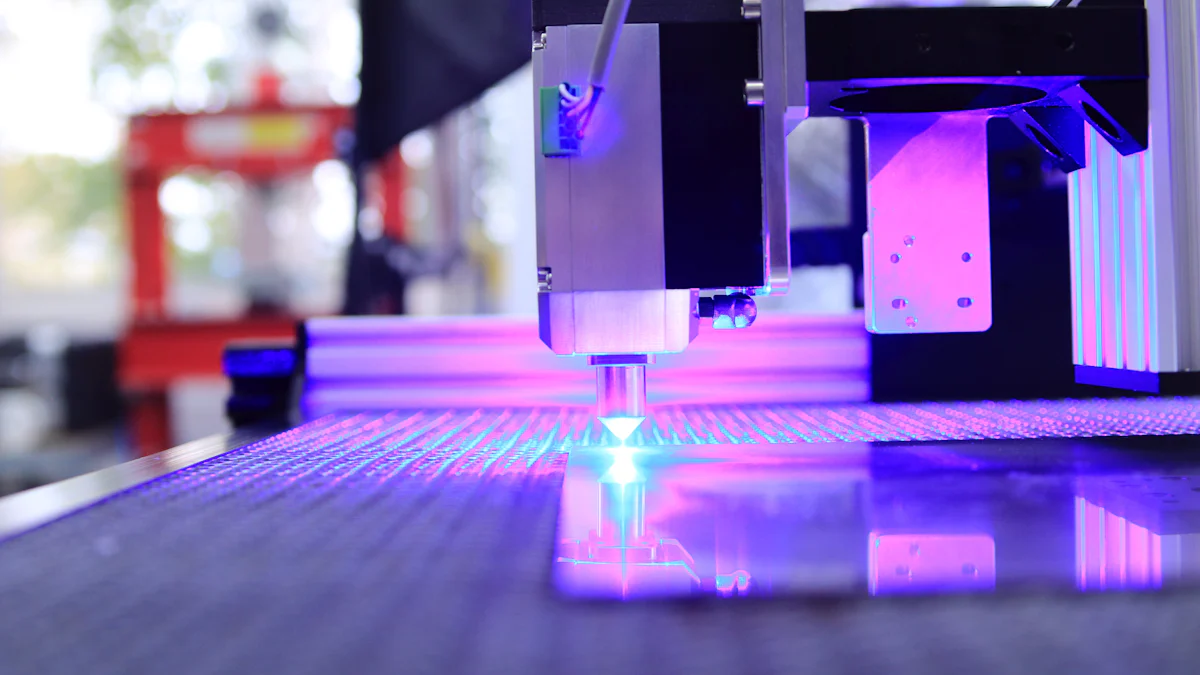
Setting the Correct Focus
Proper focus ensures the laser beam cuts through the paper cleanly and consistently. Misaligned focus can result in uneven or jagged edges.
Calibrating the laser focus for thin materials like paper
Thin materials like paper require precise focus adjustments. Use your machine’s focus tool or manually adjust the laser head to ensure the beam is sharp and concentrated. A well-focused laser delivers cleaner cuts and reduces the risk of tearing.
Testing focus on scrap paper before starting the main project
Before cutting your final design, test the focus on a piece of scrap paper. Run a small test pattern to confirm the laser is properly aligned and cutting cleanly. This step helps you catch any issues early, saving time and materials.
Using Air Assist and Vacuum Support
Air assist and vacuum support are valuable tools for improving the efficiency and quality of your laser cutting paper projects.
Reducing heat buildup and removing debris with air assist
Air assist blows a steady stream of air onto the cutting area, reducing heat buildup and clearing away debris. This prevents scorch marks and ensures the laser beam remains unobstructed. Activate air assist during every cut to achieve smoother and more precise results.
Using a vacuum box to stabilize the paper and prevent scorch marks
A vacuum box holds the paper flat against the cutting bed, preventing movement during the cutting process. It also removes smoke and debris, which can cause discoloration or uneven cuts. This tool is especially useful for intricate designs, where stability is crucial for accuracy.
By optimizing your laser cutting settings, you can elevate the quality of your projects. Adjusting power and speed, setting the correct focus, and using tools like air assist and vacuum support will help you achieve professional-grade results every time.
Techniques for Achieving Clean and Precise Cuts
Achieving clean and precise cuts with a laser cutting paper machine requires a combination of preparation, design, and execution. By testing settings, refining your designs, and using techniques like masking, you can ensure professional-quality results every time.
Testing on Scrap Paper
Testing on scrap paper is an essential step before starting any project. It helps you fine-tune your machine settings and avoid costly mistakes.
Running test cuts to fine-tune settings
Run small test cuts on scrap paper to adjust your laser’s power, speed, and focus. This process ensures that your settings are optimized for the specific type of paper you’re using. For example, if you notice burning or tearing, lower the power or increase the speed. Testing allows you to identify the perfect balance for clean cuts.
Identifying potential issues before cutting the final design
Scrap paper tests reveal potential problems, such as misaligned focus or uneven cuts. Use these tests to spot and fix issues before working on your final design. This step saves time and materials while ensuring your finished project meets your expectations.
Designing for Laser Cutting Paper
Your design plays a significant role in the success of your laser cutting paper project. Thoughtful planning and the right tools can make all the difference.
Using vector-based software for precise designs
Vector-based software, such as Adobe Illustrator or CorelDRAW, is ideal for creating precise designs. These programs allow you to define exact paths for the laser to follow, ensuring accuracy. A well-prepared design minimizes errors and produces cleaner cuts.
Avoiding overly intricate patterns that may tear
While laser cutters excel at precision, overly intricate patterns can weaken the paper and lead to tearing. Simplify your designs by avoiding extremely thin lines or overly complex shapes. This approach ensures durability and reduces the risk of errors during cutting.
Layering and Masking
Layering and masking techniques can enhance the quality of your cuts and protect your material from damage.
Applying masking tape to prevent scorch marks
Apply masking tape to the surface of your paper to shield it from scorch marks caused by heat or debris. The tape acts as a protective barrier, keeping the paper clean and free of discoloration. After cutting, peel off the tape to reveal a flawless design.
Cutting in multiple passes for thicker paper
For thicker paper, use multiple passes instead of increasing the laser’s power. This method reduces the risk of burning while ensuring a complete cut. Adjust the settings to make shallow cuts on each pass, gradually working through the material without compromising quality.
By incorporating these techniques, you can achieve clean and precise cuts with your laser cutting paper projects. Testing, thoughtful design, and protective measures like masking will help you create stunning results with minimal effort.
Troubleshooting Common Issues in Laser Cutting Paper
Even with careful preparation and optimized settings, challenges can arise when laser cutting paper. Addressing these issues promptly ensures smooth operation and high-quality results. Below are practical solutions to common problems you may encounter.
Dealing with Burn Marks
Burn marks are a frequent issue when working with paper due to its delicate nature. However, you can take steps to minimize or eliminate them.
Lowering laser power or increasing speed
Excessive laser power or slow cutting speeds often cause burn marks. Reduce the laser power to a range of 5%-20% and increase the speed to 100-500 mm/s. These adjustments limit the heat exposure on the paper, preventing discoloration. Always test these settings on scrap material to find the right balance for your project.
Using masking tape to protect the paper surface
Applying masking tape to the paper creates a protective barrier against heat and debris. This simple technique prevents scorch marks and keeps the surface clean. After cutting, peel off the tape carefully to reveal a flawless design. Masking is one of the most effective paper processing techniques for maintaining the integrity of your material.
Preventing Paper Tearing
Paper tearing can ruin intricate designs and waste materials. To avoid this, focus on stabilizing the paper and simplifying your designs.
Ensuring the paper is securely held in place
Movement during cutting often leads to tears. Secure the paper using a vacuum box or masking tape. A vacuum box not only holds the paper flat but also removes debris, enhancing the cutting precision. Stability is critical for achieving clean cuts, especially with detailed patterns.
Avoiding overly intricate designs that stress the material
While laser cutters excel at precision, overly complex designs can weaken the paper. Simplify your patterns by avoiding extremely thin lines or fragile shapes. This approach reduces stress on the material and ensures durability. Following best practices for laser cutting helps you achieve professional results without compromising the design.
Fixing Inconsistent Cuts
Inconsistent cuts can occur due to misalignment or dirty machine components. Addressing these issues promptly ensures smooth and precise operation.
Checking for proper laser alignment
Misaligned lasers produce uneven cuts and incomplete designs. Run a test pattern on scrap paper to check the alignment. If the cuts appear inconsistent, adjust the mirrors and laser head until the beam is perfectly centered. Regular alignment checks maintain the machine’s accuracy and efficiency.
Cleaning the laser lens and mirrors
Dust and debris on the laser lens or mirrors can obstruct the beam, leading to poor cut quality. Clean these components regularly using a soft, lint-free cloth and an optics-safe cleaning solution. A clean machine ensures consistent performance and extends its lifespan.
By addressing these common issues, you can enhance the quality of your laser cutting projects. Timely troubleshooting not only improves your results but also ensures the longevity of your machine. Implement these strategies to maintain smooth operations and achieve optimal outcomes.
Advanced Tips for Efficiency and Quality in Laser Cutting Paper
Enhancing the efficiency and quality of your paper laser cutting projects requires advanced techniques. By automating tasks, experimenting with materials, and keeping your software updated, you can streamline your workflow and achieve exceptional results.
Automating Repetitive Tasks
Automation can save time and reduce errors in your laser processing paper workflow. Leveraging software tools and batch processing ensures consistency and efficiency.
Using software to replicate designs efficiently
Design software allows you to replicate patterns and layouts with precision. Programs like Adobe Illustrator or LightBurn let you duplicate designs quickly, ensuring uniformity across multiple cuts. This feature is especially useful for projects requiring identical pieces, such as invitations or decorative elements.
Setting up batch processing for multiple cuts
Batch processing enables your machine to handle multiple cuts in one session. Configure your laser cutter to process several sheets of paper consecutively. This approach minimizes downtime and maximizes productivity. Ensure each sheet is securely placed to avoid misalignment during the process.
Experimenting with Different Materials
Exploring various materials can add creativity and uniqueness to your paper laser cutting projects. Testing and combining materials opens up new possibilities for design.
Testing various paper types for unique effects
Different paper types produce distinct results. Lightweight cardstock offers durability, while textured paper adds depth to designs. Specialty papers, such as translucent vellum or handmade sheets, create unique visual effects. Test each type to understand how it interacts with the laser and choose the best option for your project.
Combining paper with other materials for mixed-media projects
Mixed-media projects blend paper with materials like wood, acrylic, or fabric. This combination enhances the visual appeal and functionality of your designs. For example, pairing laser-cut paper with a wooden frame creates elegant wall art. Experiment with different pairings to discover innovative applications.
Regularly Updating Software and Firmware
Keeping your software and firmware up-to-date ensures compatibility with modern tools and improves machine performance. Regular updates also provide access to new features that enhance your workflow.
Ensuring compatibility with the latest design tools
Updated software ensures seamless integration with the latest design programs. Compatibility reduces errors during file transfers and maintains the accuracy of your cuts. Check for updates regularly to avoid issues when working with new design formats.
Accessing new features for improved performance
Manufacturers often release firmware updates that enhance machine capabilities. These updates may include improved cutting algorithms, better material presets, or enhanced safety features. Staying current with firmware upgrades ensures your machine operates at its best.
By adopting these advanced tips, you can elevate the quality and efficiency of your laser processing paper projects. Automation, material experimentation, and regular updates will help you stay ahead in your craft and achieve professional-grade results.
Optimizing your laser paper cutting machine requires preparation, precise settings, and effective techniques. Regular maintenance, like cleaning and aligning the laser, ensures smooth operation and prevents costly issues. Testing and troubleshooting help you refine your process and achieve consistent, high-quality results. Experimenting with different materials and designs unlocks creative possibilities and improves your skills. Always stay proactive by updating your software and practicing safe operation. By following these steps, you can enhance your machine’s performance and create stunning projects with confidence. Keep learning and refining to master the art of laser cutting.
FAQ
Why Should You Use a Laser Cutter for Paper?
Laser cutters offer unmatched precision and clean results when working with paper. Unlike traditional cutting tools, the laser beam doesn’t physically touch the paper, which eliminates the risk of tearing or fraying. This makes it ideal for delicate materials like handmade or specialty papers. Additionally, laser cutting produces fine, intricate designs that are difficult to achieve with manual methods.
What Types of Paper Work Best for Laser Cutting?
Not all paper types are suitable for laser cutting. Uncoated papers, lightweight cardstock, and specialty laser engraving papers perform best. These materials handle the heat of the laser without burning or discoloration. Avoid coated or metallic papers, as they can reflect the laser beam and cause uneven cuts or damage to the machine.
How Do You Prevent Burn Marks on Paper?
Burn marks occur when the laser power is too high or the speed is too slow. To prevent this, lower the laser power to 5%-20% and increase the speed to 100-500 mm/s. Applying masking tape to the paper surface also helps protect it from scorch marks. Using air assist and a vacuum box further reduces heat buildup and removes debris during the cutting process.
Can You Cut Intricate Designs with a Laser Cutter?
Yes, laser cutters excel at creating intricate designs. However, overly complex patterns with thin lines or fragile shapes may weaken the paper and lead to tearing. Simplify your designs to ensure durability. Use vector-based software like Adobe Illustrator to create precise paths for the laser to follow.
How Do You Secure Paper During Laser Cutting?
Paper movement during cutting can ruin your design. To keep the paper stable, use masking tape or a vacuum box. A vacuum box holds the paper flat against the cutting bed and removes debris simultaneously. This ensures clean, precise cuts, especially for detailed patterns.
What Are Common Challenges in Laser Cutting Paper?
Some common challenges include burn marks, paper tearing, and inconsistent cuts. Burn marks often result from excessive laser power or slow speeds. Tearing occurs when the paper isn’t securely held in place or when the design is too intricate. Inconsistent cuts usually stem from misaligned lasers or dirty machine components. Addressing these issues promptly ensures better results.
How Do You Test Laser Settings Before Cutting?
Testing on scrap paper is essential before starting any project. Run small test cuts to adjust the laser’s power, speed, and focus. This helps you fine-tune the settings for the specific type of paper you’re using. Testing also reveals potential issues, such as misalignment or uneven cuts, allowing you to fix them before cutting your final design.
Is Regular Maintenance Necessary for a Laser Cutter?
Yes, regular maintenance is crucial for consistent performance. Clean the laser lens and mirrors frequently to remove dust and debris. Check the alignment of the laser beam to ensure precise cuts. A well-maintained machine not only improves cut quality but also extends the lifespan of your equipment.
Can You Combine Paper with Other Materials in Laser Projects?
Absolutely! Combining paper with materials like wood, acrylic, or fabric can create stunning mixed-media projects. For example, pairing laser-cut paper with a wooden frame adds depth and elegance to wall art. Experimenting with different materials opens up new creative possibilities.
How Do Software Updates Improve Laser Cutting?
Updating your laser cutter’s software and firmware ensures compatibility with modern design tools. Updates often include new features, improved cutting algorithms, and better material presets. Staying current with updates enhances your machine’s performance and helps you achieve professional-grade results.
See Also
Maximizing Efficiency With Your Laser Cutting Machine
Understanding the Basics of Laser Cutting Technology
The Functionality of CNC Laser Cutting Machines