How to Operate a Laser Cutting Machine for Beginners

Learning how to operate a laser cutting machine can open up a world of creative possibilities. Whether you're crafting intricate designs or manufacturing precise components, understanding the basics is crucial. The global market for laser cutting machines is booming, valued at USD 7.12 billion in 2023, and it's expected to grow even more. As a beginner, you'll find that mastering the essentials of operating the laser cutter will set you on the right path. So, how do you get started? Let's dive into the fundamentals and begin laser cutting with confidence.
Understanding Laser Cutting Machine Components
When you start using a laser cutting machine, understanding its components is crucial. Each part plays a vital role in the cutting process, ensuring precision and efficiency. Let's break down these components and see how they work together.
Key Parts of a Laser Cutter
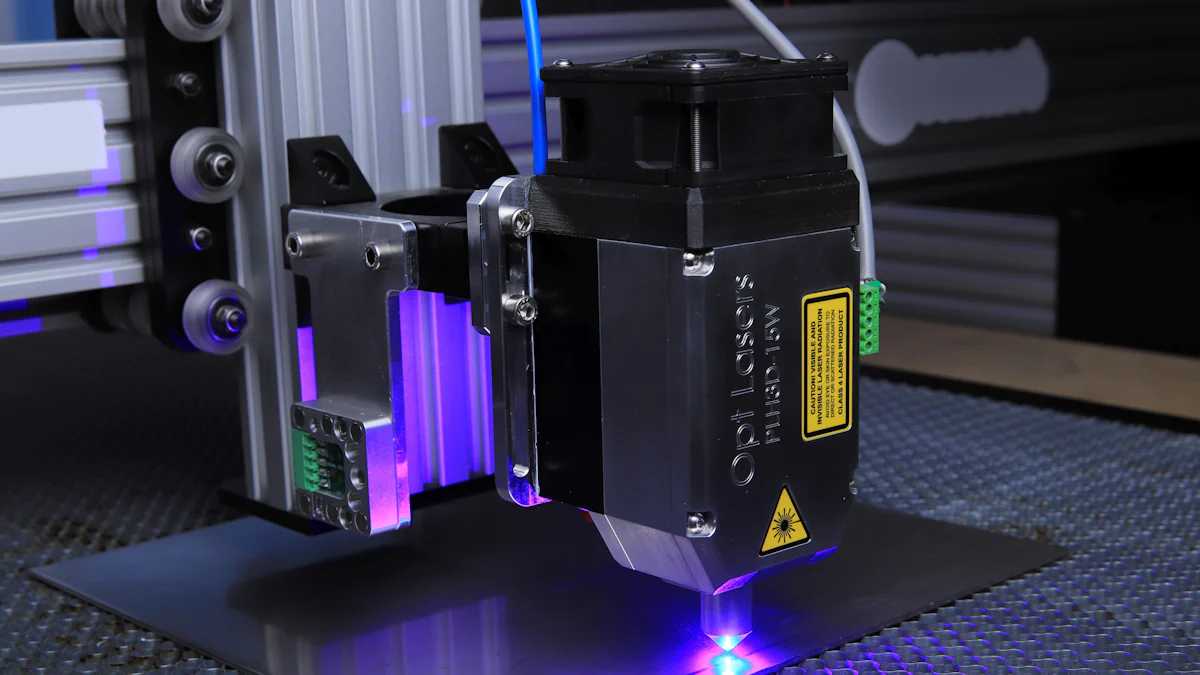
Laser Source
The laser source is the heart of your laser cutter. It generates the concentrated beam of light that cuts through materials. This beam is powerful and precise, making it possible to create intricate designs. Different types of lasers, like CO2 lasers, are used depending on the material and the desired outcome.
Cutting Bed
The cutting bed is where the magic happens. It's the surface on which you place the material to be cut. The bed must be stable and flat to ensure accurate cuts. Some machines have adjustable beds to accommodate different material thicknesses, enhancing versatility.
Control Panel
The control panel is your interface with the laser cutter. It allows you to input commands and adjust settings. You can control the speed, power, and focus of the laser beam from here. A user-friendly control panel makes the operation smoother, especially for beginners.
How Each Component Works Together
Laser Path
The laser path is the route the laser beam takes from the source to the material. It involves mirrors and lenses that guide and focus the beam. Proper alignment of these components ensures the beam hits the material precisely where needed, resulting in clean cuts.
Software Interface
The software interface is the brain behind the operation. It interprets your design files and translates them into instructions for the laser cutter. This interface controls the movement of the laser head and adjusts the beam's intensity. Familiarizing yourself with this software is essential for efficient laser cutting.
Understanding these components and their functions will help you operate your laser cutting machine more effectively. Each part contributes to the overall performance, ensuring you achieve the desired results with your projects.
Setting Up the Laser Cutting Machine
Getting your laser cutter ready for action involves a few essential steps. Proper setup ensures that your machine operates smoothly and efficiently. Let's walk through the process of setting up your laser cutting machine, so you can start creating with confidence.
Initial Setup Steps
Before you can start cutting, you need to get your laser cutter out of the box and ready to go. Here's how to get started:
Unpacking and Assembling
-
Unpack Carefully: Begin by carefully unpacking your laser cutter. Make sure you have all the components listed in the manual. Check for any damage during shipping.
-
Assemble the Parts: Follow the manufacturer's instructions to assemble the machine. This usually involves attaching the laser head, connecting cables, and securing the cutting bed. Take your time to ensure everything fits snugly.
-
Inspect Components: Once assembled, inspect all parts to ensure they are secure and in place. This step is crucial for safety and performance.
Connecting to Power and Computer
-
Power Connection: Plug your laser cutter into a reliable power source. Ensure the voltage matches the machine's requirements to avoid any electrical issues.
-
Computer Connection: Connect the laser cutter to your computer using the provided USB or Ethernet cable. This connection allows you to transfer design files and control the machine via software.
-
Install Software: Install the necessary software on your computer. This software will help you design and send cutting instructions to the laser cutter. Familiarize yourself with its interface for smooth operation.
Calibration and Alignment
Once your laser cutter is set up, you need to calibrate and align it for precise cutting. This step is vital for achieving clean and accurate results.
Focusing the Laser
-
Adjust the Focus: Use the focus tool provided with your machine to adjust the laser's focus. Proper focus ensures the laser beam cuts through materials effectively.
-
Test the Focus: Perform a test cut on a scrap piece of material. Check the cut's quality and adjust the focus if necessary. A well-focused laser produces sharp and clean edges.
Aligning the Cutting Bed
-
Level the Bed: Ensure the cutting bed is level. An uneven bed can lead to inconsistent cuts. Use a leveling tool to make adjustments if needed.
-
Align the Laser Path: Check the alignment of the laser path. The beam should travel straight from the source to the material. Misalignment can cause errors in cutting.
-
Perform a Test Cut: After alignment, perform another test cut. This step verifies that the laser cutter is ready for your projects.
By following these steps, you'll have your laser cutting machine set up and ready to create amazing designs. Remember, proper setup and calibration are key to achieving the best results with your laser cutter.
Selecting and Preparing Materials
Choosing the right materials is a crucial step when working with a laser cutting machine. Different materials react differently to laser cutting, so understanding which ones are compatible with your laser cutter is essential. Let's explore some common materials you can use and how to prepare them for cutting.
Compatible Materials
Wood
Wood is a popular choice for laser cutting and engraving. It offers versatility and can produce beautiful results. You can use various types of wood, such as plywood, MDF, and hardwood. Each type has its own characteristics, so you might want to experiment to find the best fit for your project.
Acrylic
Acrylic is another excellent material for laser cutting. It comes in various colors and thicknesses, making it ideal for creating vibrant and intricate designs. Acrylic cuts cleanly and can be used for both cutting and engraving, providing a polished finish.
Metal
While CO2 laser cutting machines are primarily used for non-metallic materials, some can handle thin metals like aluminum and stainless steel. If you're interested in cutting metal, ensure your laser cutter is equipped for it. Metal cutting requires specific settings and safety precautions.
Preparing Materials for Cutting
Once you've selected your material, proper preparation is key to achieving the best results. Here's how to get your materials ready for the laser cutter.
Cleaning and Securing
-
Clean the Surface: Before cutting, make sure the material's surface is clean. Dust and debris can affect the quality of the cut or engrave. Use a soft cloth to wipe down the material.
-
Secure the Material: Place the material securely on the cutting bed. Use clamps or weights to hold it in place. This prevents movement during the cutting process, ensuring precise cuts.
Testing Material Samples
-
Conduct a Test Cut: Before starting your main project, perform a test cut on a small piece of the material. This helps you determine the optimal settings for your laser cutter, such as speed and power.
-
Evaluate the Results: Check the test cut for quality. Look for clean edges and minimal charring. Adjust the settings if necessary to achieve the desired outcome.
By selecting the right materials and preparing them properly, you'll enhance your laser cutting experience. Whether you're working with wood, acrylic, or metal, these steps will help you achieve precise and beautiful results with your laser cutting machine.
Safety Guidelines
When operating a laser cutting machine, following safety guidelines is crucial to protect yourself and ensure smooth operation. Let's explore the essential safety precautions you need to take.
Personal Protective Equipment (PPE)
Wearing the right personal protective equipment (PPE) is your first line of defense when using a laser cutter. Here's what you should have:
Safety Glasses
Always wear safety glasses designed for laser protection. These glasses shield your eyes from harmful laser radiation, preventing potential eye damage. Make sure they fit well and are comfortable to wear during the entire operation.
Gloves
Use gloves to protect your hands from sharp edges and hot surfaces. They also provide a barrier against any debris or splinters that might occur during cutting. Choose gloves that offer both protection and dexterity, allowing you to handle materials safely.
Safe Operating Practices
Adhering to safe operating practices minimizes risks and ensures a safe working environment. Here are some key practices to follow:
Ventilation
Proper ventilation is essential when using a laser cutter. The cutting process can produce fumes and dust, which can be harmful if inhaled. Ensure your workspace has adequate ventilation to disperse these byproducts. You might consider using an exhaust system or air purifier to maintain air quality.
Emergency Procedures
Familiarize yourself with emergency procedures in case something goes wrong. Know the location of fire extinguishers and first aid kits. Have a plan for quickly shutting down the machine if needed. Regularly review these procedures to stay prepared for any situation.
By following these safety protocols, you can operate your laser cutting machine confidently and safely. Remember, taking the time to implement these measures not only protects you but also ensures the longevity and effectiveness of your equipment.
Step-by-Step Operation Instructions
Operating a laser cutting machine might seem daunting at first, but with a clear step-by-step guide, you'll find it much easier to navigate. Let's walk through the process of loading your design and executing the cut, ensuring you achieve the best results with your laser cutter.
Loading the Design
Before you start cutting, you need to load your design into the laser cutter. This involves using design software and importing files correctly.
Using Design Software
-
Choose Your Software: Start by selecting the design software compatible with your laser cutter. Popular options include Lightburn and Adobe Illustrator. These programs allow you to create or modify designs for laser cutting and laser engraving.
-
Create or Edit Your Design: Use the software to create a new design or edit an existing one. Pay attention to the dimensions and details, ensuring they match your project's requirements. The software will help you visualize how the design will look once cut.
-
Save the File: Once satisfied with your design, save the file in a format compatible with your laser cutter. Common formats include SVG, DXF, and AI. Saving in the correct format ensures smooth file transfer and accurate cutting.
Importing Files
-
Connect to the Laser Cutter: Ensure your computer is connected to the laser cutter. This connection allows you to transfer the design file directly to the machine.
-
Import the Design: Open the laser cutter's software interface and import your design file. Follow the prompts to ensure the file loads correctly. Double-check that the design appears as expected on the interface.
-
Position the Design: Use the software to position the design on the cutting bed. Adjust the placement to maximize material usage and avoid wastage. Proper positioning is crucial for achieving precise cuts.
Executing the Cut
With your design loaded, it's time to execute the cut. This involves setting parameters and monitoring the process closely.
Setting Parameters
-
Select Material Settings: Choose the appropriate settings for the material you're cutting. This includes adjusting the laser's power, speed, and focus. Refer to the material guidelines provided by the manufacturer for optimal settings.
-
Test the Settings: Perform a test cut on a scrap piece of the same material. This helps you verify that the settings are correct and make any necessary adjustments. Testing ensures the final cut meets your expectations.
-
Finalize the Parameters: Once satisfied with the test cut, finalize the parameters in the software. Double-check everything before proceeding to the actual cut.
Monitoring the Process
-
Start the Cutting Process: Initiate the cutting process by pressing the start button on the laser cutter. Stay attentive as the machine begins to cut your design.
-
Observe the Cut: Keep an eye on the laser cutter as it works. Watch for any signs of misalignment or errors. If something seems off, pause the process and make adjustments as needed.
-
Complete the Cut: Once the cutting process finishes, carefully remove the material from the cutting bed. Inspect the cut for quality and precision. If necessary, make additional cuts or adjustments.
By following this step-by-step guide, you'll gain confidence in operating your laser cutting machine. Remember, practice makes perfect, and each project will enhance your skills and understanding of how to get started with laser cutting and laser engraving.
Troubleshooting Common Issues
Even with the best preparation, you might encounter some hiccups while using your laser cutting machine. Don't worry! Troubleshooting is part of the learning process. Let's dive into some common problems and how you can solve them.
Common Problems and Solutions
Laser Not Cutting Through
Sometimes, you might find that the laser isn't cutting through the material completely. This issue can be frustrating, but it's usually easy to fix.
-
Check the Focus: Make sure the laser is properly focused. An unfocused laser won't cut effectively. Use the focus tool to adjust it until you get a sharp beam.
-
Adjust the Power and Speed: Increase the laser's power or slow down the cutting speed. These adjustments can help the laser penetrate the material better. Refer to your material's guidelines for optimal settings.
-
Inspect the Lens: A dirty or damaged lens can affect the laser's performance. Clean the lens regularly to ensure it remains clear and effective.
Misalignment Issues
Misalignment can lead to inaccurate cuts, which can ruin your project. Here's how to tackle this problem:
-
Realign the Laser Path: Check the alignment of the mirrors and lenses. They should guide the laser beam straight to the material. Adjust them if necessary to ensure precision.
-
Level the Cutting Bed: An uneven cutting bed can cause misalignment. Use a leveling tool to make sure the bed is flat and stable.
-
Perform a Test Cut: After making adjustments, do a test cut to verify the alignment. This step helps you confirm that everything is in order before starting your main project.
When to Seek Professional Help
Sometimes, issues persist despite your best efforts. Knowing when to call in a professional can save you time and frustration.
Persistent Errors
If you encounter errors that you can't resolve, it might be time to seek expert assistance. Persistent issues could indicate a deeper problem that requires specialized knowledge.
-
Consult the Manual: Before reaching out, check the user manual for troubleshooting tips. It might have solutions you haven't tried yet.
-
Contact Support: If the manual doesn't help, contact the manufacturer's support team. They can provide guidance and help you troubleshoot further.
Machine Malfunctions
Machine malfunctions can be more serious and might require professional repair.
-
Identify the Problem: Try to pinpoint the issue. Is it a mechanical failure or a software glitch? Knowing the problem can help the technician fix it faster.
-
Schedule a Repair: If the machine needs repairs, schedule a service appointment. Professional technicians have the tools and expertise to get your laser cutter back in working order.
By understanding these common issues and knowing when to seek help, you'll keep your laser cutting projects on track. Remember, every challenge is an opportunity to learn and improve your skills.
Maintenance Tips
Keeping your laser cutting machine in top shape requires regular maintenance. This ensures optimal performance and extends the machine's lifespan. Let's dive into some essential maintenance tips that will keep your laser cutter running smoothly.
Regular Cleaning
Regular cleaning is crucial for maintaining the precision and efficiency of your laser cutter. Dust and debris can interfere with the cutting process, so it's important to keep everything clean.
Cleaning the Lens
-
Inspect the Lens: Check the lens regularly for any dust or smudges. A dirty lens can reduce the laser's power and affect the quality of your cuts.
-
Use Proper Cleaning Tools: Use a soft, lint-free cloth and a lens cleaning solution to gently wipe the lens. Avoid using abrasive materials that could scratch the surface.
-
Check for Damage: Look for any signs of damage or wear on the lens. If you notice any issues, consider replacing the lens to maintain cutting precision.
Maintaining the Cutting Bed
-
Remove Debris: After each use, clear the cutting bed of any leftover material or debris. This prevents buildup that can affect the machine's performance.
-
Wipe Down the Surface: Use a damp cloth to wipe down the cutting bed. This helps remove any residue that might interfere with future cuts.
-
Inspect for Wear: Regularly check the cutting bed for signs of wear or damage. A well-maintained bed ensures consistent and accurate cuts.
Routine Checks
Routine checks help identify potential issues before they become major problems. By staying proactive, you can ensure your laser cutter operates efficiently.
Software Updates
-
Check for Updates: Regularly check for software updates from the manufacturer. Updated software can improve performance and fix any bugs.
-
Install Updates Promptly: When updates are available, install them promptly. This keeps your machine running smoothly and ensures compatibility with new features.
-
Backup Your Files: Before updating, back up your design files. This prevents data loss in case of any issues during the update process.
Mechanical Inspections
-
Lubricate Moving Parts: Regularly lubricate the moving parts of your laser cutter. This reduces wear and tear, ensuring smooth operation.
-
Check Alignment: Periodically check the alignment of the laser beam. Proper alignment is essential for accurate and consistent cuts.
-
Inspect Electrical Connections: Ensure all electrical connections are secure. Loose connections can lead to malfunctions or safety hazards.
By following these maintenance tips, you'll keep your laser cutting machine in excellent condition. Regular cleaning and routine checks not only enhance performance but also extend the life of your equipment. Remember, a well-maintained laser cutter is key to achieving precise and beautiful results in your projects.
You've now got a solid foundation for operating a laser cutting machine. As a beginner, it's important to start with simple projects to build your confidence. Dive into project ideas for beginners like creating keychains, coasters, bookmarks, signs, and even jewelry. These projects not only help you get comfortable with the machine but also let your creativity shine. Your first laser cutting project might seem daunting, but remember, practice makes perfect. Explore various project ideas and enjoy the process of learning and creating. Happy cutting!
FAQ
What materials can you safely cut with a laser cutter?
You can cut a variety of materials with a laser cutter. Common options include wood, paper, metal, acrylic, glass, plastic, and leather. Each material reacts differently to the laser, so it's important to adjust the settings accordingly for the best results.
How do you choose the right material for laser cutting?
Choosing the right material depends on your project needs. Consider factors like thickness, color, and finish. Wood and acrylic are great for beginners due to their ease of use and versatility. Always test a small sample to ensure compatibility with your laser cutter.
Is it safe to cut all types of plastic with a laser cutter?
Not all plastics are safe for laser cutting. Avoid cutting PVC and other chlorine-based plastics as they release harmful gases. Stick to laser-safe plastics like acrylic and polycarbonate for a safer cutting experience.
How do you maintain the laser cutter for optimal performance?
Regular maintenance is key. Clean the lens and cutting bed frequently to remove dust and debris. Check for software updates and lubricate moving parts. These steps help keep your machine running smoothly and extend its lifespan.
What should you do if the laser cutter isn't cutting through the material?
If the laser isn't cutting through, check the focus first. Adjust the power and speed settings to ensure the laser penetrates the material. Clean the lens to remove any obstructions that might affect performance.
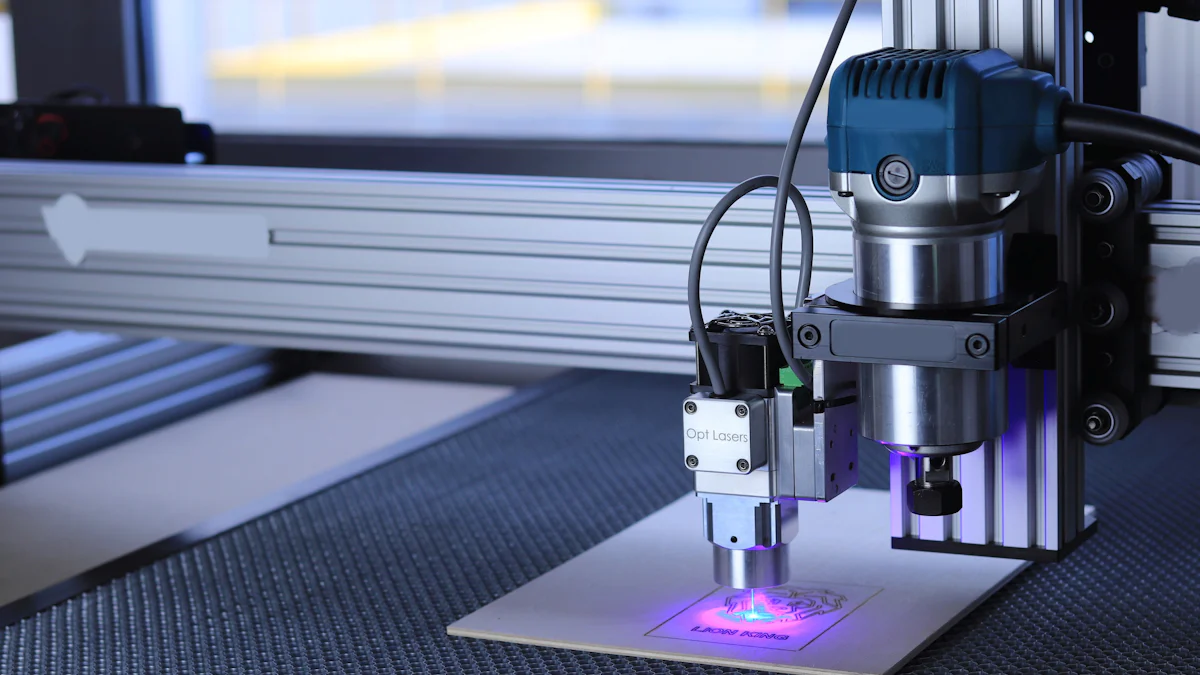
Can you engrave with a laser cutter, or is it only for cutting?
Yes, you can engrave with a laser cutter. Engraving involves etching designs onto the surface of a material without cutting through it. Adjust the laser's power and speed settings to achieve the desired engraving depth and detail.
How do you ensure safety while operating a laser cutter?
Safety is crucial. Wear safety glasses and gloves to protect yourself. Ensure proper ventilation to disperse fumes and dust. Familiarize yourself with emergency procedures and keep a fire extinguisher nearby.
What software do you need for designing laser cutting projects?
Design software like Lightburn or Adobe Illustrator is essential. These programs allow you to create and edit designs for laser cutting. Save your files in compatible formats like SVG or DXF for seamless transfer to the laser cutter.
How do you troubleshoot misalignment issues with the laser cutter?
Misalignment can cause inaccurate cuts. Realign the laser path by adjusting mirrors and lenses. Level the cutting bed to ensure stability. Perform a test cut to verify alignment before starting your main project.
When should you seek professional help for laser cutter issues?
Seek professional help if you encounter persistent errors or machine malfunctions. Consult the user manual first, then contact the manufacturer's support team for guidance. Professional technicians can diagnose and repair complex issues effectively.
See Also
Maximizing Efficiency With Your Laser Cutting Machine
Understanding The Functionality Of CNC Laser Cutters
Essential Guidelines For Effective Plasma Cutting Machine Use