How to Make a Laser Cutting Machine at Home

Ever wondered how to make a laser cutting machine at home? It's not just a dream for tech enthusiasts. You can actually build your own laser cutter with some basic components and a bit of patience. Imagine crafting custom picture frames or intricate designs right from your desktop. Learning how to make a laser cutting machine at home, with a budget ranging from $700 to $1,500, opens up endless possibilities for your projects. Plus, the satisfaction of creating something so powerful with your own hands is unmatched. Ready to dive into the world of laser cutting? Let's get started!
Project Planning for Building a Laser Cutting Machine
Embarking on the journey to build your own laser cutting machine requires careful planning. This section will guide you through the essential components and design considerations to ensure your project is a success.
Necessary Components
To start, you'll need to gather the right components for your DIY laser cutter. Here's what you'll need:
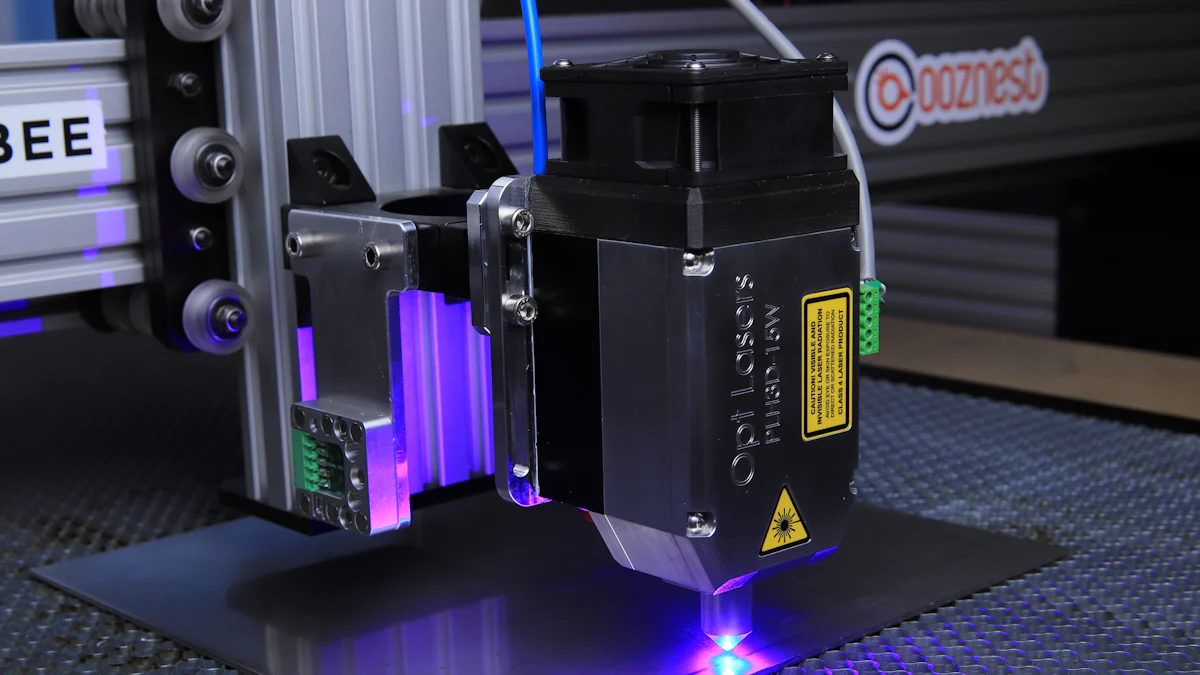
Laser Module
The heart of your laser cutting machine is the laser module. Choose a module that suits your cutting needs. Consider the power and wavelength, as these determine the types of materials you can cut and the thickness you can achieve. A higher wattage laser can cut through thicker materials, but it may also require more cooling and power.
Frame Materials
Next, decide on the materials for your machine's frame. You can choose between metal and wood. Metal frames offer durability and stability, which are crucial for precision cutting. However, wood can be a more cost-effective option if you're on a budget. Ensure the frame is sturdy enough to support the laser and other components.
Motion Control System
The motion control system is vital for guiding the laser along the desired cutting path. It includes motors and a control board that work together to move the laser head with precision. Stepper motors are commonly used due to their accuracy and ease of control. Make sure your system can handle the complexity of your designs.
Power Supply and Cooling System
A reliable power supply is essential to keep your laser cutting machine running smoothly. Check the voltage and current requirements of your laser module and motion control system. Additionally, a cooling system is necessary to prevent overheating. You can choose from air or water cooling systems, depending on your laser's power and usage.
Design Considerations
Before you start building, consider these design aspects to tailor your laser cutting machine to your needs:
Size and Material Compatibility
Determine the size of the cutting area based on the projects you plan to undertake. Ensure your machine can accommodate the materials you intend to cut, whether it's wood, acrylic, or metal. This will influence the overall dimensions and power requirements of your machine.
Budget and Skill Level
Set a realistic budget for your project. Costs can range from $700 to $1,500, depending on the components you choose. Assess your technical skills as well. Building a laser cutting machine involves wiring, assembly, and software configuration. If you're new to these areas, consider seeking help from online communities or tutorials.
Software Requirements
Finally, think about the software you'll use to design and control your laser cutter. You'll need a program to create design files and a control software to translate these files into cutting instructions. Ensure the software is compatible with your control board and easy for you to use.
By carefully planning your project and considering these factors, you'll set yourself up for success in building a functional and efficient laser cutting machine.
Building the Frame for Your DIY Laser Cutter
Creating the frame for your laser cutter is a crucial step in the building process. A well-constructed frame ensures stability and precision, which are essential for accurate cutting. Let's dive into how you can select the right materials and assemble your frame effectively.
Selecting Frame Materials
Choosing the right materials for your frame can make a big difference in the performance of your laser cutter.
Metal vs. Wood
When it comes to frame materials, you have two main options: metal and wood. Metal frames offer superior durability and stability. They can withstand the vibrations and movements of the laser cutter, ensuring precise cuts. However, if you're on a budget, wood can be a viable alternative. It's easier to work with and can still provide adequate support if constructed properly.
Durability and Stability
Durability and stability are key factors to consider when selecting your frame material. A stable frame minimizes vibrations, which can affect the accuracy of your cuts. Metal frames typically excel in this area, but a well-designed wooden frame can also perform well. Ensure that whichever material you choose, it can support the weight and movement of the laser module and other components.
Assembling the Frame
Once you've selected your materials, it's time to put everything together. Follow these steps to assemble your frame.
Tools Required
Before you start, gather the necessary tools. You'll need a drill, screwdriver, measuring tape, and a level. These tools will help you ensure that your frame is square and secure.
Step-by-Step Assembly Instructions
-
Measure and Cut: Begin by measuring and cutting your frame materials to the desired dimensions. Accuracy is crucial here, so double-check your measurements.
-
Assemble the Base: Start by assembling the base of the frame. Use screws or bolts to secure the pieces together. Make sure the base is level to provide a stable foundation.
-
Build the Vertical Supports: Attach the vertical supports to the base. These will hold the laser module and other components. Ensure they are perpendicular to the base for optimal stability.
-
Add Cross Supports: Install cross supports between the vertical supports. These will add rigidity to the frame and prevent wobbling during operation.
-
Secure All Joints: Double-check all joints and connections. Tighten any loose screws or bolts to ensure the frame is solid and stable.
Building your own laser cutter can be a rewarding project, especially if you enjoy DIY and engineering. By following these step-by-step instructions, you'll create a sturdy frame that forms the backbone of your laser cutting machine. With a solid frame in place, you're one step closer to crafting beautiful projects like custom picture frames or intricate designs.
Installing the Motion Control System
Installing the motion control system in your DIY laser cutter is a crucial step. This system ensures that the laser head moves precisely, allowing you to achieve accurate cuts. Let's explore how to choose the right motors and set up the control board effectively.
Choosing the Right Motors
Selecting the appropriate motors is essential for the smooth operation of your laser cutter. The motors drive the movement of the laser head, so their performance directly impacts the quality of your cuts.
Stepper vs. Servo Motors
You have two main options for motors: stepper motors and servo motors. Stepper motors are popular in DIY projects due to their simplicity and precision. They move in discrete steps, making them ideal for applications where accuracy is key. On the other hand, servo motors offer continuous rotation and higher torque, which can be beneficial for more demanding tasks. However, they are typically more complex and expensive.
Motor Specifications
When choosing motors, consider their specifications. Look at the torque, speed, and voltage requirements. Ensure that the motors can handle the weight of the laser module and frame. Also, check compatibility with your control board. Proper motor selection will help you achieve smooth and precise movements.
Setting Up the Control Board
The control board acts as the brain of your laser cutter. It processes the design files and sends instructions to the motors, guiding the laser head along the desired path.
Wiring and Connections
Start by wiring the motors to the control board. Follow the manufacturer's instructions carefully to ensure correct connections. Use quality wires and connectors to prevent any electrical issues. Secure all connections to avoid loose wires, which can lead to malfunctions.
Software Configuration
Once the hardware is set up, configure the software. Install the control software compatible with your board. This software translates your design files into commands for the motors. Adjust the settings to match your machine's specifications, such as motor steps per revolution and acceleration rates. Proper configuration ensures that your laser cutter operates smoothly and accurately.
By carefully selecting the right motors and setting up the control board, you'll enhance the performance of your DIY laser cutter. This setup is vital for achieving precise cuts and making the most of your machine. Once everything is in place, you'll be ready to explore how to use your lasercutter for various projects, from intricate designs to practical creations.
Laser Setup in Your DIY Laser Cutter
Setting up the laser in your DIY laser cutting machine is a pivotal step. This process ensures that your machine can cut materials accurately and efficiently. Let's explore how to select the right laser module and calibrate it for optimal performance.
Selecting the Laser Module
Choosing the right laser module is crucial for your laser cutting machine. The module determines the types of materials you can cut and the precision of your cuts.
Power and Wavelength Considerations
When selecting a laser module, consider its power and wavelength. The power of the laser affects the thickness of materials you can cut. For instance, a high quality CO2 lasercutter with higher wattage can cut through thicker materials like wood or acrylic. The wavelength determines the types of materials that can be effectively cut. Ensure the laser module matches your project needs, whether you're crafting intricate designs or producing items for customers.
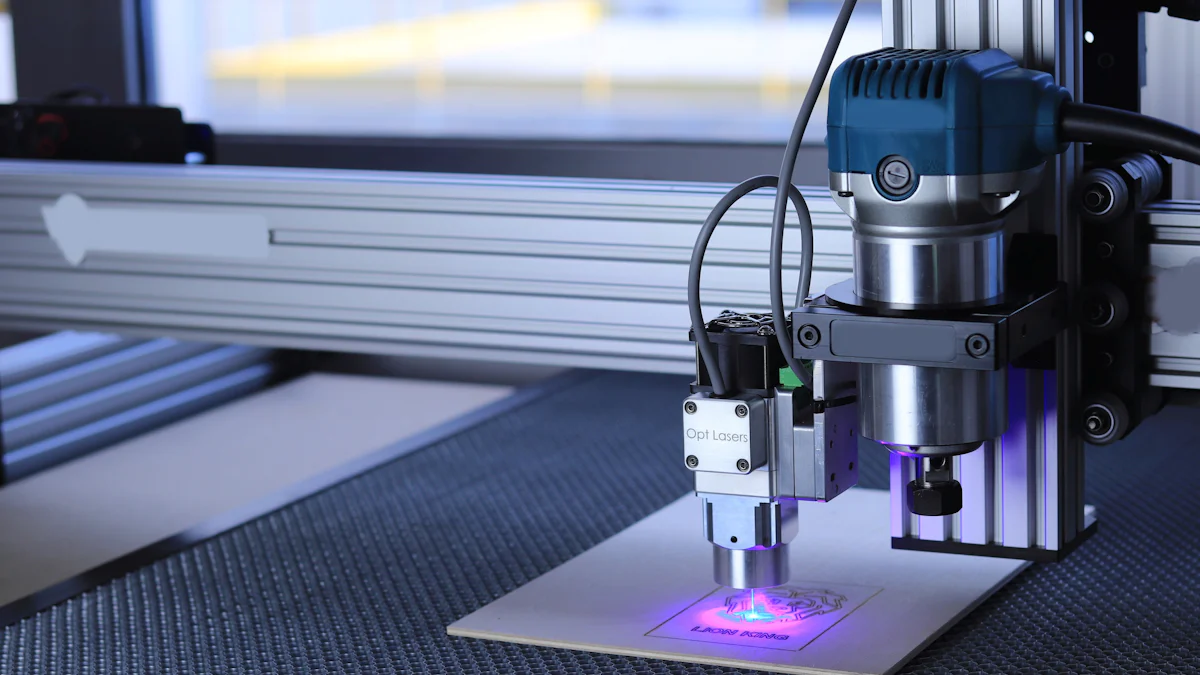
Mounting the Laser
Once you've selected the laser module, it's time to mount it securely. Proper mounting ensures stability during operation. Use a sturdy bracket or mount designed for your specific laser module. Make sure the laser is aligned with the cutting path to achieve precise cuts. A well-mounted laser reduces vibrations and enhances the quality of your projects.
Calibrating the Laser
Calibration is essential for achieving accurate cuts with your laser cutting machine. This process involves aligning mirrors and making necessary adjustments.
Aligning Mirrors
Aligning the mirrors in your laser cutting machine is a critical step. These mirrors direct the laser beam to the cutting surface. Start by adjusting the mirrors so that the laser beam travels in a straight line. Use alignment tools or guides to ensure precision. Proper mirror alignment enhances the efficiency of your high quality CO2 lasercutter.
Testing and Adjustments
After aligning the mirrors, test the laser cutter to ensure everything works correctly. Perform test cuts on scrap materials to check the accuracy and quality of the cuts. Make any necessary adjustments to the laser's focus or alignment. Regular testing and fine-tuning help maintain the performance of your laser cutting machine.
By carefully selecting and setting up the laser module, you can unlock the full potential of your DIY laser cutting machine. Whether you're creating personalized items or exploring new DIY projects, a well-calibrated laser cutter can turn your imagination into reality.
Power and Cooling Systems for a Laser Cutting Machine
When building your laser cutting machine, setting up the power and cooling systems is crucial. These systems ensure that your machine operates efficiently and safely. Let's dive into how you can set them up effectively.
Power Supply Setup
A reliable power supply is the backbone of your laser cutting machine. It provides the necessary energy to keep everything running smoothly.
Voltage and Current Requirements
First, you need to determine the voltage and current requirements of your laser module and motion control system. Check the specifications of each component to ensure compatibility with your power supply. A mismatch in voltage or current can lead to performance issues or even damage your equipment. Make sure your power supply can handle the total load of your machine.
Safety Precautions
Safety should always be a priority when dealing with electrical components. Here are some precautions to keep in mind:
- Use Proper Insulation: Ensure all wires are properly insulated to prevent short circuits.
- Grounding: Properly ground your machine to avoid electrical shocks.
- Emergency Shutoff: Install an emergency shutoff switch for quick power disconnection in case of an emergency.
By following these precautions, you can minimize risks and ensure a safe working environment.
Cooling System Installation
Cooling is essential for maintaining the performance and longevity of your laser cutting machine. Without proper cooling, components can overheat, leading to malfunctions or damage.
Types of Cooling Systems
You have several options when it comes to cooling systems:
- Air Cooling: Uses fans to dissipate heat. It's simple and cost-effective but may not be sufficient for high-power lasers.
- Water Cooling: Circulates water around the laser module to absorb heat. This method is more efficient and suitable for high-power applications.
Choose a cooling system that matches the power and usage of your laser cutter.
Installation Steps
Here's how you can install a cooling system:
- Select the Cooling Method: Decide between air or water cooling based on your laser's power requirements.
- Install Cooling Components: For air cooling, mount fans near heat-generating components. For water cooling, set up a water reservoir, pump, and tubing to circulate water around the laser module.
- Ensure Proper Ventilation: Place your laser cutting machine in a well-ventilated room. This helps dissipate heat and prevents overheating.
- Test the System: Run your machine and monitor the temperature. Make adjustments as needed to ensure efficient cooling.
By setting up an effective cooling system, you can enhance the performance and reliability of your laser cutting machine. Remember, a well-cooled machine not only performs better but also lasts longer.
Safety Considerations When Building a Laser Cutting Machine
When you're building a laser cutting machine, safety should be your top priority. Understanding the potential hazards and implementing a robust safety protection system can prevent accidents and ensure a safe working environment. Let's explore the key safety considerations you need to keep in mind.
Laser Safety
Laser safety is crucial because lasers can cause serious injuries if not handled properly. Here are some important aspects to consider:
Protective Gear
Always wear appropriate protective gear when operating your laser cutter. This includes safety goggles designed to protect your eyes from laser radiation. Regular sunglasses won't suffice, as they don't provide the necessary protection. Additionally, consider wearing gloves and long sleeves to protect your skin from accidental exposure.
Safe Operating Practices
Adopting safe operating practices is essential for preventing accidents. Always follow the manufacturer's guidelines and ensure that your laser cutter is properly enclosed. This prevents the laser beam from escaping and causing harm. Keep the work area clean and free of flammable materials. Regularly inspect your machine for any signs of wear or damage, and address issues promptly.
Electrical Safety
Electrical safety is another critical aspect when building and using a laser cutting machine. Here's what you need to know:
Insulation and Grounding
Proper insulation and grounding are vital to prevent electrical shocks. Ensure all wires are well-insulated and securely connected. Ground your machine to reduce the risk of electrical faults. This step is crucial for protecting both you and your equipment.
Emergency Procedures
Prepare for emergencies by having clear procedures in place. Install an emergency shutoff switch that allows you to quickly cut power to the machine if needed. Familiarize yourself with the location of this switch and ensure it's easily accessible. Regularly review and practice emergency procedures to ensure you're ready to respond effectively.
By prioritizing laser and electrical safety, you can create a safe environment for building and operating your laser cutting machine. Remember, a well-implemented safety protection system not only protects you but also enhances the longevity and performance of your machine.
Building a laser cutting machine at home is a rewarding journey. You gain hands-on experience and learn about the intricacies of laser technology. The process involves planning, assembling, and fine-tuning, but the satisfaction of seeing your creation in action is unmatched. Share your projects and experiences with others. Your insights might inspire someone else to embark on their own DIY adventure. Remember, every challenge you overcome adds to your knowledge and skills. Embrace the learning and enjoy the creative possibilities that come with your homemade laser cutter.
FAQ
How do I start building a laser cutting machine at home?
To kick off your DIY laser cutter project, begin by gathering all the necessary components. You'll need a laser module, frame materials, a motion control system, and a power supply with a cooling system. Once you have these, follow a step-by-step guide to assemble and configure your machine. This process involves planning, assembling, and fine-tuning each part to ensure everything works smoothly.
What materials can I use for the frame of my laser cutter?
You have two main options for frame materials: metal and wood. Metal frames offer durability and stability, which are essential for precision cutting. Wood, on the other hand, is more budget-friendly and easier to work with. Choose the material that best fits your needs and budget, ensuring it can support the weight and movement of your laser cutter components.
Which type of motors should I use for my laser cutter?
For your DIY laser cutter, you can choose between stepper motors and servo motors. Stepper motors are popular due to their simplicity and precision, making them ideal for projects where accuracy is crucial. Servo motors provide continuous rotation and higher torque, which can be beneficial for more demanding tasks. Consider your project's requirements and budget when selecting motors.
How do I ensure the safety of my laser cutting machine?
Safety is paramount when building and operating a laser cutter. Always wear protective gear, such as safety goggles, to shield your eyes from laser radiation. Ensure your machine is properly enclosed to prevent accidental exposure. Additionally, follow electrical safety practices by insulating wires and grounding your machine. Install an emergency shutoff switch for quick power disconnection if needed.
What software do I need to operate my laser cutter?
You'll need two types of software: one for designing your projects and another for controlling the laser cutter. Design software helps you create files that outline your cutting paths. Control software translates these files into instructions for the motors, guiding the laser head along the desired path. Ensure the software is compatible with your control board and easy for you to use.
How do I calibrate the laser in my DIY laser cutter?
Calibrating your laser involves aligning mirrors and making necessary adjustments to ensure accurate cuts. Start by adjusting the mirrors so the laser beam travels in a straight line. Use alignment tools or guides for precision. After alignment, perform test cuts on scrap materials to check accuracy and quality. Make any needed adjustments to maintain optimal performance.
What are the power and cooling requirements for a laser cutter?
Your laser cutter's power supply must meet the voltage and current requirements of the laser module and motion control system. Check each component's specifications to ensure compatibility. For cooling, choose between air or water systems based on your laser's power. Proper cooling prevents overheating and extends the lifespan of your machine.
Can I build a laser cutter if I'm new to DIY projects?
Absolutely! Building a laser cutter is a rewarding project that offers hands-on experience and learning opportunities. If you're new to DIY, start by researching and gathering information from online communities and tutorials. Break down the project into manageable steps and seek help when needed. With patience and persistence, you'll successfully build your own laser cutter.
How much does it cost to build a DIY laser cutter?
The cost of building a DIY laser cutter can range from $700 to $1,500, depending on the components you choose. Metal frames and high-power laser modules may increase costs, while wood frames and lower-power lasers can help you stay within budget. Plan your project carefully and set a realistic budget to ensure you have the resources needed to complete your laser cutter.
What are the benefits of building a laser cutting machine at home?
Building a laser cutting machine at home offers numerous benefits. You gain valuable technical skills and hands-on experience with laser technology. The satisfaction of creating a powerful tool with your own hands is unmatched. Plus, you can craft custom projects and explore endless creative possibilities. Share your experiences with others and inspire them to embark on their own DIY adventures.
See Also
Maximizing Efficiency with Your Laser Cutting Machine
Comparative Guide to Laser Cutting Machine Prices
Understanding the Functionality of CNC Laser Cutters