Step-by-Step Guide to Using a Scan and Cut Machine

A Scan and Cut machine is a revolutionary tool for crafting enthusiasts, combining advanced technology with boundless creativity. It allows you to scan hand-drawn sketches, magazine clippings, or treasured photos and transform them into precise cuts. Whether you're working with paper, fabric, vinyl, or even thin wood, this versatile machine handles it all with ease. Its built-in scanner eliminates the need for design cartridges or a computer, making it incredibly accessible. From quilting to creating custom designs, the creative possibilities are limitless. If you're curious about how to use a Scan and Cut machine, get ready to embark on an exciting and creative journey.
Key Takeaways
setting up your Scan and Cut machine ensuring all components are present for a smooth crafting experience.
- Always perform a test cut before executing your final design to confirm blade settings and prevent material waste.
- Utilize the machine's built-in design library for quick projects, or upload your own custom designs for personalized creations. Experiment with various materials like paper, fabric, and vinyl to discover new creative possibilities and techniques.
- Maintain your machine and cutting mat by cleaning them regularly and storing them properly to ensure longevity and consistent performance.
- Take advantage of advanced features like embossing and drawing to enhance your projects and add unique elements.
- Embrace troubleshooting as a learning opportunity; most common issues have simple solutions that can improve your crafting skills.
How to Use Scan and Cut Machine: Preparing Your Machine and Materials
Before diving into your creative projects, you need to set up your Scan and Cut machine and prepare your materials. This section will guide you through the essential steps to ensure everything is ready for a smooth crafting experience.
Setting Up the Machine
Unboxing and checking the contents
Start by unboxing your machine carefully. Check that all components are included, such as the cutting mat, blade holder, power cord, and any manuals or accessories. Missing items can delay your setup, so double-check everything against the list in the manual. If something is missing, contact the manufacturer or retailer immediately.
Plugging in and powering on the machine
Once you've confirmed all parts are present, plug in the machine using the provided power cord. Place it on a stable surface with enough space for the mat to move freely. Press the power button to turn it on. The screen will light up, and the machine will run a quick self-check. Follow any on-screen prompts to complete the initial setup.
Preparing the Blade and Mat
Installing and adjusting the blade
Locate the blade holder and insert the blade into it. Adjust the blade depth based on the material you'll be cutting. For thin materials like paper, use a shallow setting. For thicker materials like fabric or vinyl, increase the depth slightly. Refer to the manual for recommended settings if you're unsure. Proper blade adjustment ensures clean cuts and prevents damage to your materials.
Choosing the right mat for your material
Your machine comes with different mats designed for various materials. For example:
- Use a standard mat for paper and cardstock.
- Opt for a fabric-friendly mat when working with textiles.
- Choose a low-tack mat for delicate materials like vellum.
Secure your material onto the mat by pressing it down firmly. Smooth out any wrinkles or bubbles to avoid uneven cuts.
Gathering Materials
Selecting compatible materials for cutting
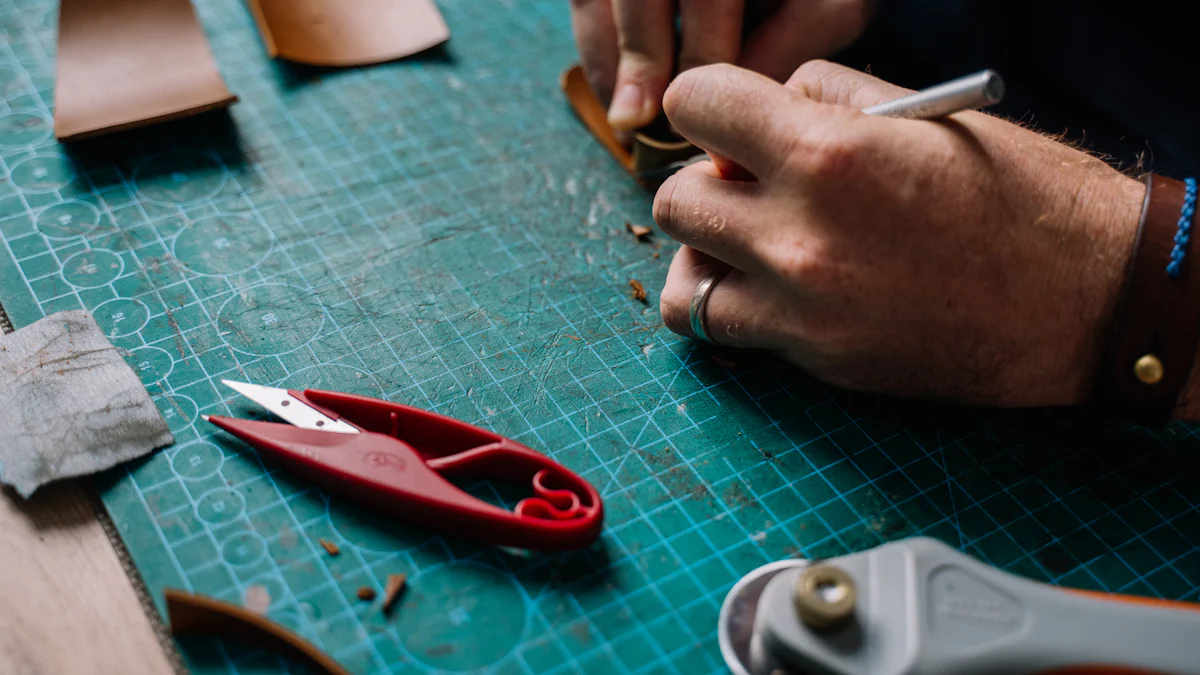
Not all materials work with a Scan and Cut machine, so choose wisely. Compatible options include paper, vinyl, fabric, and even thin wood. Avoid materials that are too thick or rigid, as they can damage the blade or mat. If you're unsure, test a small piece first to see how the machine handles it.
Ensuring materials are clean and flat
Before placing your material on the mat, make sure it's clean and free of dust or debris. Dirt can interfere with the blade's precision. Flatten the material completely to prevent misaligned cuts. For fabric, consider ironing it beforehand to remove creases.
By following these steps, you'll set yourself up for success. A well-prepared machine and materials make the cutting process smoother and more enjoyable. Ready to learn more about how to use a Scan and Cut machine? Let’s move on to selecting and uploading designs in the next section.
How to Use Scan and Cut Machine: Selecting and Uploading Designs
Once your machine and materials are ready, it’s time to dive into the creative part—choosing or uploading designs. Whether you prefer using built-in options or creating custom designs, this section will guide you through every step.
Using Built-in Designs
Navigating the machine’s built-in library
Your Scan and Cut machine comes with a treasure trove of built-in designs. To access them, tap the “Pattern” option on the touchscreen. You’ll find categories like shapes, borders, and even intricate patterns. The intuitive interface makes it easy to browse through the library. Use the stylus to scroll and select designs that catch your eye. This feature is perfect for quick projects or when you need inspiration.
Selecting and previewing a design
After choosing a design, the machine lets you preview it on the screen. This step ensures the design fits your material and project needs. You can resize, rotate, or reposition the design directly on the touchscreen. For example, if you’re working with a small scrap of vinyl, you can move the design to fit perfectly within the available space. Once satisfied, confirm your selection to proceed.
Uploading Custom Designs
Preparing your design file
If you want to use your own designs, start by preparing the file. Supported formats typically include SVG, PNG, or JPEG. Use design software to create or edit your file. Ensure the design is clean and free of unnecessary details. Save the file on your computer or USB drive for easy transfer.
Transferring the file via USB or software
To upload your custom design, connect a USB drive to the machine or use software like CanvasWorkspace. If using USB, select the “Saved Data” option on the touchscreen, then choose the USB icon. Your saved designs will appear, ready for selection. For software transfers, connect your machine to your computer via Wi-Fi or cable. Open CanvasWorkspace, upload your design, and send it directly to the machine. This method is ideal for more complex projects.
Exploring Design Software
Using software like CanvasWorkspace
CanvasWorkspace is a powerful tool that expands your creative possibilities. It allows you to create, edit, and organize designs before sending them to the machine. The software includes features like layering, welding, and adding text. You can also access additional design templates and tutorials to enhance your skills.
Creating or editing designs for the machine
With CanvasWorkspace, you can customize designs to suit your project. Resize elements, combine shapes, or add intricate details. For example, you could take a basic heart shape and transform it into a layered Valentine’s Day card. Once your design is ready, save it and transfer it to the machine. This step ensures your project turns out exactly as you envisioned.
By mastering these steps, you’ll unlock the full potential of your Scan and Cut machine. Whether you’re using built-in designs or uploading your own, the process is straightforward and rewarding. Ready to move on? Let’s explore the cutting process in the next section.
How to Use Scan and Cut Machine: Cutting Process
Now that your machine and design are ready, it’s time to bring your project to life. This section will guide you through the cutting process, ensuring precision and success at every step.
Scanning and Aligning Materials
Loading the mat into the machine
Start by placing your prepared material securely onto the cutting mat. Make sure it’s smooth and free of wrinkles or bubbles. Align the mat with the guides on the machine, then gently feed it into the slot. Press the “Load” button on the touchscreen to load the mat. The machine will pull it in automatically, ensuring proper alignment. Double-check that the mat is straight to avoid any cutting errors.
Scanning the material for precise placement
Once the mat is loaded, use the “Scan” function on your machine. This feature scans the material and displays its exact position on the screen. You can now adjust your design to fit perfectly within the material’s boundaries. For example, if you’re working with a small scrap of vinyl, move the design to avoid wasting material. This step ensures your cuts are accurate and efficient.
Performing a Test Cut
Importance of test cuts
Before cutting your full design, always perform a test cut. This small step saves you from potential mistakes. A test cut helps you confirm that the blade depth, pressure, and speed settings are correct for your material. Skipping this step could result in incomplete cuts or damage to your mat.
Pro Tip: Most Scan and Cut machines include a test cut option. It typically cuts a small triangle or square, allowing you to check the results without wasting material.
Adjusting settings based on test results
After the test cut, examine the material. If the cut is clean and precise, you’re good to go. If not, adjust the blade depth or pressure. For thicker materials like fabric, increase the blade depth slightly. For delicate materials, reduce the pressure to avoid tearing. Repeat the test cut if needed until you achieve the desired result. Taking the time to fine-tune these settings ensures a flawless final cut.
Executing the Final Cut
Starting the cutting process
With everything set, it’s time to cut your design. Press the “Start” button on the machine to begin. The blade will follow the design’s path, cutting your material with precision. Stay nearby to monitor the process, especially if you’re using a new material or design. Watching the machine in action can also help you spot any issues early.
Monitoring the machine during operation
Keep an eye on the machine as it works. If you notice the material shifting or the blade struggling, pause the operation immediately. Adjust the settings or reposition the material if necessary. This hands-on approach ensures your project turns out exactly as planned. Once the cutting is complete, unload the mat and admire your perfectly cut design.
By following these steps, you’ll master the cutting process and create stunning projects with ease. Whether you’re crafting for fun or working on a professional project, understanding how to use a Scan and Cut machine effectively makes all the difference. Ready for the next step? Let’s explore what to do after cutting in the following section.
Post-Cutting Steps
Once your Scan and Cut machine finishes its job, the post-cutting steps ensure your materials, mat, and machine stay in great condition. These steps also help you maintain the quality of your designs for future projects.
Removing Materials from the Mat
Carefully peeling off the cut material
When removing your cut material, take your time to avoid tearing or distorting the design. Start at one corner of the mat and gently peel the material away. Use a spatula or scraper tool if needed to lift delicate or intricate cuts. For example, if you're working with thin vinyl or paper, a slow and steady approach prevents accidental damage.
Pro Tip: Always peel the mat away from the material, not the other way around. This technique keeps your design flat and intact.
Avoiding damage to the mat or design
Protecting your mat is just as important as preserving your design. Avoid using sharp tools that could scratch the mat's surface. If small pieces of material stick to the mat, remove them carefully with a scraper. Keeping your mat clean and undamaged ensures it remains sticky and ready for your next project.
Cleaning and Storing the Mat
Removing adhesive residue
Over time, adhesive residue or debris can build up on your mat, reducing its effectiveness. Clean the mat gently with a lint-free cloth and mild soap. Avoid harsh chemicals, as they can damage the adhesive layer. For stubborn residue, lukewarm water works wonders. Let the mat air dry completely before storing it.
Many crafters recommend keeping the mat clean after every use. For instance, one user shared how they always ensure fabric edges are clean before placing them on the mat to minimize mess.
Properly storing the mat to maintain its stickiness
Store your mat flat to prevent warping. Use the protective cover that came with it to shield the adhesive surface from dust and dirt. If you’ve lost the cover, a clean sheet of plastic wrap works as a substitute. Proper storage extends the life of your mat and keeps it ready for your next creative session.
Storing the Machine
Turning off and unplugging the machine
After finishing your project, turn off the machine using the power button. Unplug it from the outlet to protect it from power surges. This simple step keeps your machine safe and prolongs its lifespan.
Keeping the machine in a safe, dry place
Choose a storage spot that’s clean, dry, and free from extreme temperatures. Avoid areas with high humidity, as moisture can damage the internal components. For example, many users prefer storing their machines in craft rooms or closets where they remain protected and easily accessible. Cover the machine with a dust cover or cloth to keep it clean between uses.
By following these post-cutting steps, you’ll keep your materials, mat, and machine in excellent condition. These habits not only save you time and money but also ensure your Scan and Cut machine delivers consistent results every time. Ready to troubleshoot or explore creative tips? Let’s dive into the next section!
Troubleshooting Common Issues
Even with the best preparation, you might encounter a few hiccups while using your Scan and Cut machine. Don’t worry—most issues have simple solutions. This section will help you troubleshoot common problems and get back to crafting in no time.
Material Not Cutting Properly
Checking blade sharpness and settings
If your material isn’t cutting cleanly, start by inspecting the blade. A dull blade struggles to make precise cuts. Remove the blade holder and check for wear or debris. If the blade looks dull, replace it with a new one. Adjust the blade depth to match your material. For thin materials like paper, use a shallow setting. For thicker materials like fabric, increase the depth slightly. Always refer to your machine’s manual for recommended settings.
Pro Tip: Regularly clean your blade to remove any stuck material. A clean blade ensures smoother cuts and extends its lifespan.
Ensuring the material is compatible with the machine
Not all materials work well with a Scan and Cut machine. Double-check that your material is compatible. Paper, vinyl, and fabric usually cut well, but thicker or rigid materials might cause issues. If you’re unsure, test a small piece first. This quick step saves you time and prevents damage to your machine or mat.
Mat Not Feeding Correctly
Cleaning the mat rollers
When the mat doesn’t feed properly, dirty rollers might be the culprit. Dust and debris can build up over time, affecting the rollers’ grip. Use a lint-free cloth to gently clean the rollers. Avoid using water or harsh chemicals, as they can damage the machine. Keeping the rollers clean ensures smooth mat feeding and accurate cuts.
Ensuring the mat is properly aligned
Misaligned mats can also cause feeding problems. Align the mat with the guides on the machine before loading it. Press the “Load” button and watch as the machine pulls the mat in. If the mat shifts or doesn’t load straight, unload it and try again. Taking a moment to align the mat correctly prevents errors during the cutting process.
Quick Tip: If your mat has lost its stickiness, clean it with mild soap and water. Let it air dry completely before using it again.
Machine Errors or Malfunctions
Resetting the machine
Sometimes, a simple reset fixes unexpected errors. Turn off the machine, unplug it, and wait for a minute. Plug it back in and power it on. This process clears temporary glitches and restores normal operation. If the problem persists, check the screen for error messages and follow the prompts.
Consulting the user manual or customer support
When resetting doesn’t solve the issue, turn to your user manual. It often includes troubleshooting tips for common problems. If you can’t find the answer, reach out to customer support. Many manufacturers offer apps or online resources tailored to your machine model. For example, the Brother Scan and Cut app provides helpful features and support options. You can also explore FAQs or forums where other users share solutions.
It’s a great resource when the manual doesn’t cover your common issues.
By addressing these common issues, you’ll keep your Scan and Cut machine running smoothly. Troubleshooting might feel frustrating at first, but it’s a valuable part of learning how to use your machine effectively. With practice, you’ll handle these challenges like a pro and spend more time enjoying your creative projects.
Tips for Creative Projects with a Scan and Cut Machine
Your Scan and Cut machine isn’t just a tool—it’s a gateway to endless creativity. Whether you’re crafting for fun, gifts, or professional projects, these tips will help you unlock its full potential.
Experimenting with Different Materials
Paper, vinyl, fabric, and more
The Scan and Cut machine shines when it comes to versatility. You can cut a wide range of materials, from paper and cardstock to vinyl, fabric, and even thin wood. Did you know the Scan and Cut was originally designed as a fabric cutting machine? This makes it perfect for quilting or sewing projects. If you’re feeling adventurous, try cutting materials like felt, foam, or acetate sheets. Each material opens up new possibilities for your projects.
Pro Tip: Test each material before starting a big project. A small test cut ensures the blade depth and pressure settings are just right.
One crafter shared how they spent an entire day cutting different materials into the same shape to explore the machine’s capabilities. They discovered that while fabric and vinyl were their go-to choices, experimenting with other materials sparked fresh ideas. You might find the same joy in trying something new!
Tips for layering and combining materials
Layering materials can add depth and dimension to your designs. For example, you could layer vinyl on cardstock to create a stunning greeting card or combine fabric and felt for a textured applique. When layering, start with a sturdy base material to support the design. Use adhesive sheets or transfer tape to align layers perfectly.
Quick Tip: When working with multiple materials, cut each layer separately and assemble them afterward. This approach ensures precision and avoids mistakes.
Experimenting with combinations can lead to unique results. Imagine pairing metallic vinyl with matte paper for a modern look or using patterned fabric with solid felt for a playful vibe. Let your imagination guide you!
Personalizing Your Designs
Adding text or custom elements
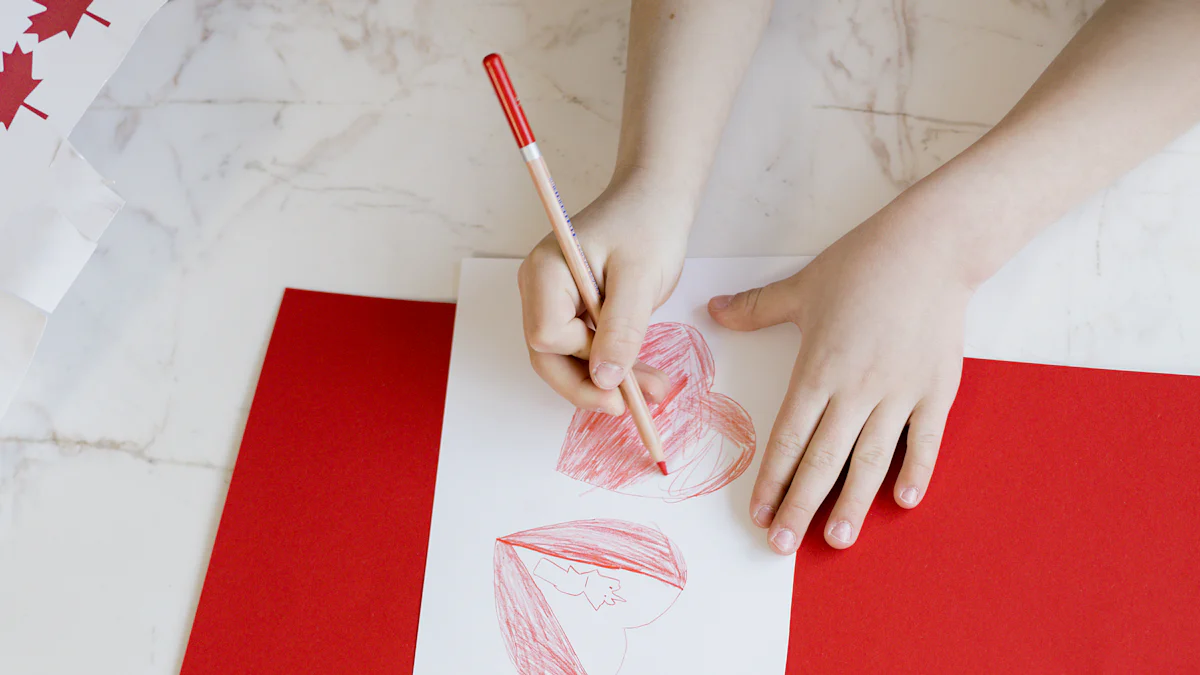
Personalization takes your projects to the next level. Use the Scan and Cut’s text feature to add names, quotes, or special messages to your designs. For instance, you could create a custom tote bag with a favorite quote or a personalized gift tag for a loved one. Adjust the font size and style to match the theme of your project.
Pro Tip: When adding text, use the preview function to ensure proper alignment and spacing. This small step saves time and prevents errors.
You can also incorporate custom elements like logos, monograms, or hand-drawn sketches. Scan your design directly into the machine or upload it using software like CanvasWorkspace. This feature is perfect for creating one-of-a-kind items that reflect your personality.
Using advanced features like embossing or drawing
The Scan and Cut isn’t limited to cutting—it also offers advanced features like embossing and drawing. With the embossing tool, you can add elegant patterns to paper or cardstock. This technique works beautifully for wedding invitations or decorative cards. The drawing tool lets you sketch intricate designs or write messages with precision. Choose from a variety of pen colors to match your project.
Did You Know? Many users revisit training videos to master these advanced features. Pausing and replaying lessons allows you to learn at your own pace while creating.
Combining these features with cutting opens up even more possibilities. For example, you could draw a design on fabric and then cut it out for a unique applique. Or, emboss a pattern onto cardstock and layer it with vinyl for a textured effect. The only limit is your creativity!
By experimenting with materials and personalizing your designs, you’ll discover just how much fun your Scan and Cut machine can be. Don’t be afraid to try new techniques or revisit tutorials for inspiration. Every project is an opportunity to learn and grow as a crafter. So, what will you create next?
Using a Scan and Cut machine opens up endless creative possibilities. You’ve learned how to set up the machine, prepare materials, select designs, and execute precise cuts. Each step builds your confidence and skills. Don’t hesitate to experiment with different materials or try intricate designs. Practice makes perfect, and every project teaches you something new.
Troubleshooting is part of the process, so embrace it as a learning opportunity. Share your creations or ask questions in the comments. Your journey with the Scan and Cut machine is just beginning—let your creativity shine!
FAQ
Why are there two versions of CanvasWorkspace for Scan and Cut?
The two versions of CanvasWorkspace exist to give you flexibility. One version works on your computer, while the other is designed for tablets. This setup ensures you can create and edit designs no matter where you are or what device you prefer. Whether you’re at your crafting desk or on the go, you’ll have the tools you need.
How can I access support for my Scan and Cut machine?
You can access support through the dedicated Scan and Cut app available in the Play Store. This app allows you to set it up specifically for your machine model. It includes helpful features like troubleshooting tips, tutorials, and updates. It’s a handy resource to keep your crafting experience smooth and stress-free.
Can the Scan and Cut machine handle intricate designs on fabric?
Yes, it absolutely can! The Scan and Cut machine excels at cutting intricate designs on fabric.
What types of fabric can I cut with my Scan and Cut machine?
Your Scan and Cut machine can handle a variety of fabrics, including cotton, felt, denim, and more. Testing different fabrics is key to finding the best settings for each material. For example, you might need to adjust the blade depth or pressure when switching from lightweight cotton to thicker denim.
Do I need to use a computer to operate the Scan and Cut machine?
No, you don’t need a computer to use the Scan and Cut machine. It comes with a built-in scanner and a library of designs, so you can create projects directly on the machine. However, using software like CanvasWorkspace on a computer or tablet can expand your creative options and make complex designs easier to manage.
How do I ensure my cuts are precise every time?
To achieve precise cuts, always perform a test cut before starting your project. This step helps you confirm that the blade depth, pressure, and speed settings are correct for your material. Also, make sure your material is clean, flat, and securely placed on the mat. These small steps make a big difference in the final result.
Can I use my own designs with the Scan and Cut machine?
Yes, you can upload your own designs to the Scan and Cut machine. Save your design in a compatible format like SVG, PNG, or JPEG. Then, transfer it via USB or software like CanvasWorkspace. This feature allows you to personalize your projects and bring your unique ideas to life.
What should I do if my mat loses its stickiness?
If your mat loses its stickiness, clean it gently with mild soap and water. Let it air dry completely before using it again. For temporary fixes, you can use a repositionable adhesive spray. Proper cleaning and maintenance will extend the life of your mat and keep it working effectively.
Can I use the Scan and Cut machine for drawing or embossing?
Yes, the Scan and Cut machine offers advanced features like drawing and embossing. With the drawing tool, you can sketch designs or write messages directly onto your material. The embossing tool adds elegant patterns to paper or cardstock. These features open up even more creative possibilities for your projects.
Is the Scan and Cut machine beginner-friendly?
Absolutely! The Scan and Cut machine is designed with beginners in mind. Its intuitive interface, built-in designs, and step-by-step instructions make it easy to get started. As you gain confidence, you can explore more advanced features and techniques. It’s a tool that grows with your skills.
See Also
Comprehensive Instructions for Operating a Hair Clipper
Beginner's Manual for Operating a Die Cutting Tool
Essential Steps for Utilizing a Die Cutting Machine