How to Use Metal Die Cuts Without a Machine


You don’t need a fancy machine to create magic with metal die cuts. With just a few simple tools, you can bring your creative ideas to life. Scissors, craft knives, or even household items like rolling pins can help you cut and emboss intricate designs. Crafting manually gives you full control over every detail, making each project uniquely yours. Did you know that nearly 37.4% of people engage in crafting activities yearly? You’re not alone in exploring this rewarding hobby. Dive in, experiment, and discover how to use metal die cuts without a machine to craft something truly special.
Key Takeaways
- You can create beautiful designs with metal die cuts using simple tools like scissors, craft knives, and rolling pins, eliminating the need for expensive machines.
- Choosing high-quality materials, such as sturdy cardstock and thin metal sheets, enhances the quality of your die-cut projects and ensures cleaner cuts.
- Manual die cutting encourages creativity and skill development, allowing you to customize designs and experiment with various techniques.
- Household items can be effectively used to apply pressure for cutting and embossing, making crafting accessible and cost-effective.
- Patience and precision are essential for achieving clean edges and perfect alignment in your designs, so take your time and practice regularly.
- Incorporating metal die cuts into gift wrapping and packaging adds a personal touch, making your gifts stand out and feel special.
- Manual die cutting is portable and convenient, allowing you to craft anywhere, whether at home or on the go, making it easier to pursue your creative passions.
Basic Tools and Materials for Manual Die Cutting
When you’re crafting without a machine, having the right tools and materials makes all the difference. Let’s explore what you’ll need to get started and how these items can elevate your projects.
Essential Tools for Success
To work with metal die cuts manually, you’ll need a few basic tools. These essentials will help you cut, shape, and emboss your designs effectively:
- Scissors: A sharp pair of scissors is your go-to tool for cutting around intricate shapes. Precision scissors work best for detailed designs.
- Craft Knife: A craft knife allows you to cut with greater accuracy, especially for small or delicate areas.
- Cutting Mat: Protect your work surface and ensure clean cuts by using a self-healing cutting mat.
- Rolling Pin: Believe it or not, a rolling pin can apply pressure to your metal dies, helping you emboss or cut without a machine.
- Ruler: A ruler ensures straight lines and helps with precise measurements.
These tools are easy to find and affordable, making them perfect for beginners and seasoned crafters alike.
Recommended Materials for Best Results
The materials you choose can impact the quality of your finished project. Here are some recommended materials to get the best results:
- Cutting Dies: Metal dies come in various shapes and sizes, from simple circles to intricate lace patterns. Choose designs that match your project’s theme.
- Paper and Cardstock: High-quality paper or cardstock works best for manual die cutting. Thicker materials hold their shape better and create a polished look.
- Thin Metal Sheets: For a unique touch, try using thin metal sheets. They add a shiny, professional finish to your crafts.
- Adhesives: Use glue or double-sided tape to secure your die-cut pieces to your project.
By selecting the right materials, you’ll achieve cleaner cuts and more vibrant designs.
Optional Supplies to Enhance Your Projects
While the basics are enough to get started, a few optional supplies can take your crafting to the next level:
- Embossing Folders: Add texture and dimension to your projects by using embossing folders with your metal dies.
- Shims: A shim, made from scrap cardstock or thin metal, helps create extra pressure when cutting or embossing manually.
- Decorative Elements: Glitter, sequins, or ribbons can enhance your die-cut designs and make them stand out.
- Markers or Paints: Add color and detail to your die cuts with markers, paints, or ink pads.
These extras aren’t necessary, but they can inspire creativity and give your projects a professional touch.
“Cutting dies offer unmatched precision and versatility for creating intricate designs and embellishments.” With the right tools and materials, you can unlock this potential even without a machine.
By gathering these tools and materials, you’ll be well-prepared to dive into manual die cutting and bring your creative ideas to life.
How to Use Metal Die Cuts Without a Machine: Manual Techniques
When you don’t have a die-cutting machine, manual techniques can still help you create beautiful designs. With a little creativity and the right approach, you can achieve impressive results. Let’s explore some effective methods for using metal die cuts without a machine.
Applying Pressure with Household Tools
Household tools can work wonders when you need to apply pressure to your metal dies. A rolling pin is one of the most accessible options. Place your metal die on top of the material you want to cut, then roll over it firmly with the pin. This method mimics the pressure applied by a die-cutting machine. For better results, add a shim made from scrap cardstock or thin metal to increase the pressure.
If you don’t have a rolling pin, try using a heavy book or a flat-bottomed object like a glass jar. Press down evenly across the die to ensure a clean cut. While these tools may not match the precision of a machine, they’re excellent for simple shapes and designs.
“Manual die cutting relies on pressure to create intricate shapes, and household tools can provide a cost-effective alternative to machines.”
Experiment with different tools to find what works best for your projects. You might be surprised by how versatile everyday items can be.
Tracing and Cutting by Hand
Tracing and cutting by hand is a classic technique that gives you complete control over your designs. Start by placing your metal die on the material and tracing its outline with a pencil or fine-tip pen. Once you’ve traced the shape, use scissors or a craft knife to cut along the lines.
For intricate designs, precision scissors or a sharp craft knife will help you achieve cleaner edges. A self-healing cutting mat is essential to protect your work surface and ensure smooth cuts. This method requires patience, but it allows you to customize your designs and add personal touches.
Here’s a quick step-by-step guide:
- Secure the metal die on your material with tape to prevent slipping.
- Trace the outline carefully, ensuring all details are captured.
- Cut along the traced lines with your chosen tool.
- Refine the edges if needed for a polished finish.
Hand-cutting is perfect for creating unique shapes and experimenting with different materials like paper, cardstock, or thin metal sheets.
Embossing Techniques for Added Texture
Embossing adds texture and dimension to your projects, making them stand out. You can achieve this effect manually with a few simple tools. Place your metal die on the material, then layer it between two pieces of scrap cardstock. Use a rolling pin or another heavy object to press down firmly. The pressure will transfer the design onto the material, creating a raised effect.
For more detailed embossing, try using an embossing folder. Place your material and die inside the folder, then apply pressure as described above. This technique works well for adding intricate patterns to greeting cards, scrapbook pages, or home décor projects.
“Combining cutting dies with embossing techniques can produce truly unique results that elevate your crafting skills.”
Embossing is a versatile technique that enhances the visual appeal of your creations. It’s an excellent way to experiment with textures and bring your designs to life.
By mastering these manual techniques, you’ll discover how to use metal die cuts without a machine in creative and innovative ways. Whether you’re cutting, tracing, or embossing, these methods open up endless possibilities for your crafting projects.
Creative Project Ideas Using Metal Die Cuts Without a Machine
Using metal die cuts manually opens up a world of creative possibilities. You can craft unique and personalized projects that reflect your style. Let’s explore some fun ideas to inspire your next creation.
Handmade Greeting Cards
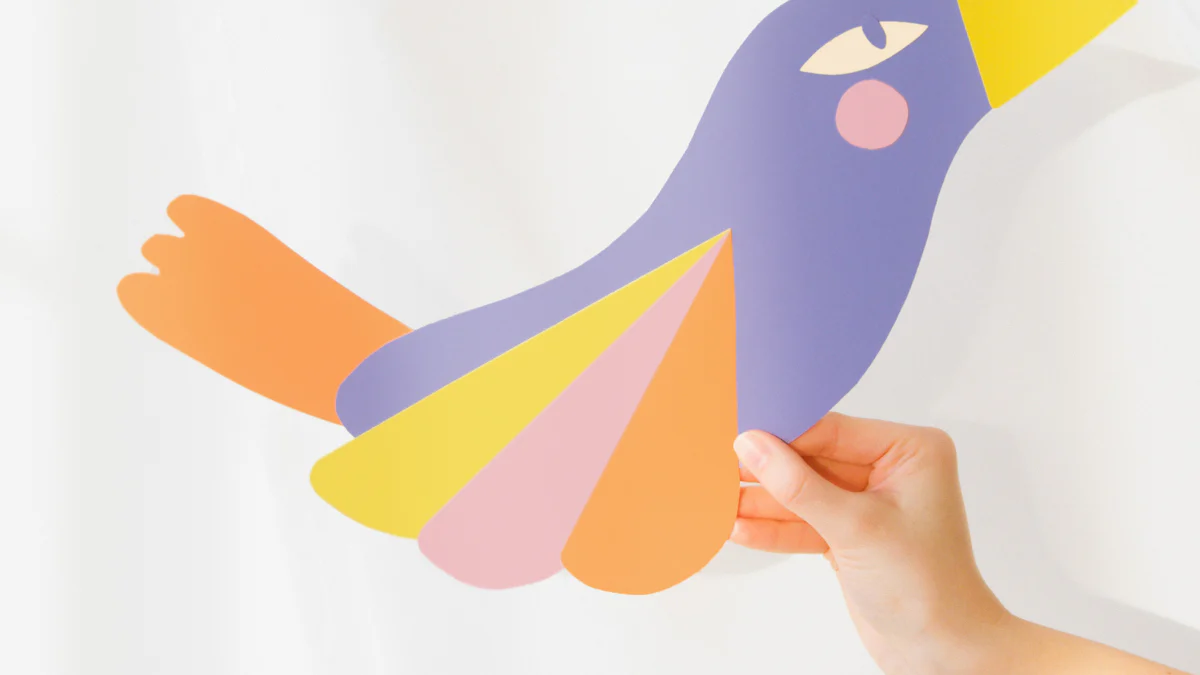
Handmade greeting cards are a thoughtful way to show someone you care. Metal die cuts can add intricate designs and a professional touch to your cards. Start by selecting a theme for your card, like birthdays, holidays, or thank-you notes. Use your metal dies to create shapes, patterns, or borders. For example, you can cut out flowers, hearts, or geometric shapes and layer them on colorful cardstock.
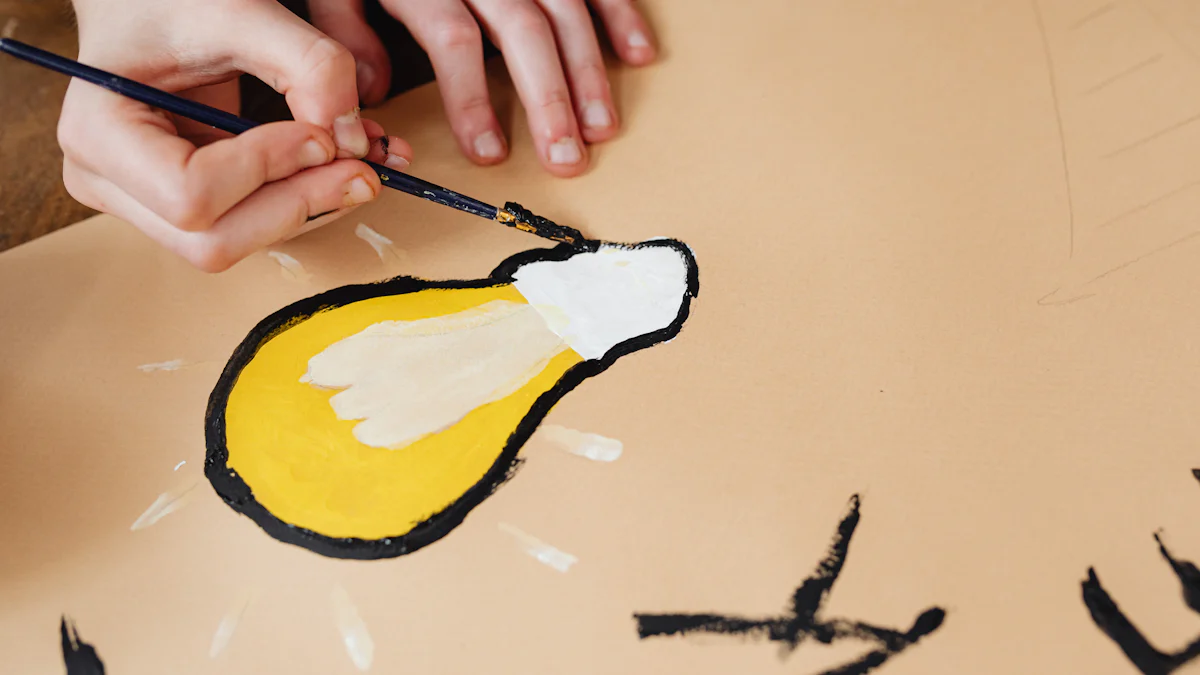
To make your card stand out, experiment with embossing techniques. Add texture to the background or highlight specific elements. You can also use markers or paints to add color and detail to your die-cut pieces. Personalize your card with handwritten messages or decorative elements like ribbons and sequins. The result will be a one-of-a-kind card that your recipient will cherish.
DIY Home Décor Projects
Metal die cuts can transform your home décor projects into stunning works of art. You can create wall art, table centerpieces, or decorative frames using simple materials. For wall art, cut out shapes or patterns from cardstock or thin metal sheets. Arrange them in a frame or on a canvas to create a unique design. You can even layer different colors and textures for added depth.
For table centerpieces, use metal die cuts to craft paper flowers, leaves, or other decorative elements. Combine them with candles, vases, or other items to create a cohesive look. If you enjoy seasonal decorating, try making ornaments or garlands with your die cuts. These projects are not only fun but also allow you to customize your space with your personal touch.
Scrapbooking and Memory Keeping
Scrapbooking is a wonderful way to preserve your memories, and metal die cuts can elevate your pages. Use them to create borders, frames, or embellishments that complement your photos. For example, you can cut out shapes like stars, hearts, or arrows to highlight special moments. Layering die-cut pieces adds dimension and makes your scrapbook pages more visually appealing.
You can also use die cuts to create custom tags or labels for journaling. Write down dates, names, or short descriptions to accompany your photos. If you enjoy mixed media, combine your die cuts with stamps, stickers, or washi tape for a creative and textured look. Scrapbooking with metal die cuts allows you to tell your story in a beautiful and artistic way.
“Crafting with metal die cuts manually gives you the freedom to create projects that are truly unique and personal.”
These project ideas show you how to use metal die cuts without a machine in creative and meaningful ways. Whether you’re making cards, decorating your home, or preserving memories, the possibilities are endless.
Gift Wrapping and Packaging
Metal die cuts can turn ordinary gift wrapping into something extraordinary. They add a personal and creative touch that makes your presents stand out. Whether you're wrapping for birthdays, holidays, or special occasions, these techniques will help you create packaging that wows.
Add Die-Cut Tags for a Personal Touch
Gift tags are a simple way to elevate your wrapping. Use metal die cuts to create unique shapes like stars, hearts, or flowers. Cut them from cardstock, thin metal sheets, or even patterned paper. Write the recipient's name or a short message on the tag. Attach it to your gift with ribbon, twine, or a decorative clip. These custom tags make your gift feel thoughtful and special.
Create Decorative Layers
Layering die-cut shapes adds dimension and style to your gift wrapping. Start by cutting out shapes that match the theme of your gift. For example, snowflakes for winter holidays or leaves for autumn celebrations. Layer these shapes on top of your wrapping paper using glue or double-sided tape. You can overlap them or arrange them in patterns for a polished look. This technique works well with plain wrapping paper, letting the die cuts take center stage.
Embellish Ribbons and Bows
Ribbons and bows look even better with die-cut accents. Cut small shapes like stars, circles, or flowers and attach them to your ribbon. You can glue them directly onto the ribbon or use a hole punch to thread the ribbon through the die cut. This adds a playful and creative element to your packaging. For an extra pop, use metallic or glittery paper for your die cuts.
Design Custom Gift Boxes
If you're feeling adventurous, try creating custom gift boxes with metal die cuts. Use sturdy cardstock to build a box, then decorate it with die-cut shapes. You can cut windows into the box using your dies, allowing a peek at the gift inside. Add embellishments like embossed patterns or layered designs to make the box truly unique. Handmade gift boxes show your effort and creativity, making the gift even more meaningful.
"Beautiful packaging makes the gift-giving experience unforgettable. It’s not just about what’s inside—it’s about the thought and care you put into the presentation."
Experiment with Seasonal Themes
Seasonal themes make your gift wrapping even more festive. For Christmas, use die cuts shaped like ornaments, trees, or snowflakes. For Valentine’s Day, hearts and roses work beautifully. You can also create themed packaging for birthdays, weddings, or baby showers. Match your die cuts to the occasion, and your gifts will feel extra special.
By incorporating metal die cuts into your gift wrapping, you’ll create packaging that’s as memorable as the gift itself. These small details show your creativity and thoughtfulness, leaving a lasting impression on the recipient.
Tips for Achieving the Best Results
Choosing the Right Tools and Materials
The tools and materials you use can make or break your crafting experience. Selecting the right ones ensures smoother cuts, cleaner designs, and more enjoyable crafting sessions. Start by investing in high-quality scissors or craft knives. These tools help you achieve precise cuts, especially for intricate designs. A self-healing cutting mat is another must-have. It protects your workspace and keeps your cuts clean and accurate.
If you want to experiment, try using thin metal sheets for a shiny, professional finish. Don’t forget adhesives like glue or double-sided tape to secure your die-cut pieces for achieving optimal results.
“Cutting dies are a game-changer in the crafting world, offering unmatched precision and versatility for creating intricate designs and embellishments.”
By choosing the right tools and materials, you set yourself up for success and open the door to endless creative possibilities.
Maintaining Your Metal Die Cuts
Taking care of your metal die cuts ensures they last longer and perform better. Regular maintenance keeps them sharp and ready for your next project. After each use, clean your dies with a soft cloth to remove any residue or debris. Avoid using harsh chemicals that could damage the metal.
Store your dies in a dry, organized space. Moisture can cause rust, so consider using silica gel packets to keep them dry. You can also store them in labeled envelopes or a dedicated storage box to prevent them from getting lost or damaged.
Keeping your tools in top condition not only saves you money but also ensures your projects always look their best.
Practicing Patience and Precision
Crafting with metal die cuts manually requires patience and precision. Rushing through a project can lead to uneven cuts or mistakes. Take your time to trace, cut, and assemble each piece carefully. Use a steady hand when working with scissors or craft knives, and always cut on a stable surface.
If you’re new to manual die cutting, start with simple designs. As you gain confidence, you can move on to more intricate patterns. Practice makes perfect, so don’t get discouraged if your first few attempts aren’t flawless. Each project helps you improve your skills and discover new techniques.
“Paper die-cutting is a fascinating hobby that allows you to express your creativity in many ways.”
Embrace the process and enjoy the journey. With patience and practice, you’ll create stunning, personalized works of art that showcase your unique style.
Common Challenges and Solutions for Manual Die Cutting
Cutting Through Tough Materials
Working with thicker or tougher materials can feel frustrating, especially when your tools struggle to make clean cuts. However, you can overcome this challenge with a few adjustments. First, ensure your scissors or craft knife is sharp. Dull tools make cutting harder and often result in jagged edges. If your tools need sharpening, try cutting through aluminum foil several times. This simple trick can restore their edge.
Using a shim can also help. Place a piece of scrap cardstock or thin metal under your material to increase pressure while cutting. This technique works well for stubborn materials like thick cardstock or thin metal sheets. Additionally, applying steady, even pressure while cutting ensures smoother results.
"The right tools and techniques make all the difference when tackling tough materials."
If you still face difficulty, consider switching to a thinner material for practice. Once you feel confident, return to the tougher material with improved skills and techniques.
Achieving Clean and Smooth Edges
Clean edges can elevate your project, but achieving them manually requires precision. Uneven or rough edges often occur when tools slip or when cuts are rushed. To avoid this, always use a stable surface like a self-healing cutting mat. This not only protects your workspace but also provides a firm base for accurate cuts.
Take your time when cutting intricate designs. Rushing increases the chance of mistakes. Use small, deliberate movements with your scissors or craft knife. For curves or detailed areas, precision scissors work best. If edges still appear rough, gently sand them with fine-grit sandpaper or an emery board for a polished finish.
"Patience and precision are your best allies when striving for smooth, professional-looking edges."
Practicing on scrap materials can also help you refine your technique. Over time, you’ll notice significant improvement in the quality of your cuts.
Aligning Designs Perfectly
Aligning your designs perfectly can feel tricky, especially when working with multiple layers or intricate patterns. To simplify this process, use removable tape to secure your metal die in place before tracing or cutting. This prevents slipping and ensures your design stays aligned.
A ruler can also be a valuable tool. Use it to measure and mark guidelines on your material before starting. These marks act as a reference, helping you maintain symmetry and alignment. For layered designs, assemble the pieces temporarily before gluing them down. This allows you to adjust their placement until everything looks just right.
"Small adjustments and careful planning lead to perfectly aligned designs."
If alignment still feels challenging, start with simpler shapes. As you gain confidence, move on to more complex patterns. Remember, practice makes perfect, and each project helps you improve your skills.
By addressing these common challenges with practical solutions, you’ll find manual die cutting more enjoyable and rewarding. With patience, the right tools, and a bit of creativity, you can overcome any obstacle and create stunning designs.
Why Learn How to Use Metal Die Cuts Without a Machine?
Crafting without a machine might seem challenging at first, but it offers unique benefits that make the effort worthwhile. Let’s explore why learning this skill can transform your creative journey.
Cost-Effective Crafting Solutions
By learning manual techniques, you save money while still enjoying the versatility of metal die cuts.
Historically, die cutting began in the mid-1800s as a manual process to cut leather for shoe soles. This method allowed manufacturers to replicate patterns efficiently without relying on costly machinery. Similarly, you can achieve beautiful results today without investing in expensive equipment. Manual crafting proves that creativity doesn’t have to come with a hefty price tag.
“Crafting manually not only saves money but also encourages resourcefulness and innovation.”
By choosing this approach, you can focus on your projects without worrying about the financial burden of high-tech tools.
Encouraging Creativity and Skill Development
Working without a machine pushes you to think outside the box. You’ll discover new ways to use household items, experiment with different materials, and develop techniques that suit your style. This hands-on approach enhances your problem-solving skills and boosts your confidence as a crafter.
Tracing and cutting by hand, for example, allows you to customize designs in ways machines can’t replicate. You gain full control over every detail, making each project uniquely yours. Over time, you’ll notice improvements in your precision, patience, and artistic vision.
“Manual crafting transforms challenges into opportunities for growth and creativity.”
Every project becomes a chance to learn something new. Whether you’re a beginner or an experienced crafter, this journey helps you refine your skills and expand your creative horizons.
Portable and Convenient Crafting Options
One of the biggest advantages of manual die cutting is its portability. Without a bulky machine, you can craft anywhere—at home, outdoors, or even while traveling. All you need are your tools and materials, which fit easily into a bag or small workspace.
This flexibility makes crafting more accessible and enjoyable. You can work on projects during your free time, whether it’s a quiet afternoon at the park or a cozy evening at home. The convenience of manual techniques ensures that creativity is always within reach.
Crafting without a machine gives you the freedom to create wherever inspiration strikes.
By embracing this portable approach, you open up endless possibilities for when and where you can craft.
Learning how to use metal die cuts without a machine isn’t just about saving money or finding alternatives. It’s about unlocking your potential, exploring your creativity, and enjoying the freedom to craft on your terms. With these benefits in mind, you’ll see that manual die cutting is more than a skill—it’s a rewarding and empowering experience.
Using metal die cuts without a machine offers more than just creative satisfaction. It’s a hands-on process that lets you explore your artistic side while enjoying the therapeutic benefits of crafting. Studies have shown that crafting can reduce anxiety and boost dopamine levels, making it a great way to relax and recharge. With the right tools and techniques, you can create stunning projects that reflect your unique style. Don’t hesitate to experiment, embrace challenges, and let your imagination guide you. Every cut, trace, and design brings you closer to mastering this rewarding craft.
FAQ
What are metal die cuts used for?
Metal die cuts help you create intricate shapes and designs for various crafting projects. You can use them for making greeting cards, scrapbooking, gift wrapping, or even home décor. They add precision and detail to your work, making your creations look professional and polished.
“Cutting dies are a game-changer in the crafting world, offering unmatched precision and versatility for creating intricate designs and embellishments.”
Can I use metal die cuts without a machine?
Yes, you can! While die-cutting machines make the process faster, you don’t need one to use metal die cuts. With tools like scissors, craft knives, and even household items like rolling pins, you can manually cut and emboss designs. This approach gives you more control and allows you to craft anywhere.
What tools do I need for manual die cutting?
To get started, you’ll need a few basic tools:
- Scissors or a craft knife for cutting.
- A cutting mat to protect your workspace.
- A rolling pin or heavy object to apply pressure.
- Adhesives like glue or double-sided tape for assembling your designs.
Optional tools like embossing folders or shims can enhance your projects further.
How do I achieve clean edges when cutting by hand?
Clean edges require sharp tools and steady hands. Use precision scissors or a craft knife for detailed cuts. Work on a stable surface, like a self-healing cutting mat, to keep your cuts smooth. If edges appear rough, gently sand them with fine-grit sandpaper for a polished finish.
“Patience and precision are your best allies when striving for smooth, professional-looking edges.”
Can I emboss with metal die cuts without a machine?
Absolutely! You can emboss manually by layering your material and metal die between two pieces of scrap cardstock. Apply firm pressure using a rolling pin or a heavy object. This transfers the design onto your material, creating a raised texture. Embossing folders can also help you achieve more intricate patterns.
What materials work best for manual die cutting?
High-quality paper or cardstock is ideal for manual die cutting. Thicker materials hold their shape better and create a polished look. You can also experiment with thin metal sheets for a shiny, professional finish. Always choose materials that suit your project’s theme and style.
How do I align designs perfectly when layering?
Use removable tape to secure your metal die in place before tracing or cutting. This prevents slipping and ensures alignment. For layered designs, assemble the pieces temporarily before gluing them down. A ruler can also help you measure and mark guidelines for symmetry.
“Small adjustments and careful planning lead to perfectly aligned designs.”
Why should I learn manual die cutting instead of using a machine?
Manual die cutting offers several benefits:
- It’s cost-effective since you don’t need to invest in a machine.
- It encourages creativity by pushing you to think outside the box.
- It’s portable, allowing you to craft anywhere without bulky equipment.
This hands-on approach helps you develop skills and adds a personal touch to your projects.
What are some common challenges with manual die cutting?
Some challenges include cutting through tough materials, achieving clean edges, and aligning designs. You can overcome these by sharpening your tools, using a shim for extra pressure, and practicing patience. Each project helps you refine your technique and improve your results.
Can I create professional-looking projects without a machine?
Yes, you can! Manual die cutting allows you to achieve stunning results with the right tools and techniques. By mastering this skill, you can transform simple projects into unique, professional-looking creations. The effort you put into crafting manually adds a personal and artistic touch that machines can’t replicate.
See Also
Creative Ways to Utilize Die Cuts Without Equipment
Is It Possible to Use Die Cuts Manually?
Simple Techniques for Using Die Cuts by Hand