How to Use Ellison Die Cut Machine Effectively

The Ellison die cut machine is a game-changer for crafting enthusiasts, and learning how to use the Ellison die cut machine can elevate your projects to a professional level. It allows you to cut materials with precision and speed, whether you're working with paper, fabric, or foam. This versatile tool makes creating intricate designs effortless, eliminating the need for scissors or knives. By understanding how to use the Ellison die cut machine properly, you can unlock its full potential and take your creativity to new heights. Ready to get started? Let’s dive in!
Key Takeaways
Properly set up your die cut machine on a stable surface to ensure clean and precise cuts. Use the right type of die for your material; steel-rule dies are best for thicker materials, while wafer-thin dies work well with paper.
- Create a 'die sandwich' by layering the die and material between cutting pads to achieve even pressure during cutting.
- Regularly clean your machine and cutting plates to maintain performance and prevent unwanted marks on your materials.
- Inspect and replace worn-out components like cutting pads to ensure consistent cutting quality.
- Experiment with various materials beyond paper, such as fabric and foam, to expand your creative possibilities.
- Combine multiple dies for unique designs, and plan your projects on paper to visualize the final outcome before cutting.
Setting Up the Ellison Die Cut Machine
Setting up your Ellison Die Cut Machine is the first step to unlocking its full potential. A proper setup ensures smooth operation and helps you avoid unnecessary issues later. Let’s walk through the process together.
Unboxing and Assembling
Inspecting the contents of the box
When you unbox your machine, take a moment to inspect everything inside. Look for the main machine, cutting pads, and any included accessories like shims or dies. Check that all parts are intact and free from damage. Missing or broken components can affect the machine's performance, so it’s important to verify everything is in good condition before moving forward.
Pro Tip: Keep the packaging and manual handy. They can be useful if you need to store the machine or refer to instructions later.
Assembling the machine step by step
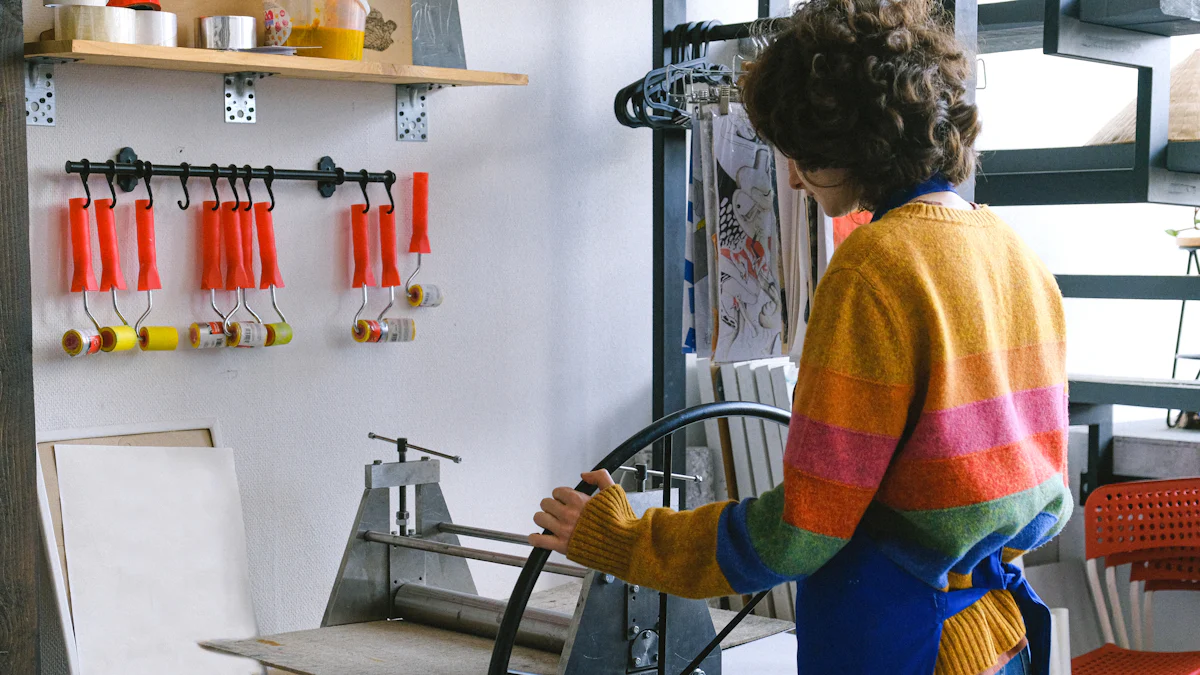
Assembling the Ellison Die Cut Machine is straightforward. Start by attaching any removable parts, such as the handle or crank, if they aren’t pre-installed. Follow the instructions in the manual to ensure each piece is securely in place. Once assembled, give the handle a quick turn to confirm it moves smoothly. This step ensures the machine is ready for use.
Quick Reminder: Tighten screws or bolts firmly, but avoid over-tightening to prevent damage.
Initial Setup
Positioning the machine on a stable surface
Choose a sturdy, flat surface for your machine. A wobbly table or uneven surface can lead to poor cuts or even damage the machine. Position it in a well-lit area where you have enough space to work comfortably. Make sure the machine is within easy reach of your materials and tools.
Why it matters: Stability is key to achieving clean, precise cuts. A stable surface also protects the machine from unnecessary wear and tear.
Testing the machine for proper functionality
Before diving into your first project, test the machine to ensure it’s functioning correctly. Place a scrap piece of material and a die between the cutting pads, then run it through the machine. Check the cut for accuracy and smoothness. If the result looks good, your machine is ready to go.
Helpful Tip: If the cut isn’t clean, double-check the alignment of the die and cutting pads. Adjust as needed to get the best results.
By following these steps, you’ll set up your Ellison Die Cut Machine for optimal performance. A proper setup not only saves time but also ensures you get the most out of your crafting experience.
How to Use Ellison Die Cut Machine for Basic Cutting
Mastering the basics of cutting with the Ellison die cut machine is essential for achieving clean, precise results. Whether you're a beginner or an experienced crafter, understanding the tools and techniques will help you make the most of this versatile machine.
Understanding Dies and Materials
Types of dies compatible with the machine
The Ellison die cut machine works with a variety of dies, making it adaptable to different projects. You’ll find steel-rule dies and wafer-thin dies among the most commonly used options. Steel-rule dies are perfect for cutting thicker materials like fabric or foam, while wafer-thin dies excel at intricate designs on paper or cardstock. Always check the compatibility of your die with the machine to avoid damage.
Quick Tip: Steel-rule dies are more durable and can handle tougher materials, making them ideal for heavy-duty crafting.
Recommended materials for cutting
This machine can cut through a wide range of materials, including paper, cardstock, fabric, foam, and even thin metal sheets. For best results, use materials that match the die type. For example, pair wafer-thin dies with lightweight materials like paper. Using the right material ensures clean cuts and prevents unnecessary wear on your machine.
Pro Tip: Test a small piece of your material first to confirm it cuts smoothly before starting your project.
Step-by-Step Cutting Process
Placing the die and material between cutting pads
Start by creating a "die sandwich." Place the die on one cutting pad with the cutting side facing up. Lay your material on top of the die, then cover it with the second cutting pad. This sandwich ensures even pressure during cutting and protects the machine from damage.
Helpful Reminder: Always align the material and die properly to avoid uneven cuts.
Operating the machine to achieve clean cuts
Insert the die sandwich into the machine’s opening. Turn the crank or lever steadily to feed the sandwich through. The machine applies pressure to cut the material precisely. Once the sandwich exits the other side, remove the layers and check your cut. If the edges look clean, you’ve done it right!
Did You Know? Manual die cutting machines like this one are ergonomic and provide immediate feedback, making them enjoyable to use for both adults and kids.
Tips for Best Results
Avoiding common mistakes during cutting
To avoid mistakes, double-check the alignment of your die and material before cutting. Misaligned layers can lead to incomplete or crooked cuts. Also, don’t rush the process. Feeding the sandwich too quickly can cause jams or uneven pressure.
Pro Tip: Keep your cutting pads clean and free of debris to prevent unwanted marks on your material.
Maintaining even pressure and preventing plate warping
Consistent pressure is key to achieving flawless cuts. Always turn the crank at a steady pace. To prevent your cutting plates from warping, alternate their positions regularly. For example, flip the top plate after every few uses. This simple habit extends the life of your plates and ensures better results.
Quick Tip: Use a clean, unused plate as the bottom layer of your die sandwich to maintain even pressure and protect your plates.
By following these steps and tips, you’ll quickly learn how to use the Ellison die cut machine effectively. With practice, you’ll achieve professional-quality cuts and unlock endless creative possibilities.
Maintenance and Troubleshooting for the Ellison Die Cut Machine
Keeping your Ellison die cut machine in top condition ensures it delivers precise cuts and lasts for years. Regular maintenance and quick troubleshooting can save you time and frustration. Let’s explore how you can care for your machine and resolve common issues effectively.
Cleaning the Machine
Removing debris and residue after use
After every crafting session, check your machine for leftover scraps or debris. Small bits of paper, fabric, or foam can accumulate and affect its performance. Use a soft brush or an Ellison die pick to gently remove these particles. Keeping the machine clean after each use prevents buildup and ensures smooth operation.
Quick Tip: Avoid using sharp tools to clean the machine, as they can scratch or damage its components.
Cleaning the cutting plates with rubbing alcohol
Over time, your cutting plates may collect residue from materials or adhesives. To clean them, pour a small amount of isopropyl alcohol (rubbing alcohol) onto a clean cloth or paper towel. Wipe the plates thoroughly until the residue disappears. Let the alcohol evaporate before using the plates again. This simple step keeps your cuts clean and prevents unwanted marks on your materials.
Important Reminder: Never use bleach or abrasive cleaners on the machine or plates. These can cause permanent damage.
Replacing Parts
Identifying worn-out components like cutting pads or shims
Frequent use can wear down parts like cutting pads, shims, or rollers. Inspect these components regularly for signs of wear, such as cracks, warping, or uneven surfaces. If your cuts are no longer clean or precise, it might be time to replace one or more parts. Worn-out components can compromise the machine’s performance and lead to frustration during crafting.
Pro Tip: Keep spare cutting pads and shims on hand so you can replace them immediately when needed.
Steps to replace cutting plates or rollers
Replacing parts on the Ellison die cut machine is straightforward. For cutting plates, simply remove the old ones and insert the new ones in their place. If you need to replace rollers, refer to the user manual for specific instructions. Most machines come with a hex wrench or Allen wrench for this purpose. Tighten all screws securely but avoid over-tightening to prevent damage.
Helpful Tip: Perform a test cut after replacing any part to ensure the machine works correctly.
Resolving Common Issues
Troubleshooting uneven cuts
Uneven cuts can happen if the die sandwich isn’t aligned properly or if the cutting plates are warped. Start by checking the alignment of your die and material. Make sure everything is centered and flat between the cutting pads. If the issue persists, inspect the cutting plates for warping. Flipping or rotating the plates can often resolve this problem.
Did You Know? Alternating the position of your cutting plates regularly helps prevent warping and extends their lifespan.
Fixing jams or stuck materials
Jams can occur when the die sandwich is too thick or misaligned. If your machine gets stuck, don’t force it. Gently reverse the crank to release the sandwich. Check the thickness of your layers and remove any extra shims or materials. Always ensure the die sandwich fits smoothly into the machine before cranking.
Quick Reminder: Avoid overloading the machine with multiple layers of thick materials. This can strain the rollers and lead to jams.
By following these maintenance and troubleshooting tips, you’ll keep your Ellison die cut machine running smoothly for years. Regular care not only enhances its performance but also makes your crafting experience more enjoyable. Now that you know how to use the Ellison die cut machine effectively, you’re ready to tackle any project with confidence!
Creative Applications of the Ellison Die Cut Machine
The Ellison die cut machine isn’t just a tool—it’s a gateway to endless creative possibilities. Whether you’re crafting for fun, school, or professional projects, this machine can help you bring your ideas to life with precision and flair. Let’s explore some exciting ways to use it and tips to maximize your creativity.
Project Ideas
Creating custom greeting cards
Designing personalized greeting cards becomes effortless with the Ellison die cut machine. You can cut intricate shapes, patterns, or even letters to create cards for any occasion—birthdays, holidays, or thank-you notes. Imagine layering colorful cardstock with delicate floral designs or adding bold, cut-out text to make your message stand out. The machine’s ability to handle various materials allows you to experiment with textures like glitter paper or metallic sheets, giving your cards a professional touch.
“I would LOVE to have the rectangle envelope die cut!! There are a million things you could do with it…”
This sentiment from a crafting enthusiast highlights how versatile the machine is for creating unique card designs. With the right dies, you can even make matching envelopes to complete the set.
Designing scrapbook embellishments
Scrapbooking enthusiasts will find the Ellison die cut machine indispensable. It lets you create custom embellishments that add personality to your pages. Cut out themed shapes, borders, or frames to highlight your photos and memories. For example, use heart-shaped dies for a romantic theme or star-shaped ones for a celebratory vibe. You can also layer different materials like fabric or foam to add depth and texture to your scrapbook layouts.
Pro Tip: Use alphabet dies to create titles or captions for your scrapbook pages. This adds a polished look and saves time compared to handwriting or printing text.
Tips for Maximizing Creativity
Experimenting with different materials like fabric and foam
Don’t limit yourself to just paper! The Ellison die cut machine works beautifully with materials like fabric, foam, and even thin metal sheets. Try cutting fabric shapes for sewing projects or foam pieces for 3D crafts. For example, you can create felt flowers for a DIY wreath or foam letters for a classroom bulletin board. Experimenting with different materials not only expands your creative options but also helps you discover new crafting techniques.
“I teach first grade in a small Christian school… I would absolutely LOVE for our school to have an Ellison die cut machine! It came in so handy for bulletin boards and centers…”
Teachers often use the machine to create vibrant decorations and learning aids. You can follow their lead by exploring how different materials can enhance your projects.
Combining dies for unique and intricate designs
One of the best ways to elevate your crafting is by combining multiple dies. Layering shapes or mixing patterns can result in stunning, one-of-a-kind designs. For instance, you could pair a floral die with a geometric background to create a modern aesthetic. Or, combine alphabet dies with decorative borders for personalized banners or signs. The possibilities are endless when you think outside the box.
Quick Tip: Plan your design on paper before cutting. This helps you visualize how the elements will come together and ensures you use your materials efficiently.
By exploring these creative applications, you’ll discover how to use the Ellison die cut machine to its fullest potential. Whether you’re crafting for personal enjoyment or professional purposes, this machine empowers you to turn your ideas into reality. So, grab your favorite dies and materials, and let your imagination take the lead!
The Ellison die cut machine transforms crafting into an enjoyable and efficient experience. It empowers you to create intricate designs with precision, saving time and effort compared to traditional cutting methods. By mastering how to use the Ellison die cut machine, you unlock endless creative possibilities. Regular maintenance ensures it stays in top condition, ready for your next project. Whether you're crafting for fun or professional purposes, this tool helps you bring your ideas to life. Embrace its versatility, experiment with materials, and let your creativity shine.
FAQ
What is the Ellison die cut machine?
The Ellison die cut machine is a crafting tool that helps you cut perfect shapes quickly and easily.
Fun Fact: Many teachers and librarians use this machine to create engaging visuals for classrooms and storytime activities.
Can the Ellison die cut machine cut different materials?
Yes, it can handle a wide range of materials. You can cut paper, cardstock, fabric, foam, and even thin metal sheets. The type of material you use depends on the die you choose. For example, steel-rule dies work well with thicker materials like fabric, while wafer-thin dies are better for paper and cardstock. Always test a small piece of your material first to ensure the best results.
Do I need special dies for the Ellison die cut machine?
The machine works with a variety of dies, but not all dies are compatible. Steel-rule dies and wafer-thin dies are the most common options. Steel-rule dies are durable and can cut through tougher materials, while wafer-thin dies are ideal for intricate designs. Always check the compatibility of your die with the machine before starting your project.
Pro Tip: Investing in high-quality dies ensures cleaner cuts and extends the life of your machine.
How do I maintain the cutting plates?
To keep your cutting plates in good condition, clean them regularly with rubbing alcohol and a soft cloth. This removes residue and prevents unwanted marks on your materials. Flip and rotate the plates after every few uses to prevent warping. If you notice cracks or uneven surfaces, replace the plates to maintain cutting precision.
What should I do if my cuts aren’t clean?
If your cuts look uneven or incomplete, check the alignment of your die and material. Make sure everything is centered and flat between the cutting pads. Inspect the cutting plates for warping or damage. Flipping the plates or replacing them often solves the problem. Also, ensure you’re using the right die for your material.
Can I fix a jammed machine?
Yes, you can fix a jammed machine without much trouble. If the die sandwich gets stuck, gently reverse the crank to release it. Check the thickness of your layers and remove any extra shims or materials. Avoid forcing the machine, as this can damage the rollers. Always ensure the die sandwich fits smoothly before cranking.
Where can I learn more about using Ellison die cut machines?
You can find helpful resources online, including instructional videos and guides. Watching a short video tutorial can give you a clear understanding of how to use the machine effectively. These resources often include tips and tricks to improve your crafting experience.
Quick Tip: Visit the official Ellison website or search for tutorials on platforms like YouTube for step-by-step instructions.
Is the Ellison die cut machine suitable for beginners?
Absolutely! The Ellison die cut machine is user-friendly and perfect for beginners. Its straightforward design makes it easy to set up and operate. With a little practice, you’ll be creating professional-quality cuts in no time. The machine’s versatility also allows you to experiment with different projects and materials.
How do I know when to replace parts?
Inspect your machine regularly for signs of wear. Cutting pads, shims, and rollers are the most commonly replaced parts. If your cuts are no longer clean or precise, it’s time to replace these components. Keeping spare parts on hand ensures you can quickly swap them out and continue crafting without interruptions.
What are some creative ways to use the Ellison die cut machine?
The possibilities are endless! You can create custom greeting cards, scrapbook embellishments, bulletin board decorations, and even fabric appliqués for sewing projects. Experiment with combining different dies or using unique materials like glitter paper or felt. Let your imagination guide you to create one-of-a-kind designs.
“I love using my Ellison die cut machine for holiday crafts. It makes creating decorations so much easier and more fun!”
By exploring these FAQs, you’ll feel more confident using your Ellison die cut machine. Whether you’re troubleshooting an issue or looking for creative inspiration, these answers will help you make the most of this versatile tool. Happy crafting!
See Also
A Beginner's Guide To Using A Die Cutting Machine
Essential Tips For Beginners Using Die Cutting Machines
Understanding Die Cutting Machines: Beginner Tips Explained