How to Use Cutting Dies Without a Machine Easily

Did you know how to use cutting dies without a machine? It’s true! With just a few simple tools, you can create precise and professional-looking designs by hand. This approach saves money and eliminates the need for bulky equipment. Plus, it’s perfect for beginners or anyone who loves DIY crafting. Whether you’re working with paper, cardstock, or fabric, this method lets you explore your creativity without limits. All you need is a little patience and the right technique to get started.
Key Takeaways
- You can create professional-looking designs by hand using cutting dies, saving money and space compared to bulky machines. make die cuts without a machine.
- Gather essential tools like cutting dies, a rolling pin, and a sturdy surface to ensure clean and precise cuts.
- Secure your cutting die with washi tape to prevent shifting, especially for intricate designs, ensuring accuracy in your work.
- Apply even pressure with a rolling pin to achieve clean cuts; use a bone folder for stubborn areas that need extra attention.
- Practice on scrap materials before starting your final project to build confidence and refine your technique.
- Experiment with different materials and tools to discover what works best for your crafting style and projects.
- Protect your workspace with a craft mat or cardboard to avoid damage and create a stable cutting surface.
Tools and Materials Needed
To get started with how to use cutting dies without a machine, you’ll need a few basic tools and materials. These items are easy to find and often already available in your home or crafting supplies.
Essential Tools
Cutting Dies
Cutting dies are the stars of this process. They come in various shapes, sizes, and designs, allowing you to create anything from simple patterns to intricate details. Choose dies that suit your project, whether it’s for cards, scrapbooks, or fabric crafts.
Paper, Cardstock, or Fabric
The material you cut plays a big role in the final outcome. Paper and lightweight cardstock are ideal for beginners because they’re easier to work with. If you’re feeling adventurous, try cutting fabric for unique designs. Always ensure the material is clean and smooth for better results.
A Rolling Pin or Similar Household Tool (e.g., a Glass Bottle)
A rolling pin is your go-to tool for applying pressure to the cutting die. If you don’t have one, a sturdy glass bottle works just as well. The key is to use something cylindrical and strong enough to press the die into the material.
A Sturdy, Flat Surface
A solid, flat surface is crucial for stability. A kitchen countertop or a sturdy table works perfectly. This ensures even pressure when you roll over the die, giving you cleaner cuts.
Optional Tools for Better Results
Washi Tape or Masking Tape to Hold the Die in Place
Taping the die in place prevents it from shifting while you apply pressure. This small step can make a big difference, especially when working with intricate designs.
A Craft Mat or Thick Cardboard to Protect Your Surface
Protect your workspace by placing a craft mat or thick cardboard underneath your materials. This not only safeguards your table but also provides a slightly cushioned surface for better cutting.
A Bone Folder or Similar Tool for Added Pressure
For stubborn areas where the rolling pin doesn’t quite do the job, a bone folder or any similar tool can help. Use it to apply extra pressure to specific spots, ensuring a clean and complete cut.
A Craft Knife for Intricate Designs or Finishing Edges
A craft knife is a lifesaver for detailed work. If your die doesn’t cut all the way through or you’re working on a complex design, use the knife to carefully finish the edges. It’s also great for adding fine details to your project.
Pro Tip: Investing in quality tools, even for manual die cutting, can make your crafting experience smoother and more enjoyable. While the initial cost might seem high, these tools last long and offer great value for your projects.
By gathering these tools and materials, you’re setting yourself up for success. Whether you’re a beginner or an experienced crafter, having the right supplies makes the process easier and more enjoyable. Now that you know what you need, you’re ready to dive into the creative world of manual die cutting!
Step-by-Step Tutorial on How to Use Cutting Dies Without a Machine
Ready to dive into the process? Follow these simple steps to master how to use cutting dies without a machine. With a little patience and practice, you’ll create stunning designs in no time.
Step 1: Prepare Your Materials
Start by gathering everything you need. Choose your cutting die and the material you want to work with, whether it’s paper, cardstock, or fabric. Make sure the material is clean and smooth for the best results.
Set up your workspace on a flat, sturdy surface. Protect it with a craft mat or a piece of thick cardboard. This not only keeps your table safe but also provides a stable base for cutting. A clean and organized area helps you focus better and ensures a smoother crafting experience.
Quick Tip: If you’re new to this, start with lightweight materials like paper or thin cardstock. These are easier to cut and help you get the hang of the process.
Step 2: Position the Cutting Die
Place the cutting die on your chosen material. Make sure the cutting edge faces down toward the material. Align it carefully to ensure the design comes out exactly where you want it.
To keep the die from moving, secure it with washi tape or masking tape. This step is especially important for intricate designs. The tape holds everything in place while you apply pressure, preventing any unwanted shifts that could ruin your cut.
Pro Tip: Use low-tack tape like washi tape to avoid damaging your material when you peel it off.
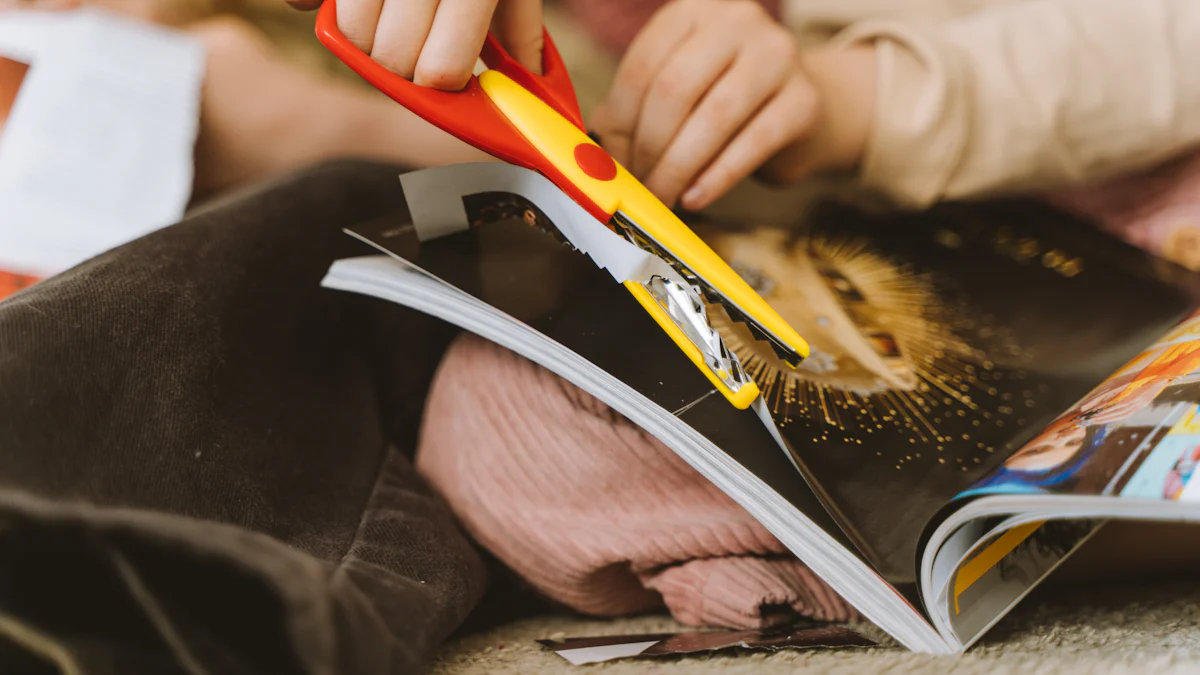
Step 3: Apply Pressure
Now comes the fun part! Grab your rolling pin or a similar cylindrical tool, like a sturdy glass bottle. Place it over the die and press down firmly. Roll back and forth several times, applying even pressure across the entire die. This ensures the cutting edge presses through the material cleanly.
If you notice any areas that didn’t cut through completely, focus on those spots. Apply extra pressure using the rolling pin or a bone folder. For intricate designs, you might need to go over the die a few more times to get a perfect cut.
Did You Know? Manual die cutting works by applying pressure to push the die’s cutting edge through the material. This technique mimics the action of a die-cutting machine but gives you more control over the process.
By following these steps, you’ll see how easy it is to create beautiful designs without a machine. Whether you’re crafting cards, scrapbooks, or fabric projects, this method opens up endless creative possibilities.
Step 4: Check and Remove the Die
Once you’ve applied enough pressure, it’s time to reveal your work. Carefully lift the cutting die from the material. Start from one edge and peel it back slowly to avoid tearing or damaging the design. If the die sticks, gently wiggle it free without pulling too hard. This step ensures that your material stays intact and your design remains clean.
Take a moment to inspect the cut. Look closely at the edges and intricate areas. If you notice any incomplete cuts or rough spots, don’t worry. Grab your craft knife and carefully trim or clean up those sections. Use small, precise movements to maintain the integrity of the design. For more detailed patterns, take your time to ensure every edge looks sharp and professional.
Pro Tip: Place your material on a craft mat while using the craft knife. This protects your workspace and gives you better control over the blade.
If you’re working with multiple layers or thicker materials, you might need to repeat this process. Check each layer individually to ensure all parts of the design are fully cut. This extra step guarantees a polished and uniform result.
By following these steps, you’ll master how to use cutting dies without a machine. With practice, you’ll achieve clean, precise cuts that rival those made with a die-cutting machine. This hands-on approach not only saves money but also gives you complete control over your creative projects.
Tips for Best Results When Using Cutting Dies Without a Machine
When you’re crafting without a die-cutting machine, a few smart tips can make all the difference. These suggestions will help you achieve cleaner cuts, protect your workspace, and enjoy a smoother crafting experience.
Choose the Right Materials
The material you choose plays a huge role in how successful your cuts turn out.
Opt for thinner materials like paper or lightweight cardstock for easier cuts.
Thinner materials require less pressure, making them ideal for manual die cutting. Paper and lightweight cardstock are perfect for beginners because they’re easy to handle and cut cleanly. If you’re just starting out, stick to these materials to build confidence in your technique.
Avoid overly textured or thick materials that may require excessive pressure.
Thick or textured materials, like heavy cardstock or felt, can be tricky to cut without a machine. They demand more pressure, which might lead to uneven cuts or even damage your tools. Save these materials for when you’ve mastered the basics or have access to a die-cutting machine.
Pro Tip: Test your die on a scrap piece of material before committing to your final project. This helps you gauge how much pressure is needed and ensures the material works well with your die.
Apply Even and Consistent Pressure
The way you apply pressure directly affects the quality of your cuts.
Roll the pin evenly across the die to avoid uneven cuts.
When using a rolling pin or similar tool, focus on maintaining steady, even pressure. Start at one end of the die and roll across its entire surface. Repeat this process a few times to ensure the cutting edge presses through the material completely.
Use a bone folder or similar tool for extra pressure on stubborn areas.
Some intricate designs may need a little extra attention. For these spots, grab a bone folder or another sturdy tool with a flat edge. Press down firmly on the stubborn areas to help the die cut through. This method works especially well for detailed patterns that require precision.
Did You Know? Experienced crafters often emphasize the importance of consistent pressure when working with intricate dies. Uneven pressure can leave parts of the design incomplete, so take your time to get it right.
Protect Your Workspace
A well-prepared workspace not only keeps your tools safe but also makes the process more enjoyable.
Always use a craft mat or thick cardboard to avoid damaging your surface.
Place a craft mat or a piece of thick cardboard under your material before you start cutting. This layer protects your table from scratches and dents caused by the die’s cutting edge. It also provides a stable base, which helps you apply pressure more effectively.
Quick Tip: If you don’t have a craft mat, an old magazine or a stack of newspapers can work as a temporary solution. Just make sure the surface underneath stays protected.
By following these tips, you’ll see noticeable improvements in your manual die-cutting projects. Whether you’re creating simple shapes or tackling intricate designs, these strategies will help you achieve professional-looking results. With practice, you’ll feel more confident in how to use cutting dies without a machine and unlock endless creative possibilities.
Practice and Experiment
Test the method on scrap materials before working on your final project.
Before diving into your main project, try practicing on scrap materials. This step helps you get a feel for the tools and techniques. Use leftover paper, cardstock, or fabric to test how much pressure you need to apply. It’s a great way to avoid mistakes on your actual project.
Testing also lets you see how the cutting die interacts with different materials. Some dies may work better on thinner paper, while others handle thicker cardstock with ease. By experimenting first, you’ll know exactly what to expect when you start your final design.
Quick Tip: Keep a small stash of scrap materials handy for practice. It’s a simple way to build confidence and refine your skills without wasting valuable supplies.
Experiment with different tools, such as craft knives, for intricate designs.
When working with intricate designs, don’t hesitate to try out different tools. A craft knife, for example, can help you achieve precise cuts in areas where a rolling pin might not provide enough pressure. Use it to clean up edges or add fine details to your design.
You can also explore other household items to see what works best for you. Some crafters swear by using a sturdy glass bottle instead of a rolling pin. Others find that a bone folder gives them better control over stubborn areas. The key is to experiment and find what feels most comfortable for your crafting style.
Pro Tip: According to experienced crafters, the condition of your tools plays a big role in achieving consistent results. Keep your craft knife sharp and your rolling pin clean for smoother cuts.
By practicing and experimenting, you’ll discover new techniques and tools that make manual die cutting easier and more enjoyable. This hands-on approach not only improves your skills but also sparks creativity, allowing you to create unique and professional-looking designs.
Using cutting dies without a machine offers a simple and budget-friendly way to bring your creative ideas to life. With just a few household tools, like a rolling pin or craft knife, you can achieve clean and professional-looking results. This method not only saves money but also gives you the freedom to experiment with different materials and designs. Whether you're crafting cards, scrapbooks, or fabric projects, this hands-on approach lets you enjoy the satisfaction of creating something unique. Start today and discover how rewarding it feels to master this technique!
FAQ
Can I use any type of cutting die for manual die cutting?
Yes, you can use most cutting dies for manual die cutting. However, simpler designs work better when you’re starting out.
What materials work best for cutting dies without a machine?
Thinner materials like paper and lightweight cardstock are ideal. These require less pressure and produce cleaner cuts. Avoid thick or textured materials, as they can be harder to cut manually. If you’re experimenting with fabric, choose smooth and lightweight options for better results.
How much pressure should I apply when using a rolling pin?
Apply firm and even pressure across the entire die. Roll back and forth several times to ensure the cutting edge presses through the material. For stubborn areas, use a bone folder or similar tool to add extra pressure. Practicing on scrap materials helps you figure out the right amount of force.
Can I reuse washi tape or masking tape to secure the die?
You can reuse tape a few times, but it may lose its stickiness after repeated use. Low-tack tape like washi tape works best because it holds the die in place without damaging your material. Replace the tape if it no longer sticks securely.
What should I do if the die doesn’t cut all the way through?
If the die doesn’t cut completely, focus on the incomplete areas. Use a craft knife to carefully finish the edges or add extra pressure with a bone folder. For thicker materials, you may need to roll over the die multiple times to achieve a clean cut.
Is it possible to cut intricate designs without a machine?
Yes, but intricate designs require more patience and precision. Use a craft knife to clean up fine details or finish incomplete cuts. Securing the die with tape helps prevent shifting, which is especially important for detailed patterns.
How do I protect my workspace while cutting?
Place a craft mat, thick cardboard, or an old magazine under your material. This protects your table from scratches and dents caused by the die’s cutting edge. A cushioned surface also helps you apply pressure more effectively.
Can I use household items instead of a rolling pin?
Absolutely! A sturdy glass bottle or any cylindrical object can replace a rolling pin. Just make sure it’s strong enough to apply consistent pressure. Some crafters even use handheld tools like bone folders for smaller areas.
How do I clean and maintain my cutting dies?
Wipe your cutting dies with a soft, dry cloth after each use. For stubborn residue, use a damp cloth or mild soap and water. Dry them thoroughly to prevent rust. Proper care ensures your dies stay sharp and last longer.
Is manual die cutting suitable for beginners?
Yes, manual die cutting is perfect for beginners. It’s affordable, easy to learn, and doesn’t require expensive equipment. Start with simple designs and lightweight materials to build confidence. With practice, you’ll master the technique and create stunning projects.
See Also
Simple Ways to Die Cut Without Any Machine
Effortless Techniques for Die Cutting Without Machines
Guide to Die Cutting Without Using a Machine