Tips for How to Use Brother Scan and Cut Machine


The Brother Scan and Cut machine is a game-changer for anyone who loves crafting and wants to learn how to use Brother Scan and Cut machine effectively. It combines precision cutting with a built-in scanner, making it perfect for creating unique designs. You’ll find it easy to use, thanks to features like Blade Sensor Technology that adjusts automatically for material thickness. Whether you’re working with paper, fabric, or foam, this machine handles it all with ease. Its versatility lets you explore endless creative possibilities, from intricate patterns to bold designs. Dive in and discover how learning how to use Brother Scan and Cut machine can transform your crafting experience.
Key Takeaways
- Start by properly setting up your Brother Scan and Cut machine, ensuring all components are assembled and connected to power and software.
- Adjust blade depth and pressure settings based on the material you are cutting to achieve precise and clean cuts every time.
- Utilize the Background Scan feature to accurately position your designs on materials, especially when working with patterns or intricate designs.
- Perform test cuts before starting your project to fine-tune settings and avoid wasting materials.
- Explore optional accessories like the pen tool and embossing kits to expand your creative possibilities and enhance your projects.
- Regularly clean and maintain your machine and accessories to ensure optimal performance and longevity.
- Take advantage of the CanvasWorkspace software to create custom designs and easily transfer them to your machine for cutting.
Getting Started with How to Use Brother Scan and Cut Machine
Setting Up Your Machine
Unboxing and assembling the machine
When you first unbox your Brother Scan and Cut machine, take a moment to check all the included components. You’ll typically find the machine, power cord, cutting mat, blade holder, and a few starter accessories. Lay everything out on a clean, flat surface. Follow the instructions in the manual to assemble the machine. Most of the setup involves attaching the blade holder and ensuring the cutting mat is ready for use. The process is straightforward, so you’ll have your machine ready in no time.
Connecting the machine to power and software
Plug the power cord into the machine and connect it to a nearby outlet. Turn on the machine using the power button. If your model supports wireless connectivity, follow the steps in the manual to connect it to your Wi-Fi network. For models requiring a USB connection, plug the cable into your computer. Download the Brother Canvas Workspace software from the official website. This software allows you to create and transfer designs to your machine. Once connected, you’re ready to explore how to use Brother Scan and Cut machine for your projects.
Understanding Basic Settings
Adjusting blade depth and pressure
The blade depth and pressure settings determine how well your machine cuts through different materials. Start by identifying the material you’re working with, such as paper, fabric, or vinyl. Use the test cut feature to adjust the blade depth. Turn the blade holder dial to increase or decrease the depth until you achieve a clean cut. For pressure, navigate to the settings menu on the machine’s screen. Increase or decrease the pressure based on the thickness of your material. These adjustments ensure precise cuts every time.
Selecting the right mat for your project
Brother Scan and Cut machines come with different mats designed for specific materials. For lightweight materials like paper, use the standard mat. For thicker materials like fabric or foam, opt for the high-tack adhesive mat. Always check the material compatibility chart in the manual. Place your material on the mat, ensuring it sticks firmly. Smooth out any wrinkles or bubbles to avoid cutting errors. Choosing the right mat is essential for achieving the best results.
Essential Tools and Accessories
Recommended tools for beginners
As a beginner, a few basic tools can make your crafting experience smoother. A spatula helps lift delicate designs from the mat without tearing them. Tweezers are great for handling small pieces. A scraper ensures your material adheres properly to the mat. These tools are affordable and easy to find, making them perfect for anyone just starting to learn how to use Brother Scan and Cut machine.
Optional accessories to enhance your experience
Once you’re comfortable with the basics, consider adding optional accessories to expand your creative possibilities. The pen tool lets you draw or write directly on your material. Embossing kits add texture to your designs. Specialty blades, like the rotary blade, make cutting fabric easier. These accessories allow you to explore advanced techniques and take your projects to the next level.
Fabric Cutting Tips for the Brother Scan and Cut Machine
Preparing Your Fabric
Stabilizing fabric for clean cuts
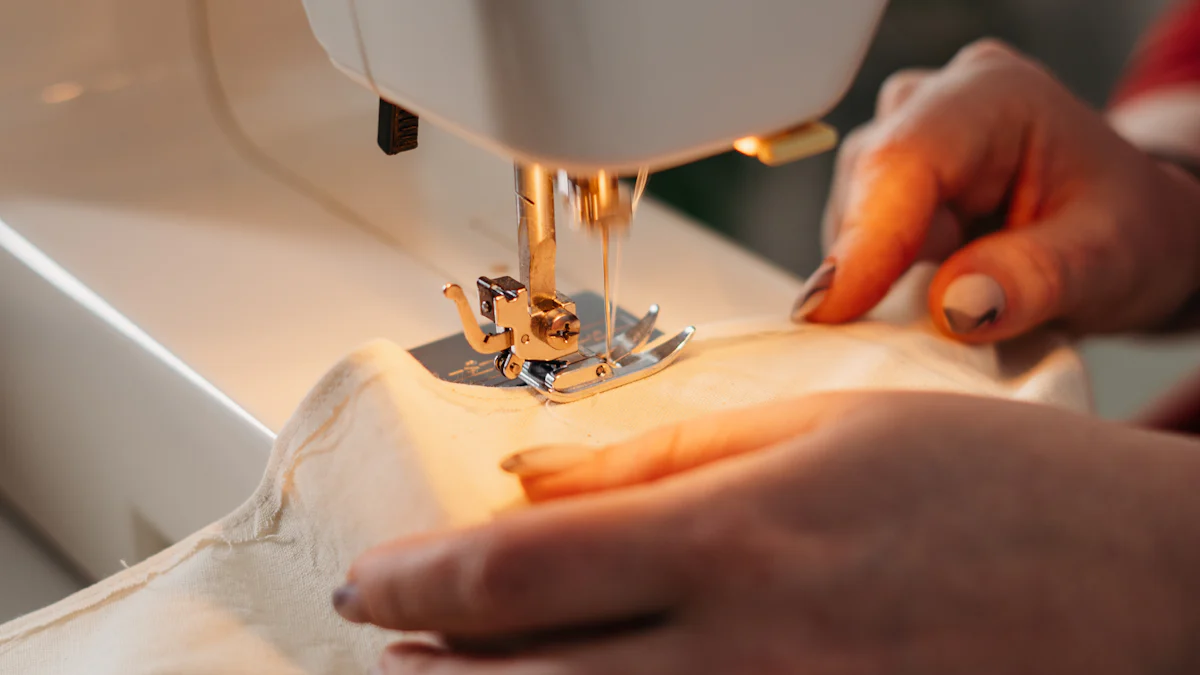
To get clean and precise cuts, you need to stabilize your fabric properly. Wrinkled or loose fabric can lead to uneven edges or incomplete cuts. Start by ironing your fabric to remove any creases. A smooth surface ensures the blade glides effortlessly. For added stability, apply a fusible web or fabric stabilizer to the back of your material. This extra layer keeps the fabric firm during cutting and prevents it from crumpling. If you’re working with lightweight fabrics, starching them can also help. Stiffer fabrics cut more accurately and reduce the chances of errors.
Choosing the right blade and mat
The right tools make all the difference when cutting fabric. Use a fabric-specific blade, such as the rotary blade, for the best results. This blade is designed to handle delicate and thick fabrics without tearing. Pair it with the high-tack adhesive mat to keep your material securely in place. Before starting, ensure the mat is clean and sticky enough to hold the fabric flat. If the adhesive has worn off, consider resticking the mat to maintain its grip. Proper blade and mat selection will save you time and frustration.
Adjusting Machine Settings for Fabric
Setting blade depth and pressure for different fabrics
Different fabrics require different settings to achieve clean cuts. Adjust the blade depth based on the thickness of your material. For thin fabrics like cotton, a shallow blade depth works well. For thicker materials like denim, increase the depth slightly. Use the test cut feature on your Brother Scan and Cut machine to fine-tune the settings. Adjust the pressure as needed to ensure the blade cuts through the fabric without dragging or snagging. These small adjustments can make a big difference in the quality of your cuts.
Testing cuts to ensure accuracy
Before cutting your entire design, always perform a test cut. Place a small piece of fabric on the mat and run a simple shape through the machine. Check if the blade cuts cleanly without damaging the mat or leaving frayed edges. If the cut isn’t perfect, tweak the blade depth or pressure and test again. This step helps you avoid wasting fabric and ensures your final project turns out exactly as planned.
Tips for Intricate Designs
Using the Background Scan feature for precise placement
The Background Scan feature is a game-changer for intricate designs. It allows you to scan your material and see it on the machine’s screen. This feature helps you position your design exactly where you want it. For example, if you’re cutting shapes from patterned fabric, you can align the design perfectly with the pattern. This level of precision makes your projects look professional and polished.
Cutting small or detailed patterns effectively
Small or detailed patterns can be tricky, but the right approach makes them manageable. Use a sharp blade and ensure your fabric is firmly secured to the mat. Slow down the machine’s cutting speed if possible. This gives the blade more time to navigate tight corners and intricate details. For best results, keep your fabric stabilized and double-check your settings before starting. With these tips, even the most complex designs become achievable.
Paper Crafting Tips with the Brother Scan and Cut Machine
Using Auto Layout for Creative Projects
Arranging multiple designs on a single mat
The Auto Layout feature on the Brother Scan and Cut machine is a lifesaver when you want to fit multiple designs onto a single mat. Start by selecting your designs from the built-in patterns or importing your own. Once you’ve placed them on the mat, activate the Auto Layout option. This tool automatically arranges your designs to maximize the available space. For example, if you’re cutting out heart shapes, the machine will position them as close together as possible without overlapping. This not only saves time but also reduces material waste. You’ll find this feature especially helpful when working on bulk projects like party decorations or card-making.
Maximizing material usage with Auto Layout
Getting the most out of your materials is easy with Auto Layout. After arranging your designs, check the Pattern Interval setting. This controls how much space exists between each design. A smaller interval means the designs are closer together, which helps you use every inch of your paper. For instance, if you’re cutting shapes for scrapbooking, reducing the interval can allow you to fit a few extra pieces on the same sheet. Always preview the layout on the machine’s screen before cutting. This ensures everything fits perfectly and minimizes any wasted material.
Leveraging the Background Scan Feature
Aligning designs with pre-printed patterns
The Background Scan feature is a game-changer for aligning your designs with pre-printed patterns. Place your patterned paper on the mat and scan it using the machine. The scanned image will appear on the screen, allowing you to position your design exactly where you want it. For example, if you’re cutting a star shape from a polka-dot paper, you can align the star with a specific dot for a polished look. This feature ensures precision and makes your projects look professional.
Ensuring accurate cuts on patterned paper
Cutting patterned paper can be tricky, but the Background Scan feature simplifies the process. After scanning your paper, zoom in on the screen to fine-tune the placement of your design. Double-check that the edges of your design align perfectly with the pattern. This step is crucial for intricate designs or when working with limited materials. Once everything looks good, proceed with the cut. You’ll love how this feature eliminates guesswork and delivers flawless results every time.
Tips for Working with Different Paper Types
Adjusting settings for cardstock, vellum, and specialty papers
Different types of paper require different settings for the best results. For cardstock, increase the blade depth and pressure to cut through the thicker material. Vellum, being delicate, needs a lighter touch. Reduce the blade pressure and use a standard mat to avoid tearing. Specialty papers like glitter or metallic sheets may require additional adjustments. Always perform a test cut to ensure the settings are just right. This small step can save you from ruining your materials and ensures clean, precise cuts.
Preventing tearing or uneven cuts
Tearing or uneven cuts can ruin your project, but you can avoid these issues with a few simple tips. First, make sure your paper is firmly adhered to the mat. Use a scraper to smooth out any bubbles or wrinkles. Next, check your blade for sharpness. A dull blade struggles with clean cuts, especially on thicker or textured papers. Finally, adjust the cutting speed. Slowing it down gives the blade more time to navigate intricate designs, reducing the risk of tearing. With these precautions, you’ll achieve smooth and professional-looking cuts every time.
Advanced Features of the Brother Scan and Cut Machine
Introduction to Canvas Workspace
Setting up and syncing with the software
CanvasWorkspace is your go-to software for unlocking the full potential of your Brother Scan and Cut machine. To get started, download the software from Brother's official website. Once installed, create an account or log in if you already have one. Connect your machine to the software by syncing it via Wi-Fi or USB, depending on your model. The process is straightforward, and the software guides you step-by-step. After syncing, you can transfer designs seamlessly between your computer and the machine. This setup ensures you’re ready to explore advanced design options.
Creating custom designs and importing files
CanvasWorkspace allows you to create custom designs tailored to your projects. Use the built-in tools to draw shapes, add text, or combine elements into unique patterns. If you prefer working with pre-made designs, import files in formats like SVG or FCM directly into the software. For example, you can download free SVG files online and tweak them in CanvasWorkspace to suit your needs. Once your design is ready, send it to your machine for cutting. This feature makes it easy to personalize your projects and bring your creative ideas to life.
Using Built-in Patterns and Designs
Accessing and modifying pre-installed designs
Your Brother Scan and Cut machine comes with over 250 built-in designs, patterns, and fonts. Access these directly from the machine’s touchscreen. Browse through categories like shapes, borders, and letters to find what you need. Select a design and adjust its size, orientation, or position right on the screen. For instance, if you’re making a greeting card, you can resize a floral pattern to fit perfectly. These built-in options save time and provide endless inspiration for your projects.
Combining patterns for unique projects
Take your creativity further by combining multiple patterns into one design. Start by selecting a base pattern, then layer additional elements on top. For example, pair a geometric shape with a floral border to create a custom frame. Use the editing tools on the machine or in CanvasWorkspace to align and merge the patterns. This feature lets you experiment and craft one-of-a-kind designs that stand out. Whether you’re working on home décor or personalized gifts, combining patterns adds a unique touch.
Exploring Additional Features
Using the pen tool for drawing and writing
The pen tool transforms your Brother Scan and Cut machine into a drawing and writing device. Replace the blade with the pen holder and insert a compatible pen. Select a design or text from the built-in options or create your own in CanvasWorkspace. The machine will draw or write directly onto your material, whether it’s paper, fabric, or even wood veneer. This feature is perfect for adding handwritten-style messages to cards or creating intricate illustrations for art projects.
Adding embossing or foiling effects
Elevate your projects with embossing and foiling effects. Use an embossing kit to add texture to materials like cardstock or leather. The machine presses patterns into the material, creating a raised effect that looks professional. For foiling, apply a heat-activated foil sheet to your material and let the machine transfer the design. These techniques work well for wedding invitations, gift tags, or decorative accents. With these advanced features, your projects will have a polished and luxurious finish.
Troubleshooting and Maintenance for the Brother Scan and Cut Machine
Common Issues and Solutions
Resolving cutting errors or incomplete cuts
Cutting errors or incomplete cuts can be frustrating, but they’re often easy to fix. Start by checking your blade. A dull blade struggles to cut cleanly, so replace it if necessary. Also, inspect the blade holder for debris that might block its movement. Adjust the blade depth and pressure settings to match the material you’re using. For example, thicker materials like cardstock need more pressure than thin paper. Always perform a test cut before starting your project to ensure the settings are correct. If the issue persists, clean the mat and ensure the material is firmly adhered to it. A secure surface helps the machine cut accurately.
Pro Tip: If you’re still experiencing issues, consult the user manual or visit Brother’s Online Solution Center for additional troubleshooting steps.
Fixing mat adhesion problems
A cutting mat that loses its stickiness can cause materials to shift during cutting. To fix this, clean the mat with a lint-free cloth and mild soap. Avoid harsh chemicals that could damage the adhesive. Once dry, check if the mat regains its tackiness. If not, consider resticking it using a repositionable adhesive spray. Apply the spray evenly and let it dry before placing your material. For heavily worn mats, replacing them might be the best option. Always store your mat with its protective cover to keep it clean and sticky for longer.
Quick Tip: Regularly cleaning your mat after each use prevents buildup and extends its lifespan.
Tips for Machine Maintenance
Cleaning the blade and mat regularly
Keeping your blade and mat clean ensures your machine performs at its best. After each project, remove the blade and wipe it gently with a soft cloth to clear away any residue. For the mat, use a scraper to remove leftover material bits. If the mat gets too dirty, wash it with warm water and mild soap. Let it air dry completely before using it again. Regular cleaning not only improves cutting accuracy but also extends the life of your tools.
Did You Know? A clean blade reduces wear and tear on your machine, saving you money on replacements.
Storing the machine and accessories properly
Proper storage protects your machine and accessories from damage. Keep your Brother Scan and Cut machine in a dry, dust-free area. Use a cover to shield it from dirt when not in use. Store blades, mats, and other accessories in a designated container to prevent loss or damage. Avoid placing heavy objects on top of the machine, as this could affect its alignment. Taking these precautions ensures your machine stays in excellent condition for years.
Friendly Reminder: Always unplug the machine before cleaning or storing it to avoid accidental damage.
When to Seek Professional Help
Identifying hardware issues
Sometimes, problems go beyond basic troubleshooting. If your machine makes unusual noises, fails to power on, or shows error messages you can’t resolve, it might have a hardware issue. Check the user manual for guidance on identifying these problems. If the issue persists, avoid attempting repairs yourself, as this could void your warranty. Instead, reach out to Brother’s support team for assistance.
Helpful Resource: Visit Brother’s support website to access manuals, FAQs, and troubleshooting guides tailored to your model.
Contacting Brother support for assistance
When all else fails, contacting Brother support is your best option. Their team can guide you through advanced troubleshooting steps or recommend professional repairs. Have your machine’s model number and purchase details ready when you call. This information helps the support team provide faster and more accurate assistance. Whether it’s a software update or a hardware fix, Brother’s experts are there to help.
Final Tip: Bookmark Brother’s support page for quick access to updates, manuals, and helpful videos.
Using the Brother Scan and Cut machine opens up endless creative possibilities. By following these tips, you’ll master its features and create stunning projects with ease. Don’t hesitate to experiment with different materials and settings. Trying new techniques helps you discover the full potential of your machine and sparks fresh ideas. Regular maintenance, like cleaning the blade and mat, ensures your machine stays in top condition for years. Dive into your crafting journey with confidence, and let your creativity shine through every project you make!
FAQ
How do I clean the cutting mat for my Brother Scan and Cut machine?
To clean the cutting mat, use a lint-free cloth and mild soap with warm water.
Pro Tip: Always store your mat with its protective cover to keep it clean and extend its lifespan.
What materials can the Brother Scan and Cut machine cut?
The Brother Scan and Cut machine handles a wide range of materials, including paper, cardstock, fabric, vinyl, foam, and even thin wood veneer. For thicker or specialty materials, adjust the blade depth and pressure settings to ensure clean cuts. Always check the user manual for material compatibility and recommended settings.
Why is my machine not cutting through the material properly?
If your machine isn’t cutting properly, check the blade for dullness or debris. Replace the blade if it’s worn out. Adjust the blade depth and pressure settings to match the material’s thickness. Ensure the material is firmly adhered to the mat without wrinkles or bubbles. Performing a test cut can help fine-tune the settings before starting your project.
Can I use my own designs with the Brother Scan and Cut machine?
Yes, you can! Use the CanvasWorkspace software to create or import custom designs. The software supports file formats like SVG and FCM. Once your design is ready, transfer it to your machine via Wi-Fi, USB, or a memory stick, depending on your model. This feature allows you to personalize your projects and bring unique ideas to life.
How do I restick my cutting mat?
To restick your cutting mat, clean it first with mild soap and water. Once dry, apply a thin, even layer of repositionable adhesive spray. Let the adhesive dry completely before placing your material on the mat. This process restores the mat’s stickiness and ensures your materials stay in place during cutting.
What is the Background Scan feature, and how do I use it?
The Background Scan feature lets you scan your material and display it on the machine’s screen. This helps you position your design precisely where you want it. For example, you can align a shape with a specific pattern on your material. To use it, place your material on the mat, select the Background Scan option, and follow the on-screen instructions.
How often should I replace the blade?
The frequency of blade replacement depends on how often you use the machine and the types of materials you cut. For heavy use or cutting thick materials, replace the blade more frequently. Signs of a dull blade include incomplete cuts, frayed edges, or difficulty cutting through materials. Regularly inspect the blade to ensure optimal performance.
Can I draw or write with the Brother Scan and Cut machine?
Yes, the Brother Scan and Cut machine can draw or write using the pen tool. Replace the blade with the pen holder and insert a compatible pen. Select a design or text, and the machine will draw or write directly onto your material. This feature works well for creating handwritten-style cards, labels, or decorative elements.
What should I do if my machine shows an error message?
If your machine displays an error message, refer to the user manual for troubleshooting steps. Common issues include connectivity problems, incorrect settings, or hardware malfunctions. Restart the machine and check all connections. If the error persists, contact Brother support for assistance. Have your model number and purchase details ready for faster help.
How do I maintain my Brother Scan and Cut machine?
Regular maintenance keeps your machine in top condition. Clean the blade and mat after each use to remove residue. Store the machine in a dry, dust-free area with a protective cover. Keep accessories like blades and mats in a designated container. Avoid placing heavy objects on the machine to prevent alignment issues. Proper care ensures long-term performance and reliability.
Quick Tip: Unplug the machine before cleaning or storing it to avoid accidental damage.
See Also
Essential Advice for Operating a Meat Slicing Device
Comprehensive Instructions for Hair Clipper Usage
Beginner's Guide to Operating a Die Cutting Tool