How to Use a Cutting Machine for Beginners

Cutting machines open up a world of creativity, letting you craft intricate designs with precision. Whether you're working with paper, vinyl, fabric, or even wood, these tools make it easy to bring your ideas to life. If you're wondering how to use a cutting machine, it's essential to start with the right model. Some machines, like the Cricut Maker, can handle up to 300 materials, while others, like the Cricut Joy, are perfect for simpler projects. Learning how to use a cutting machine effectively ensures smoother learning and better results. With a little practice, you'll turn your creative visions into reality.
Key Takeaways
- Start with the right cutting machine model that suits your project needs, whether it's manual, electronic, or laser.
- Familiarize yourself with the key components of your machine, including the blade, cutting mat, and software, to ensure effective use.
- Follow proper setup steps, including unboxing, assembly, and calibration, to prepare your machine for optimal performance.
- Choose the right materials for your projects and ensure they are placed correctly on the cutting mat for accurate cuts.
- Adjust blade depth and pressure settings based on the material thickness to achieve clean and precise cuts.
- Engage in beginner-friendly projects like greeting cards or custom stickers to build confidence and explore your machine's capabilities.
- Prioritize safety and maintenance by keeping hands away from the blade and regularly cleaning your machine to extend its lifespan.
Understanding Cutting Machines
Understanding these types and their components will help you choose the right one and use it effectively.
Types of Cutting Machines
Manual Cutting Machines
Manual cutting machines are simple and easy to use. They rely on hand-operated mechanisms to cut materials like paper, fabric, and thin cardboard. These machines are perfect for small projects or when you want to work without electricity. They’re also budget-friendly, making them a great choice for beginners.
Electronic Cutting Machines
Electronic cutting machines are versatile tools that use software to create precise designs. Popular brands like Cricut and Silhouette offer models that can cut materials such as vinyl, fabric, and even thin wood. These machines are ideal for crafting enthusiasts who want to explore intricate designs or work on larger projects. With electronic cutting machines, you can upload your designs and let the machine handle the rest.
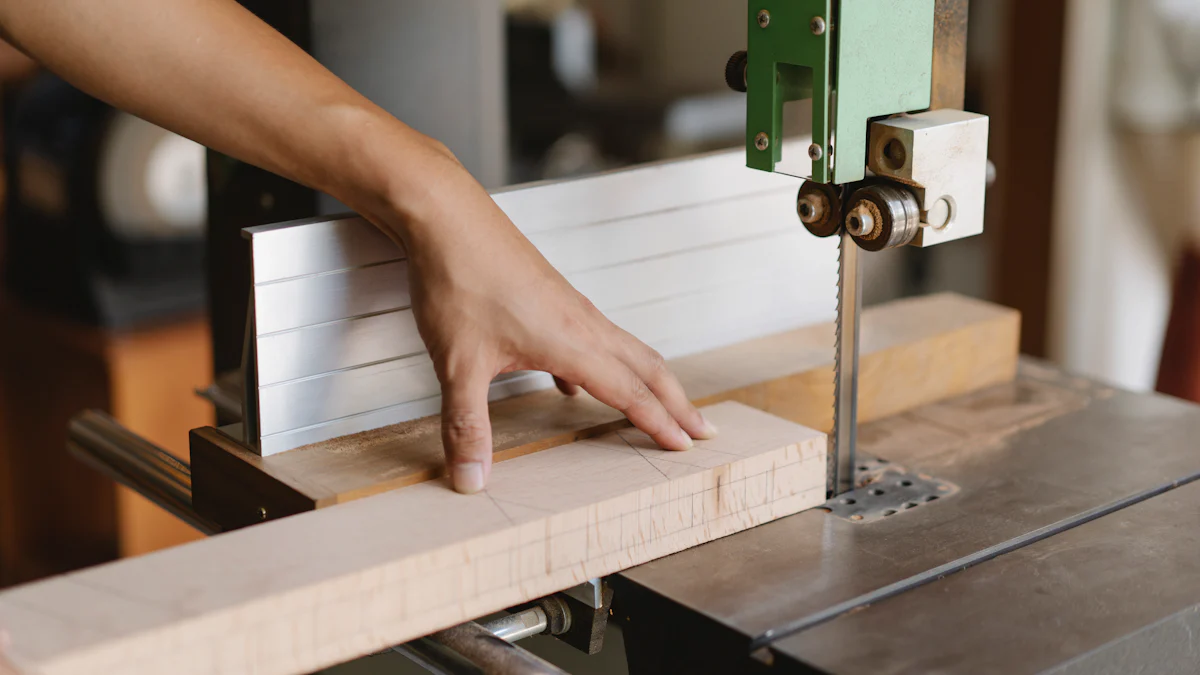
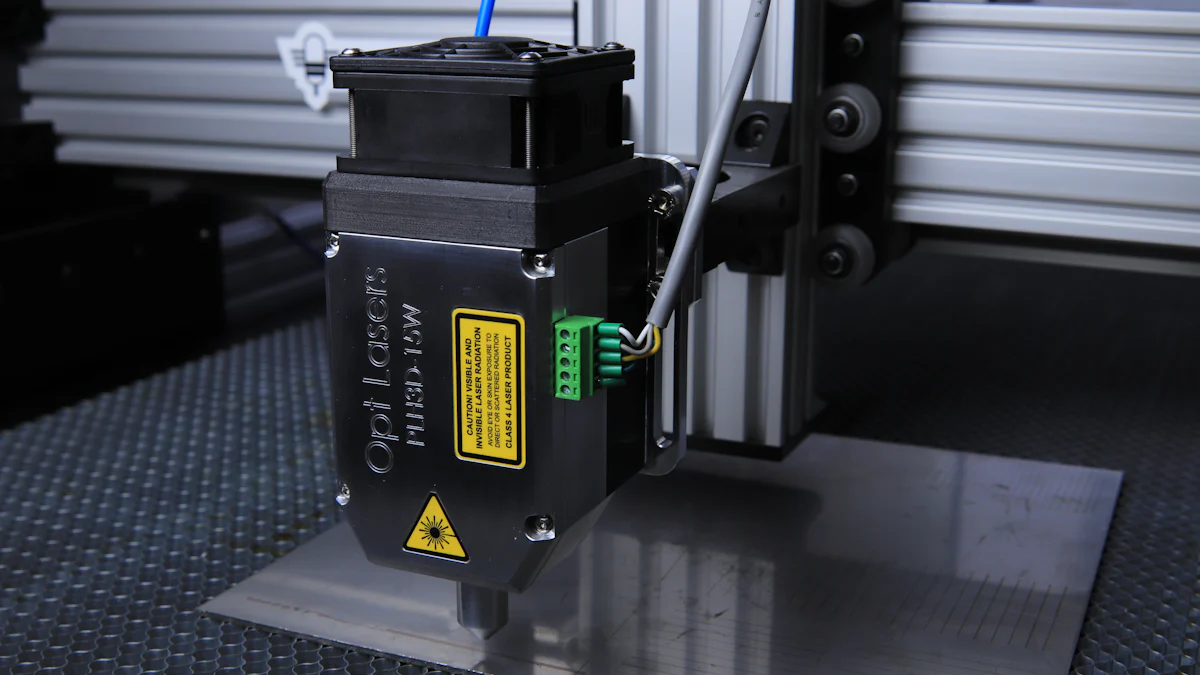
Laser Cutting Machines
Laser cutting machines use high-powered laser beams to cut through materials with incredible precision.
Key Components of a Cutting Machine
Blade and Cutting Mat
The blade is the heart of any cutting machine. It determines how clean and precise your cuts will be. Different blades are available for various materials, so always choose the right one for your project. The cutting mat holds your material in place during the cutting process. It’s essential to keep the mat clean and sticky to ensure accurate results.
Software or Control Panel
Electronic and laser cutting machines rely on software or a control panel to operate. The software allows you to design, edit, and customize your projects. Some machines come with user-friendly apps that connect to your smartphone or computer. Learning how to navigate the software is crucial for getting the most out of your cutting machine.
Power Source and Connectivity Options
Most cutting machines require a power source to operate. Some models connect directly to a computer via USB, while others offer wireless options like Bluetooth. Ensure your machine’s connectivity matches your setup to avoid compatibility issues.
“Choosing the right cutting machine depends on your project needs and the materials you plan to use. Understanding the types and components will set you up for success.”
By familiarizing yourself with these types and components, you’ll gain confidence in how to use a cutting machine effectively. Whether you’re crafting at home or working on professional projects, this knowledge will help you achieve the best results.
How to Use a Cutting Machine: Setting Up Your Machine
Setting up your cutting machine for the first time might feel overwhelming, but it’s simpler than you think. By following these steps, you’ll have your machine ready to create stunning projects in no time.
Unboxing and Assembly
Checking the Contents of the Box
When you open the box, take a moment to inspect everything inside. Most cutting machines come with essential components like the machine itself, a power cord, a blade, a cutting mat, and sometimes a starter kit with sample materials. Check the manual or quick-start guide to ensure nothing is missing. If something seems off, contact the manufacturer right away.
Pro Tip: Keep the packaging and box for a while. It’s handy for storage or if you need to return the machine.
Assembling the Machine Step-by-Step
Start by placing your cutting machine on a flat, stable surface. Plug in the power cord and connect it to the machine. Insert the blade into its holder, following the instructions in the manual. Attach any additional parts, like a pen holder or tool adapter, if your machine includes them. Once everything is in place, your machine is ready for calibration.
Calibrating the Machine
Aligning the Blade
Blade alignment is crucial for clean and precise cuts. Begin by adjusting the blade depth according to the material you plan to use. Most machines have a dial or knob for this purpose. Test the blade on a scrap piece of material to ensure it cuts smoothly without tearing or dragging.
Testing the Cutting Mat
Your cutting mat holds materials in place during operation. Remove the protective film from the mat and check its stickiness. Place a small piece of material on the mat and load it into the machine. Run a test cut to confirm that the mat feeds correctly and the material stays secure. If the mat isn’t sticky enough, clean it or replace it.
Quick Tip: Always use the right mat for your material. For example, light-grip mats work well for paper, while strong-grip mats are better for thicker materials like vinyl or fabric.
Installing Software or Apps
Downloading and Installing the Required Software
Most electronic cutting machines require software to operate. Visit the manufacturer’s website or app store to download the recommended program. Popular options like Cricut Design Space or Silhouette Studio are user-friendly and packed with features. Follow the installation prompts, and make sure your computer or mobile device meets the software’s requirements. setting up your machine.
Connecting the Machine to Your Computer or Mobile Device
Once the software is installed, connect your cutting machine. Use a USB cable for a direct connection or pair the machine via Bluetooth if it supports wireless connectivity. Open the software and follow the setup wizard to sync your device. This step ensures your machine and software communicate seamlessly.
Did You Know? Some cutting machines, like the Cricut Joy, offer app-based control, making it easy to design and cut directly from your smartphone.
By completing these setup steps, you’ll be ready to dive into your first project. Understanding how to use a cutting machine starts with proper assembly and calibration.
How to Use a Cutting Machine: Operating the Machine
Once your cutting machine is set up, it’s time to dive into the fun part—operating it! This section will guide you through preparing your materials, setting the right parameters, and running the machine to create your first masterpiece.
Preparing Your Materials
Choosing the Right Material for Your Project
The success of your project starts with selecting the right material. Cutting machines can handle a variety of materials, including paper, vinyl, fabric, and even thin wood. Think about your project’s requirements. For example, use cardstock for sturdy paper crafts or adhesive vinyl for custom stickers. Always check your machine’s manual to confirm it supports the material you’ve chosen.
Pro Tip: Test a small piece of your material before starting the full project. This helps you avoid wasting materials if adjustments are needed.
Properly Placing the Material on the Cutting Mat
Once you’ve chosen your material, place it on the cutting mat. Align it with the grid lines to ensure accurate cuts. Smooth out any wrinkles or bubbles, as these can interfere with the cutting process. For materials like vinyl or fabric, use the appropriate mat type—light-grip for delicate materials and strong-grip for heavier ones.
Quick Tip: If your material doesn’t stick well to the mat, clean the mat with a lint roller or mild soap and water. Let it dry completely before use.
Setting Parameters
Adjusting Blade Depth and Pressure
Blade depth and pressure settings are crucial for clean cuts. Adjust the blade depth based on the thickness of your material. For example, use a shallow setting for paper and a deeper one for fabric. Most machines allow you to adjust pressure through the software. Start with the recommended settings and tweak them if needed.
Expert Insight: Brent Donner, a laser cutting expert, emphasizes that proper blade maintenance ensures optimal cutting quality. Regularly check your blade for wear and replace it when necessary.
Selecting the Correct Cutting Speed
Cutting speed affects both precision and efficiency. Slower speeds work best for intricate designs, while faster speeds are ideal for simple shapes. Experiment with different speeds to find what works best for your project. Many machines offer preset options for common materials, making this step easier.
Did You Know? Slower speeds reduce the risk of tearing delicate materials like paper or vinyl.
Running the Machine
Loading the Cutting Mat into the Machine
Carefully load the cutting mat into the machine. Align the mat with the guides on the machine to ensure it feeds straight. Press the load button (usually marked with an arrow) to secure the mat in place. Double-check that the material is still aligned properly before proceeding.
Pro Tip: Keep your hands away from the blade area while loading the mat to avoid accidents.
Starting the Cutting Process
With everything in place, it’s time to start cutting! Open your design in the software and double-check the settings. Once you’re satisfied, send the design to the machine. Watch as the machine brings your vision to life. When the cutting is complete, unload the mat and carefully remove the material. cutting machine
Quick Reminder: Save your design in the software before cutting. This way, you can reuse it for future projects.
Learning how to use a cutting machine effectively takes practice, but following these steps will set you up for success. By preparing your materials, setting the right parameters, and running the machine correctly, you’ll create stunning projects with ease. cutting machines
Beginner-Friendly Projects with a Cutting Machine
Starting with simple projects is the best way to get comfortable with your cutting machine. These beginner-friendly ideas will help you explore its capabilities while creating something fun and useful.
Simple Paper Crafts
Paper crafts are perfect for beginners. They’re affordable, easy to work with, and allow you to experiment with your machine’s settings.
Greeting Cards
Designing custom greeting cards is a great way to start. Use your cutting machine to create intricate designs, cutouts, or even layered effects. Choose cardstock in your favorite colors and let your creativity shine. Add personal touches like handwritten messages or embellishments to make your cards unique.
“I’ve always loved making greeting cards with my Cricut machine. It’s amazing how professional they look, even as a beginner!” - A happy crafter.
Paper Decorations
Paper decorations, like banners or party garlands, are another beginner-friendly project. Use your machine to cut shapes like stars, hearts, or letters. String them together with twine or ribbon for a festive touch. These decorations are perfect for birthdays, holidays, or just sprucing up your space.
Pro Tip: Use patterned paper for an extra pop of color and texture in your decorations.
Vinyl Projects
Vinyl is a versatile material that opens up endless possibilities. It’s easy to cut and works well for both decorative and functional projects.
Custom Stickers
Creating custom stickers is one of the most satisfying vinyl projects. Design your stickers using the machine’s software, then cut them out on adhesive vinyl. You can make stickers for planners, laptops, or even water bottles. This project is quick, fun, and lets you personalize everyday items.
“My Cricut machine has turned sticker-making into a hobby I never knew I’d love. It’s so much fun to see my designs come to life!”
Wall Decals
Wall decals are a simple way to transform any room. Use your cutting machine to create quotes, shapes, or patterns on removable vinyl. Apply them to walls, mirrors, or furniture for a custom look. This project is beginner-friendly and adds a personal touch to your home.
Quick Tip: Use transfer tape to apply your decals smoothly and avoid air bubbles.
Fabric Projects
Fabric projects might seem intimidating, but they’re surprisingly easy with a cutting machine. Start with simple designs to build your confidence.
Iron-On Designs for T-Shirts
Customizing t-shirts with iron-on vinyl is a fun and practical project. Design your graphic or text, cut it out, and use a heat press or iron to transfer it onto the fabric. This is a great way to make personalized gifts or team shirts.
“I was nervous about trying iron-on vinyl at first, but my Cricut made it so easy. Now I make t-shirts for every occasion!”
Simple Fabric Appliqués
Fabric appliqués are perfect for adding flair to clothing, bags, or home décor. Use your cutting machine to cut shapes from fabric or iron-on material. Sew or press them onto your project for a polished look. This is a great way to upcycle old clothes or create unique accessories.
Did You Know? Many cutting machines can cut fabric directly, saving you time and effort compared to cutting by hand.
These beginner-friendly projects will help you get comfortable with your cutting machine while creating something beautiful. Whether you’re crafting for fun, gifts, or home décor, these ideas are a great starting point. Remember, practice makes perfect, so don’t be afraid to experiment and let your creativity flow!
Safety Tips and Maintenance for Cutting Machines
Using a cutting machine can be exciting, but safety and maintenance should always come first. By following these tips, you’ll protect yourself and keep your machine in top condition for years to come.
Safety Guidelines
Keeping Hands Away from the Blade During Operation
Always keep your hands and fingers away from the blade while the machine is running. Even if you’re adjusting the material or checking the progress, stop the machine first. Cutting machines operate with precision and speed, which makes the blade extremely sharp. Use tools like tweezers or a scraper to handle small pieces instead of your hands.
Quick Tip: Many machines come with safety features like blade guards. Make sure these are in place before starting any project.
Ensuring Proper Ventilation When Cutting Certain Materials
Some materials, like vinyl or acrylic, release fumes when cut. These fumes can be harmful if inhaled in large amounts. Always work in a well-ventilated area or use an exhaust fan to direct fumes away from your workspace. If you’re using a laser cutting machine, proper ventilation becomes even more critical due to the heat and gases involved.
“Good ventilation not only protects your health but also prevents residue buildup inside the machine, which can affect its performance.”
Maintenance Tips
Cleaning the Blade and Cutting Mat Regularly
A clean blade ensures precise cuts, while a clean cutting mat keeps your materials secure. After each use, remove debris or residue from the blade using a soft cloth or brush. For the cutting mat, wipe it down with a lint roller or mild soap and water. Let it dry completely before using it again.
Pro Tip: Avoid using harsh chemicals on the blade or mat, as they can cause damage. Gentle cleaning keeps your tools in great shape.
Storing the Machine in a Safe, Dry Place
When not in use, store your cutting machine in a safe, dry location. Moisture can damage the internal components, while dust can clog the moving parts. Cover the machine with a dust cover or store it in its original box to protect it. Keep it away from direct sunlight or extreme temperatures.
Did You Know? Proper storage not only extends the life of your machine but also ensures consistent performance every time you use it.
By prioritizing safety and maintenance, you’ll enjoy a smoother crafting experience and avoid unnecessary repairs. These simple steps make a big difference in keeping your cutting machine reliable and ready for your next creative project.
Using a cutting machine as a beginner becomes simple when you follow the right steps. Start by learning about the machine and its features. Take time to set it up properly and explore beginner-friendly projects like paper crafts or vinyl designs. Practice regularly to build confidence and improve your skills. Always prioritize safety and maintain your machine to keep it running smoothly. Now that you know how to use a cutting machine, dive into your first project. Let your creativity flow and enjoy the satisfaction of bringing your ideas to life!
FAQ
How can beginners start using their cutting machine?
Starting with a cutting machine might feel overwhelming, but it doesn’t have to be. Focus on simple projects like decals or iron-on designs to get comfortable. Platforms like HGTV and the Crafty Lumberjacks offer beginner-friendly tutorials to guide you step by step. Take your time exploring the machine’s features and practice with basic materials like paper or vinyl.
“The key is to start small and build confidence. Once you master the basics, you’ll be amazed at what you can create!”
What materials can I use with my cutting machine?
Cutting machines work with a variety of materials, including paper, cut vinyl, fabric, and even thin wood.
Pro Tip: Test a small piece of your material before starting your project to ensure the settings are correct.
Do I need special software to operate my cutting machine?
Yes, most cutting machines require specific software to function. Popular options include Cricut Design Space and Silhouette Studio. These programs let you design, edit, and customize your projects. Download the software from the manufacturer’s website or app store, and follow the setup instructions to connect it to your machine.
How do I maintain my cutting machine?
Regular maintenance keeps your cutting machine in top shape. Clean the blade and cutting mat after each use to remove debris. Store the machine in a dry, dust-free area when not in use. Avoid exposing it to extreme temperatures or moisture, as these can damage its components.
Quick Tip: Use a lint roller or mild soap and water to clean your cutting mat. Let it dry completely before using it again.
Can I use my cutting machine without an internet connection?
Some cutting machines, like the Cricut Maker, require an internet connection for certain features, such as accessing design libraries. However, many machines offer offline modes, allowing you to work on saved designs without Wi-Fi. Check your machine’s manual to understand its connectivity options.
What’s the best way to learn how to use a cutting machine?
Hands-on practice is the best way to learn. Start with beginner-friendly projects like greeting cards or custom stickers. Watch tutorials online or join crafting communities for tips and inspiration. Don’t rush—take your time to explore the machine’s features and experiment with different materials.
“Learning by doing is the most rewarding approach. Each project teaches you something new!”
Why isn’t my material cutting properly?
If your material isn’t cutting correctly, check the blade depth and pressure settings. Ensure the blade is sharp and suitable for the material. Also, confirm that the cutting mat is sticky enough to hold the material securely. Running a test cut can help identify and fix any issues.
Are cutting machines safe to use?
Yes, cutting machines are safe when used correctly. Keep your hands away from the blade during operation, and always follow the safety guidelines in the manual. Work in a well-ventilated area, especially when cutting materials like vinyl that may release fumes.
Reminder: Use tools like tweezers or scrapers to handle small pieces instead of your fingers.
Can I create my own designs with a cutting machine?
Absolutely! Most cutting machines allow you to upload custom designs through their software. You can create designs using graphic design tools or draw them by hand and scan them into the software. This feature lets you personalize projects and bring your unique ideas to life.
What are some beginner-friendly projects to try?
Start with simple projects like paper crafts, custom stickers, or iron-on t-shirt designs. These projects help you get familiar with your machine’s settings and capabilities. As you gain confidence, move on to more complex creations like wall decals or fabric appliqués.
Pro Tip: Choose projects that align with your interests. This makes the learning process more enjoyable and rewarding.
See Also
Beginner's Guide to Operating a Die Cutting Machine
Essential Tips for New Users of Die Cutting Machines
Comprehensive Instructions for Hair Cutting Machine Use