Step-by-Step Guide to Set Up Laser Cutting Machine


Learning how to set up a laser cutting machine is essential for achieving precision and ensuring safety. Proper setup not only optimizes the machine's performance but also minimizes the risk of errors, inefficiency, or accidents. This step is especially critical for those new to laser cutting or working with advanced tools like desktop laser cutters or personal laser cutters.
Understanding how to set up a laser cutting machine becomes easier with a step-by-step guide, which simplifies the process for both beginners and intermediate users. Whether you're using a desktop laser engraver for DIY laser cutters projects or operating professional-grade machines, a quick start guide can save time and help you avoid costly mistakes. By following clear instructions, you can confidently focus on creating precise and high-quality designs.
Preparing Your Workspace for a Laser Cutting Machine
Creating a safe and efficient workspace is the first step in setting up your laser cutting machine. A well-prepared environment ensures smooth operation, protects you from potential hazards, and enhances the performance of your equipment. Follow these guidelines to get started.
Choosing the Right Location
Ventilation and exhaust system requirements
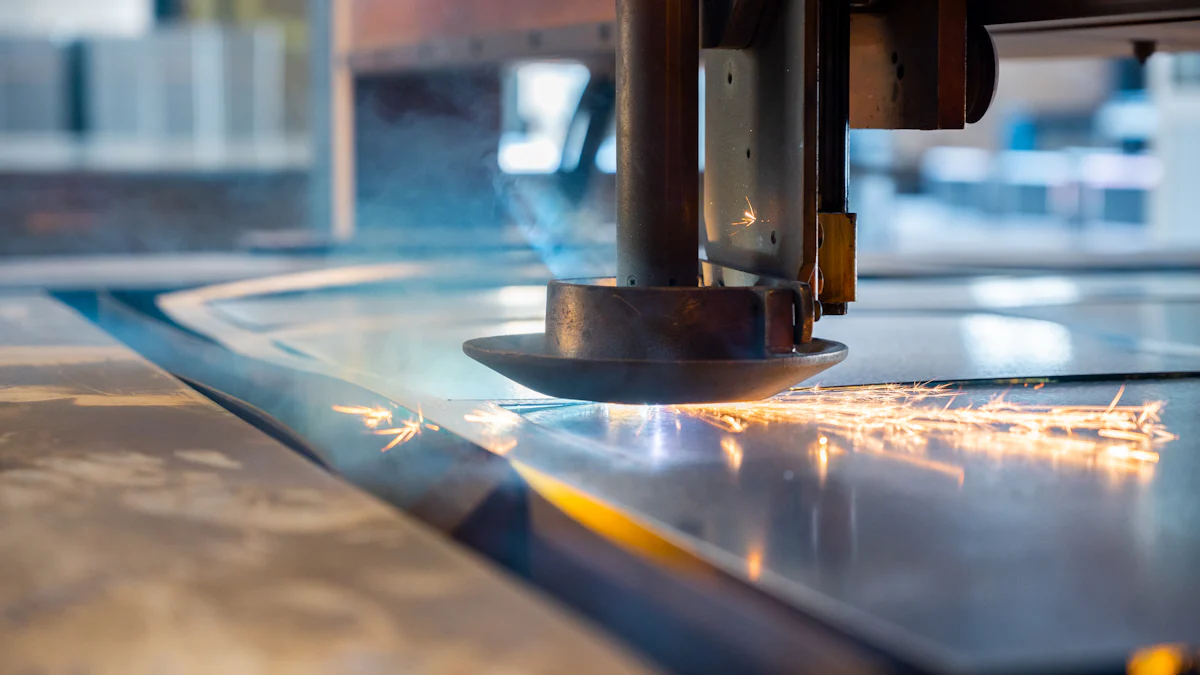
Proper ventilation is essential when working with a laser cutter. The cutting process generates fumes and particles that can be harmful if inhaled. Install an exhaust system to direct these emissions outside or into a filtration unit. Ensure the exhaust system is compatible with your machine's specifications. If you're using a desktop laser cutter, position it near a window or ventilation outlet to simplify this setup.
Ensuring a stable and level surface
Place your laser cutting machine on a sturdy, level surface to prevent vibrations during operation. An uneven surface can affect the precision of your cuts and damage the machine over time. Use a spirit level to confirm the stability of the table or stand. For heavier machines, consider reinforced furniture designed to support the weight.
Safety Measures for Setting Up the Machine
Fire safety precautions and equipment
Laser cutters use high heat, which increases the risk of fire. Keep a fire extinguisher rated for electrical fires within easy reach. Avoid placing flammable materials near the machine. Conduct a safety inspection of the workspace to identify and eliminate potential fire hazards. Never leave the machine unattended while it’s running.
Protective gear and eyewear
Protect yourself by wearing appropriate safety gear. Some laser cutters emit invisible infrared light, which can harm your eyes. Use laser safety glasses designed for your machine's wavelength. Additionally, wear gloves and avoid loose clothing to reduce the risk of accidents. Always follow the safety instructions provided in your machine's manual.
Power and Connectivity Requirements
Electrical outlet specifications
Check the power requirements of your laser cutting machine before plugging it in. Most machines require a grounded outlet to prevent electrical hazards. Avoid using extension cords, as they can cause voltage drops or overheating. If you're setting up a desktop laser cutter machine, ensure the outlet is easily accessible for quick disconnection in emergencies.
Setting up a reliable internet connection (if applicable)
Some modern laser cutters, especially those used for DIY laser cutters projects, require an internet connection for software updates or cloud-based design uploads. Use a stable Wi-Fi network or a wired connection to avoid interruptions during operation. Confirm that your workspace has adequate connectivity before setting up the machine.
Unboxing and Assembling the Laser Cutting Machine
Unboxing and assembling your laser cutting machine is an exciting step toward bringing your creative projects to life. This process requires attention to detail to ensure that all components are in good condition and properly installed. Follow these steps to set up your machine correctly and avoid potential issues during operation.
Inspecting the Components
Checking for damage or missing parts
Begin by carefully unboxing your laser cutting machine. Inspect each component for visible damage, such as dents, scratches, or broken parts. Use the packing list provided in the manual to confirm that all items are included. Missing or damaged parts can affect the machine's performance, so contact the manufacturer immediately if you notice any issues. This step ensures that your machine is ready for safe and efficient assembly.
Identifying tools needed for assembly
Before starting the assembly, gather the necessary tools. Most laser cutters come with basic tools like Allen wrenches or screwdrivers, but you may need additional items such as pliers or a small wrench. Refer to the user manual for a detailed list of required tools. Having everything ready will streamline the assembly process and prevent unnecessary delays.
Step-by-Step Assembly Process
Attaching the laser head and gantry
Start by attaching the laser head to the gantry. Align the laser head with the mounting brackets and secure it using the screws provided. Tighten the screws firmly to prevent movement during operation. Next, install the gantry onto the machine's frame, ensuring it moves smoothly along the rails. Proper alignment is crucial for achieving precise cuts and engravings.
Connecting cables and power supply
Connect the cables according to the instructions in the manual. Attach the control cables to their designated ports on the laser cutter and the power supply unit. Double-check the connections to ensure they are secure and match the labeled ports. Incorrect wiring can damage the machine or cause it to malfunction. Once the cables are connected, plug the power supply into a grounded electrical outlet.
Final Checks Before Powering On
Ensuring all screws and connections are secure
Before powering on the machine, inspect all screws and connections. Tighten any loose screws and verify that all cables are firmly attached. Loose components can lead to operational issues or safety hazards. Take your time during this step to ensure everything is properly secured.
Verifying the machine is level and stable
Place the assembled laser cutting machine on a stable and level surface. Use a spirit level to check the machine's alignment. An uneven surface can affect the accuracy of the laser cutter and cause vibrations during use. Adjust the table or stand as needed to create a stable foundation. For heavier models, consider using reinforced furniture designed to support the weight.
By following these steps, you can assemble your laser cutting machine with confidence. A well-assembled machine ensures smooth operation and sets the stage for successful projects, whether you're working on DIY laser cutters or professional designs.
Initial Setup and Operation of the Laser Cutting Machine
Setting up your laser cutting machine for its first operation is an exciting milestone. This stage ensures that your equipment is ready to deliver precise and efficient results. Follow these steps to power on, load material, and focus the laser for optimal performance.
Powering On the Machine
Turning on the main power and control panel
Begin by locating the main power switch on your laser cutter. Ensure all safety covers are in place and interlocks are functioning properly. Flip the switch to turn equipment on, activating the machine and its control panel. Some models may also require you to power on additional components, such as a water cooling system or air assist. Always refer to your user manual for specific instructions.
Once the machine is powered, check the control panel for any error messages or alerts. A properly functioning control panel is essential for smooth operation. If your desktop laser cutter includes a touchscreen interface, navigate through the menu to confirm that all systems are operational.
Running initial diagnostics (if applicable)
Many modern laser cutting machines come equipped with diagnostic tools. Use these to perform a quick system check. Diagnostics can identify potential issues, such as misaligned components or connectivity problems, before they affect your work. If your machine lacks built-in diagnostics, manually inspect the laser head, gantry, and cables to ensure everything is secure and aligned. This step prevents interruptions during cutting.
Loading Materials for Cutting
Selecting the right material for your project
Choose a material that matches your project requirements and is compatible with your laser cutter. Common materials include wood, acrylic, leather, and certain metals. Check the manufacturer's guidelines to confirm the material's suitability. Avoid using materials that emit harmful fumes or are highly flammable. For beginners, start with simple materials like plywood or cardboard to practice cutting techniques.
Positioning the material on the cutting bed
Place the material flat on the cutting bed, ensuring it is free of debris or dust. Align it with the machine's grid or rulers for accurate positioning. Use clamps or weights if necessary to keep the material stable during operation. For a desktop laser cutter, ensure the material fits within the machine's working area. Proper placement minimizes errors and ensures clean cuts.
Focusing the Laser for Precision
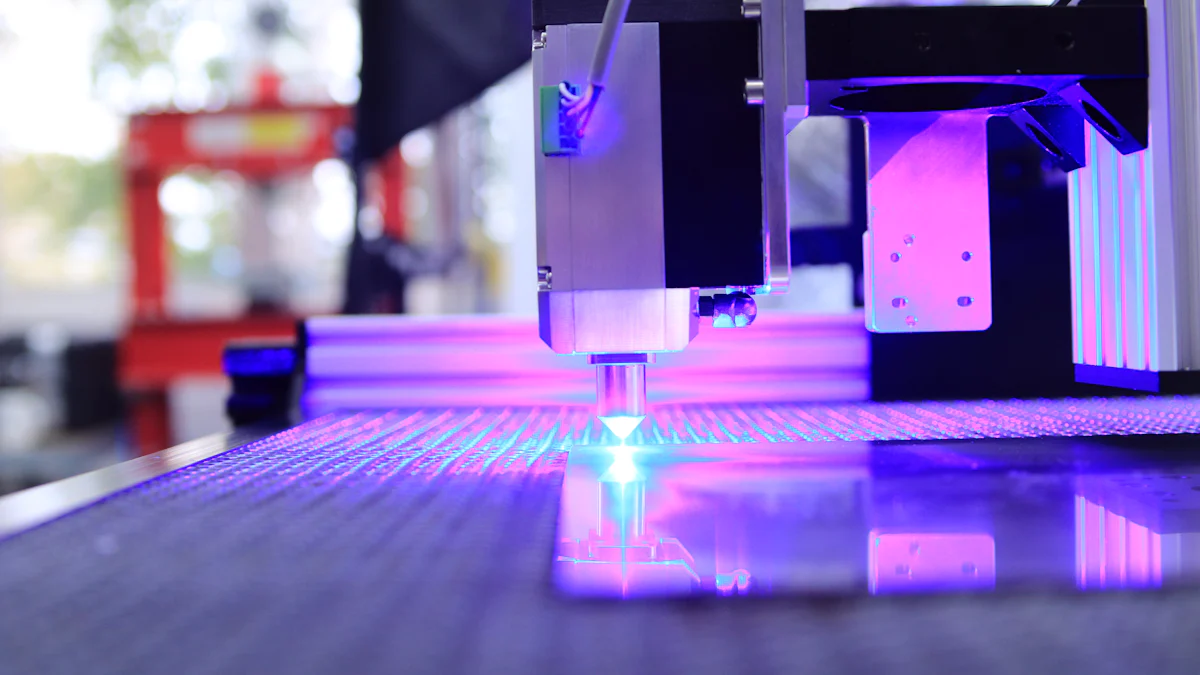
Adjusting the laser focus for accuracy
To achieve precise cuts, you must focus the laser correctly. Adjust the distance between the laser head and the material based on the thickness of the material. Most laser cutting machines include a focus tool, such as a spacer or gauge, to help you set the correct distance. If your machine lacks a tool, consult the manual for recommended measurements. Proper focus ensures the laser beam cuts cleanly and efficiently.
Using focus tools or manual adjustments
Use the focus tool provided with your laser cutter to simplify the focusing process. Place the tool between the laser head and the material, then adjust the laser head until it lightly touches the tool. For manual adjustments, lower the laser head gradually while observing the beam's sharpness on the material. A well-focused laser produces a fine, concentrated beam, which is essential for detailed designs and intricate cutting techniques.
By following these steps, you can prepare your laser cutting machine for its first operation with confidence. Proper setup ensures accurate results, reduces material waste, and extends the life of your equipment. Whether you're working on a professional project or experimenting with a desktop laser cutter, these practices will help you achieve success.
Software and File Preparation for Laser Cutting
Preparing your software and design files is a crucial step in operating your laser cutting machine. This process ensures that your machine communicates effectively with your computer and executes your designs accurately. Follow these steps to install the necessary software, prepare your laser cutter design files, and configure the machine settings for optimal performance.
Installing the Software
Downloading and installing the manufacturer's software
Start by visiting the manufacturer's official website to download the recommended software for your laser cutter. Look for the version that matches your operating system, whether it's Windows, macOS, or Linux. Once downloaded, launch the installer and follow the on-screen instructions. Choose an installation location on your computer with sufficient storage space.
Some laser cutting machines may require additional firmware or controller support. Check the user manual to confirm if your machine needs these updates. Installing the correct software ensures seamless integration between your computer and the laser cutter, enabling smooth operation and precise results.
Ensuring compatibility with your computer
Before installing, verify that your computer meets the software's minimum requirements. Check for compatibility with your operating system, processor, and memory capacity. If you're using a desktop laser cutter, ensure that the software supports the machine's firmware and hardware. Compatibility issues can lead to errors when running a file or executing a laser cutting design.
For added convenience, consider joining the software's active user community. These forums often provide troubleshooting tips and advice for resolving compatibility problems. Staying informed about updates and patches will help you maintain a reliable connection between your computer and the laser cutter.
Preparing Design Files
Importing templates or creating custom designs
To begin, decide whether to use pre-made templates or create custom designs. Many laser cutting machines come with a library of templates that you can import directly into the software. These templates are ideal for beginners who want to practice basic cuts and engravings.
If you prefer custom designs, use graphic design software like Adobe Illustrator, CorelDRAW, or Inkscape. Save your designs in a format compatible with your laser cutter, such as SVG, DXF, or PDF. Import the file into the laser cutter's software and ensure it displays correctly. Properly prepared files reduce errors during the cutting process and improve the quality of your final product.
Assigning layers for cutting, engraving, or scoring
Organize your design by assigning layers for different operations. For example, use one layer for cutting, another for engraving, and a third for scoring. Assigning layers allows the laser cutter to differentiate between these tasks and execute them with precision.
Most laser cutting software includes tools for assigning colors or line weights to each layer. Use these tools to define the power and speed settings for each operation. This step ensures that your laser cutter design is executed exactly as planned, whether you're working on intricate engravings or simple cuts.
Configuring Machine Settings
Setting power, speed, and resolution parameters
Adjust the machine settings to match the material and design requirements. Set the laser power and speed based on the thickness and type of material you're using. For example, cutting thicker materials like wood may require higher power and slower speed, while engraving on acrylic might need lower power and faster speed.
Resolution settings determine the level of detail in your laser cutting design. Higher resolution produces finer details but may increase processing time. Experiment with different settings on scrap material to find the optimal balance for your project. Proper configuration ensures clean cuts and precise engravings.
Saving settings for future use
Once you've configured the machine settings, save them for future projects. Most laser cutting software allows you to create presets for specific materials and designs. Name each preset clearly, such as "Plywood Cutting" or "Acrylic Engraving," to make them easy to identify later.
Saving settings not only saves time but also ensures consistency across multiple projects. This feature is especially useful for desktop laser cutter users who frequently switch between different materials and designs. With saved settings, you can focus on creativity without worrying about recalibrating the machine for every project.
By following these steps, you can prepare your software and files efficiently. A well-prepared setup ensures that your laser cutting machine operates smoothly and delivers high-quality results. Whether you're running a file for a simple cut or executing a complex laser cutter design, proper preparation is key to success.
Test Run and Calibration of the Laser Cutting Machine
Testing and calibrating your laser cutting machine is a vital step to ensure precision and efficiency. This process helps you identify potential issues, fine-tune settings, and achieve optimal performance. By dedicating time to this stage, you can avoid costly mistakes and ensure your machine operates at its best.
Performing a Test Cut
Using scrap material for initial tests
Start by selecting a piece of scrap material that matches the type you plan to use for your project. Scrap material allows you to test the machine without risking valuable resources. Place the material securely on the cutting bed, ensuring it lies flat and stable. This step minimizes movement during the test and ensures accurate results.
Run a simple design or shape, such as a square or circle, to evaluate the machine's performance. Observe how the laser cutter interacts with the material. Check for clean edges, consistent depth, and proper alignment. Testing on scrap material not only saves resources but also provides a safe way to familiarize yourself with the machine's capabilities.
Checking for accuracy and clean cuts
After completing the test cut, inspect the results closely. Look for signs of uneven edges, burn marks, or incomplete cuts. These issues often indicate problems with the laser focus, power settings, or cutting speed. Use a ruler or caliper to measure the dimensions of the cut and compare them to your design. Accurate measurements confirm that the machine is calibrated correctly.
If you notice imperfections, take note of the specific areas that need adjustment. For example, jagged edges may require a slower cutting speed, while shallow cuts might need increased laser power. Regularly checking for accuracy ensures that your laser cutting machine delivers consistent and high-quality results.
Adjusting Settings for Optimal Results
Fine-tuning power and speed
Adjusting the power and speed settings is essential for achieving clean and precise cuts. Begin by increasing or decreasing the laser power based on the material's thickness and density. Higher power works well for thicker materials, while lower power is ideal for delicate or thin materials.
Next, modify the cutting speed to match the material's characteristics. Slower speeds allow the laser cutter to penetrate deeper, creating cleaner cuts. Faster speeds work better for engraving or scoring. Experiment with different combinations of power and speed on scrap material until you find the optimal balance. Fine-tuning these settings ensures that your desktop laser cutter performs efficiently and produces professional-grade results.
Recalibrating the laser if necessary
If the test cut reveals alignment issues or inconsistent performance, recalibrate the laser. Start by checking the alignment of the laser head and gantry. Misaligned components can cause uneven cuts or missed details. Adjust the laser head to ensure it moves smoothly along the rails and aligns perfectly with the cutting bed.
Verify the focus of the laser by using a focus tool or manual adjustments. Proper focus ensures that the laser beam remains sharp and concentrated, which is crucial for precision. Additionally, inspect the machine's control parameters, such as power output and resolution settings, to confirm they match your project requirements. Regular recalibration keeps your laser cutter in peak condition and prevents errors during operation.
By performing a test run and making necessary adjustments, you can optimize your laser cutting machine for any project. These steps not only improve accuracy but also extend the lifespan of your equipment. Whether you're using a desktop laser cutter for DIY projects or a professional-grade machine, calibration ensures consistent and reliable performance.
Maintenance and Troubleshooting for Laser Cutting Machines
Proper maintenance and effective troubleshooting are essential for keeping your laser cutting machine in excellent condition. Regular care ensures consistent performance, extends the machine’s lifespan, and minimizes costly repairs. By addressing potential issues early, you can maintain efficiency and avoid unexpected downtime.
Routine Maintenance
Routine maintenance plays a vital role in ensuring your laser cutter operates smoothly. Follow these steps to keep your machine in top shape.
Cleaning the laser lens and mirrors
The laser lens and mirrors are critical components of your laser cutting machine. Dust, debris, and residue from cutting materials can accumulate on these parts, reducing the laser's precision and power. Clean the lens and mirrors regularly using a soft, lint-free cloth and a cleaning solution recommended by the manufacturer. Avoid using abrasive materials that could scratch the surfaces.
Inspect these components before each use to ensure they remain free of contaminants. A clean lens and properly aligned mirrors improve the accuracy of your laser cutter and prevent uneven cuts or engravings.
Checking and replacing filters in the exhaust system
The exhaust system removes fumes and particles generated during the cutting process. Over time, the filters in the system can become clogged, reducing airflow and compromising ventilation. Check the filters periodically and replace them when necessary.
A well-maintained exhaust system not only protects your workspace from harmful emissions but also enhances the performance of your desktop laser cutter. Neglecting this step can lead to overheating and damage to internal components. Make it a habit to inspect the exhaust system as part of your regular maintenance routine.
Common Issues and Solutions
Even with proper care, you may encounter occasional issues with your laser cutting machine. Understanding how to address these problems ensures uninterrupted operation and high-quality results.
Resolving alignment problems
Misalignment of the laser beam is a common issue that affects cutting precision. If you notice uneven cuts or inconsistent engraving, check the alignment of the laser head and mirrors. Use the alignment tools provided with your machine to adjust the beam path.
Start by aligning the mirrors to ensure the laser beam travels straight and hits the intended target. Then, verify the position of the laser head relative to the cutting bed. Proper alignment restores the accuracy of your laser cutter and prevents material waste.
Addressing inconsistent cutting or engraving
Inconsistent cutting or engraving often results from incorrect settings or worn components. Begin by reviewing the power and speed settings for your material. Adjust these parameters to match the thickness and type of material you are using.
If the issue persists, inspect the laser tube and lens for signs of wear or damage. Replace any worn parts to restore the machine's performance. Additionally, ensure the cutting bed is level and free of debris. Regular calibration and maintenance prevent these problems and keep your desktop laser cutter running efficiently.
By following these maintenance practices and troubleshooting tips, you can maximize the performance of your laser cutting machine. Routine care reduces repair costs, enhances production quality, and ensures your equipment remains reliable for years to come.
Setting up a laser cutting machine may seem complex, but following a structured process simplifies the task. You’ve learned how to prepare your workspace, assemble the machine, and configure it for precise operation. Each step ensures safety, efficiency, and optimal performance. Regular maintenance, like cleaning lenses and checking filters, keeps your machine running smoothly and extends its lifespan. By mastering how to set up laser cutting machines, you can confidently start creating projects with accuracy and creativity. Take the first step today and unlock the full potential of your desktop laser cutter.
FAQ
Can I make money with a laser cutting machine?
Yes, you can turn your laser cutting machine into a profitable venture. Many users create and sell custom products like engraved gifts, signage, jewelry, and prototypes. The versatility of laser cutters allows you to cater to various markets, from personalized items to industrial applications. Start by exploring niche markets and building a portfolio of unique designs to attract customers.
How long does it take to learn to use a laser cutting machine?
Most users can learn the basics of operating a laser cutting machine within a few hours. However, mastering advanced techniques, such as intricate engraving or optimizing settings for different materials, may take a few weeks of practice. Many manufacturers provide tutorials, user manuals, and online resources to help you get started quickly. Hands-on experience is the best way to build confidence and improve your skills.
Do I need separate machines for engraving and cutting?
No, most modern laser cutting machines can handle both engraving and cutting tasks. You can switch between these functions by adjusting the power and speed settings in the software. For example, higher power and slower speed are ideal for cutting, while lower power and faster speed work well for engraving. This versatility makes laser cutters a cost-effective solution for diverse projects.
Are laser cutting machines safe to operate?
Yes, laser cutting machines are safe when used correctly. Always follow the safety guidelines provided in the user manual. Wear protective eyewear designed for your machine's laser wavelength, and ensure proper ventilation to remove fumes. Keep a fire extinguisher nearby and never leave the machine unattended during operation. Regular maintenance also helps prevent potential hazards.
What materials can I cut or engrave with a laser cutter?
Laser cutters work with a wide range of materials, including wood, acrylic, leather, fabric, and certain metals. However, avoid materials like PVC or polycarbonate, as they release harmful fumes when cut. Always check the manufacturer's guidelines to confirm material compatibility. Testing on scrap material is a good practice to ensure optimal results.
What are the computer requirements for running laser cutting software?
Most laser cutting software runs on standard computers with basic specifications. Ensure your computer meets the minimum requirements, such as sufficient RAM, storage, and a compatible operating system (e.g., Windows, macOS, or Linux). A stable internet connection may also be necessary for software updates or cloud-based design uploads. Check the user manual for specific recommendations.
How do I troubleshoot alignment issues with my laser cutter?
If you notice uneven cuts or inconsistent engraving, check the alignment of the laser head and mirrors. Use the alignment tools provided with your machine to adjust the beam path. Start by aligning the mirrors to ensure the laser beam travels straight. Then, verify the position of the laser head relative to the cutting bed. Proper alignment restores precision and prevents material waste.
Can I get technical support if I encounter issues?
Yes, most manufacturers offer technical support to help you resolve any issues. For example, companies like Kern Laser Systems provide live customer service during business hours. You can also access user communities, forums, and tutorials for additional guidance. Reliable support ensures you can quickly address problems and keep your projects on track.
How often should I perform maintenance on my laser cutting machine?
Perform routine maintenance regularly to keep your machine in top condition. Clean the laser lens and mirrors after every few uses to remove dust and debris. Check and replace filters in the exhaust system as needed to maintain proper ventilation. Inspect the machine for loose screws or worn components monthly. Consistent care extends the lifespan of your equipment and ensures reliable performance.
Can I build my own laser cutting machine?
Yes, building your own laser cutting machine is possible if you have technical expertise. You can purchase components like laser tubes, mirrors, and gantries from suppliers. However, assembling a machine requires precision and knowledge of laser technology. If you're new to this, consider starting with a pre-assembled machine to gain experience before attempting a DIY project.
See Also
Comprehensive Instructions For Operating A Hair Clipper
Effective Techniques For Operating A Laser Cutter
Understanding The Functionality Of CNC Laser Cutters