How to Make a Mini Laser Cutting Machine

A mini laser cutting machine is a compact device that uses a focused laser beam to cut or engrave materials like wood, acrylic, and leather. It offers precision and versatility, making it ideal for crafting, prototyping, and small-scale manufacturing. Learning how to make a mini laser cutting machine empowers you to create a tool tailored to your needs. Building your own lasercutter saves money and allows for customization. This DIY project is beginner-friendly and provides a hands-on way to explore engineering and design while producing a functional and creative tool.
Tools and Materials for Your DIY Lasercutter
Before you begin building your mini lasercutter, gathering the right tools and materials is essential. A well-prepared bill of materials (BOM) ensures a smoother assembly process and helps you avoid unnecessary delays. Below, you'll find a detailed breakdown of what you need to get started.
Essential Tools
To assemble your lasercutter, you’ll need a set of basic tools. These tools are crucial for precise construction and proper alignment:
- Screwdrivers: A set of Phillips and flathead screwdrivers for securing components.
- Allen wrenches: Often required for assembling frames and tightening bolts.
- Wire cutters and strippers: For managing electrical connections.
- Soldering iron: Necessary for connecting wires to electronic components.
- Measuring tape or ruler: Ensures accurate measurements during assembly.
- Multimeter: Helps you test electrical connections and troubleshoot issues.
- Protective gear: Safety goggles and gloves to protect yourself during the build.
Having these tools on hand will make the assembly process more efficient and enjoyable.
Required Materials
The materials you choose will directly impact the performance and durability of your lasercutter. Here’s a list of must-have items for your bill of materials (BOM):
- Laser module: A 20W to 60W laser is ideal for cutting and engraving materials like wood, acrylic, and leather.
- Frame components: Aluminum extrusions or sturdy wooden panels to construct the machine’s structure.
- Electronics kit: Includes a microcontroller (such as Arduino), stepper motors, motor drivers, and a power supply.
- Motion system parts: Timing belts, pulleys, and linear rails for smooth and precise movement.
- Wiring and connectors: Ensure proper electrical connections between components.
- Cooling system: Fans or water-cooling systems to prevent the laser module from overheating.
- Work surface: A heat-resistant base, such as a honeycomb panel, to support materials during cutting.
These materials form the backbone of your lasercutter. If you’re using a pre-packaged solution like the Algolaser DIY Kit Mini, many of these components will already be included, simplifying the process.
Optional Add-ons
While optional, these add-ons can enhance the functionality and usability of your lasercutter:
- Air assist system: Directs a stream of air to the cutting area, improving cutting quality and reducing burn marks.
- Enclosure: Protects you from laser exposure and contains fumes during operation.
- Exhaust fan: Removes smoke and fumes, keeping your workspace clean and safe.
- Rotary attachment: Allows you to engrave cylindrical objects like bottles or tumblers.
- Upgraded laser module: For those looking to cut thicker or more resilient materials.
These extras can elevate your DIY project, making your lasercutter more versatile and user-friendly.
Pro Tip: When selecting materials, consider the types and thicknesses of materials you plan to cut or engrave. A laser in the 20W to 60W range is sufficient for most home projects, but higher wattage may be necessary for tougher materials.
By carefully selecting your tools and materials, you set the foundation for a successful DIY lasercutter build. Whether you’re sourcing individual components or opting for a pre-assembled kit like the Algolaser DIY Kit Mini, planning ahead ensures a rewarding and efficient experience.
Preparing Your Workspace for Assembly
Creating a safe and efficient workspace is crucial when building your mini laser cutting machine. A well-organized environment not only ensures smooth assembly but also minimizes risks during the process. Follow these steps to set up your workspace and prioritize safety.
Setting Up a Safe and Efficient Workspace
Your workspace plays a significant role in the success of your DIY project. A clutter-free, well-lit area helps you focus and reduces the chances of errors. Here’s how you can prepare your workspace:
-
Choose a Stable Work Surface
Select a sturdy table or bench that can support the weight of your tools and materials. Ensure the surface is level to avoid misalignments during assembly. -
Organize Your Tools and Materials
Arrange your tools and components within easy reach. Use labeled containers or trays to keep small parts like screws, connectors, and wires organized. -
Ensure Proper Lighting
Bright lighting is essential for precision work. Use overhead lights or a desk lamp to illuminate your workspace, especially when handling small components. -
Set Up Ventilation
Good airflow is important, especially if you plan to test your laser module during assembly. Place your workspace near a window or use a fan to maintain ventilation. -
Create a Dedicated Area for Electronics
Keep electronic components away from liquids or potential hazards. Use an anti-static mat to protect sensitive parts like microcontrollers and motor drivers. -
Keep a Trash Bin Nearby
Dispose of packaging, wire trimmings, and other waste immediately. A clean workspace reduces distractions and keeps the area safe.
Pro Tip: Use a pegboard or tool rack to hang frequently used tools. This keeps them accessible and prevents clutter on your work surface.
Safety Precautions to Follow
Safety should always be your top priority when working on a DIY project involving lasers and electronics. Follow these precautions to protect yourself and others:
-
Wear Protective Gear
Always wear safety goggles to shield your eyes from accidental laser exposure or flying debris. Use gloves when handling sharp tools or hot components like a soldering iron. -
Avoid Flammable Materials
Keep flammable items, such as paper or solvents, away from your workspace. Lasers and soldering irons can ignite these materials. -
Unplug When Not in Use
Disconnect electronic components from the power supply when making adjustments. This prevents accidental shocks or short circuits. -
Handle the Laser Module with Care
Never look directly into the laser beam, even when it’s off. Treat the laser module as if it’s always active to avoid accidents. -
Keep Children and Pets Away
Restrict access to your workspace to prevent interruptions or accidents. Curious hands or paws can lead to injuries or damaged components. -
Have a Fire Extinguisher Nearby
Keep a small fire extinguisher within reach. It’s a precautionary measure in case of unexpected sparks or overheating. -
Follow Manufacturer Guidelines
If you’re using a pre-packaged kit like the Algolaser DIY Kit Mini, read the instructions carefully. Adhering to the guidelines ensures safe and proper assembly.
Important Reminder: Never operate the laser module without proper safety measures in place. Even low-powered lasers can cause serious harm if misused.
By setting up a well-organized workspace and following these safety precautions, you create an environment that supports both productivity and safety. Taking the time to prepare your workspace properly will make the assembly process smoother and more enjoyable.
Step-by-Step Guide on How to Make a Mini Laser Cutting Machine
Creating your own lasercutter can be an exciting and rewarding project. This section provides a detailed step-by-step instruction to guide you through the process. Follow these steps carefully to ensure a smooth assembly.
Building the Frame
The frame serves as the foundation of your lasercutter. A sturdy and well-constructed frame ensures stability and precision during operation. Here’s how you can build it:
-
Choose Your Frame Material
Use aluminum extrusions for a lightweight yet durable structure. Alternatively, wooden panels can work if you’re looking for a cost-effective option. Ensure the material is strong enough to support the laser module and motion system. -
Cut and Assemble the Frame
Measure and cut the frame components to the required dimensions. Use a measuring tape or ruler for accuracy. Secure the pieces together with screws and brackets. Tighten all connections using an Allen wrench to prevent wobbling. -
Add Support for the Work Surface
Install a flat, heat-resistant base, such as a honeycomb panel, within the frame. This surface will hold the materials you plan to cut or engrave. Ensure it sits level to avoid uneven cuts.
Pro Tip: Use clamps to hold the frame components in place while tightening screws. This helps maintain alignment and prevents shifting.
A well-built frame provides the stability needed for precise laser cutting and engraving.
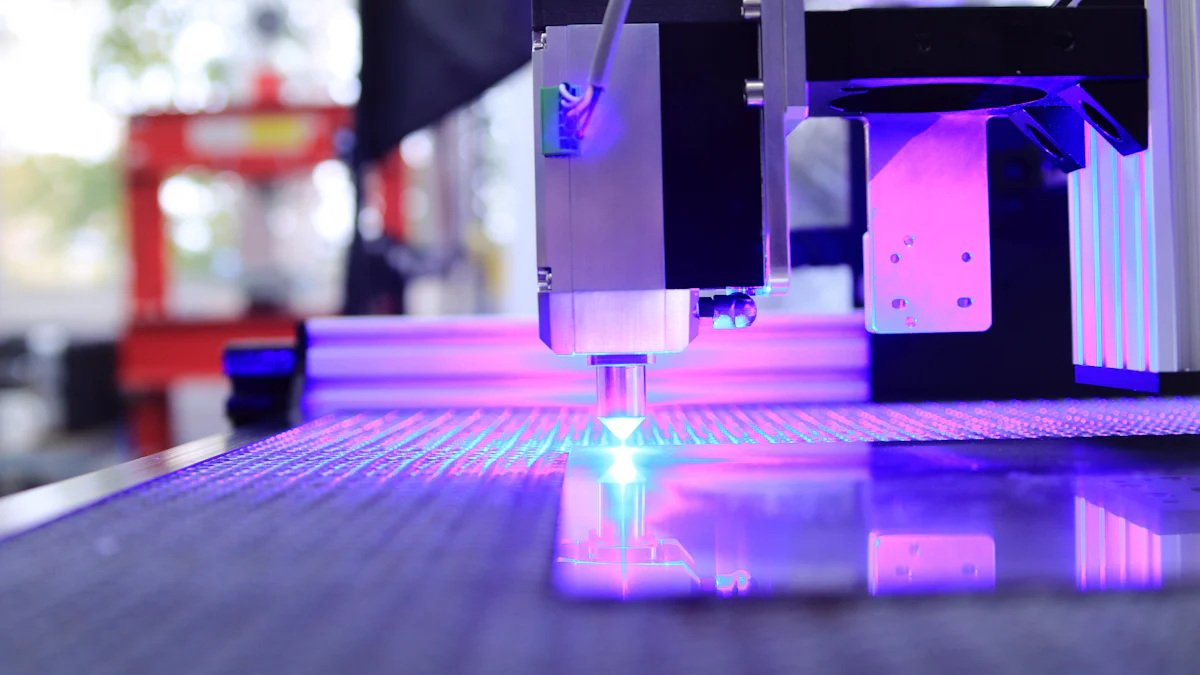
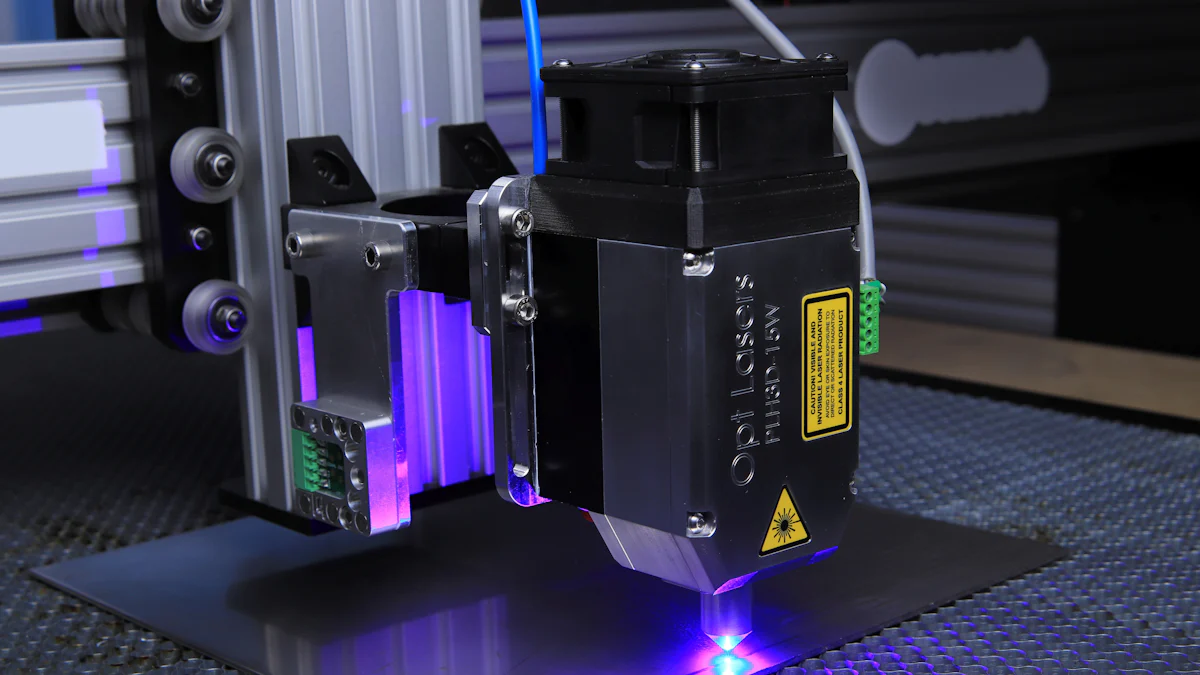
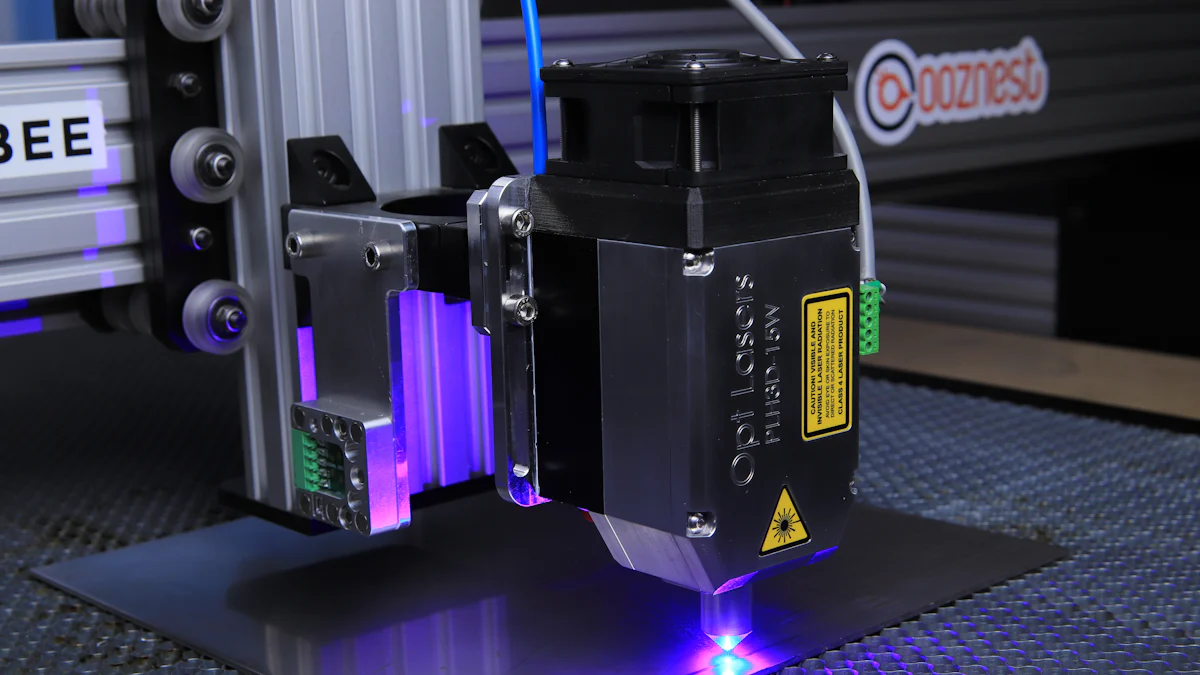
Installing the Laser Module
The laser module is the heart of your lasercutter. Proper installation is crucial for safety and performance. Follow these steps to install it:
-
Select the Right Laser Module
Choose a laser module with a power rating between 20W and 60W. This range works well for cutting and engraving materials like wood, acrylic, and leather. Ensure the module is compatible with your electronics kit. -
Mount the Laser Module
Attach the laser module to the frame using the mounting brackets provided in your kit. Position it securely to prevent movement during operation. Adjust the height based on the thickness of the materials you plan to use. -
Connect the Cooling System
Install a cooling system, such as a fan or water-cooling setup, to prevent the laser from overheating. Position the cooling components close to the laser module for maximum efficiency. -
Test the Laser Alignment
Power on the laser briefly to check its alignment. Use a piece of scrap material to ensure the beam hits the intended spot. Adjust the position if necessary.
Important Reminder: Never look directly into the laser beam. Always wear safety goggles when working with the laser module.
Proper installation of the laser module ensures optimal performance and reduces the risk of accidents.
Setting Up the Electronics
The electronics control the movement and operation of your lasercutter. Setting them up correctly is essential for smooth functionality. Here’s how to do it:
-
Install the Microcontroller
Use an Arduino with GRBL firmware to control the lasercutter. Mount the microcontroller on the frame or a dedicated electronics board. Connect it to your computer for programming and testing. -
Wire the Stepper Motors
Attach the stepper motors to the motion system. Connect the motor wires to the motor drivers included in your electronics kit. Follow the wiring diagram provided with your kit to avoid errors. -
Connect the Power Supply
Install a power supply that matches the voltage requirements of your components. Secure the power supply to the frame and connect it to the microcontroller and laser module. -
Organize the Wiring
Use zip ties or cable organizers to keep the wires neat and secure. Avoid loose wires, as they can interfere with the motion system or cause short circuits. -
Test the Electronics
Power on the system and run basic commands to test the motors and laser module. Ensure everything responds correctly before proceeding.
Pro Tip: Label the wires during installation. This makes troubleshooting easier if you encounter issues later.
Setting up the electronics properly ensures your lasercutter operates smoothly and efficiently.
By completing these steps, you’ll have a solid foundation for your mini laser cutting machine. The next steps will involve adding the motion system and performing the final assembly, which will bring your project closer to completion.
Adding the Motion System
The motion system is a critical component of your lasercutter. It ensures precise movement of the laser module, allowing you to achieve accurate cuts and engravings. Follow these steps to install and optimize the motion system for your mini laser cutting machine.
-
Install Linear Rails or Rods
Attach linear rails or rods to the frame. These components guide the motion of the laser module along the X and Y axes. Use clamps or brackets to secure them firmly. Ensure they are parallel to avoid misalignment during operation. -
Set Up Timing Belts and Pulleys
Connect timing belts to the stepper motors and pulleys. The belts transfer motion from the motors to the laser module. Measure and cut the belts to the correct length, ensuring they fit snugly without sagging. Tighten the belts to maintain tension, as loose belts can cause inaccuracies. -
Mount the Laser Carriage
Attach the laser module to a carriage that moves along the rails. Use screws or bolts to secure the carriage. Test its movement manually to ensure it glides smoothly without resistance. -
Align the Motion System
Check the alignment of the entire motion system. Use a ruler or measuring tape to verify that the rails, belts, and pulleys are straight and level. Misalignment can lead to uneven cuts or skipped steps. -
Connect the Stepper Motors
Attach the stepper motors to the frame and connect them to the belts. Secure the motors tightly to prevent vibrations. Double-check the wiring to ensure proper connections to the motor drivers. -
Test the Motion System
Power on the system and run basic commands to test the movement of the laser carriage. Observe its motion along the X and Y axes. Adjust the belts or rails if you notice any irregularities.
Pro Tip: Apply a small amount of lubricant to the rails or rods to reduce friction and extend their lifespan.
A well-installed motion system ensures your lasercutter operates with precision and consistency, making it suitable for detailed projects.
Final Assembly and Inspection
With the motion system in place, you’re ready to complete the final assembly of your mini laser cutting machine. This step brings all the components together and prepares your lasercutter for operation.
-
Secure All Components
Inspect the frame, laser module, electronics, and motion system. Tighten any loose screws or bolts. Ensure every part is securely attached to the frame. -
Install the Work Surface
Place the heat-resistant work surface, such as a honeycomb panel, within the frame. Align it with the laser module to ensure accurate cutting and engraving. Secure it to prevent movement during operation. -
Organize Wiring
Arrange the wires neatly using zip ties or cable organizers. Keep them away from moving parts to avoid tangling or damage. Label the wires for easy identification during maintenance. -
Perform a Full System Test
Power on the lasercutter and test all functions. Move the laser module along the X and Y axes. Activate the laser briefly to check its alignment and focus. Run a simple engraving or cutting test on scrap material to verify performance. -
Inspect for Safety
Double-check all safety measures. Ensure the laser module is properly mounted and the cooling system is functional. Confirm that the enclosure, if installed, provides adequate protection. -
Make Final Adjustments
Fine-tune the alignment of the laser and motion system. Adjust the height of the laser module based on the thickness of the materials you plan to use. Test again to confirm the adjustments.
Important Reminder: Never leave the lasercutter unattended during operation. Always follow safety guidelines to prevent accidents.
Completing the final assembly and inspection ensures your lasercutter is ready for use. Take pride in your work and enjoy the satisfaction of building a functional tool from scratch.
Calibration and Testing Your DIY Lasercutter
Once you’ve assembled your mini lasercutter, calibration and testing become essential steps. These processes ensure that your machine operates accurately and efficiently. Proper calibration aligns the laser and motion system, while testing verifies functionality and identifies potential issues. Follow this guide to fine-tune your lasercutter and prepare it for optimal performance.
Calibrating the Laser and Motion System
Calibration is the foundation of precision. Without it, your lasercutter may produce uneven cuts or misaligned engravings. Here’s how you can calibrate both the laser and motion system:
-
Align the Laser Beam
Place a piece of scrap material on the work surface. Activate the laser at low power and mark a small dot. Adjust the laser module until the beam hits the exact center of the target. Repeat this process for different positions on the work surface to ensure consistent alignment. -
Set the Focus
Adjust the laser module’s height to achieve the correct focus. Use a focus gauge or measure the distance between the laser lens and the material. A properly focused laser produces cleaner cuts and sharper engravings. -
Calibrate the X and Y Axes
Use a ruler or caliper to measure the movement of the laser carriage along the X and Y axes. Compare the actual movement to the commanded distance. If discrepancies exist, adjust the stepper motor settings in your microcontroller software. -
Test the Motion System
Run a simple pattern, such as a square or circle, to test the motion system. Observe the laser’s movement and check for smoothness and accuracy. Tighten belts or realign rails if you notice any irregularities.
Pro Tip: Perform calibration in a well-lit environment to see the laser’s path clearly. Use protective goggles even during low-power tests.
Proper calibration ensures that your lasercutter delivers precise results, making it suitable for detailed projects.
Running Initial Tests
Initial tests help you evaluate your lasercutter’s performance and identify areas for improvement. Start with simple tasks to build confidence in your machine’s capabilities.
-
Engraving Test
Select a basic design, such as a logo or text, and engrave it onto a piece of wood or acrylic. Observe the depth and clarity of the engraving. Adjust the laser power or speed settings if necessary. -
Cutting Test
Use a thin material, like cardboard or plywood, to test the cutting function. Create a small shape, such as a square or triangle, and check the edges for smoothness. Increase the laser power or reduce the cutting speed if the material doesn’t cut through completely. -
Material Compatibility Test
Experiment with different materials to understand your lasercutter’s capabilities. Test wood, acrylic, leather, and other materials you plan to use. Record the optimal settings for each material to streamline future projects. -
Repeatability Test
Run the same design multiple times to test the lasercutter’s consistency. Ensure that each result matches the previous one. Inconsistent results may indicate issues with the motion system or laser alignment.
Important Reminder: Always monitor the lasercutter during tests. Never leave it unattended, especially when testing new materials.
Initial tests provide valuable insights into your lasercutter’s performance and help you make necessary adjustments.
Troubleshooting Common Issues
Even with careful assembly and calibration, you may encounter issues during testing. Troubleshooting helps you resolve these problems and optimize your lasercutter’s performance.
-
Laser Not Cutting Through Material
- Check the laser focus and ensure it’s properly adjusted.
- Increase the laser power or reduce the cutting speed.
- Verify that the material is compatible with your laser’s wattage.
-
Uneven Cuts or Engravings
- Inspect the motion system for misaligned rails or loose belts.
- Recalibrate the X and Y axes to ensure accurate movement.
- Confirm that the work surface is level and stable.
-
Laser Beam Misalignment
- Realign the laser module to center the beam on the target.
- Tighten the mounting brackets to prevent movement during operation.
- Test the alignment at multiple points on the work surface.
-
Stepper Motors Not Responding
- Check the wiring connections between the motors and drivers.
- Test the motor drivers using a multimeter to ensure they’re functioning.
- Update the microcontroller firmware if the issue persists.
-
Overheating Components
- Ensure the cooling system is operational and positioned correctly.
- Avoid running the laser at maximum power for extended periods.
- Inspect the power supply for signs of overheating or damage.
Pro Tip: Keep a troubleshooting log to document issues and solutions. This record will help you address similar problems in the future.
Troubleshooting ensures that your lasercutter operates smoothly and reliably, allowing you to focus on creative projects.
Tips for Using and Maintaining Your Mini Laser Cutting Machine
Proper usage and maintenance of your mini laser cutting machine ensure its longevity and consistent performance. By following best practices and implementing a regular maintenance routine, you can maximize the efficiency of your lasercutter and avoid unnecessary repairs.
Best Practices for Operation
Operating your lasercutter effectively requires attention to detail and adherence to safety guidelines. These best practices will help you achieve precise results while protecting your equipment.
-
Understand Your Machine’s Capabilities
Familiarize yourself with the specifications of your lasercutter, including its power range and material compatibility. Knowing these limits prevents overloading the machine and ensures optimal performance. -
Adjust Power and Speed Settings
Tailor the power and speed settings to match the material and desired outcome. For example, lower power and slower speeds work well for detailed engravings, while higher power and faster speeds are better for cutting thicker materials. Proper adjustments reduce wear and tear on the laser module and improve cutting precision. -
Use Appropriate Materials
Stick to materials that are safe and suitable for laser cutting. Avoid materials like PVC, which release harmful fumes when cut. Always check the manufacturer’s guidelines for approved materials. -
Monitor the Machine During Operation
Never leave your lasercutter unattended while it’s running. Keep an eye on the process to ensure smooth operation and to address any issues immediately, such as material shifting or unexpected overheating. -
Keep the Work Surface Clean
Remove debris, dust, and residue from the work surface after each use. A clean surface ensures accurate cuts and prevents material damage. -
Log Your Settings
Maintain a record of the power, speed, and focus settings for different materials. This log saves time during future projects and helps you achieve consistent results.
Pro Tip: When learning how to use your lasercutter, start with simple designs and inexpensive materials. Gradually experiment with more complex projects as you gain confidence.
By following these practices, you’ll not only enhance the quality of your work but also extend the life of your lasercutter.
Maintenance Tips for Longevity
Regular maintenance is essential for keeping your lasercutter in top condition. A well-maintained machine delivers consistent results and minimizes the risk of breakdowns. Follow these tips to ensure your lasercutter remains reliable over time.
-
Clean the Laser Lens
Dust and residue can accumulate on the laser lens, reducing its effectiveness. Use a soft, lint-free cloth and a lens cleaning solution to gently wipe the lens. Perform this task weekly or after heavy use. -
Inspect and Tighten Components
Check the frame, belts, and screws for signs of wear or looseness. Tighten any loose parts to maintain stability and precision. Regular inspections prevent misalignments and mechanical failures. -
Lubricate Moving Parts
Apply a small amount of lubricant to the linear rails or rods to reduce friction. This keeps the motion system running smoothly and extends the lifespan of the components. -
Calibrate Regularly
Calibration fine-tunes your lasercutter for accuracy. Align the laser beam, adjust the focus, and test the motion system periodically. Proper calibration ensures consistent results and prevents material damage. -
Check the Cooling System
Ensure the cooling system, whether fan-based or water-cooled, operates efficiently. Overheating can damage the laser module and other components. Clean the cooling system regularly to remove dust and blockages. -
Replace Worn Parts
Over time, components like belts, pulleys, and the laser module may wear out. Replace these parts promptly to maintain performance. Keep spare parts on hand for quick replacements. -
Schedule Professional Maintenance
Have a qualified technician inspect your lasercutter annually. Professional checks identify hidden issues and ensure the machine operates at peak efficiency.
Important Reminder: Always unplug the machine before performing maintenance tasks. This precaution protects you from electrical shocks and accidental activation.
By incorporating these maintenance tips into your routine, you’ll protect your investment and enjoy reliable performance from your lasercutter for years to come.
You’ve now explored the key steps to assemble your own mini laser cutting machine, from gathering tools to final calibration. Completing this project is more than just a technical achievement—it’s a chance to create a tool tailored to your needs. Take pride in your successful build and experiment with creative applications, whether crafting, engraving, or prototyping. Share your experiences and improvements with others. Your insights could inspire someone else to embark on their own DIY journey and unlock new possibilities with their lasercutter.
FAQ
What materials can I cut or engrave with a mini laser cutting machine?
You can work with a variety of materials, including wood, acrylic, leather, cardboard, and certain types of fabric. These materials are ideal for creating personalized home décor, custom gifts, intricate models, and unique art pieces. Avoid materials like PVC, as they release harmful fumes when cut.
How powerful should the laser module be for home projects?
A laser module with a power range of 20W to 60W works well for most DIY projects. This range allows you to cut and engrave common materials like wood and acrylic. If you plan to work with thicker or more resilient materials, consider upgrading to a higher-wattage laser.
Is it safe to build and use a DIY laser cutting machine?
Yes, it is safe if you follow proper safety precautions. Always wear protective goggles, keep flammable materials away, and ensure your workspace has good ventilation. Never leave the machine unattended during operation, and consider adding an enclosure to contain fumes and protect against accidental exposure.
Can I use a pre-assembled kit instead of sourcing individual components?
Absolutely! Pre-assembled kits, like the Algolaser DIY Kit Mini, simplify the process by including all necessary components. These kits save time and reduce the complexity of sourcing parts. They are especially helpful for beginners who want a straightforward assembly experience.
How do I ensure precise cuts and engravings?
Precision depends on proper calibration and alignment. Adjust the laser focus, align the motion system, and test the machine with simple patterns. Regular maintenance, such as tightening belts and cleaning the laser lens, also ensures consistent accuracy.
What should I do if my laser cutter doesn’t cut through the material?
Start by checking the laser focus and ensuring it’s correctly adjusted. Increase the laser power or reduce the cutting speed. Verify that the material is suitable for your laser’s wattage. If the issue persists, inspect the motion system for misalignments or loose belts.
Can I use a laser cutting service instead of building my own machine?
Yes, using a laser cutting service is a great alternative. Services like SendCutSend handle the technical aspects, including machine selection and software setup. This option is ideal if you want professional results without the effort of building and maintaining your own machine.
How do I maintain my mini laser cutting machine?
Regular maintenance keeps your machine in top condition. Clean the laser lens weekly, lubricate moving parts, and inspect belts and screws for wear. Calibrate the laser and motion system periodically. Ensure the cooling system operates efficiently to prevent overheating.
What are some creative uses for a mini laser cutting machine?
You can create personalized items like engraved gifts, custom jewelry, and intricate art pieces. Laser cutters are also perfect for crafting unique home décor, prototyping designs, and making detailed models. The possibilities are endless when you combine creativity with precision.
Is a mini laser cutting machine suitable for beginners?
Yes, mini laser cutting machines are beginner-friendly, especially if you use a pre-assembled kit. The step-by-step assembly process helps you learn about the components and functionality. With proper guidance and safety measures, even first-time users can successfully build and operate one.
See Also
Maximizing Efficiency with Your Laser Cutting Machine
Understanding the Functionality of CNC Laser Cutters
A Simple Explanation of Laser Cutting Machine Operation