How to Make a Laser Cutting Machine at Home

Are you curious about how to make a laser cutting machine at home? This exciting project allows you to create a laser cutting machine tailored to your needs. By building your own laser cutting machine, you unlock endless possibilities for customization and personal use. Whether you're a DIY enthusiast or a small-scale manufacturer, a DIY laser cutter offers an economical solution for innovation. However, understanding the process and prioritizing safety is crucial. As you embark on this journey, remember that knowledge and caution are your best allies.
Understanding Laser Cutting Machines
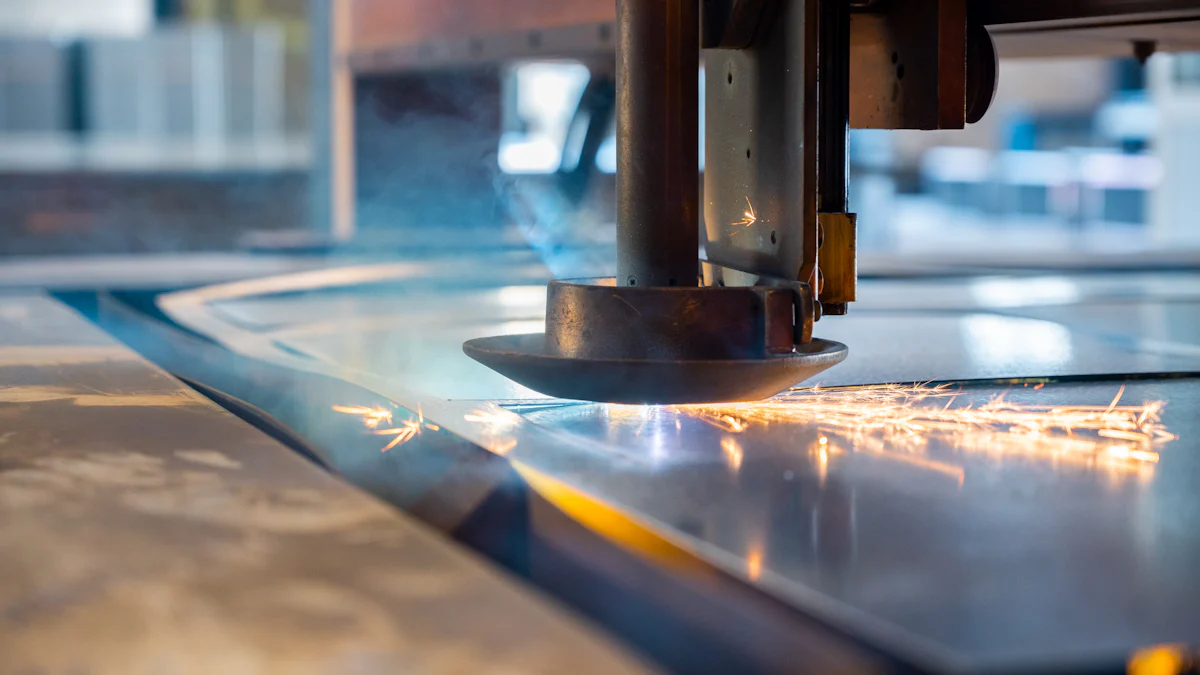
Laser cutting machines have revolutionized the way we approach precision cutting. These machines use high-power laser beams to cut materials with remarkable accuracy. The process involves focusing the laser on the material's surface, which melts, burns, or vaporizes it to create intricate designs. This method is not only fast but also highly efficient, making it a popular choice in industries like manufacturing, aerospace, and automotive.
How Laser Cutting Machines Work
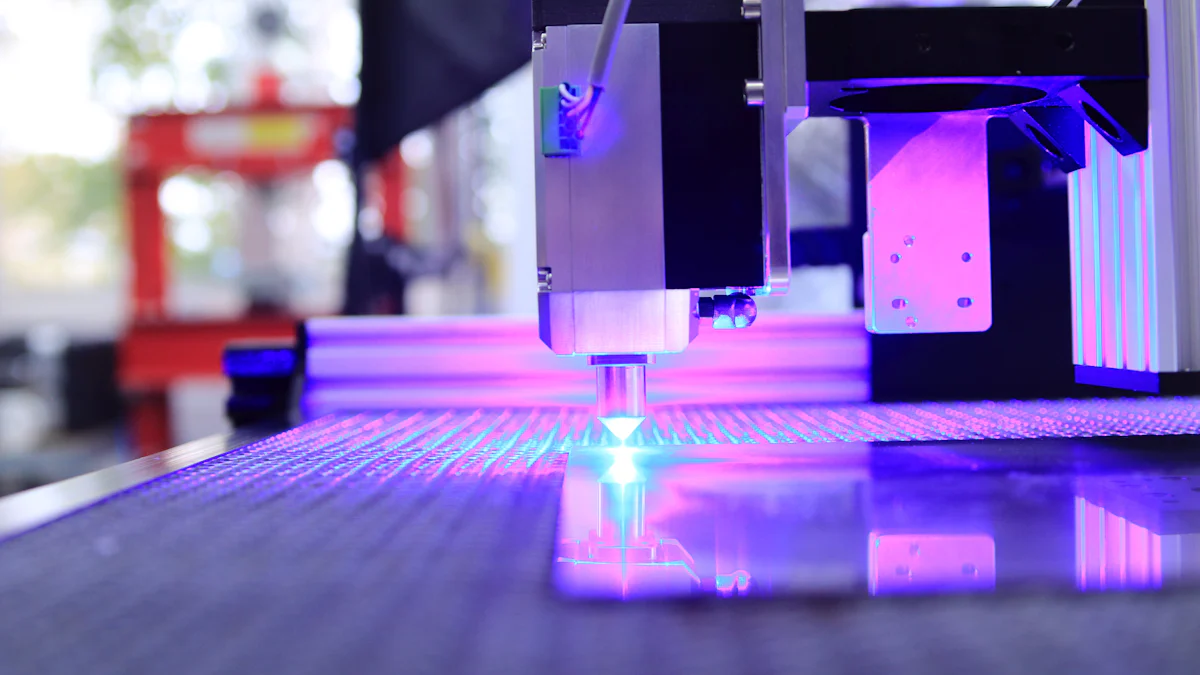
You might wonder how these machines achieve such precision. The secret lies in their automated nature. You upload your design to the laser cutter software, which then controls the laser's power, speed, and focus settings. This ensures that the laser cuts the material efficiently, following the exact specifications of your design. The result is a clean, precise cut that would be difficult to achieve manually.
Types of Laser Cutting Machines
Understanding the different types of laser cutting machines is crucial for selecting the right one for your needs. Each type has unique features and applications.
CO2 Lasers
CO2 lasers are among the most common types of laser cutting machines. They are known for their versatility and ability to cut a wide range of materials, including wood, acrylic, and some metals. If you're looking for a high quality co2 lasercutter, you'll find that it offers excellent precision and speed, making it ideal for both hobbyists and professionals.
Fiber Lasers
Fiber lasers are another popular choice, especially for cutting metals. They use a solid-state laser source, which provides a higher intensity beam compared to CO2 lasers. This makes them perfect for cutting through tougher materials like stainless steel and aluminum. Fiber lasers are also more energy-efficient, which can be a significant advantage if you're concerned about power consumption.
Diode Lasers
Diode lasers are typically used for engraving rather than cutting. They are smaller and less powerful than CO2 or fiber lasers, but they offer excellent precision for detailed work. If your projects involve intricate designs on softer materials, a diode laser might be the right choice for you.
By understanding how laser cutting machines work and the different types available, you can make an informed decision about which machine best suits your needs. Whether you're interested in a high quality co2 lasercutter or another type, knowing these details will help you achieve the best results in your DIY projects.
Planning Your DIY Laser Cutting Project
Embarking on a DIY laser cutting machine project requires careful planning. This stage sets the foundation for a successful build, ensuring that your machine meets your specific needs and functions efficiently.
Determining Your Requirements
Start by identifying what you want from your laser cutting machine. Consider the materials you plan to cut, such as wood, acrylic, or metal. Each material requires different laser power levels. Think about the size of the cutting area you need. A larger cutting area allows for bigger projects but may require more space in your workshop. Also, decide on the precision level you need. High precision is crucial for intricate designs.
Setting a Budget
Budgeting is a critical step in your project. Determine how much you are willing to spend on your laser cutter. Costs can vary widely based on the components you choose. A basic setup might cost less, but investing in higher-quality parts can improve performance and longevity. Consider expenses for the laser source, frame materials, and electronics. Remember to allocate funds for safety equipment, such as protective eyewear and ventilation systems.
Design Choices and Considerations
Your laser cutter design should reflect your requirements and budget. Choose a design that accommodates your selected laser type, whether it's CO2, fiber, or diode. Each type has its own advantages and limitations. Consider the machine's size and weight, ensuring it fits your workspace. Think about the ease of assembly and maintenance. A well-thought-out design simplifies the building process and enhances the machine's usability.
By systematically planning your DIY laser cutting machine, you pave the way for creative production at home or in your workshop. This approach not only helps you overcome potential challenges but also ensures that your machine is tailored to your specific needs.
Gathering Materials and Components
Embarking on the journey to build your own laser cutting machine requires careful selection of materials and components. This section will guide you through the essential materials and key components necessary for a successful build.
Essential Materials
To start, gather the essential materials that form the backbone of your laser cutting machine. These materials include:
- Frame Materials: Choose sturdy materials like aluminum or steel for the frame. These provide the necessary support and stability for the machine.
- Protective Enclosures: Use acrylic or polycarbonate sheets to create a protective enclosure. This shields you from laser exposure and contains any debris during operation.
- Cooling and Extraction Systems: Ensure you have proper cooling systems, such as air blasts, and exhaust systems to maintain safe and efficient operation.
These materials form the foundation of your machine, ensuring it operates smoothly and safely.
Key Components
The performance and application of your laser cutting machine depend heavily on its key components. Understanding these components will help you make informed decisions during the build process.
Laser Source
The laser source is the heart of your machine. It determines the power and type of materials you can cut. Options include:
- CO2 Lasers: Ideal for cutting non-metal materials like wood and acrylic.
- Fiber Lasers: Suitable for cutting metals such as stainless steel and aluminum.
- Diode Lasers: Best for engraving and detailed work on softer materials.
Choose a laser source that aligns with your project requirements.
Optics
Optics play a crucial role in directing and focusing the laser beam. They include mirrors and lenses that guide the laser to the cutting surface. High-quality optics ensure precision and efficiency in your cuts.
Frame Materials
The frame provides the structural integrity of your machine. As mentioned earlier, materials like aluminum or steel are preferred for their durability and strength. A well-constructed frame supports the components and withstands the rigors of operation.
Electronics
The electronics control the laser tube control system, which manages the laser's power and movement. This includes:
- Control Boards: These boards process the design files and translate them into movements for the laser.
- Motors and Drivers: They move the laser head along the X, Y, and Z axes, ensuring accurate cuts.
A reliable laser tube control system is essential for precise and consistent performance.
By carefully selecting these materials and components, you lay the groundwork for a high-quality laser cutting machine. This attention to detail ensures your machine meets your specific needs and delivers excellent results.
Step-by-Step Build Process

Building your own laser cutting machine at home can be an exciting and rewarding project. Follow this step-by-step instruction to ensure a successful build.
Frame Construction
-
Select Your Frame Material: Choose sturdy materials like aluminum or steel for the frame. These materials provide the necessary support and stability for your laser cutting machine.
-
Cut and Assemble the Frame: Measure and cut the frame materials according to your design specifications. Use screws or welding to assemble the frame securely. Ensure all joints are tight to prevent any wobbling during operation.
-
Install the Base: Attach a flat, stable base to the frame. This base will support the materials you cut. Ensure it is level to maintain precision in your cuts.
-
Add Protective Enclosures: Use acrylic or polycarbonate sheets to create a protective enclosure around the frame. This enclosure will shield you from laser exposure and contain any debris during operation.
Laser and Optics Setup
-
Mount the Laser Source: Securely attach the laser source to the frame. Ensure it is aligned properly with the cutting area. This alignment is crucial for accurate cuts.
-
Install Optics: Place mirrors and lenses to direct and focus the laser beam onto the cutting surface. Adjust these optics to ensure the laser beam is focused precisely on the material.
-
Test the Laser Path: Run a test to check the laser path. Ensure the beam travels smoothly and accurately along the intended path. Make any necessary adjustments to the optics for optimal performance.
Electronics and Wiring
-
Set Up Control Boards: Install the control boards that process design files and translate them into movements for the laser. These boards are essential for managing the laser's power and movement.
-
Connect Motors and Drivers: Attach motors and drivers to move the laser head along the X, Y, and Z axes. Ensure these components are wired correctly for accurate and smooth operation.
-
Wire the System: Connect all electronic components, including the laser source, control boards, and motors. Use appropriate wiring techniques to ensure a safe and reliable connection.
-
Test the Electronics: Power up the system and test the electronics. Ensure all components function correctly and the laser cutting machine operates smoothly.
By following these steps, you can build a functional and efficient laser cutting machine. This process not only enhances your understanding of laser technology but also provides a valuable tool for your creative projects.
Software Configuration
Configuring the software for your laser cutting machine is a crucial step. It ensures that your machine operates smoothly and accurately. Follow these steps to set up the software effectively:
-
Choose the Right Software: Select software compatible with your laser cutter's control board. Popular options include LaserGRBL and LightBurn. These programs offer user-friendly interfaces and robust features for managing your laser cutting projects.
-
Install the Software: Download and install the chosen software on your computer. Follow the installation instructions provided by the software developer. Ensure your computer meets the software's system requirements for optimal performance.
-
Connect Your Machine: Use a USB cable to connect your laser cutting machine to your computer. Ensure the connection is secure. The software should recognize the machine once connected.
-
Configure Machine Settings: Open the software and access the machine settings. Input the specifications of your laser cutter, such as the size of the cutting area and the type of laser source. Adjust the settings to match your machine's capabilities.
-
Calibrate the Laser: Use the software to calibrate the laser. This process involves setting the laser's power, speed, and focus. Perform test cuts on scrap material to fine-tune these settings. Calibration ensures precise and clean cuts.
-
Import Design Files: Import your design files into the software. Most laser cutting software supports common file formats like SVG, DXF, and AI. Ensure your designs are compatible with the software for seamless operation.
-
Simulate the Cutting Path: Before starting the actual cut, simulate the cutting path in the software. This feature allows you to preview the laser's movements and make any necessary adjustments. It helps prevent errors and material wastage.
-
Start Cutting: Once satisfied with the settings and simulation, initiate the cutting process. Monitor the machine closely during the first few cuts to ensure everything operates correctly. Make adjustments as needed for optimal results.
By following these steps, you can configure the software for your DIY laser cutting machine effectively. Proper software setup enhances the machine's performance and ensures successful cutting projects.
Testing and Calibration
Testing and calibrating your laser cutting machine ensures it operates efficiently and safely. This process involves several steps to verify that all components function correctly and that the machine delivers precise cuts.
Initial Testing Procedures
-
Power On the Machine: Begin by powering on your laser cutting machine. Ensure all connections are secure and that the machine boots up without any errors.
-
Check the Laser Path: Use the control software to run a test pattern. This pattern helps you verify that the laser beam follows the intended path accurately. Observe the movement of the laser head to ensure it aligns with the design specifications.
-
Inspect the Optics: Examine the mirrors and lenses for any dust or debris. Clean them if necessary to maintain a clear laser path. Properly aligned optics are crucial for achieving precise cuts.
-
Test the Cooling System: Activate the cooling system and check for proper airflow. A functioning cooling system prevents the laser from overheating, which can affect performance and safety.
-
Verify Safety Features: Ensure all safety features, such as protective enclosures and emergency stop buttons, are operational. These features protect you during the machine's operation.
Calibration Techniques
-
Adjust Laser Power: Use the control software to set the laser power according to the material you plan to cut. Different materials require different power levels for optimal results.
-
Calibrate Speed and Focus: Adjust the speed and focus settings in the software. Perform test cuts on scrap material to fine-tune these settings. Proper calibration ensures clean and precise cuts.
-
Align the Laser Beam: Use alignment tools to ensure the laser beam is centered and focused on the cutting surface. Misalignment can lead to inaccurate cuts and wasted material.
-
Perform Test Cuts: Conduct test cuts on various materials to verify the machine's performance. Adjust the settings as needed to achieve the desired cut quality.
Troubleshooting Common Issues
-
Inconsistent Cuts: If you notice inconsistent cuts, check the alignment of the laser beam and the condition of the optics. Clean or adjust them as necessary.
-
Overheating: If the machine overheats, inspect the cooling system for blockages or malfunctions. Ensure the cooling fans and exhaust systems operate correctly.
-
Software Errors: If you encounter software errors, update the control software to the latest version. Check for compatibility issues with your operating system.
-
Mechanical Jams: If the laser head jams, inspect the motors and drivers for any obstructions. Lubricate moving parts to ensure smooth operation.
By following these testing and calibration procedures, you can optimize the performance of your laser cutting machine. Regular maintenance and adjustments help maintain precision and extend the machine's lifespan.
Safety Considerations
When building and operating a laser cutting machine, safety should be your top priority. Understanding and implementing safety measures will protect you and those around you from potential hazards.
Laser Safety Precautions
Laser beams can cause serious injuries if not handled properly. You must take specific precautions to ensure safe operation:
- Avoid Direct Exposure: Never look directly into the laser beam. Even brief exposure can damage your eyes.
- Use Safety Goggles: Always wear safety goggles designed for laser protection. These goggles shield your eyes from harmful laser radiation.
- Install a Safety Enclosure: A safety enclosure around the laser cutting machine prevents accidental exposure to the laser beam. It also contains debris and fumes generated during cutting.
Protective Gear and Equipment
Wearing the right protective gear is essential when working with a laser cutting machine. This gear minimizes the risk of injury:
- Protective Clothing: Wear long sleeves and pants made of non-flammable materials. This clothing protects your skin from burns and flying debris.
- Gloves: Use gloves to handle materials and components safely. They provide a barrier against sharp edges and hot surfaces.
- Ventilation System: Ensure your workspace has proper ventilation. A good ventilation system removes harmful fumes and smoke produced during cutting.
Safe Operating Practices
Adopting safe operating practices ensures the efficient and secure use of your laser cutting machine:
- Regular Maintenance: Perform regular maintenance checks on your machine. This includes cleaning optics, checking alignment, and ensuring all components function correctly.
- Calibration: Regularly calibrate your machine to maintain cutting accuracy and system stability. Proper calibration improves beam quality and cutting speed.
- Emergency Procedures: Familiarize yourself with emergency procedures. Know how to quickly shut down the machine in case of a malfunction.
By following these safety considerations, you create a safer environment for your laser cutting projects. Prioritizing safety not only protects you but also enhances the performance and longevity of your machine.
Building a DIY laser cutting machine involves several key steps. You start by understanding the types of lasers and selecting the right components. Then, you carefully plan and gather materials before assembling the machine. Testing and calibration ensure precision, while safety measures protect you during operation. Take your time and enjoy the process. This project not only enhances your skills but also provides a valuable tool for creativity. For successful operation, regularly maintain your machine and follow safety guidelines. Knowing how to use your lasercutter effectively will maximize its potential and longevity.
FAQ
What materials can I cut with a DIY laser cutting machine?
You can cut a variety of materials with a DIY laser cutting machine. Common materials include wood, acrylic, and some metals. The type of laser you use will determine the materials you can cut. CO2 lasers work well for non-metal materials, while fiber lasers are better for metals.
How much does it cost to build a laser cutting machine at home?
The cost of building a laser cutting machine at home varies. It depends on the components you choose. Basic setups can cost under $150, while more advanced machines can exceed $900. Consider your budget and project needs when selecting parts.
Is it safe to build and operate a laser cutting machine at home?
Yes, it is safe if you follow proper safety guidelines. Always wear protective gear, such as safety goggles and gloves. Ensure your workspace has good ventilation. Install safety enclosures around the machine to prevent accidental exposure to the laser beam.
How do I choose the right laser for my DIY project?
Choose the right laser based on the materials you plan to cut. CO2 lasers are versatile and suitable for non-metal materials. Fiber lasers are ideal for cutting metals. Diode lasers work well for engraving detailed designs on softer materials.
Can I use open-source designs for my laser cutting machine?
Yes, you can use open-source designs. Many online resources offer designs and kits for DIY laser cutters. These resources provide a cost-effective way to build your machine. Ensure the design meets your project requirements before starting.
How do I maintain my DIY laser cutting machine?
Regular maintenance is crucial. Clean the optics and check the alignment frequently. Ensure the cooling system works properly. Perform regular calibration to maintain cutting accuracy. Follow the manufacturer's guidelines for specific maintenance tasks.
What software should I use with my laser cutting machine?
Choose software compatible with your machine's control board. Popular options include LaserGRBL and LightBurn. These programs offer user-friendly interfaces and robust features. They help manage your laser cutting projects effectively.
How do I troubleshoot common issues with my laser cutter?
Start by checking the alignment of the laser beam and the condition of the optics. Ensure the cooling system functions correctly. Update the control software if you encounter errors. Inspect motors and drivers for obstructions if the laser head jams.
Can I upgrade my DIY laser cutting machine in the future?
Yes, you can upgrade your machine. You might want to add more powerful lasers or improve the control system. Consider upgrading the frame for better stability. Ensure any upgrades are compatible with your existing setup.
What are the benefits of building my own laser cutting machine?
Building your own machine offers customization and personal use. You gain valuable skills and knowledge about laser technology. A DIY laser cutter provides an economical solution for innovation. It allows you to tailor the machine to your specific needs.
See Also
Maximizing Efficiency With Your Laser Cutting Machine
Comparative Guide to Laser Cutting Machine Prices
Understanding the Functionality of CNC Laser Cutters