How to Make Homemade Laser Cutting Machine Designs Compared

Laser cutting machines have revolutionized the way you can bring creative ideas to life. Whether you're crafting intricate designs, personalizing products, or building functional prototypes, these tools open up endless possibilities. Understanding the variety of DIY laser cutter designs is crucial. It helps you choose a machine that fits your needs, budget, and skill level. DIY options also let you customize features, save money, and even learn how to make homemade laser cutting machine setups from scratch. This hands-on approach bridges the gap between hobby projects and professional-grade results.
Overview of Laser Cutter Types
When diving into the world of laser cutting technology, understanding the different types of laser cutters is essential. Each type has unique strengths, making it suitable for specific applications. Let’s explore the most common options and see how they compare.
CO2 Laser Cutters
Description and Applications
CO2 laser cutters are among the most popular and versatile options available. They use a carbon dioxide gas mixture to generate a laser beam, making them ideal for cutting non-metal materials like wood, acrylic, leather, and some plastics. These machines excel in creating smooth edges and intricate designs, making them a favorite for hobbyists and professionals alike.
Fun Fact: CO2 lasers are highly efficient and widely used for engraving and cutting non-metallic materials due to their precision and adaptability.
Advantages and Disadvantages
CO2 laser cutters offer several advantages:
- They handle a wide variety of materials.
- They produce clean cuts with minimal material contamination.
- They are relatively affordable compared to other types.
However, they also have limitations:
- They consume more energy during operation.
- They cannot cut metals effectively.
- Maintenance can be higher due to the wear and tear of components.
Best Use Cases
CO2 laser cutters are the best choice for projects involving non-metals. Whether you’re crafting custom signs, engraving intricate patterns, or working on thick materials like wood (over 10mm), these machines deliver excellent results. They are perfect for small businesses, DIY enthusiasts, and creative professionals.
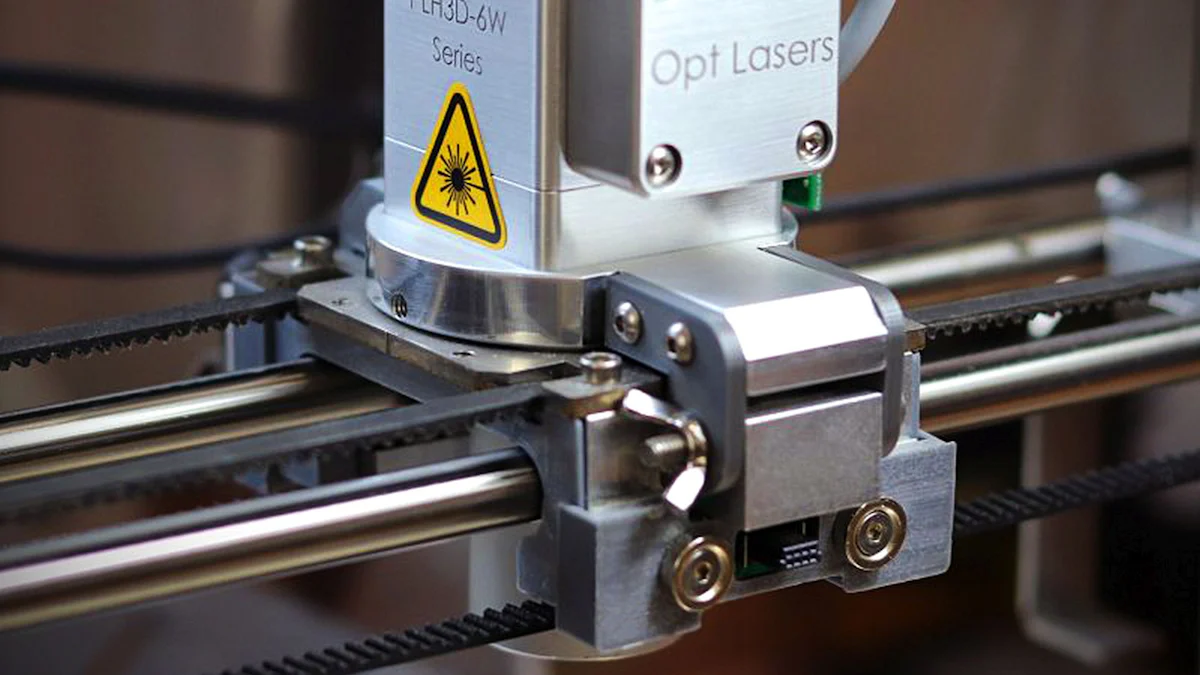
Diode Laser Cutters
Description and Applications
Diode laser cutters are compact and user-friendly, making them a great entry point for beginners. These machines use semiconductor diodes to produce a laser beam. While they are less powerful than CO2 lasers, they are excellent for engraving and light cutting tasks on materials like paper, thin wood, and soft plastics.
Advantages and Disadvantages
Here’s what makes diode laser cutters stand out:
- They are portable and easy to set up.
- They are energy-efficient and require minimal maintenance.
- They are budget-friendly, making them accessible to hobbyists.
On the downside:
- They struggle with thicker or harder materials.
- Their cutting speed is slower compared to other types.
- They are not suitable for heavy-duty or industrial applications.
Best Use Cases
Diode laser cutters shine in engraving projects and light-duty cutting tasks. If you’re personalizing items like phone cases, creating intricate paper designs, or experimenting with small-scale projects, this type of laser cutter is your best bet.
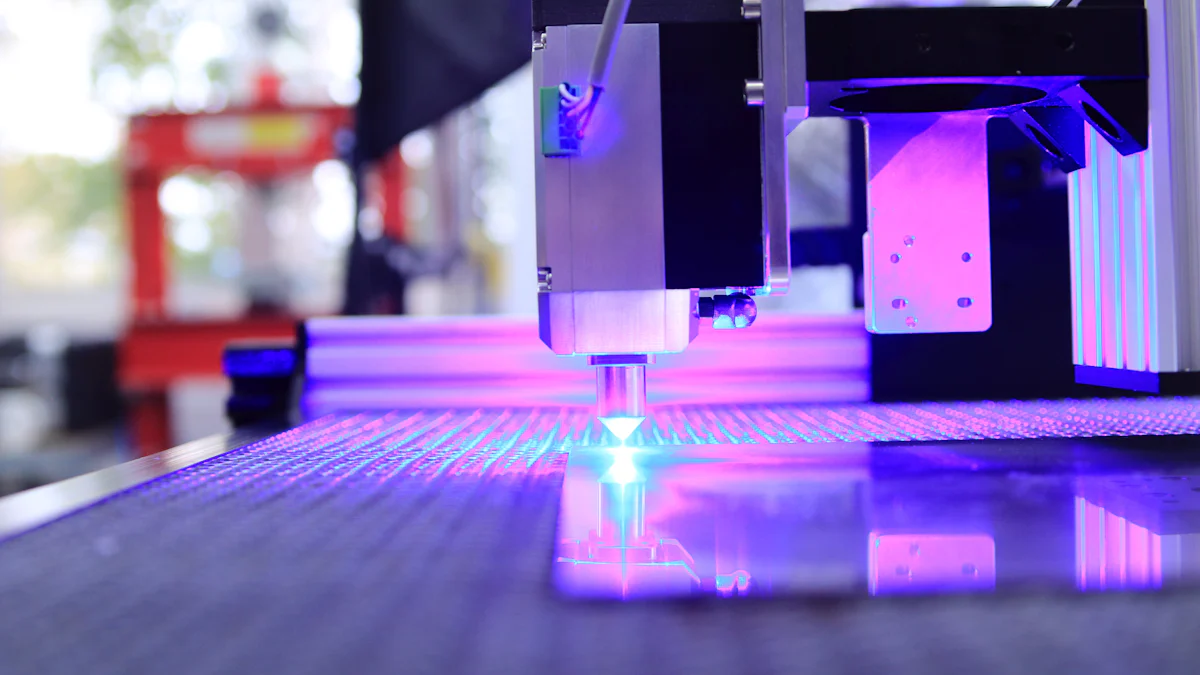
Fiber Laser Cutters
Description and Applications
Fiber laser cutters are designed for precision and power. They use high-quality laser beams generated through optical fibers, making them ideal for cutting metals such as stainless steel, carbon steel, and aluminum alloys. These machines are known for their efficiency and durability, making them a top choice for industrial applications.
Did You Know? Fiber lasers boast high energy conversion efficiency, which reduces operating costs and ensures consistent performance.
Advantages and Disadvantages
Fiber laser cutters offer impressive benefits:
- They deliver unmatched precision and speed.
- They require low maintenance and have a long lifespan.
- They are highly effective for metal cutting.
However, they come with challenges:
- They are more expensive than other types.
- They are not suitable for non-metal materials.
- They require advanced skills to operate effectively.
Best Use Cases
Fiber laser cutters are the best laser cutter for metalworking projects. Whether you’re fabricating machine parts, creating intricate jewelry, or working on automotive components, these machines provide exceptional results. They are ideal for professionals and industries requiring high precision.
UV Laser Cutters
Description and Applications
UV laser cutters stand out for their precision and ability to work on delicate materials. These machines use ultraviolet light to create a laser beam with a shorter wavelength, which allows for highly focused energy. This makes them perfect for intricate tasks that require minimal heat impact. You’ll find UV lasers commonly used in industries like electronics, medical devices, and fine jewelry.
Quick Insight: The shorter wavelength of UV lasers enables "cold cutting," which reduces thermal damage and ensures cleaner results on sensitive materials.
UV laser cutters excel at engraving and cutting materials such as glass, ceramics, thin metals, and certain plastics. Their precision makes them ideal for micro-machining tasks, like creating circuit boards or engraving detailed patterns on small surfaces.
Advantages and Disadvantages
UV laser cutters bring several benefits to the table:
- High Precision: They deliver unmatched accuracy, making them ideal for detailed work.
- Minimal Heat Damage: The cold cutting process prevents warping or discoloration of materials.
- Versatility: They can handle a wide range of materials, including fragile and heat-sensitive ones.
However, there are some drawbacks you should consider:
- Higher Cost: UV laser cutters are more expensive than CO2 or diode lasers.
- Slower Cutting Speed: They may take longer to complete tasks compared to other laser types.
- Limited Power: They are not suitable for cutting thick or heavy-duty materials.
Best Use Cases
UV laser cutters shine in projects where precision and material integrity are critical. If you’re working on tasks like engraving intricate designs on glassware, creating medical device components, or producing detailed circuit boards, this type of laser cutter is your best choice. They are also excellent for industries that demand high-quality finishes without compromising the material’s structure.
Pro Tip: If your projects involve delicate materials or require extreme detail, investing in a UV laser cutter can save you time and ensure professional-grade results.
Key Features to Consider in DIY Laser Cutter Designs
When building or choosing a DIY laser cutter, understanding the key features can make all the difference. These features determine how well your machine performs and whether it meets your project needs. Let’s break down the most important aspects you should focus on.
Power Output
Importance for Cutting Performance
Power output directly impacts the performance of your laser cutter. A higher power output allows the machine to cut through thicker materials with ease. For example, if you’re working on wood or acrylic, a 40W laser might suffice. However, for tougher materials like metal, you’ll need a machine with at least 100W. The right power level ensures clean cuts and reduces the chances of material damage.
Tip: If you’re new to laser cutting technology, start with a lower-power machine. It’s easier to handle and perfect for lighter projects.
Impact on Material Compatibility
The power output also determines the types of materials your laser cutter can handle. Lower-powered machines, like diode lasers, work well for engraving or cutting thin materials such as paper or soft plastics. On the other hand, higher-powered CO2 or fiber lasers are better suited for metal fabrication or cutting dense materials. Matching the power output to your material ensures optimal cutting precision and efficiency.
Material Compatibility
Common Materials for Laser Cutting
Laser cutters can work with a wide range of materials, but not all machines are compatible with every type. Common materials include wood, acrylic, leather, glass, and certain metals. For instance, CO2 lasers excel at cutting non-metals, while fiber lasers are ideal for metal fabrication. Knowing what materials you’ll use most often helps you pick the right machine.
Quick Insight: UV laser cutters are perfect for delicate materials like glass or ceramics because they minimize heat damage.
How to Choose Based on Project Needs
Your project goals should guide your choice of materials and machine. If you’re engraving intricate designs on glassware, a UV laser cutter offers unmatched precision. For heavy-duty tasks like cutting steel or aluminum, a fiber laser cutter is the best option. Always consider the thickness and type of material before deciding on a laser cutter design.
Precision and Cutting Speed
Why Precision Matters for DIY Projects
Precision is crucial for achieving professional-quality results in DIY projects. Whether you’re engraving detailed patterns or cutting complex shapes, the accuracy of your laser cutter determines the final outcome. Machines like UV and fiber lasers are known for their high precision, making them ideal for intricate tasks.
Pro Tip: Look for a machine with adjustable settings to fine-tune the cutting precision based on your project.
Balancing Speed and Accuracy
Cutting speed plays a big role in how quickly you can complete a project. However, faster speeds often compromise accuracy. For DIY projects, it’s important to find a balance. A slower speed ensures cleaner cuts and better detail, while a moderate speed works well for less intricate designs. Machines with variable speed settings give you the flexibility to adjust based on your needs.
Did You Know? Fiber lasers combine high cutting speed with excellent accuracy, making them a popular choice for metal fabrication.
Cost and Budget
When planning your DIY laser cutter project, understanding the cost involved is essential. A well-thought-out budget ensures you get the best value without overspending. Let’s explore how you can evaluate cost-effectiveness and stay within your financial limits.
Evaluating Cost-Effectiveness
The first step in managing your expenses is assessing the cost-effectiveness of your choices. This means balancing the features you need with the price you’re willing to pay. For example, a UV laser cutter might seem expensive upfront, but its precision and ability to handle delicate materials could save you money in the long run by reducing material waste. Always consider the long-term benefits of investing in quality components.
Pro Tip: Don’t just focus on the initial purchase price. Factor in maintenance, replacement parts, and energy consumption when evaluating the total costs of a machine.
Another way to ensure cost-effectiveness is by comparing different designs. Some DIY plans might require fewer materials or simpler tools, which can significantly lower your expenses. Look for designs that match your skill level and project needs without unnecessary complexity.
Tips for Staying Within Budget
Sticking to a budget doesn’t mean compromising on quality. Here are some practical tips to help you manage your costs effectively:
-
Start Small: If you’re new to laser cutting, begin with a basic design. Diode laser cutters, for instance, are affordable and perfect for light-duty tasks. You can always upgrade later as your skills and needs grow.
-
Repurpose Materials: Check your garage or local thrift stores for materials you can reuse. Many DIY enthusiasts build frames or housings from scrap metal or wood, cutting down on costs.
-
Shop Smart: Compare prices across multiple suppliers. Online marketplaces often have competitive deals on laser components like mirrors, lenses, and power supplies. Bulk purchases can also reduce per-unit costs.
-
Join Communities: Online forums and maker groups are treasure troves of advice. Members often share tips on sourcing affordable parts or even offer second-hand components at reduced cost.
-
DIY Where Possible: Building certain parts yourself, like a custom enclosure or cooling system, can save significant costs. Plus, it adds a personal touch to your machine.
Quick Insight: Many DIY laser cutter enthusiasts recommend starting with open-source designs. These plans are free and often come with detailed instructions, helping you save on design costs.
By carefully evaluating your options and following these tips, you can create a high-performing laser cutter without breaking the bank. Remember, the goal is to maximize value while keeping your costs under control.
Laser Cutter Comparison of Popular DIY Designs
When exploring DIY laser cutting machine options, comparing different designs helps you find the one that fits your needs. Each design offers unique features, assembly challenges, and performance levels. Let’s dive into three popular designs and see how they stack up.
Design A
Features and Specifications
Design A focuses on simplicity and versatility. It typically uses a diode laser, making it ideal for light-duty cutting and engraving tasks. This design often includes adjustable power settings, allowing you to work on materials like thin wood, paper, and soft plastics. Its compact size makes it perfect for small workspaces.
Key Highlight: Diode lasers in this design are energy-efficient and require minimal maintenance, making them a great choice for beginners.
Assembly Difficulty
You’ll find Design A relatively easy to assemble. Most DIY plans for this design come with straightforward instructions and require basic tools. The frame often uses lightweight materials like aluminum, which simplifies the process. Even if you’re new to DIY projects, you can complete this setup without much hassle.
Performance and Cost
Design A delivers decent performance for its price. While it doesn’t handle thick or hard materials, it excels in precision and accuracy for detailed designs. The cost is budget-friendly, making it an excellent entry point for hobbyists. However, its slower cutting speed may not suit large-scale projects.
Pro Tip: If you’re looking for a low-cost option for engraving or light cutting, Design A is a solid choice.
Design B
Features and Specifications
Design B steps up in power and capability. It often incorporates a CO2 laser, which allows for efficient cutting and engraving on a wider range of materials. You can work with wood, acrylic, leather, and even some thin metals. This design usually includes a larger cutting bed, giving you more flexibility for bigger projects.
Did You Know? CO2 lasers are known for their smooth edges and high accuracy, making them a favorite for crafting and prototyping.
Assembly Difficulty
Assembling Design B requires more effort compared to Design A. The CO2 laser components demand careful alignment, and the frame is typically more robust. You’ll need intermediate DIY skills and access to tools like a drill and soldering iron. While the process takes longer, the result is a more powerful and versatile machine.
Performance and Cost
Design B offers a great balance between performance and cost. It handles thicker materials and produces cleaner cuts, making it suitable for both cutting and engraving. The price is higher than Design A, but the added capabilities justify the investment. If you’re serious about laser cutting, this design provides excellent value.
Quick Insight: Design B is perfect for users who want to tackle more complex projects without breaking the bank.
Design C
Features and Specifications
Design C is the powerhouse of DIY laser cutter designs. It often features a fiber laser, which excels in cutting metals like stainless steel, carbon steel, and aluminum. This design prioritizes precision and speed, making it ideal for industrial-level tasks. Advanced features like automated focusing and cooling systems enhance its performance.
Scientific Research Findings: Fiber lasers deliver high energy efficiency and consistent results, making them a top choice for metal cutting.
Assembly Difficulty
Design C is the most challenging to assemble. The components are more complex, and the setup requires advanced technical skills. You’ll need to source high-quality parts and ensure precise calibration. This design is best suited for experienced DIYers or those willing to invest significant time in the build.
Performance and Cost
Design C outshines the others in performance. It cuts through thick metals with ease and maintains exceptional accuracy. However, this level of performance comes at a premium. The cost is significantly higher, and maintenance can add to the expenses. If you need a professional-grade laser cutting machine, Design C is worth the investment.
Pro Tip: Choose Design C if your projects demand efficient cutting of metals and high precision.
By comparing these designs, you can identify the one that aligns with your goals. Whether you’re a beginner looking for an affordable option or an expert seeking industrial-grade performance, there’s a DIY laser cutter design for you.
Step-by-Step Guide on How to Make Homemade Laser Cutting Machine
Creating your own laser cutting machine can feel like a big project, but breaking it into manageable steps makes it achievable. This guide walks you through the process, from understanding your needs to assembling your machine. Let’s dive in!
Assessing Your Needs
Before you start building, take a moment to figure out what you need from your laser cutter. This step ensures your machine aligns with your goals and resources.
Identifying Primary Use Cases
Ask yourself: What will you use the laser cutter for? Are you planning to engrave intricate designs, cut thick materials, or experiment with light-duty tasks? For example, if you want to work on delicate materials like paper or glass, a UV laser might be the right choice. On the other hand, if you’re cutting wood or acrylic, a CO2 laser cutter could be more suitable. Defining your primary use cases helps narrow down the type of machine you’ll build.
Determining Skill Level and Budget
Next, evaluate your technical skills and budget. If you’re new to DIY projects, start with a simpler design like a diode laser cutter. These are easier to assemble and cost less. For those with advanced skills, a fiber laser cutter offers more power and precision but requires a bigger investment. Keep in mind that DIY laser engraver kits are generally cheaper than prebuilt desktop laser cutters, but they require assembly. Balancing your skills and budget ensures a smoother building process.
Researching and Comparing Designs
Once you know your needs, it’s time to explore different designs. This step helps you find a reliable plan that matches your goals.
Finding Reliable DIY Plans
Search for DIY plans from trusted sources. Online maker communities, forums, and open-source platforms are great places to start. Look for plans with detailed instructions, clear diagrams, and a list of required materials. Many enthusiasts share their experiences, so you can learn from their successes and challenges. A good plan saves you time and reduces errors during assembly.
Pro Tip: Check reviews or feedback from others who’ve used the same plan. Their insights can help you avoid common pitfalls.
Evaluating Design Options
Compare the features of various designs. Some prioritize simplicity, while others focus on power or precision. For example:
- Basic Designs: Ideal for beginners, these often use diode lasers and are perfect for engraving or light cutting.
- Intermediate Designs: These typically feature CO2 lasers, offering versatility for cutting and engraving a wider range of materials.
- Advanced Designs: Fiber laser-based setups excel in metal cutting but require more expertise and a higher budget.
Choose a design that aligns with your skill level and project requirements. Remember, simpler designs are easier to build, while advanced ones offer more capabilities.
Building or Assembling Your Laser Cutter
Now comes the exciting part—bringing your laser cutter to life! With the right tools and preparation, you can assemble your machine successfully.
Tools and Materials Required
Gather all the tools and materials before starting. Here’s a basic checklist:
- Frame Materials: Aluminum extrusions or wood for the structure.
- Laser Module: Diode, CO2, or fiber laser, depending on your design.
- Electronics: Power supply, control board, and wiring.
- Optics: Mirrors and lenses for directing the laser beam.
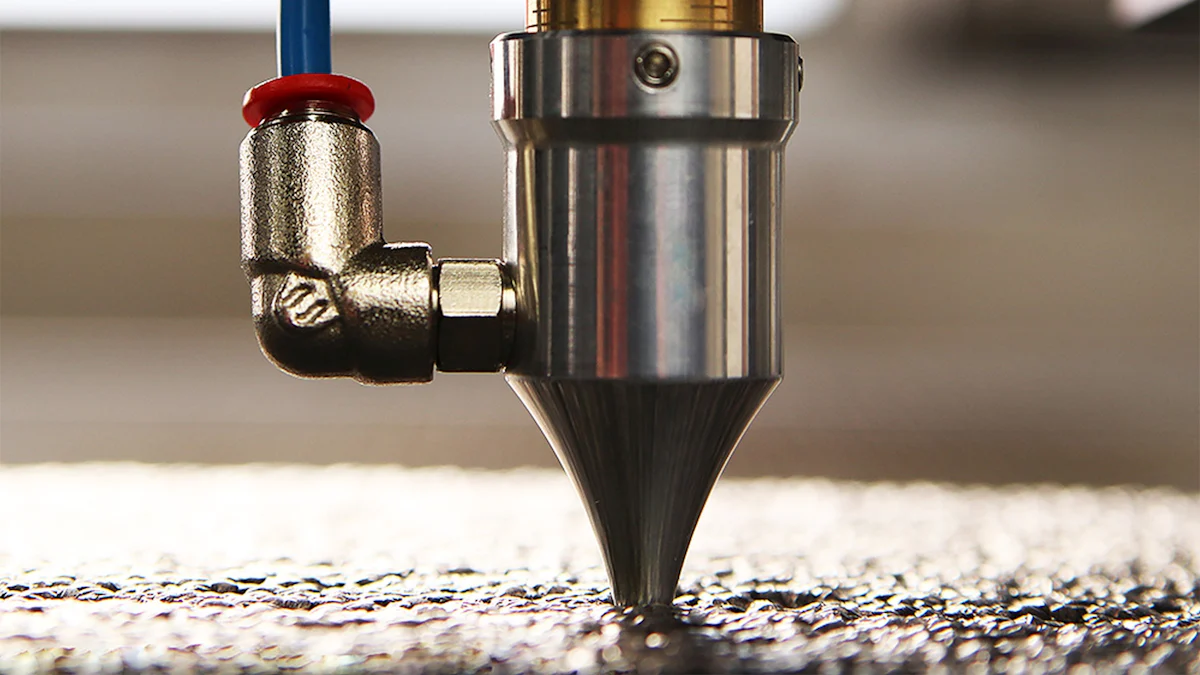
- Cooling System: Essential for CO2 and fiber lasers to prevent overheating.
- Safety Gear: Goggles and gloves to protect yourself during assembly and operation.
You’ll also need basic tools like a screwdriver, soldering iron, and multimeter. Having everything ready ensures a smoother workflow.
Tips for Successful Assembly
Follow these tips to make the assembly process easier:
-
Read the Instructions Thoroughly: Go through the entire plan before starting. Understanding the steps helps you avoid mistakes.
-
Work in a Well-Lit Space: A clean, organized workspace makes it easier to handle small components and tools.
-
Test Components Individually: Before assembling, test each part to ensure it works. For example, check the laser module and power supply for functionality.
-
Take Your Time: Rushing can lead to errors. Assemble each section carefully and double-check your work.
-
Join Online Communities: If you get stuck, maker forums and DIY groups can provide guidance. Many members are happy to share advice or troubleshoot issues.
Quick Insight: Building your own laser cutter not only saves money but also gives you a deeper understanding of how the machine works. This knowledge can help you troubleshoot and upgrade your setup in the future.
By following these steps, you’ll have a functional homemade laser cutting machine tailored to your needs. Whether you’re a beginner or an experienced DIYer, this process lets you create a tool that brings your creative ideas to life.
Innovations and Trends in DIY Laser Cutting Machine Designs
The world of DIY laser cutting is constantly evolving, with new technologies and community-driven innovations shaping the way you can create and customize your projects. Staying informed about these trends helps you build better machines and achieve more precise results.
Emerging Technologies
Advances in Laser Technology
Laser cutting technology has seen remarkable advancements in recent years, making it more accessible and efficient for DIY enthusiasts. One of the most exciting developments is the improvement in laser modules. For example, modern diode lasers now feature ultra-fine compressed spots, such as 0.08 x 0.08 mm, which allow for intricate engravings and precise cuts. These advancements mean you can tackle detailed designs with ease, even on smaller machines.
Another breakthrough is the increasing power of compact lasers. While earlier DIY laser cutters struggled with thicker materials, newer models can cut through 8mm acrylic or 10mm plywood in a single pass. This level of performance was once limited to industrial-grade machines, but now it’s available for home setups. These improvements not only expand the range of materials you can work with but also enhance the speed and quality of your projects.
Quick Insight: Higher-powered lasers, like 10W modules, are becoming more common in DIY kits, offering greater versatility without sacrificing precision.
Potential Impact on DIY Designs
These technological advancements are transforming how you approach DIY laser cutter designs. With more powerful and precise lasers, you can now build machines capable of handling a wider variety of materials, from thin sheets of wood to delicate acrylics. This flexibility allows you to take on diverse projects, whether you’re engraving intricate patterns or cutting functional components.
Additionally, the availability of modular components makes it easier to customize your machine. You can choose laser modules, working area sizes, and even cooling systems based on your specific needs. For instance, some DIY kits offer multiple size options, such as 160x160x145mm or 320x350x330mm, so you can save money if you only need a smaller workspace. This adaptability ensures that your machine aligns perfectly with your goals.
Pro Tip: When selecting components, prioritize features like spot size and power output to ensure your machine delivers the precision and performance you need.
Open-Source and Community Contributions
Role of Online Communities in Innovation
Online communities play a huge role in driving innovation in DIY laser cutting. Platforms like forums, maker groups, and social media channels bring together enthusiasts from around the world. These spaces allow you to share ideas, troubleshoot issues, and discover new techniques. Many members contribute by posting detailed guides, sharing open-source designs, or offering advice on sourcing affordable parts.
These communities also foster collaboration. For example, someone might develop a new cooling system for a CO2 laser, while another member refines the design for easier assembly. By participating in these groups, you gain access to a wealth of knowledge and resources that can help you improve your machine and skills.
Did You Know? Many popular DIY laser cutter designs started as open-source projects shared by hobbyists in online forums.
Popular Open-Source Projects
Open-source projects have revolutionized the DIY laser cutting space. These projects provide free plans and instructions, making it easier for you to build your own machine. Some of the most notable designs focus on affordability and simplicity, using readily available components like diode lasers and aluminum frames.
One standout example is the rise of modular DIY kits. These kits often include pre-cut parts and detailed assembly guides, reducing the complexity of building a laser cutter from scratch. They also allow for customization, so you can upgrade components like the laser module or control board as your needs evolve.
Another trend is the integration of advanced features into open-source designs. For instance, some projects now include automated focusing systems or software compatibility with popular design programs. These enhancements make it easier for you to achieve professional-grade results without investing in expensive commercial machines.
Pro Tip: Explore open-source platforms like GitHub or Instructables to find reliable DIY plans and join discussions with other makers.
By embracing emerging technologies and tapping into the power of community-driven innovation, you can create a DIY laser cutter that’s both efficient and tailored to your needs. Whether you’re a beginner or an experienced maker, these trends open up new possibilities for creativity and precision.
Choosing the right laser cutter design can transform your creative projects. From understanding different types of machines to comparing DIY designs, you now have the tools to make an informed decision. Building your own laser cutter isn’t just about saving money—it’s a chance to customize a machine that fits your goals perfectly. Makers like Owen Schafer have shown how accessible and rewarding these projects can be. Why not take the leap? Explore DIY plans, join online communities, and start creating something extraordinary today.
FAQ
What is a DIY laser cutter, and why should you consider building one?
A DIY laser cutter is a machine you assemble yourself to cut or engrave materials using laser technology. Building one allows you to customize features, save money, and gain hands-on experience. It’s perfect if you want to create unique designs, experiment with materials, or start small-scale manufacturing from home. Plus, it bridges the gap between hobby projects and professional-grade results, giving you flexibility and control over your creative process.
Quick Insight: Many DIY enthusiasts find that building their own laser cutter helps them understand the technology better, making it easier to troubleshoot or upgrade later.
What materials can you cut or engrave with a laser cutter?
Laser cutters work on a wide range of materials, depending on the type of laser you use. Common materials include wood, acrylic, leather, glass, paper, and certain metals. For example, CO2 lasers excel at cutting non-metals like wood and acrylic, while fiber lasers are ideal for metals such as stainless steel or aluminum. UV lasers handle delicate materials like glass and ceramics with precision.
Pro Tip: Always check the material compatibility of your laser cutter before starting a project. Using the wrong laser type can damage both the material and the machine.
How do laser cutters compare to traditional cutting tools?
Laser cutters offer unmatched precision, speed, and design flexibility compared to traditional tools. They can create intricate patterns and shapes that are difficult or impossible to achieve with manual methods. Unlike mechanical tools, lasers don’t wear out or dull over time, ensuring consistent results. Additionally, laser cutting minimizes material waste and reduces the need for post-processing.
Did You Know? Laser technology has replaced many tedious mechanical processes in manufacturing, improving productivity and lowering operational costs.
Are DIY laser cutters safe to use?
Yes, but safety precautions are essential. Laser cutters emit powerful beams that can harm your eyes and skin. Always wear protective goggles designed for your laser type. Ensure proper ventilation to avoid inhaling fumes from materials like acrylic or leather. Many DIY designs include safety features like enclosures and emergency stop buttons to enhance protection.
Safety Tip: Never leave your laser cutter unattended during operation. Regularly inspect components like mirrors and lenses to ensure they function properly.
How much does it cost to build a DIY laser cutter?
The cost varies based on the design and components you choose. A basic diode laser cutter might cost around $200–$500, while a more advanced CO2 or fiber laser setup could range from $1,000 to $5,000. Repurposing materials, sourcing parts from online marketplaces, and using open-source plans can help you save money.
Pro Tip: Start with a budget-friendly design if you’re new to laser cutting. You can always upgrade components as your skills and needs grow.
What tools and skills do you need to build a DIY laser cutter?
You’ll need basic tools like screwdrivers, a soldering iron, and a multimeter. For the frame, materials like aluminum extrusions or wood are common. You’ll also need a laser module, power supply, control board, and optics. As for skills, basic knowledge of electronics and mechanical assembly is helpful. Many DIY plans include step-by-step instructions, making it easier for beginners to follow.
Quick Insight: Joining online maker communities can provide valuable guidance and support during the building process.
Can a DIY laser cutter handle professional-grade projects?
Yes, many DIY laser cutters can produce professional-quality results, especially with the right components and calibration. For example, CO2 lasers deliver smooth edges on acrylic and wood, while fiber lasers excel in metal cutting. Advances in laser technology now allow DIY machines to achieve precision and speed comparable to commercial models.
Scientific Research Findings: Laser cutters empower makers to produce high-quality products from home, blurring the lines between personal projects and market-ready goods.
What are the most common mistakes to avoid when building a DIY laser cutter?
Some common mistakes include choosing the wrong laser type for your materials, neglecting safety measures, and rushing the assembly process. Skipping component testing can lead to malfunctions. Also, failing to align mirrors and lenses properly can reduce cutting accuracy.
Pro Tip: Take your time during assembly and double-check each step. Testing components individually before full assembly can save you from troubleshooting later.
How do you maintain a DIY laser cutter?
Regular maintenance ensures your laser cutter performs well over time. Clean the mirrors and lenses to prevent dust buildup, which can affect the laser beam’s focus. Check the alignment of optical components periodically. For CO2 and fiber lasers, monitor the cooling system to avoid overheating. Replace worn-out parts like belts or bearings as needed.
Maintenance Tip: Keep a log of maintenance tasks and dates. This helps you stay on top of routine checks and identify potential issues early.
Where can you find reliable DIY laser cutter plans?
You can find plans on platforms like GitHub, Instructables, and maker forums. Look for designs with detailed instructions, clear diagrams, and a list of required materials. Many open-source projects also include community feedback, which can help you avoid common pitfalls.
Did You Know? Open-source designs often come with modular options, allowing you to customize your machine based on your needs and budget.
These FAQs cover the essentials of DIY laser cutters, helping you make informed decisions and avoid common pitfalls. Whether you’re a beginner or an experienced maker, understanding these key points will set you up for success in your laser cutting journey.
See Also
Comparative Guide to Laser Cutting Machine Costs
Maximizing Efficiency with Your Laser Cutting Machine
Understanding the Advantages and Disadvantages of Laser Cutters