How to Make Die Cuts Without a Machine: 5 Ideas

Die cutting doesn’t have to rely on expensive machines. You can create stunning designs with just a few basic tools and your creativity. Think of it as crafting with a personal touch—every cut, every detail shaped by your hands. Whether you’re making cards, scrapbook pages, or decorations, manual die cutting lets you explore endless possibilities. It’s not just about saving money; it’s about enjoying the process and adding a unique flair to your projects. With a little patience and practice, you’ll discover how to make die cuts without a machine that look just as professional.
Key Takeaways
- You can create stunning die cuts without expensive machines by using basic tools and your creativity.
- Stencils and craft knives allow for precise and intricate designs, making them ideal for card-making and scrapbooking.
- Freehand cutting with scissors offers complete creative freedom, enabling you to craft unique shapes and designs.
- Using embossing folders and a rolling pin adds texture and dimension to your die cuts, enhancing their professional look.
- Layering and collage techniques let you combine different materials and colors, resulting in one-of-a-kind designs.
- Practice on scrap paper to refine your skills and gain confidence before tackling your final projects. Manual die cutting is not just about the end result; it's a rewarding process that allows for personal expression and creativity. cut dies without a machine
Using Stencils and Craft Knives

Stencils and craft knives are a fantastic duo for creating precise and intricate die cuts. This method allows you to replicate designs with accuracy, making it perfect for detailed projects like card-making or scrapbooking. If you're wondering how to make die cuts without a machine, this technique is a great place to start.
Materials Needed
To get started, gather the following items:
- Stencil Knife or Sterling Stencil Craft Knife: These tools provide excellent precision for cutting tight angles and small details. The safety cap on the Sterling model ensures safe handling.
- Stencils: You can purchase pre-made stencils or create your own using sturdy materials like plastic sheets or thick cardstock.
- Craft Paper or Cardstock: Choose a material that suits your project.
- Self-Healing Cutting Mat: Protect your work surface and keep your cuts clean.
- Masking Tape or Washi Tape: Use these to secure your stencil in place.
Step-by-Step Instructions
Follow these steps to create beautiful die cuts with stencils and a craft knife:
-
Choose or create a stencil design.
Select a design that fits your project. If you're feeling creative, draw your own stencil on a sturdy material and cut it out using a Stencil Knife. -
Secure the stencil to your paper or material.
Place the stencil on your chosen paper or cardstock. Use masking tape or washi tape to hold it firmly in place. This prevents shifting while you cut. -
Use a craft knife to carefully cut along the stencil edges.
Hold the knife at a slight angle and apply steady pressure as you trace the stencil's edges. A tool like the Dual Blade Strip Cutter can help if you're working with straight lines or uniform patterns.
Tips for Success
Here are some tips to ensure your die cuts turn out perfectly:
-
Use a self-healing cutting mat to protect your surface.
This mat not only safeguards your table but also helps your knife glide smoothly, resulting in cleaner cuts. -
Practice on scrap paper to perfect your technique.
Before working on your final project, test your skills on leftover paper. This helps you get comfortable with the knife and stencil.
"Precision is key when working with stencils and craft knives. Take your time, and you'll achieve professional-looking results."
By mastering this method, you'll unlock endless possibilities for your crafting projects. Whether you're creating intricate patterns or simple shapes, stencils and craft knives give you the control to bring your ideas to life.
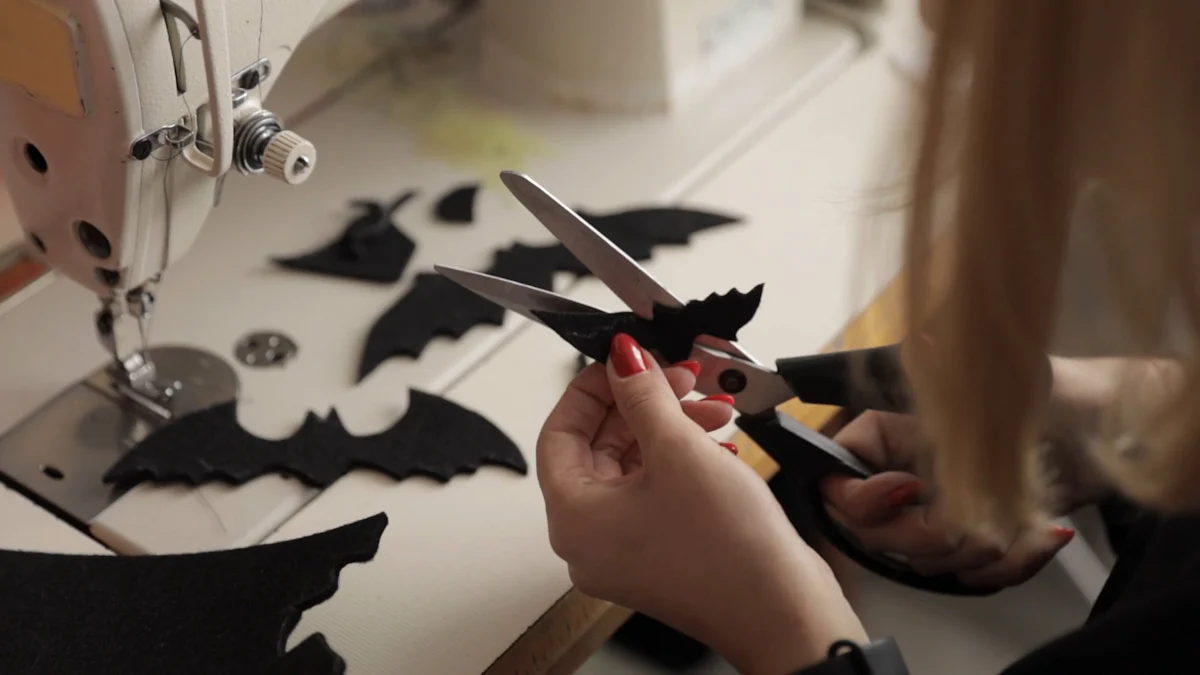
Freehand Cutting with Scissors
Freehand cutting with scissors is one of the simplest and most accessible ways to create die cuts. This method gives you complete creative freedom, allowing you to craft unique shapes and designs without relying on stencils or templates. If you're looking for a hands-on approach to learn how to make die cuts without a machine, this technique is a fantastic choice.
Materials Needed
To get started, gather these basic tools:
- Sharp Scissors: Choose a pair with fine, pointed blades for better precision. Small scissors work best for intricate designs.
- Pencil: Use a pencil to sketch your design lightly on paper before cutting.
- Paper or Cardstock: Select a material that suits your project. Thicker paper works well for sturdy die cuts.
- Good Lighting: Ensure your workspace is well-lit to help you see the details clearly.
Step-by-Step Instructions
Follow these steps to create beautiful freehand die cuts:
-
Sketch your design lightly on paper with a pencil.
Start by drawing your desired shape or pattern directly onto the paper. Keep the lines light so they’re easy to erase if needed. Begin with simple shapes like hearts, stars, or circles to build confidence. -
Use sharp scissors to carefully cut out the design.
Hold the scissors firmly and cut along the pencil lines with steady hands. For curved or intricate shapes, rotate the paper instead of the scissors to maintain control. This technique helps you achieve smoother edges.
"Good lighting is essential when working on detailed cuts. It reduces strain on your eyes and ensures accuracy."
Tips for Success
Here are some tips to make your freehand cutting experience smoother:
-
Start with simple shapes before attempting intricate designs.
Mastering basic shapes first helps you develop control and confidence. Once you’re comfortable, move on to more complex patterns. -
Use small, precise scissors for better control.
Smaller scissors allow you to navigate tight corners and delicate details with ease. They’re especially useful for creating intricate designs. -
Practice makes perfect.
Like any skill, freehand cutting improves with practice. Spend time experimenting with different shapes and techniques to refine your skills.
"Improving your cutting skills takes time. Start simple, and challenge yourself gradually with more complex designs."
Freehand cutting with scissors is a rewarding way to create personalized die cuts. It’s not just about the final product—it’s about enjoying the process and letting your creativity shine. With patience and practice, you’ll be amazed at what you can achieve.
Using Embossing Folders and a Rolling Pin
Embossing folders and a rolling pin offer a creative way to add texture and dimension to your die cuts. This method is perfect if you want to achieve a professional embossed look without using a machine. By combining the pressure of a rolling pin with the design of an embossing folder, you can create stunning raised patterns that elevate your crafting projects.
Materials Needed
To get started, gather these essential items:
- Embossing Folders: These folders come in various designs, from floral patterns to geometric shapes. Brands like Sizzix and Spellbinders offer high-quality options.
- Rolling Pin: A standard rolling pin works well for applying even pressure to your embossing folder.
- Paper or Cardstock: Choose thicker paper for more pronounced embossing results.
- Scissors or Craft Knife: Use these tools to cut out your embossed designs.
Step-by-Step Instructions
Follow these simple steps to create beautiful embossed die cuts:
-
Place your paper or cardstock inside an embossing folder.
Open the embossing folder and position your paper or cardstock between the two sides. Make sure the design aligns with the area you want to emboss. -
Use a rolling pin to press the design into the material.
Close the folder and place it on a flat, sturdy surface. Roll the pin firmly over the folder, applying even pressure. Repeat this process a few times to ensure the design transfers completely. -
Cut out the embossed design with scissors or a craft knife.
Once the embossing is complete, carefully cut around the raised design to create your die cut. Use sharp scissors for smooth edges or a craft knife for intricate details.
"Embossing adds a tactile element to your crafts, making them stand out with a professional finish."
Tips for Success
Here are some tips to help you get the best results:
-
Experiment with different embossing folder patterns.
Try a variety of designs to find the ones that suit your project. Some folders even combine embossing and cutting for unique effects. -
Use thicker paper for more pronounced designs.
Cardstock or heavy paper holds the embossed pattern better and creates a more durable die cut. -
Apply consistent pressure with the rolling pin.
Uneven pressure can result in incomplete embossing. Roll slowly and steadily for the best outcome.
"Thicker paper not only enhances the embossed effect but also makes your die cuts sturdier for long-lasting crafts."
Using embossing folders and a rolling pin is a fun and effective way to learn how to make die cuts without a machine. This technique allows you to explore endless design possibilities while adding texture and depth to your projects. Whether you're crafting for a scrapbook, card, or decoration, this method ensures your creations look polished and professional.
Tracing and Cutting with a Craft Knife
Tracing and cutting with a craft knife is a precise and versatile method for creating custom die cuts. This technique gives you full control over your designs, making it ideal for intricate patterns or unique shapes. If you're exploring how to make die cuts without a machine, this approach offers a hands-on way to bring your ideas to life.
Materials Needed
Before you begin, gather these essential tools:
- Craft Knife: A sharp blade ensures clean and accurate cuts. Replace dull blades regularly to maintain precision.
- Paper or Cardstock: Choose a material that suits your project. Thicker paper works well for sturdy designs.
- Pencil: Use this to trace your design onto the material.
- Lightbox (Optional): A lightbox can help you trace designs more easily, especially on thicker paper.
- Ruler: This helps you achieve straight edges and smooth curves.
- Cutting Mat: Protect your workspace and keep your cuts clean with a self-healing cutting mat.
Step-by-Step Instructions
Follow these steps to create beautiful die cuts using a craft knife:
-
Print or draw your design on a separate piece of paper.
Start by sketching or printing your desired design. Keep the lines clear and bold for easy tracing. If you're new to this, begin with simple shapes like stars or flowers. -
Trace the design onto your material using a pencil or lightbox.
Place your design over the material and trace it lightly with a pencil. If you're using a lightbox, position the paper on top and let the light guide your tracing. This step ensures accuracy and helps you visualize the final cut. -
Cut along the traced lines with a craft knife.
Place your material on a cutting mat. Hold the craft knife firmly and follow the traced lines with steady pressure. For straight edges, use a ruler as a guide. Rotate the paper instead of the knife for smoother curves.
"Precision is everything when working with a craft knife. Take your time and focus on each cut to achieve professional results."
Tips for Success
Here are some tips to make your crafting experience smoother and more enjoyable:
Use a ruler for straight edges and curves.
A ruler helps you maintain clean, straight lines. For curves, gently guide the knife along the edge of the ruler to keep the shape consistent.
Keep your craft knife blade sharp for clean cuts.
A dull blade can tear the paper and ruin your design. Replace the blade as soon as it starts to drag or snag.
Practice on scrap material before starting your project.
Test your technique on leftover paper to get comfortable with the knife and tracing process. This helps you avoid mistakes on your final design.
"Don’t rush the process. Crafting is about enjoying the journey as much as the result."
Tracing and cutting with a craft knife allows you to create intricate and personalized die cuts without relying on expensive tools. This method combines creativity with precision, giving you the freedom to design anything you imagine. Whether you're crafting for cards, scrapbooks, or decorations, this technique ensures your projects stand out with a handmade touch.
Layering and Collage Techniques
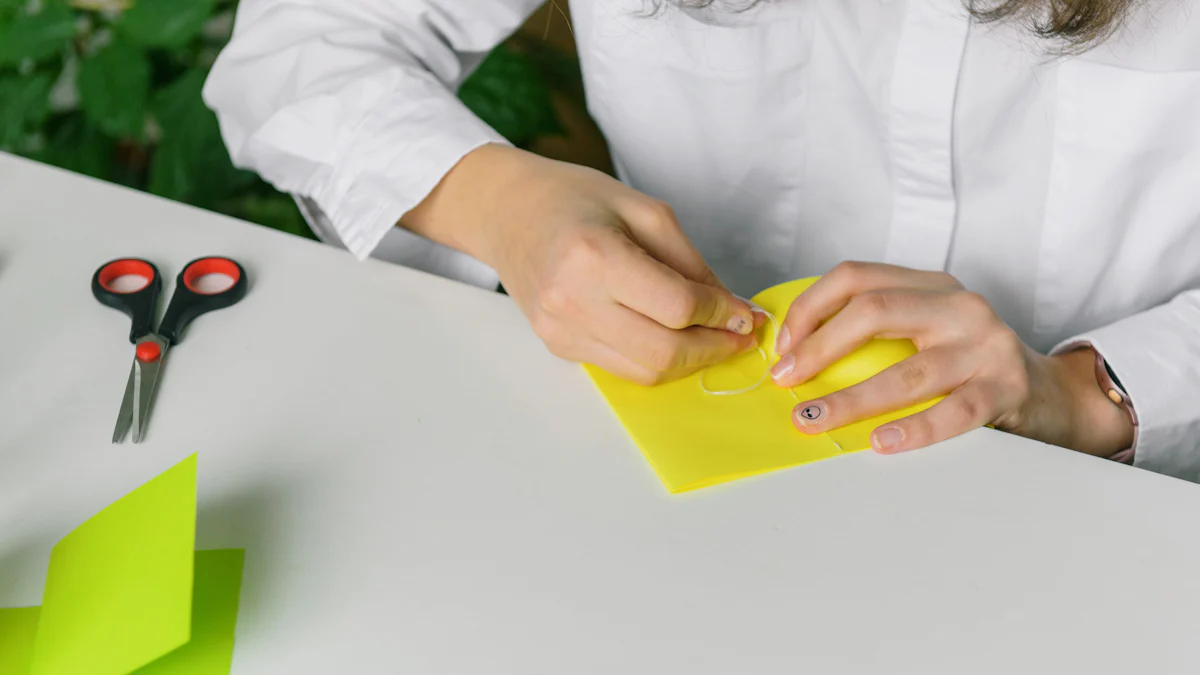
Layering and collage techniques bring a whole new dimension to your die cuts. This method lets you combine different materials, textures, and colors to create unique designs that stand out. It’s a hands-on approach that encourages creativity and experimentation. If you’re exploring how to make die cuts without a machine, this technique offers endless possibilities for crafting one-of-a-kind pieces.
Materials Needed
To get started, gather these essentials:
- Paper or Cardstock: Use a mix of colors, patterns, and textures to add variety to your layers.
- Scissors or Craft Knife: These tools help you cut precise shapes for layering.
- Glue or Adhesive: Choose a strong adhesive for durability. Double-sided tape works well for a cleaner finish.
- Decorative Elements: Include items like glitter, foil, or fabric scraps to enhance your designs.
- Cutting Mat: Protect your workspace while cutting out shapes.
Step-by-Step Instructions
Follow these steps to create stunning layered die cuts:
-
Cut out multiple shapes or designs from different materials.
Start by cutting various shapes from your chosen materials. Mix and match colors, patterns, and textures to create visual interest. For example, pair a bold patterned paper with a solid color for contrast. -
Layer and glue the pieces together to create a unique die cut.
Arrange the cutouts on your workspace. Experiment with different placements until you find a layout you love. Once satisfied, glue the pieces together, starting with the base layer and building up. Use double-sided tape for a seamless look.
"Layering adds depth and dimension to your die cuts, making them pop off the page."
Tips for Success
Here are some tips to help you master layering and collage techniques:
Experiment with textures and colors for added depth.
Combine smooth and textured papers or mix matte and glossy finishes. Play with contrasting colors to make your designs more dynamic.
Use double-sided tape for a cleaner finish.
Glue can sometimes seep out and create a mess. Double-sided tape keeps your layers neat and tidy, especially for intricate designs.
Don’t be afraid to try unconventional materials.
Incorporate fabric, foil, or even pressed flowers into your layers. These elements add a unique touch that sets your die cuts apart.
"The beauty of layering lies in its flexibility. There’s no right or wrong way—just let your creativity guide you."
Layering and collage techniques allow you to craft die cuts that are truly your own. This method doesn’t just save you from needing a machine; it also gives you the freedom to experiment and express your style. Whether you’re creating scrapbook embellishments, greeting cards, or decorative accents, layered die cuts add a personal and artistic flair to your projects.
Making die cuts manually gives you the chance to explore your creativity while saving money. These five methods show you how to make die cuts without a machine, proving that expensive tools aren’t necessary for professional-looking results. Each technique offers unique possibilities, from layering textures to crafting intricate designs. The process is as rewarding as the final product. Experiment with different materials, try new ideas, and enjoy the journey. Your imagination is the only limit when it comes to creating custom designs for your projects.
FAQ
Can I create my own die-cutting designs?
Absolutely! Creating your own die-cutting designs is one of the most rewarding aspects of manual crafting. You can sketch your ideas on paper, use stencils, or even trace existing patterns. This hands-on approach allows you to personalize your projects and bring your unique vision to life. Whether you’re cutting freehand with scissors or using a craft knife, the possibilities are endless.
"Your creativity is your only limit when it comes to designing custom die cuts."
Do I need special tools to make die cuts without a machine?
Not at all! You can start with basic tools like sharp scissors, a craft knife, and sturdy paper or cardstock. Additional items like stencils, embossing folders, or a self-healing cutting mat can enhance your results, but they’re not mandatory. Many of the methods shared in this blog rely on simple, everyday tools that you might already have at home.
How do I ensure clean and precise cuts?
Clean and precise cuts come down to using the right tools and practicing your technique. Always work with sharp scissors or a craft knife to avoid tearing the paper. A self-healing cutting mat can provide a stable surface for smoother cuts. If you’re using stencils, secure them with tape to prevent shifting. Practicing on scrap paper can also help you refine your skills before working on your final project.
What type of paper works best for manual die cutting?
Thicker paper, like cardstock, often works best for manual die cutting. It holds its shape well and is easier to handle when cutting intricate designs. However, you can experiment with different materials, including patterned paper, vellum, or even fabric, depending on your project. Each material offers a unique look and feel, so don’t hesitate to try something new.
Can I achieve professional-looking results without a machine?
Yes, you can! With patience and practice, manual die-cutting techniques can produce results that look just as polished as machine-made designs. The key lies in attention to detail and using the right tools for the job. Techniques like layering, embossing, and tracing allow you to create intricate and professional-quality die cuts by hand.
"Handmade doesn’t mean imperfect—it means unique and full of character."
How do I avoid mistakes when cutting intricate designs?
Mistakes happen, but you can minimize them with a few simple tips. First, take your time and work slowly, especially on detailed areas. Rotate the paper instead of your scissors or knife to maintain control. Use a ruler for straight edges and practice on scrap material to build confidence. Remember, precision improves with experience, so don’t get discouraged.
Are there any safety tips for using craft knives?
Safety is crucial when working with craft knives. Always use a self-healing cutting mat to protect your surface and keep your fingers away from the blade. Hold the knife firmly and cut with steady pressure. Replace dull blades promptly to avoid accidents caused by dragging or snagging. Store your knife with a safety cap when not in use.
Can I combine different techniques for unique results?
Definitely! Combining techniques like layering, embossing, and freehand cutting can lead to truly one-of-a-kind designs. For example, you could emboss a pattern onto cardstock and then cut it into a specific shape. Mixing textures, colors, and methods adds depth and dimension to your projects, making them stand out even more.
What’s the best way to practice manual die cutting?
Start with simple shapes like circles, stars, or hearts. Use scrap paper to practice your cuts and get comfortable with your tools. Gradually move on to more intricate designs as your confidence grows. Watching tutorials or following step-by-step guides can also help you learn new techniques and improve your skills.
Why should I try manual die cutting instead of using a machine?
Manual die cutting offers a hands-on, creative experience that machines can’t replicate. It allows you to personalize every detail and enjoy the process of crafting. Plus, it’s cost-effective and doesn’t require investing in expensive equipment. There’s something special about knowing that every piece you create is entirely your own work.
See Also
Creative Techniques for Using Die Cuts Manually
Manual Methods for Die Cutting Without Equipment
Five Innovative Techniques for Die Cut Machines