How to Level CNC Laser Cutting Machine

Understanding how to level a CNC laser cutting machine is crucial for ensuring the frame and laser head are perfectly aligned. Proper leveling is essential for achieving precise cuts and engravings while preventing uneven surfaces that could damage tools or materials. Additionally, a well-leveled machine enhances safety by minimizing the risk of operational errors. Although beginners may find learning how to level a CNC laser cutting machine challenging, mastering this process significantly improves productivity and efficiency. Using laser leveling provides unmatched accuracy compared to manual methods, making it a vital step in maintaining optimal machine performance.
Tools and Preparation for Leveling a Laser Cutting Machine
Essential Tools and Materials
To level your CNC laser cutting machine effectively, you need the right tools and materials. These items ensure precision and simplify the process:
- Laser Level: A laser level provides unmatched accuracy when checking the flatness of the machine's surface. Unlike manual methods, it eliminates guesswork and ensures consistent results.
- Spirit Level: While not as precise as a laser level, a spirit level can serve as a backup tool for quick checks.
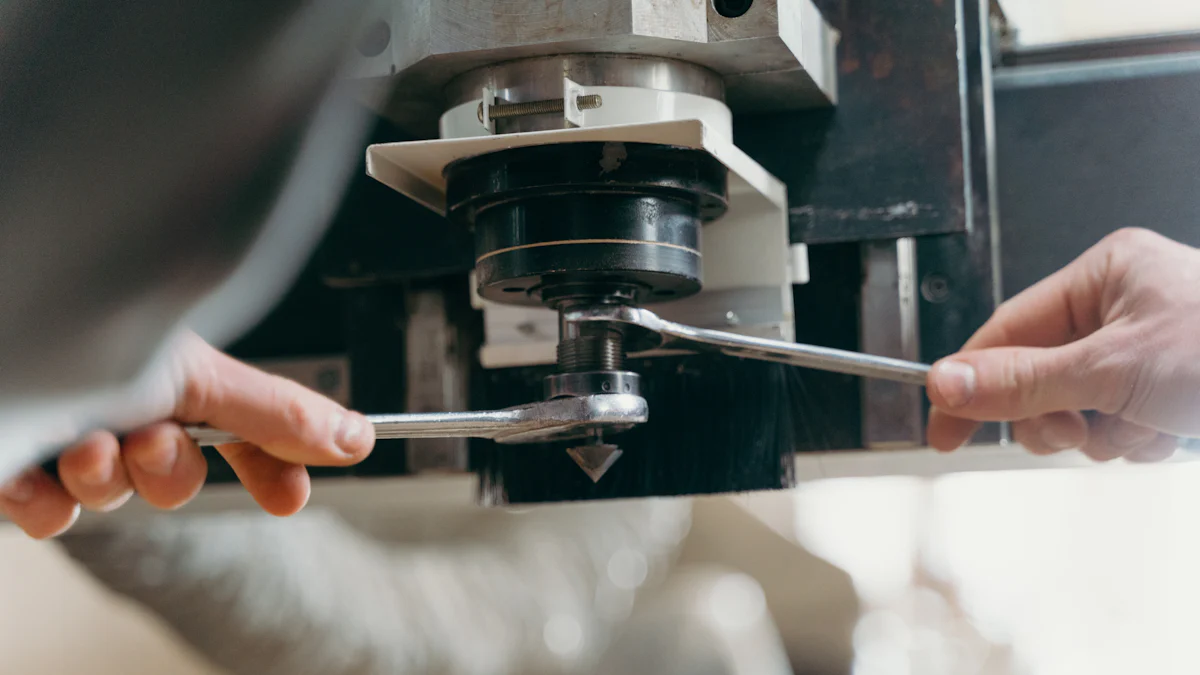
- Adjustable Wrenches: These are essential for adjusting the machine's feet or base to achieve proper alignment.
- Measuring Tape: Use this to verify distances and ensure the machine is positioned correctly on its surface.
- Cleaning Supplies: Dust and debris can interfere with leveling. A clean surface ensures accurate measurements.
- Protective Gloves: These keep your hands safe while handling tools and making adjustments.
Investing in high-quality tools, such as a laser level, enhances productivity and ensures your machine operates at peak efficiency. CNC manufacturers often recommend laser leveling because it delivers precision that the human eye cannot match.
Safety Precautions
Safety should always be your priority when working with a CNC laser cutting machine. Follow these precautions to protect yourself and maintain a safe workspace:
- Turn Off the Machine: Always power down the machine before starting the leveling process. This prevents accidental activation during adjustments.
- Wear Protective Gear: Use gloves to protect your hands and safety glasses to shield your eyes from potential hazards.
- Ensure a Stable Environment: Place the machine on a sturdy, vibration-free surface. An unstable base can compromise both safety and accuracy.
- Clear the Workspace: Remove clutter and obstacles around the machine. A clean area reduces the risk of tripping or damaging tools.
- Handle Tools Carefully: Use tools as intended and avoid applying excessive force, which could damage the machine or cause injury.
By preparing the necessary tools and following these safety measures, you set the foundation for a smooth and efficient leveling process. Proper preparation not only ensures accurate results but also extends the lifespan of your CNC laser cutting machine.
Step-by-Step Tutorial: How to Level CNC Laser Cutting Machine
Positioning the Machine on a Stable Surface
Start by selecting a flat and sturdy surface for your laser cutting machine. Uneven or unstable surfaces can lead to misalignment, which affects the precision of your cuts and engravings. Place the machine in an area free from vibrations, as these can disrupt its operation. A concrete floor or a heavy-duty workbench often works best.
Use a measuring tape to ensure the machine is evenly spaced from nearby walls or obstacles. This spacing allows you to access all sides of the machine for adjustments and maintenance. Clean the surface thoroughly before positioning the machine. Dust and debris can interfere with leveling and compromise accuracy.
"A stable foundation is the first step toward achieving consistent, high-quality output," says a CNC service technician. Proper placement not only enhances performance but also reduces wear and tear on the machine over time.
Checking the Frame for Levelness
Once the machine is positioned, check the frame for levelness. Use a laser level for this step, as it provides unmatched accuracy. Place the laser level on the machine's bed and project the beam across its surface. Observe the beam's alignment with the edges of the frame. If the beam deviates, the frame is not level.
For a quick secondary check, use a spirit level. Place it at multiple points on the frame, such as the corners and center. This ensures the entire frame is even, not just one section. Consistency across the frame is critical for maintaining the alignment of the laser head.
"Regularly checking the frame prevents long-term issues like uneven cuts or tool damage," explains another CNC technician. This step is essential for quality control and safety.
Adjusting the Machine's Feet or Base
After identifying uneven areas, adjust the machine's feet or base to correct the levelness. Most CNC laser cutting machines come with adjustable feet. Use an adjustable wrench to turn the feet clockwise or counterclockwise, depending on whether you need to raise or lower a specific corner.
Work systematically. Adjust one foot at a time and recheck the level after each adjustment. This prevents overcompensation, which can create new alignment issues. If your machine lacks adjustable feet, consider placing shims under the base to achieve the desired level.
Perform a final check with the laser level and spirit level to confirm the adjustments. The frame should now be perfectly aligned, ensuring the laser head operates accurately across the entire cutting surface.
"Proper leveling minimizes operator exposure to dangerous equipment and ensures consistent results," notes a CNC expert. This step is vital for both productivity and safety.
Calibrating the Laser Head Alignment
Calibrating the laser head alignment ensures your CNC laser cutting machine delivers precise and consistent results. Misalignment can lead to uneven cuts, wasted materials, and potential damage to the machine. Follow these steps to properly calibrate the laser head and maintain optimal performance.
-
Inspect the Laser Head Position
Begin by examining the laser head's position relative to the machine's bed. Use a laser level to project a beam across the cutting surface. Check if the laser head aligns perfectly with the beam. Misalignment at this stage indicates the need for calibration. Ensure the machine is powered off during this inspection to avoid accidental activation. -
Adjust the Laser Head Brackets
Locate the brackets or screws securing the laser head. These components allow you to fine-tune the head's position. Use an adjustable wrench or screwdriver to make small adjustments. Move the laser head horizontally and vertically until it aligns with the projected beam. Work slowly and recheck the alignment after each adjustment. -
Verify the Beam Path
After adjusting the laser head, test the beam path. Place a flat piece of material on the machine's bed. Activate the laser briefly to mark the material. Inspect the mark to ensure it is centered and consistent across the surface. Uneven marks indicate further calibration is necessary. -
Test Across Multiple Points
To confirm accuracy, test the laser head alignment at various points on the machine's bed. Place the material in different corners and repeat the beam test. Consistent results across all points indicate successful calibration. If discrepancies occur, revisit the adjustment process. -
Secure the Laser Head
Once the laser head is properly aligned, tighten all screws and brackets to secure its position. Double-check the alignment to ensure no movement occurred during tightening. A stable laser head prevents misalignment during operation.
"Calibrating the machine regularly ensures high-quality output and reduces the risk of errors," explains a CNC service technician. Proper calibration not only enhances productivity but also protects the machine from unnecessary wear and tear.
- Perform a Final Test Cut
Complete the calibration process by performing a test cut or engraving. Use a simple design to evaluate the machine's precision. Inspect the results for uniformity and accuracy. If the output meets your expectations, the calibration is complete. Otherwise, repeat the steps as needed.
Regular calibration is essential for maintaining the performance of your CNC laser cutting machine. It ensures the laser head operates efficiently, delivering precise cuts and engravings every time. By following this tutorial, you can master the process of calibrating the machine and achieve consistent, high-quality results.
Testing and Fine-Tuning After Leveling
Performing Test Cuts or Engravings
After leveling your laser cutting machine, testing its performance ensures the adjustments were successful. Begin by selecting a simple design or pattern for the test. Use a material you frequently work with, such as wood, acrylic, or metal, to evaluate the machine's precision under typical conditions.
Place the material securely on the machine's bed. Activate the laser and perform a test cut or engraving. Observe the results closely. Look for consistent depth, clean edges, and uniformity across the entire surface. Uneven cuts or inconsistent engraving often indicate lingering alignment issues.
If you notice any irregularities, recheck the machine's levelness. Pay attention to the laser head alignment, as even minor misalignments can impact the quality of your output. Repeat the test until the results meet your expectations. Testing not only confirms the machine's accuracy but also helps you identify areas that may require further fine-tuning.
"A properly calibrated laser head ensures consistent cutting quality and efficient use of laser power," explains a CNC expert. Misaligned components, on the other hand, can lead to uneven cuts and wasted resources.
Making Final Adjustments for Precision
Once the test cuts or engravings show promising results, focus on fine-tuning the machine for maximum precision. Start by inspecting the laser beam's path. Ensure it remains consistent across the entire cutting area. Use a flat material to verify that the laser cuts evenly at different points on the bed.
Adjust the laser head brackets if necessary. Small tweaks can make a significant difference in achieving perfect alignment. Tighten all screws and fasteners to secure the machine's components. Loose parts can shift during operation, compromising accuracy.
Next, calibrate the machine's software settings. Check parameters like laser power, speed, and focus. These settings should match the material you're working with. Incorrect configurations can affect the quality of your cuts and engravings, even if the machine is perfectly leveled.
Perform another test cut to confirm the adjustments. Evaluate the results carefully. Consistent output across multiple tests indicates that the machine is now operating at peak performance. Regular fine-tuning ensures your laser cutting machine maintains its precision over time.
By following this tutorial, you can master the art of testing and fine-tuning your laser cutting machine. These steps not only enhance the machine's performance but also extend its lifespan, ensuring reliable results for every project.
Troubleshooting Common Issues When Operating a Laser Cutting Machine
Operating a laser cutting machine can sometimes present challenges that affect its performance and output quality. Understanding these issues and their solutions ensures your machine operates efficiently and delivers precise results. Below are common problems you may encounter and practical steps to resolve them.
Uneven Cuts or Engravings
Uneven cuts or engravings often indicate alignment or leveling issues. This problem can waste materials and compromise the quality of your work. To address this, follow these steps:
-
Check the Machine's Levelness
Use a laser level to verify that the machine's frame and bed are perfectly aligned. Even minor unevenness can cause inconsistent cuts. Adjust the machine's feet or base as needed to restore balance. -
Inspect the Laser Head Alignment
Misaligned laser heads can lead to uneven engraving depths or jagged cuts. Recalibrate the laser head by aligning it with the machine's bed. Test the beam path across multiple points to ensure consistency. -
Evaluate the Material Placement
Ensure the material lies flat on the machine's bed. Warped or improperly secured materials can shift during operation, resulting in uneven output. Use clamps or weights to keep the material stable.
"Precision starts with proper alignment and stable materials," says a CNC technician. Regular checks prevent uneven results and improve overall efficiency.
Persistent Misalignment
Persistent misalignment can disrupt the accuracy of your laser cutting machine. This issue often stems from loose components or improper calibration. To resolve it, take the following actions:
-
Tighten All Screws and Brackets
Loose screws or brackets can cause the laser head or frame to shift during operation. Inspect all fasteners and tighten them securely. Pay special attention to the laser head assembly. -
Recalibrate the Laser Head
Misalignment may require recalibration. Use a laser level to adjust the laser head horizontally and vertically. Test the alignment by performing a series of cuts or engravings across the bed. -
Inspect for Wear and Tear
Over time, components like belts or rails may wear out, leading to alignment issues. Check these parts for signs of damage and replace them if necessary. Regular maintenance minimizes the risk of persistent misalignment. -
Stabilize the Machine's Environment
Vibrations from nearby equipment or an unstable surface can cause misalignment. Place the machine on a sturdy, vibration-free base to maintain its precision.
"Addressing misalignment promptly prevents long-term damage and ensures consistent performance," advises a CNC expert. Regular inspections keep your machine in top condition.
Vibrations During Operation
Excessive vibrations during operation can affect the precision and safety of your laser cutting machine. Vibrations often result from an unstable setup or mechanical issues. Here’s how to troubleshoot this problem:
-
Stabilize the Machine's Base
Ensure the machine rests on a flat, sturdy surface. Uneven floors or weak workbenches can amplify vibrations. Use adjustable feet or shims to stabilize the base. -
Inspect Moving Parts
Vibrations may occur if moving parts, such as belts or rails, are loose or damaged. Examine these components for wear and tighten or replace them as needed. -
Reduce External Interference
Nearby machinery or heavy equipment can transfer vibrations to your laser cutting machine. Relocate the machine to a quieter area or use vibration-dampening pads to isolate it. -
Perform a Test Run
After making adjustments, run a test cut to evaluate the machine's stability. Observe the laser head and material for any signs of shaking. If vibrations persist, revisit the setup and inspect for overlooked issues.
"Minimizing vibrations enhances both safety and output quality," explains a CNC service technician. A stable machine delivers more accurate and reliable results.
By addressing these common issues, you can maintain the efficiency and precision of your laser cutting machine. Regular troubleshooting not only resolves immediate problems but also prevents future complications, ensuring your machine operates at its best.
Maintenance Tips for a Laser Cutting Machine
Proper maintenance ensures your laser cutting machine operates efficiently and delivers precise results. Neglecting upkeep can lead to misalignment, uneven cuts, and reduced lifespan. Follow these essential tips to keep your machine in top condition.
Regular Inspections to Maintain Levelness
Frequent inspections help you identify and address alignment issues before they affect performance. A misaligned machine can cause uneven cuts and inconsistent edge quality. To maintain levelness:
- Check the Cutting Bed: Use a laser level to verify the bed's flatness. An uneven bed can shift materials during operation, leading to poor accuracy.
- Inspect the Frame: Look for signs of wear or damage on the machine's frame. Even minor shifts can disrupt the laser beam's focus and power distribution.
- Monitor the Feet or Base: Ensure the machine's feet remain stable and properly adjusted. Vibrations or movement can compromise levelness over time.
"A well-leveled machine ensures consistent focus and power distribution," explains a CNC technician. Regular checks prevent long-term issues and maintain cutting precision.
Cleaning and Lubrication for Longevity
Dirt, dust, and debris can interfere with your machine's performance. Cleaning and lubrication keep components functioning smoothly and extend the machine's lifespan. Follow these steps:
-
Clean the Cutting Bed
Remove residue and debris after each use. A clean bed ensures materials stay stable during cutting, improving accuracy. -
Wipe Down the Laser Head
Dust on the laser head can obstruct the beam and reduce cutting quality. Use a soft, lint-free cloth to clean the lens and mirrors. -
Lubricate Moving Parts
Apply lubricant to rails, belts, and other moving components. Proper lubrication reduces friction and prevents wear and tear. -
Inspect for Build-Up
Check for material build-up around the nozzle or cutting area. Excess residue can block the laser beam and affect its focus.
"Routine cleaning and lubrication protect your investment and ensure reliable performance," says a maintenance expert. Neglecting these tasks can lead to costly repairs.
Proper Storage to Prevent Misalignment
Storing your machine correctly minimizes the risk of misalignment and damage. Improper storage can cause the frame to warp or components to loosen. To store your machine safely:
- Choose a Stable Location: Place the machine on a flat, vibration-free surface. Avoid areas with heavy foot traffic or nearby machinery that could cause movement.
- Cover the Machine: Use a dust cover to protect the machine from dirt and debris. This keeps sensitive parts clean and ready for use.
- Secure Components: Tighten screws, brackets, and other fasteners before storing the machine. Loose parts can shift during storage, leading to misalignment.
- Maintain a Controlled Environment: Store the machine in a dry, temperature-controlled space. Extreme conditions can damage electronic and mechanical components.
"Proper storage safeguards your machine against misalignment and environmental damage," advises a CNC service technician. A well-stored machine stays ready for optimal performance.
By following these maintenance tips, you can ensure your laser cutting machine remains efficient and precise. Regular inspections, cleaning, and proper storage not only enhance performance but also extend the machine's lifespan.
Proper leveling plays a critical role in ensuring your CNC laser cutting machine operates with precision and safety. By following this tutorial, you can achieve consistent results and avoid common issues like uneven cuts or misalignment. Regular maintenance, such as cleaning, inspections, and proper storage, keeps your machine in optimal condition. These practices not only extend the machine’s lifespan but also reduce unexpected downtime and improve productivity.
"A well-maintained machine ensures seamless operation and protects your investment," as experts often emphasize. Take proactive steps today to maintain accuracy and efficiency in every project.
FAQ
What is the purpose of leveling a CNC laser cutting machine?
Leveling ensures the machine's frame and laser head are perfectly aligned. This alignment is essential for achieving precise cuts, consistent engravings, and safe operation. Without proper leveling, you risk uneven results, wasted materials, and potential damage to the machine.
"A well-leveled machine ensures consistent focus and power distribution," explains a CNC technician. This foundational step directly impacts the quality of your work.
How often should I check the level of my CNC laser cutting machine?
You should inspect the machine's level regularly, especially after heavy use or relocation. Vibrations and frequent operation can cause misalignment over time. A proactive approach helps maintain accuracy and prevents long-term issues.
Regular checks not only ensure precision but also extend the machine's lifespan by addressing minor problems before they escalate.
Can I level the machine without a laser level?
While a laser level provides unmatched accuracy, you can use a spirit level as an alternative. However, manual tools may not detect subtle misalignments. Investing in a laser level ensures precise results and simplifies the process.
"Precision starts with the right tools," says a CNC expert. Using high-quality equipment minimizes guesswork and enhances productivity.
What should I do if my machine vibrates during operation?
Vibrations often result from an unstable base or loose components. To resolve this:
- Stabilize the machine on a flat, sturdy surface.
- Tighten all screws and brackets.
- Inspect moving parts like belts and rails for wear or damage.
- Use vibration-dampening pads if external machinery causes interference.
Minimizing vibrations improves both safety and output quality, ensuring reliable performance.
Why are my cuts uneven even after leveling the machine?
Uneven cuts may indicate issues beyond leveling. Check the following:
- Laser Head Alignment: Misalignment can cause inconsistent engraving depths.
- Material Placement: Ensure the material lies flat and is securely positioned.
- Machine Calibration: Recalibrate the laser head and test the beam path across multiple points.
Addressing these factors ensures uniform results and reduces material waste.
How can I maintain the levelness of my machine over time?
To maintain levelness:
- Perform regular inspections using a laser level.
- Keep the machine on a stable, vibration-free surface.
- Tighten screws and brackets periodically.
- Avoid moving the machine unnecessarily.
A proactive maintenance routine prevents misalignment and ensures consistent performance.
What are the consequences of neglecting regular maintenance?
Neglecting maintenance can lead to costly breakdowns, uneven cuts, and reduced machine lifespan. A poorly maintained machine may also compromise safety and productivity.
"Performing regular maintenance helps keep the machines running properly, eliminating the possibility of a costly shutdown," emphasizes a CNC technician.
How do I clean and lubricate my CNC laser cutting machine?
Follow these steps for effective cleaning and lubrication:
- Remove debris from the cutting bed after each use.
- Wipe down the laser head with a lint-free cloth.
- Apply lubricant to moving parts like rails and belts.
- Inspect for material build-up around the nozzle and clean it thoroughly.
Routine cleaning and lubrication protect your investment and ensure smooth operation.
Can improper storage affect the machine's alignment?
Yes, improper storage can cause misalignment and damage. To store the machine safely:
- Place it on a flat, stable surface.
- Cover it to protect against dust and debris.
- Tighten all components before storage.
- Keep it in a dry, temperature-controlled environment.
Proper storage safeguards your machine and keeps it ready for optimal performance.
Why is regular maintenance critical for CNC laser cutting machines?
Regular maintenance ensures optimal performance, prevents breakdowns, and extends the machine's lifespan. It also improves quality control and reduces downtime.
"Adopting a proactive maintenance approach is imperative for ensuring seamless productivity and prolonging the longevity of CNC machines," highlights a manufacturing expert.
See Also
Understanding The Functionality Of CNC Laser Cutters
Guide To Metal Cutting Using A Desktop CNC
Enhancing CNC Machines For Efficient Metal Cutting