How to Laser Cut Your Own CNC Machine from Scratch


Are you curious about how to laser cut my own CNC machine from scratch? Building your own laser cutter offers a unique opportunity to tailor the machine to your specific needs. Imagine the satisfaction of crafting a tool that combines high accuracy, minimal waste, and efficiency. This project not only enhances your technical skills but also provides a rewarding learning experience. Many DIY enthusiasts engage in such projects, each with its own unique characteristics. Dive into this adventure and discover the joy of creating something truly your own.
Project Planning and Preparation
Before you dive into the exciting world of building your own lasercutter, it's crucial to lay a solid foundation with proper planning and preparation. This section will guide you through understanding the basics, gathering necessary materials, and setting a realistic budget and timeline.
Understanding the Basics of CNC Laser Cutters
A CNC laser cutting machine is a marvel of modern technology. It uses a focused laser beam to cut or engrave materials with high precision. The beauty of a lasercutter lies in its versatility. You can use it to create intricate designs on wood, acrylic, and even some metals. The process starts with a design created on a computer, which the machine then translates into precise cuts or engravings. This technology minimizes waste and enhances the quality of your work, making it an essential tool for any DIY enthusiast.
Gathering Necessary Materials and Tools
To build your own lasercutter, you'll need to gather a comprehensive bill of materials. This list ensures you have everything you need before starting the project.
Essential Materials
- Frame Material: Aluminum or steel for durability.
- Laser Module: Choose based on the power you need. A high quality CO2 lasercutter module is ideal for cutting thicker materials.
- Control Board: The brain of your machine, responsible for executing your designs.
- Stepper Motors: These drive the motion systems, ensuring precise movements.
- Power Supply: Provides the necessary energy to run the laser and motors.
Required Tools
- Screwdrivers and Wrenches: For assembling the frame and components.
- Soldering Iron: Essential for wiring the electronics.
- Multimeter: To test electrical connections and ensure everything works correctly.
- Safety Gear: Goggles and gloves to protect yourself during assembly and operation.
Setting a Budget and Timeline
Creating a diy laser cutter involves both time and money. Start by setting a realistic budget. Consider the cost of materials, tools, and any additional expenses like software licenses. It's wise to allocate some extra funds for unexpected costs. Next, establish a timeline. Break down the project into manageable phases, such as design, assembly, and testing. This approach helps you stay organized and track your progress.
By understanding the basics, gathering the right materials, and planning your budget and timeline, you're well on your way to mastering how to laser cut your own CNC machine. This preparation phase sets the stage for a successful and rewarding DIY project.
Designing Your CNC Laser Cutter
Designing your own lasercutter is an exciting step in the journey of building a CNC machine. This phase involves creating a blueprint and selecting the right components to ensure your machine meets your specific needs.
Creating a Design Blueprint
A well-thought-out design blueprint is crucial for your lasercutter. It serves as the roadmap for your project, guiding you through each step of the build.
Software Tools for Design
To start, you'll need reliable software tools. Programs like AutoCAD, SolidWorks, or Fusion 360 are popular choices among DIY enthusiasts. These tools allow you to create detailed 2D and 3D models of your lasercutter. They offer features that help you visualize the design of this machine before you begin the physical build. With these tools, you can experiment with different designs and make adjustments easily.
Key Design Considerations
When designing your lasercutter, consider the size and type of materials you'll be working with. A larger cutting area might be necessary if you plan to work with bigger pieces. Also, think about the power of the laser module. A high quality CO2 lasercutter module is ideal for cutting thicker materials. Ensure your design includes adequate ventilation and safety features to handle the laser's heat and fumes.
Selecting the Right Components
Choosing the right components is vital for the functionality and efficiency of your lasercutter. Each part plays a significant role in the overall performance of your machine.
Frame and Structure
The frame forms the backbone of your lasercutter. You want a sturdy and stable structure to support the laser cutting process. Aluminum is a popular choice due to its strength and lightweight properties. Steel is another option if you need extra durability. Ensure the frame design allows for easy access to the laser and other components for maintenance and adjustments.
Laser Module Selection
Selecting the right laser module is crucial. The module determines the types of materials you can cut and the precision of your cuts. For most DIY projects, a laser with a power range of 40-150 watts is sufficient. This range allows you to cut through materials like wood and acrylic with ease. Remember, the higher the wattage, the thicker the material you can cut.
Expert Testimony:
"Using a CNC Machine for Laser Cutting & Engraving machines offer a precise and efficient way to handle a variety of materials. These tools are perfect for woodworkers, small manufacturers, and hobbyists who want to create intricate designs and parts with minimal waste."
By carefully designing your lasercutter and selecting the right components, you set the stage for a successful build. This preparation ensures your machine will perform efficiently and meet your specific needs, making the process of learning how to laser cut your own CNC machine both rewarding and enjoyable.
Assembling Mechanical Components

Now that you've designed your lasercutter, it's time to bring it to life by assembling the mechanical components. This phase involves building the frame and installing the motion systems. Let's dive into the details.
Building the Frame
The frame is the backbone of your lasercutter. It provides the necessary support and stability for the entire machine. Here's how you can assemble the frame effectively.
Cutting and Assembling the Frame
Start by cutting the frame materials according to your design blueprint. Use aluminum or steel for durability. Precision is key here, so measure twice and cut once. Once you have all the pieces, begin to assemble the frame. Use screwdrivers and wrenches to secure the parts together. Make sure each joint is tight and aligned correctly. This step ensures that your lasercutter has a solid foundation.
Ensuring Structural Integrity
After you assemble the frame, check its structural integrity. The frame should be stable and not wobble. If you notice any instability, reinforce the joints with additional screws or brackets. A sturdy frame is crucial for accurate laser cutting. It prevents vibrations that could affect the precision of your cuts.
Installing Motion Systems
With the frame ready, you can move on to installing the motion systems. These components allow your lasercutter to move precisely and execute your designs.
Linear Rails and Bearings
Linear rails and bearings guide the movement of the laser head. Install the rails along the frame, ensuring they are parallel and level. Attach the bearings to the laser head assembly. This setup allows smooth and accurate movement along the X and Y axes. Proper alignment is essential for precise laser cutting.
Stepper Motors and Belts
Stepper motors drive the motion systems. Mount the motors securely to the frame. Connect them to the linear rails using belts. The belts transfer the motor's rotational motion into linear movement. Adjust the tension of the belts to ensure smooth operation. Properly installed stepper motors and belts are vital for the lasercutter's performance.
By following these steps, you can successfully assemble the mechanical components of your lasercutter. This process transforms your design into a functional machine. As you learn how to laser cut your own CNC machine, remember that attention to detail is key. A well-built frame and precise motion systems set the stage for successful laser cutting.
Setting Up the Laser and Control Systems
You're almost there! Now it's time to set up the laser and control systems for your lasercutter. This step is crucial for ensuring your machine operates smoothly and safely. Let's dive into the details.
Installing the Laser Module
The laser module is the heart of your lasercutter. Proper installation is key to achieving precise cuts and engravings.
Positioning and Mounting
First, position the laser module on the frame. Ensure it aligns with the motion systems you installed earlier. This alignment guarantees accurate laser cutting. When mounting the laser, use brackets or mounts that came with your kit. Secure them tightly to prevent any movement during operation. A stable laser module is essential for consistent results.
Safety Precautions
Safety should always be your top priority when working with a laser cutting machine. Wear protective goggles to shield your eyes from the laser beam. Ensure your workspace is well-ventilated to avoid inhaling fumes. Install safety switches that can quickly turn off the laser in case of emergencies. These precautions protect you and ensure a safe DIY experience.
Configuring the Control Software
With the laser module in place, it's time to configure the control software. This software translates your designs into commands for the lasercutter.
Software Installation
Start by installing the control software on your computer. Popular options include GRBL, LightBurn, or LaserGRBL. Follow the installation instructions provided by the software developer. Once installed, connect your computer to the lasercutter's control board using a USB cable. This connection allows the software to communicate with the machine.
Calibration and Testing
After installation, calibrate the software to match your lasercutter's specifications. Input the dimensions of your cutting area and the power settings of your laser module. Run a few test cuts to ensure everything works correctly. Adjust the settings as needed to achieve the desired precision. Calibration is crucial for learning how to use your lasercutter effectively.
By setting up the laser and control systems, you bring your DIY project to life. This step transforms your design into a functional laser cutting machine. As you learn how to laser cut your own CNC machine, remember that attention to detail and safety are key. Enjoy the process and the satisfaction of creating something truly your own.
Integrating Electronics
You're now ready to dive into the world of electronics for your lasercutter. This step is crucial for bringing your machine to life. Let's explore how to wire the electronics and ensure everything functions smoothly.
Wiring the Electronics
Wiring your lasercutter involves connecting various components to create a cohesive system. This process requires attention to detail and a bit of patience.
Connecting the Control Board
The control board acts as the brain of your lasercutter. It processes the commands from your computer and directs the machine's movements. To connect the control board, follow these steps:
- Identify the Ports: Locate the ports on the control board for the stepper motors, laser module, and power supply.
- Connect the Stepper Motors: Use the provided cables to connect each stepper motor to its corresponding port on the control board. Ensure the connections are secure to prevent any disruptions during operation.
- Attach the Laser Module: Connect the laser module to the designated port. Double-check the polarity to avoid damaging the module.
- Link the Power Supply: Finally, connect the power supply to the control board. This connection provides the necessary energy for the entire system.
Properly connecting the control board ensures your lasercutter responds accurately to your commands.
Power Supply Setup
The power supply is vital for your lasercutter's operation. It delivers the energy needed to run the laser and motors. Here's how to set it up:
- Select the Right Voltage: Ensure your power supply matches the voltage requirements of your components. Most DIY lasercutters operate on 12V or 24V systems.
- Secure the Connections: Use appropriate connectors to attach the power supply to the control board. Tighten the connections to prevent any power loss.
- Test the Output: Use a multimeter to verify the power supply's output. This step ensures you're delivering the correct voltage to your lasercutter.
A well-set-up power supply guarantees your machine runs efficiently and safely.
Testing Electrical Connections
Once you've wired everything, it's time to test the electrical connections. This step ensures your lasercutter functions as expected.
Ensuring Proper Functionality
Testing your lasercutter involves running a series of checks to confirm everything works correctly:
- Power On the Machine: Turn on the power supply and check if the control board lights up. This indicates the board is receiving power.
- Run a Test Cut: Use the control software to execute a simple design. Observe the lasercutter's movements and ensure the laser cuts or engraves as intended.
- Check for Errors: Listen for unusual noises or vibrations. These could indicate misalignments or loose connections.
By ensuring proper functionality, you can confidently proceed with your laser cutting projects.
Troubleshooting Common Issues
Even with careful setup, you might encounter some issues. Here are common problems and their solutions:
- Laser Not Firing: Check the laser module's connection and ensure it's receiving power. Verify the control software settings.
- Stepper Motors Not Moving: Inspect the motor connections and ensure they're secure. Test the control board's output to the motors.
- Inconsistent Cuts: Adjust the laser's focus and check the alignment of the motion systems.
Troubleshooting is a critical skill for any CNC programmer. It helps you identify and solve problems efficiently, ensuring your lasercutter operates smoothly.
By integrating the electronics and testing the connections, you bring your lasercutter to life. This step transforms your project from a collection of parts into a functional machine. Enjoy the satisfaction of seeing your DIY creation in action!
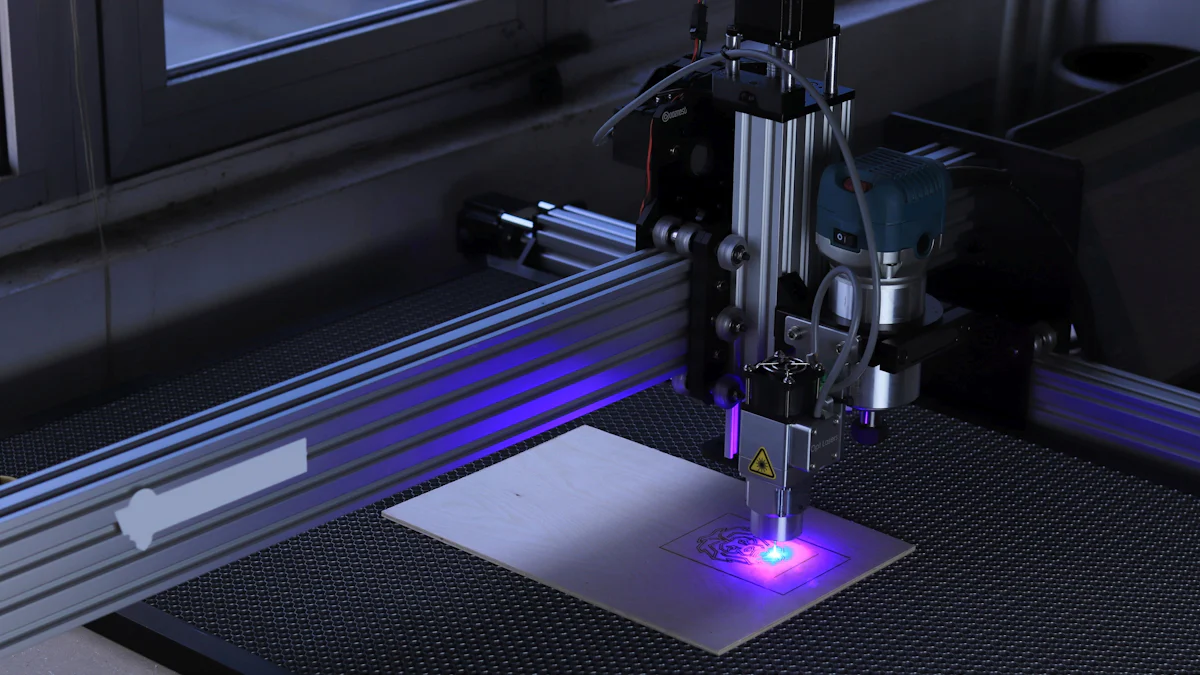
Testing, Debugging, and Operation
You've reached the exciting phase of testing your lasercutter. This step ensures your machine operates smoothly and delivers precise results. Let's explore how to conduct initial tests and troubleshoot any issues that arise.
Initial Testing Procedures
Before diving into full-scale projects, it's essential to perform initial tests. These tests help you understand your lasercutter's capabilities and make necessary adjustments.
Running Test Cuts
Start by running simple test cuts. Choose a basic design, like a square or circle, and use a material you're familiar with. This step allows you to observe the laser's performance and make sure it cuts cleanly. Pay attention to the edges of the cut. They should be smooth and free of burn marks. If you notice any irregularities, it might indicate a need for adjustment.
Adjusting Settings for Precision
Precision is key in laser cutting. After your initial test cuts, evaluate the results. If the cuts aren't as precise as you'd like, adjust the settings. You might need to tweak the laser's power or speed. Remember, precision and accuracy are crucial in CNC manufacturing. By fine-tuning these settings, you ensure your lasercutter performs at its best.
Debugging and Problem Solving
Even with careful setup, you might encounter issues. Debugging is an essential skill that helps you identify and resolve these problems efficiently.
Identifying and Fixing Errors
Errors can occur for various reasons. If your lasercutter isn't performing as expected, start by checking the basics. Ensure all connections are secure and the software settings match your machine's specifications. Listen for unusual noises or vibrations, as these could indicate mechanical issues. By systematically checking each component, you can identify and fix errors quickly.
Optimizing Performance
Once you've resolved any errors, focus on optimizing your lasercutter's performance. Consider conducting a repeatability test. This test involves selecting measurement functions and identifying test points to ensure your machine consistently produces accurate results. Additionally, explore ways to enhance the laser's efficiency. Automated monitoring systems can provide insights into performance, helping you make informed adjustments.
By following these step-by-step instructions, you can confidently operate your lasercutter. This process transforms your DIY project into a reliable tool for creating intricate designs. Enjoy the satisfaction of mastering your CNC machine and the endless possibilities it offers.
Congratulations on completing your lasercutter! You've navigated through the intricate process of building a CNC laser cutter from scratch. From planning and designing to assembling and testing, each step has brought you closer to mastering this craft. Embrace the confidence you've gained and consider the endless possibilities for customization and future upgrades. This project not only enhances your technical skills but also fuels your passion for creating. Remember, every challenge you overcame adds to your valuable experience. Enjoy the satisfaction of having built a tool that reflects your dedication and creativity.
FAQ
What materials can I cut with my DIY CNC laser cutter?
You can cut a variety of materials with your DIY CNC laser cutter. Common choices include wood, acrylic, and some metals. The type of material you can cut depends on the power of your laser module. For instance, a laser with a power range of 40-150 watts can handle most DIY projects.
How do I ensure my lasercutter is safe to use?
Safety is crucial when operating a lasercutter. Always wear protective goggles to shield your eyes from the laser beam. Ensure your workspace is well-ventilated to avoid inhaling fumes. Install safety switches that can quickly turn off the laser in case of emergencies. These precautions help protect you during operation.
Can I upgrade my CNC laser cutter in the future?
Yes, you can upgrade your CNC laser cutter. You might want to enhance the laser module for more power or add automated features for better efficiency. Consider upgrading the control software for improved functionality. These upgrades can extend the capabilities of your machine.
How do I maintain my CNC laser cutter?
Regular maintenance keeps your CNC laser cutter in top condition. Clean the laser lens and mirrors to ensure optimal performance. Check the alignment of the motion systems and tighten any loose connections. Regularly inspect the wiring and replace any worn-out components. These steps help maintain the precision and efficiency of your machine.
What should I do if my laser cutter isn't cutting accurately?
If your laser cutter isn't cutting accurately, start by checking the alignment of the laser module and motion systems. Ensure the laser's focus is correct. Adjust the power and speed settings in the control software. If the issue persists, inspect the mechanical components for wear or damage.
How long does it take to build a DIY CNC laser cutter?
The time it takes to build a DIY CNC laser cutter varies. It depends on your experience level and the complexity of your design. On average, it might take a few weeks to gather materials, assemble the machine, and test it. Setting a realistic timeline helps you stay organized and track your progress.
Can I use my CNC laser cutter for engraving?
Yes, you can use your CNC laser cutter for engraving. The process is similar to cutting but requires different settings. Adjust the laser's power and speed to achieve the desired depth and detail. Engraving adds versatility to your projects, allowing you to create intricate designs.
What software do I need for my CNC laser cutter?
You'll need control software to operate your CNC laser cutter. Popular options include GRBL, LightBurn, and LaserGRBL. These programs translate your designs into commands for the machine. Choose software that suits your needs and offers features that enhance your laser cutting experience.
See Also
Understanding The Functionality Of CNC Laser Cutters
Guide To Metal Cutting Using A Desktop CNC
Maximizing Efficiency With Your Laser Cutting Machine