Step-by-Step Guide to Die Cutting Paper Without a Machine

Die cutting is a popular crafting technique that allows you to create precise shapes and intricate patterns from paper or other materials. It’s an excellent way to add unique details to your projects. While machines are commonly used for this process, knowing how to die cut paper without a machine opens up a world of creative possibilities. Manual methods provide a hands-on approach that encourages experimentation and keeps costs low. You can explore your creativity without the need for expensive equipment. Best of all, these techniques are easy to try, making crafting more accessible and enjoyable for everyone. Curious about how to die cut paper without a machine? Let’s get started!
Key Takeaways
manual die cutting allows for creativity without the need for expensive machines, making crafting accessible to everyone. Essential tools include a craft knife, scissors, cutting mat, stencils, and a ruler—these ensure precision and clean cuts.
- Start with simple designs and practice on scrap paper to build confidence before tackling more intricate projects.
- Layering die-cut shapes adds depth and dimension to your creations, enhancing their visual appeal.
- Experiment with pressure techniques using a rolling pin or hammer for unique textures and effects.
- Always keep your tools sharp and organized to achieve the best results and maintain safety while crafting.
- Explore various projects like greeting cards, scrapbooking, and home décor to fully utilize your manual die cutting skills.
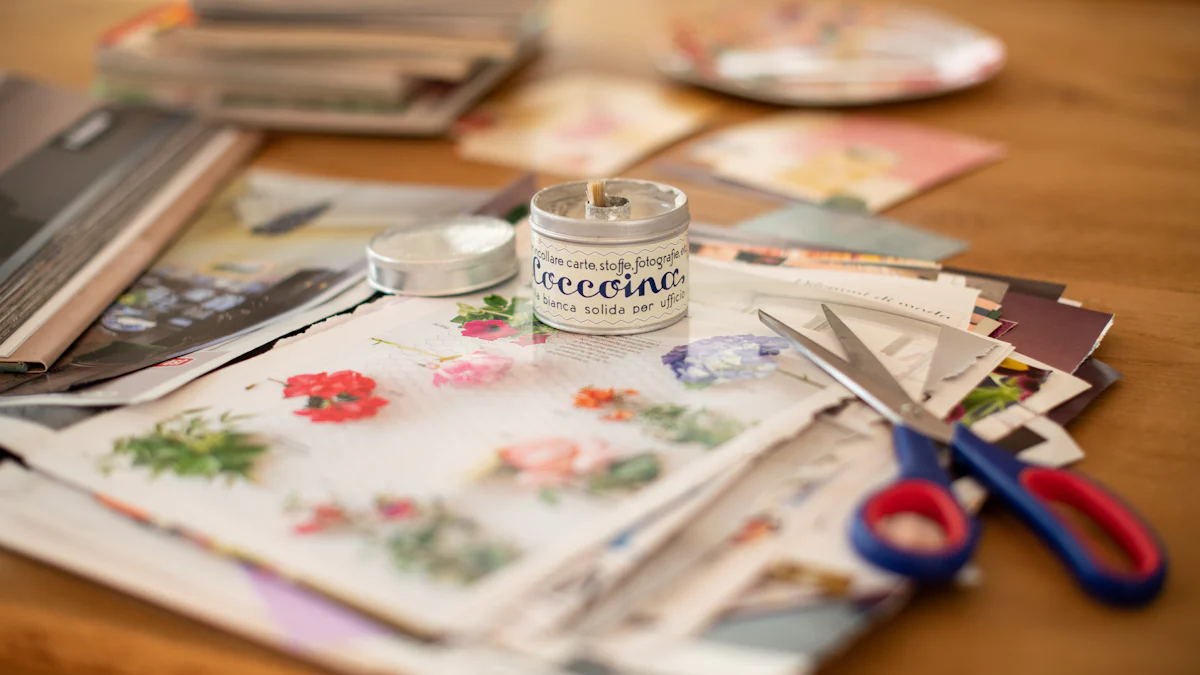
Tools and Materials for How to Die Cut Paper Without Machine
To get started with manual die cutting, you’ll need the right tools and materials. These essentials will make the process smoother and help you achieve clean, professional results.
Essential Tools
Craft knife or precision blade
Craft knife or precision blade is your go-to tool for intricate cuts. It allows you to follow detailed designs with accuracy. Choose a sharp blade to ensure smooth edges and avoid tearing the paper.
Scissors (regular and fine-tip)
Scissors are versatile and perfect for cutting simpler shapes. Regular scissors work well for larger cuts, while fine-tip scissors help with smaller, more detailed areas. Keep them sharp for the best results.
Cutting mat
A cutting mat protects your workspace and provides a stable surface for cutting. It also helps prevent your tools from dulling quickly. Look for a self-healing mat, which can withstand repeated cuts without showing wear.
Stencils or templates
Stencils or templates guide your design. You can buy pre-made ones or create your own using sturdy materials like cardboard or plastic. They’re essential for keeping your shapes consistent.
Ruler and pencil
A ruler ensures straight lines, while a pencil lets you trace your design lightly onto the paper. These tools are simple but crucial for precision.
Rolling pin or hammer (for alternative methods)
If you’re experimenting with pressure techniques, a rolling pin or hammer can help. Place your die on the paper, cover it with a protective layer like cardboard, and apply pressure evenly. This method works well for thicker materials.
Recommended Materials
Cardstock or paper (durable and suitable for cutting)
Choose cardstock or high-quality paper that can handle cutting without tearing. Thicker paper holds its shape better, especially for intricate designs.
Adhesive (optional for layering designs)
Adhesive comes in handy if you plan to layer your die-cut shapes. It adds dimension and depth to your projects. Use glue or double-sided tape for a clean finish.
Protective layers (e.g., cardboard or foam)
Protective layers like cardboard or foam prevent damage to your tools and workspace. They also help distribute pressure evenly when using alternative methods like a rolling pin.
Decorative elements (e.g., glitter, markers, or paint)
Decorative elements let you personalize your die-cut creations. Add glitter for sparkle, use markers for color, or paint for a bold look. These extras make your projects stand out.
Pro Tip: If you’re new to manual die cutting, practice on scrap paper first. This helps you get comfortable with the tools and techniques before working on your final project.
With these tools and materials, you’re ready to dive into the world of manual die cutting. Whether you’re creating greeting cards, scrapbook embellishments, or home décor, having the right setup makes all the difference. Now that you know what you need, let’s move on to the step-by-step process of how to die cut paper without a machine.
Step-by-Step Process for How to Die Cut Paper Without Machine
Creating beautiful die-cut designs manually is easier than you might think. Follow these steps to bring your ideas to life with precision and creativity.
Step 1: Choose Your Design
Start by deciding on the design you want to create. This could be a simple shape like a heart or star, or something more intricate like floral patterns.
Use pre-made stencils or create your own template.
Pre-made stencils are a great option if you’re looking for convenience. You can find them in craft stores or online. If you prefer a personal touch, make your own template. Use sturdy materials like cardboard or plastic to ensure durability.
Sketch your design on paper if creating a custom shape.
If you’re going for a custom design, grab a pencil and sketch it out on paper. Keep the lines light so they’re easy to erase later. This step helps you visualize the final look and ensures accuracy when cutting.
If you’re new to manual die cutting, start with simpler shapes.
Step 2: Prepare Your Workspace
A well-organized workspace sets the stage for smooth crafting. Take a few moments to get everything ready before you begin.
Place a cutting mat on a flat, stable surface.
Lay down a cutting mat to protect your table or desk. It also provides a firm surface for precise cuts. A self-healing mat works best since it can handle repeated use without showing wear.
Gather all necessary tools and materials.
Keep your tools and materials within arm’s reach. This includes your craft knife, scissors, stencils, ruler, pencil, and paper. Having everything ready saves time and keeps you focused on your project.
Quick Tip: Use a small tray or container to organize your tools. This prevents them from rolling off the table and keeps your workspace tidy.
Step 3: Trace or Transfer the Design
Now it’s time to bring your design to life on paper. This step ensures that your cuts are accurate and aligned.
Use a pencil to lightly trace the stencil or template onto the paper.
Place your stencil or template on the paper and trace around it with a pencil. Keep the lines light so they don’t show on the final piece. If you’re freehanding a design, draw directly onto the paper with steady hands.
For intricate designs, secure the stencil with tape to prevent shifting.
If your design has fine details, use a small piece of tape to hold the stencil in place. This prevents it from moving while you trace, ensuring clean and consistent lines.
Did You Know? Using washi tape instead of regular tape can help avoid tearing the paper when you remove it.
By following these steps, you’ll set yourself up for success in manual die cutting. Once your design is traced, you’re ready to move on to the cutting process. Stay tuned for the next steps where we’ll dive into cutting techniques and refining your masterpiece.
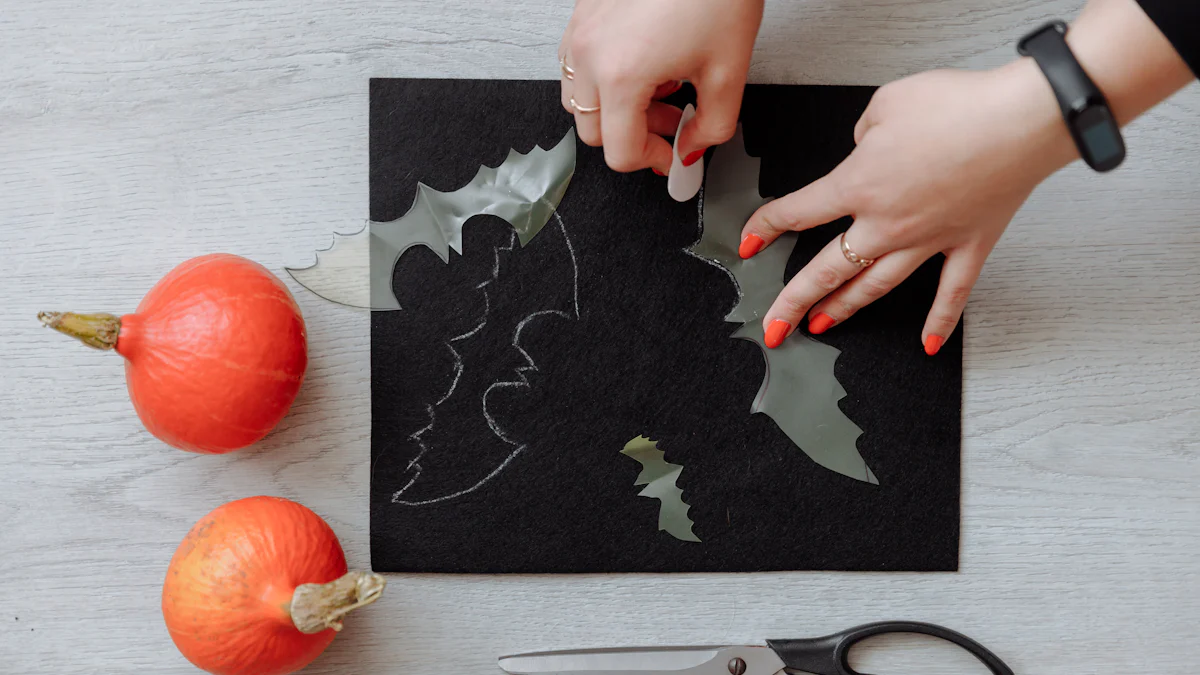
Step 4: Cut Out the Design
Now comes the exciting part—cutting out your design! This step transforms your traced outline into a beautiful die-cut creation. Here’s how you can do it effectively:
Use a craft knife for detailed cuts, following the traced lines carefully.
For intricate designs, grab your craft knife or precision blade. Hold it firmly and guide it along the traced lines with steady hands. Take your time to ensure clean, smooth cuts. A sharp blade is essential here, as it prevents tearing and gives you crisp edges. If you’re working on curves or tiny details, rotate the paper instead of the knife for better control.
Pro Tip: Keep a spare blade handy. A dull blade can ruin your design by dragging or snagging the paper.
For simpler shapes, use scissors for quicker cutting.
If your design features basic shapes like circles or squares, scissors are your best friend. Use regular scissors for larger cuts and fine-tip scissors for smaller, more precise areas. Make sure to cut just outside the traced line to leave room for adjustments later. This method is faster and works well for straightforward designs.
For alternative methods, place the die on the paper, cover it with cardboard, and use a rolling pin or hammer to apply pressure.
Use a rolling pin or hammer for manual die cutting.
Quick Tip: Protect your workspace by placing a foam sheet or extra cardboard underneath. This prevents damage and ensures even pressure distribution.
Step 5: Refine the Edges
Once you’ve cut out your design, it’s time to refine it. This step polishes your work and gives it a professional finish.
Smooth out rough edges with a precision blade or sandpaper (optional).
Inspect your die-cut piece for any jagged or uneven edges. Use a precision blade to trim away excess paper or sandpaper to smooth out rough spots. This step is optional but can make a big difference, especially for intricate designs. A little extra effort here ensures your final piece looks clean and polished.
Erase any visible pencil marks.
Grab an eraser and gently remove any pencil lines left from tracing. Be careful not to smudge or tear the paper. This simple step makes your design look neat and ready for display or further decoration.
Did You Know? A kneaded eraser works great for delicate paper. It lifts pencil marks without damaging the surface.
With these steps, you’ve successfully learned how to die cut paper without a machine. Whether you’re creating a single piece or multiple designs, taking the time to cut and refine your work ensures stunning results. Now, you’re ready to move on to adding those creative finishing touches!
Tips and Tricks for Better Results
When it comes to manual die cutting, a few thoughtful strategies can make a big difference in the quality of your results. These tips will help you refine your technique and create stunning designs with ease.
Use High-Quality Tools
The tools you use play a huge role in the outcome of your project. Investing in sharp blades and sturdy stencils ensures cleaner cuts and reduces the risk of tearing your paper. A dull blade can drag through the material, leaving jagged edges that are hard to fix. Stencils made from durable materials like plastic or metal hold their shape better, giving you consistent results every time.
Quick Tip: Keep your craft knife or scissors sharp by regularly replacing the blade or sharpening the edges. This small step saves you time and frustration during the cutting process.
Practice on Scrap Paper
Before diving into your final project, take a moment to practice on scrap paper. This helps you get comfortable with your tools and refine your technique. Testing your design on a less important piece of paper allows you to spot potential issues and make adjustments without wasting valuable materials.
A seasoned crafter once shared how practicing on scrap paper saved her from ruining an entire batch of wedding invitations. She discovered that her stencil shifted slightly during tracing, and a quick fix made all the difference!
Work Slowly and Steadily
Precision is key when cutting intricate designs. Rushing through the process increases the chances of mistakes, like uneven cuts or accidental tears. Take your time and focus on steady, deliberate movements. If you’re using a craft knife, guide it along the traced lines with care. For scissors, make small, controlled snips to maintain accuracy.
Pro Tip: Rotate the paper instead of your cutting tool when working on curves or tight corners. This gives you better control and helps you achieve smoother edges.
By following these tips, you’ll elevate your manual die cutting skills and create professional-looking designs. Whether you’re crafting for fun or working on a special project, these tricks ensure that your efforts pay off beautifully.
Experiment with Layering
Layering adds depth and dimension to your die-cut creations, making them visually striking. By combining multiple die-cut shapes, you can create a 3D effect that brings your designs to life. Here’s how you can experiment with layering to elevate your projects:
- Start with a base layer. Choose a simple shape or design as the foundation. This layer sets the tone for the rest of your creation.
- Add complementary shapes. Stack additional die-cut pieces on top of the base layer. Use smaller or more intricate designs to create contrast and interest.
- Play with colors and textures. Mix and match different shades of paper or materials. For example, pair matte cardstock with glitter paper for a dynamic look.
- Use adhesive strategically. Apply glue or double-sided tape to secure each layer. For a true 3D effect, use foam adhesive squares to lift certain pieces and create shadows.
A crafter once shared how layering transformed her handmade greeting cards. She combined floral die cuts with metallic accents, creating a stunning bouquet effect that wowed her friends and family.
Layering is all about creativity. Don’t be afraid to experiment with different combinations until you find the perfect balance. Whether you’re making cards, scrapbook pages, or home décor, layering adds a professional touch that’s hard to beat.
Experiment with Pressure Techniques
Pressure techniques offer a unique way to achieve clean cuts without a machine. By adjusting the pressure applied during the cutting process, you can control the outcome and even explore new textures. Here’s how to make the most of this method:
- Use a rolling pin for even pressure. Place your die on the paper, cover it with a protective layer like cardboard, and roll the pin firmly over the surface. This technique works well for thinner materials like cardstock.
- Try a hammer for thicker materials. For sturdier papers or fabrics, gently tap the die with a hammer. Focus on even, consistent strikes to avoid damaging the die or paper.
- Experiment with layering protective sheets. Adding foam or extra cardboard between the die and your workspace can help distribute pressure evenly. This prevents unwanted marks or indentations.
- Adjust your force based on the material. Lighter pressure works for delicate papers, while heavier force may be needed for thicker materials.
Quick Tip: Always test your pressure technique on scrap paper first. This helps you find the right balance without risking your final project.
Pressure techniques not only give you clean cuts but also allow you to explore creative possibilities. You might discover new textures or effects that add a unique flair to your designs. With a little practice, you’ll master this method and expand your crafting skills.
Creative Ideas for Manual Die Cutting Projects
Manual die cutting opens up endless possibilities for creative projects. Whether you're crafting for fun or working on something special, these ideas will inspire you to put your skills to good use.
Greeting Cards
Create intricate designs for birthdays, holidays, or special occasions.
Handmade greeting cards always leave a lasting impression. Use manual die cutting to craft unique designs that stand out. For birthdays, try cutting out balloons, cakes, or numbers to personalize the card. During the holidays, create snowflakes, Christmas trees, or stars to add a festive touch. Special occasions like weddings or anniversaries call for elegant patterns such as hearts or floral motifs.
Expert Tip: Experts at American Micro Industries emphasize the importance of precision in die cutting. While professionals use advanced machinery, you can achieve clean cuts manually by controlling your tools carefully and practicing steady pressure.
Layering die-cut shapes on your card adds depth and dimension. For example, stack a glittery star over a matte background for a striking effect. Add decorative elements like markers or paint to make your designs pop. Your handmade cards will not only look professional but also carry a personal touch that store-bought ones can't match.
Scrapbooking
Add custom die-cut embellishments to your scrapbook pages.
Scrapbooking is all about preserving memories creatively. Manual die cutting lets you add custom embellishments that reflect your personal style. Cut out shapes like flowers, leaves, or frames to highlight photos. Use themed designs—like seashells for a beach trip or pumpkins for a fall event—to tie your pages together.
Pro Tip: Test your designs on scrap paper before cutting your final materials. This ensures your shapes fit perfectly on the page and align with your layout.
Experiment with layering to create a 3D effect. For instance, layer a die-cut frame over a photo or stack multiple shapes to build a scene. You can also use textured paper or metallic cardstock to add variety. These small details make your scrapbook pages more dynamic and visually appealing.
Home Décor
Make paper garlands, wall art, or table decorations.
Transform your home with handmade décor using manual die cutting. Paper garlands are a simple yet stunning way to decorate for parties or holidays. Cut out shapes like stars, hearts, or leaves, and string them together with twine or ribbon. Hang them across walls, windows, or doorways for an instant festive vibe.
Wall art is another great project. Create intricate designs like mandalas or silhouettes, and frame them for a personalized touch. You can also make table decorations, such as place cards or centerpieces, to elevate your dining setup. For example, cut out floral shapes and layer them to form a bouquet centerpiece.
Quick Tip: Use sturdy materials like cardstock for home décor projects. Thicker paper holds its shape better and lasts longer.
Adding decorative elements like glitter or paint can enhance your creations. A touch of gold paint on a die-cut leaf or a sprinkle of glitter on a star can make your décor shine. These handmade pieces will not only beautify your space but also showcase your creativity.
Gift Wrapping
Use die-cut shapes as tags or decorative accents for wrapped gifts.
Gift wrapping becomes extra special when you add personal touches. Die-cut shapes can transform ordinary wrapping into something memorable. Whether you're preparing a birthday present or a holiday surprise, these shapes make your gifts stand out.
Start by choosing a design that matches the occasion. For example, stars or snowflakes work well for Christmas, while hearts are perfect for anniversaries or Valentine’s Day. Use your manual die-cutting tools to create these shapes from colorful cardstock or patterned paper. If you want a more elegant look, metallic or glitter paper adds a touch of sophistication.
Once you’ve cut out your shapes, think about how to use them creatively. Attach them as gift tags by punching a small hole and threading ribbon or twine through it. Write the recipient’s name on the tag for a personal touch. You can also layer multiple die-cut shapes to create a 3D effect. For instance, stack a smaller star on top of a larger one and secure them with foam adhesive for added depth.
Decorative accents are another way to elevate your wrapping. Arrange die-cut shapes directly on the gift box or bag. Use glue or double-sided tape to attach them securely. Try clustering shapes in one corner for a modern look or spreading them evenly for a balanced design. Adding small details like glitter or hand-drawn patterns can make your accents even more eye-catching.
Expert Tip: Experts at American Micro Industries highlight the importance of precision in die cutting. While professionals use advanced machinery for perfect results, you can achieve similar accuracy by practicing steady pressure and using sharp tools.
Experiment with different materials to create unique effects. Vellum paper adds a soft, translucent touch, while textured cardstock gives a more tactile feel. Mixing materials can make your gift wrapping truly one-of-a-kind. With manual die cutting, you have endless possibilities to make every gift feel special and thoughtful.
Manual die cutting offers a creative and budget-friendly way to bring your crafting ideas to life. By following the steps outlined in this guide, you can master how to die cut paper without machine and create stunning designs with just a few tools. This hands-on approach not only saves money but also encourages you to explore your artistic side. Whether you're making cards, decorations, or scrapbook embellishments, the possibilities are endless. So, gather your materials, try these techniques, and let your imagination lead the way. Don’t forget to share your unique creations with others!
FAQ
What is die cutting, and how does it work?
Die cutting is a crafting technique that involves cutting paper or other materials into specific shapes using a die. A die is like a stencil or mold that helps create consistent designs. When you press the die onto the material with enough pressure, it cuts out the shape cleanly. While machines often handle this process, you can achieve similar results manually with tools like craft knives, scissors, or even a rolling pin.
Fun Fact: Manual die cutting gives you more control over the design process and allows for unique, custom creations.
Can I die cut without a machine?
Yes, you can! Manual die cutting doesn’t require a machine. Instead, you use tools like craft knives, scissors, or stencils to cut your designs by hand. For added pressure, you can use a rolling pin or hammer with a protective layer. This method is budget-friendly and perfect for small projects or beginners who want to explore crafting without investing in expensive equipment.
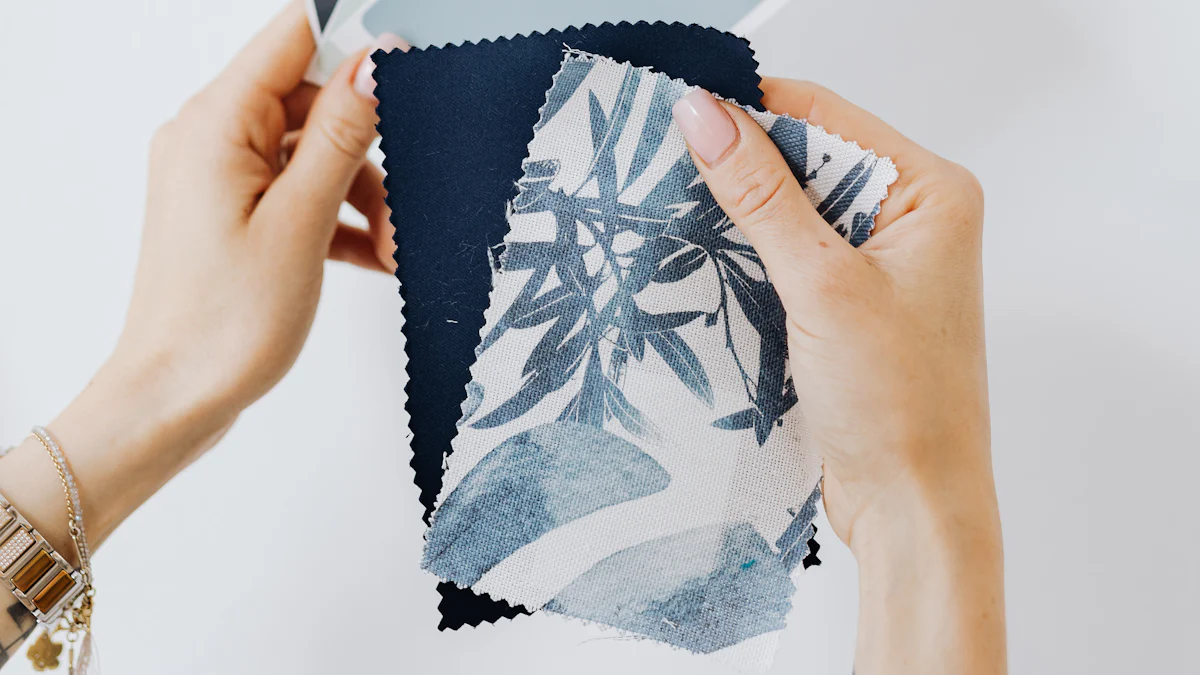
What materials can I use for manual die cutting?
You can use a variety of materials, but paper and cardstock are the most common. Thicker materials like cardboard or foam sheets also work well, especially for layered designs. If you’re feeling adventurous, try cutting thin fabrics or vellum for unique effects. Just make sure your tools are sharp enough to handle the material without tearing.
Pro Tip: Always test your material on scrap pieces first to ensure it cuts smoothly.
How do I choose between manual and machine die cutting?
It depends on your needs and budget. Manual die cutting is ideal for small, one-time projects or when you want a hands-on approach. It’s affordable and encourages creativity. Machine die cutting, on the other hand, is better for larger projects or frequent use. Machines offer speed and precision, making them great for professional crafters or those working on bulk designs.
Are there any safety tips for manual die cutting?
Absolutely! Here are some key safety tips:
- Use a cutting mat to protect your workspace and prevent accidents.
- Keep your tools sharp to avoid dragging or tearing the material.
- Always cut away from your body to reduce the risk of injury.
- Store your craft knives and scissors safely when not in use.
Quick Reminder: Take breaks if you’re working on intricate designs to avoid hand fatigue.
Can I create my own stencils for die cutting?
Yes, creating your own stencils is a great way to personalize your projects. Use sturdy materials like cardboard or plastic to make durable templates. Sketch your design first, then cut it out carefully with a craft knife. Custom stencils let you experiment with unique shapes and patterns that aren’t available in stores.
What are some common mistakes to avoid in manual die cutting?
Here are a few mistakes to watch out for:
- Using dull tools, which can tear the material.
- Skipping the cutting mat, leading to damage on your workspace.
- Rushing through intricate designs, resulting in uneven cuts.
- Forgetting to secure stencils, causing them to shift during tracing.
Take your time and focus on precision to avoid these pitfalls.
How can I improve my manual die cutting skills?
Practice is key! Start with simple shapes and gradually move to more intricate designs. Use high-quality tools and materials for better results. Experiment with layering and pressure techniques to discover new effects. Online resources, like crafting blogs or video tutorials, can also provide inspiration and tips to refine your skills.
Did You Know? Many experienced crafters recommend practicing on scrap paper before working on your final project.
What are some creative projects I can try with manual die cutting?
The possibilities are endless! Here are a few ideas:
- Greeting Cards: Add intricate designs for birthdays or holidays.
- Scrapbooking: Create custom embellishments to highlight your memories.
- Home Décor: Make paper garlands, wall art, or table decorations.
- Gift Wrapping: Use die-cut shapes as tags or accents for a personal touch.
Let your imagination guide you, and don’t be afraid to experiment with different materials and techniques.
Where can I find inspiration for die cutting projects?
You can find inspiration online through crafting blogs, Pinterest boards, or YouTube tutorials. Many crafters share their designs and techniques, which can spark new ideas for your projects. Craft stores often have pre-made stencils or templates that you can adapt to your style. Joining crafting communities or forums is another great way to exchange ideas and learn from others.
Pro Tip: Save your favorite designs or tutorials in a folder for easy reference when you need a creative boost.
See Also
Creative Die Cutting Techniques Without Any Machine
Exploring Die Cuts Without The Need For Machines
Simple Ways to Die Cut Without Using Machines