How to Cut Your Own Hair with a Machine at Home

Learning how to cut your own hair with a machine might seem daunting at first, but it’s a valuable skill to master. Many individuals have embraced the advantages of self-haircuts, from saving hundreds of dollars each year to skipping the long waits at the barber shop. One person shared their journey of switching to cutting their own hair out of necessity and now consistently achieving better results than they ever did at a salon. While mistakes are inevitable, hair always grows back, giving you countless chances to refine your technique. With the proper tools and a little patience, you’ll discover that understanding how to cut your own hair with a machine is simpler than you might expect.
Key Takeaways
- Invest in quality tools like adjustable clippers, combs, and mirrors to achieve a professional-looking haircut at home.
- Prepare your space by ensuring good lighting and keeping your tools organized to create a stress-free haircutting environment.
- Start with longer guard sizes on your clippers to avoid cutting too much hair at once, and gradually switch to shorter guards for blending.
- Use a handheld mirror to check the back of your head, ensuring even cuts and blending as you work.
- Refine your haircut by blending uneven areas with a comb and shears, paying special attention to tricky spots like cowlicks.
- Finish your haircut by trimming the edges for clean lines around your ears and neckline, and perform a final check for any missed spots.
- Maintain your clippers by cleaning and oiling them regularly to ensure they perform well and last longer.
Tools and Equipment for Cutting Your Own Hair with a Machine
When learning how to cut your own hair with a machine, having the right tools makes all the difference. The right equipment ensures precision, ease, and a professional-looking result. Let’s break down the essentials and optional tools you’ll need.
Essential Tools for Success
Clippers and Guards: Choosing adjustable clippers and the right guard sizes
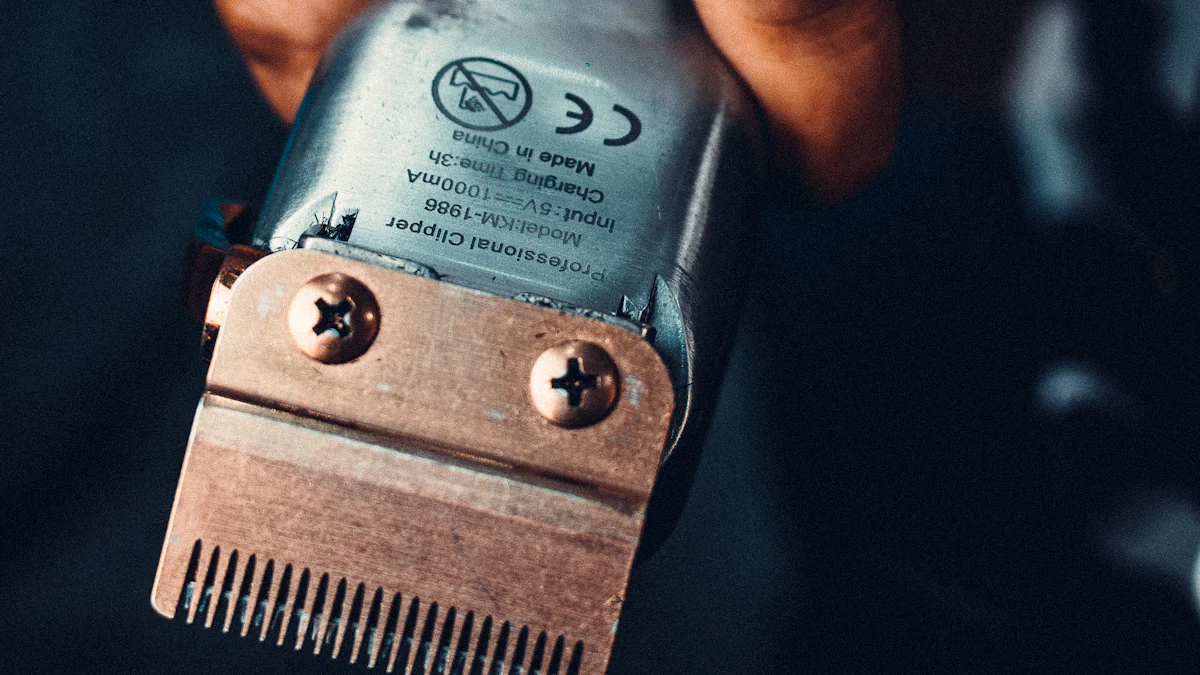
Clippers are the backbone of any self-haircut. Look for clippers with adjustable blades and a variety of guard sizes. Adjustable clippers, like the Wahl Professional 5-Star Senior Clipper, offer precision and control, making them perfect for beginners and pros alike. If you have thick hair, the Andis ReVite Clipper is a great choice because it handles dense hair effortlessly. For those seeking durability, the Andis Master Cordless Clipper stands out for its long-lasting performance. Always start with a longer guard to avoid cutting too much hair at once, then gradually switch to shorter guards for blending.
Comb and Shears: For blending and refining details
A good comb is essential for blending and achieving clean lines. The Clipper Comb is ideal for techniques like tapering and flat-top cutting. Pair it with sharp shears to refine details and tackle uneven spots. These tools help you achieve a polished look by smoothing out transitions between different lengths.
Mirrors: Using a handheld and wall-mounted mirror for better visibility
Cutting your own hair requires clear visibility. A combination of a wall-mounted mirror and a handheld mirror works best. The wall-mounted mirror provides a stable view of the front and sides, while the handheld mirror helps you see the back of your head. Position the mirrors strategically to ensure you can check every angle as you work.
Optional Tools for Enhanced Results
Cape or Towel: To keep hair off your clothes and maintain cleanliness
A cape or towel keeps your workspace tidy and prevents hair from sticking to your clothes. Draping a towel over your shoulders or using a barber’s cape makes cleanup easier and keeps you comfortable during the process.
Cleaning Brush and Oil: For maintaining clipper performance
Maintaining your clippers is just as important as using them. A cleaning brush removes hair clippings from the blades, ensuring smooth operation. Applying clipper oil after each use keeps the blades sharp and extends the life of your equipment. The Wahl Color Pro Cordless Clipper is a budget-friendly option that includes maintenance tools, offering great value for beginners.
“Investing in quality tools not only improves your haircut but also makes the process more enjoyable.”
By gathering these tools, you’ll set yourself up for success. Whether you’re a beginner or experienced, the right equipment simplifies the process and helps you master how to cut your own hair with a machine.
Preparing to Cut Your Own Hair with a Machine
Preparation is the foundation of a successful self-haircut. Taking the time to set up your space, ready your hair, and organize your tools ensures a smoother process and better results. Let’s dive into the steps you need to follow before you start cutting.
Setting Up Your Space
Creating the right environment makes cutting your hair easier and less stressful. Here’s how to get your space ready:
Choose a well-lit area with access to a mirror.
Good lighting is essential for spotting uneven cuts and ensuring precision. Pick a room with natural light or use bright artificial lighting. Position yourself near a large mirror, like the one in your bathroom, for a clear view of your head. If possible, add a handheld mirror to check the back of your hair.
Lay down a towel or mat to catch hair clippings.
Hair clippings can get messy quickly. Spread a towel or a nonslip mat on the floor to catch the hair as you cut. This simple step saves time during cleanup and keeps your workspace tidy. A clean area helps you focus on the haircut instead of worrying about the mess.
“A well-prepared space not only keeps things organized but also helps you stay calm and focused during the process.”
Preparing Your Hair
Your hair needs to be in the right condition before you start cutting. Proper preparation ensures the clippers glide smoothly and deliver even results.
Wash and dry your hair to remove dirt and tangles.
Clean hair is easier to work with. Wash your hair with shampoo to remove any dirt, oil, or product buildup. Dry it thoroughly with a towel or blow dryer. Wet or damp hair can stick to the clippers, making it harder to achieve a clean cut.
Comb your hair to ensure it’s smooth and ready for cutting.
Use a comb to detangle your hair and smooth it out. This step helps you see the natural direction of your hair growth, which is crucial for achieving a polished look. Combing also makes it easier to section your hair and cut it evenly.
Organizing Your Tools
Having all your tools within reach keeps the process efficient and interruption-free. Here’s how to get organized:
Arrange all tools within easy reach to avoid interruptions.
Place your clippers, guards, comb, shears, and mirrors on a countertop or table nearby. Keep everything neatly arranged so you can grab what you need without searching. If you’re using additional items like a cape or cleaning brush, include those in your setup too. Staying organized minimizes distractions and helps you focus on perfecting your haircut.
“Preparation is key when learning how to cut your own hair with machine tools. A little effort upfront leads to a smoother and more enjoyable experience.”
By following these steps, you’ll set yourself up for success. A well-prepared space, clean and combed hair, and organized tools make the process less intimidating and more manageable. Once you’ve completed these preparations, you’ll be ready to start cutting with confidence.
Step-by-Step Guide on How to Cut Your Own Hair with Machine
Cutting your own hair can feel intimidating, but breaking it into manageable steps makes the process much easier. Follow this guide to achieve a clean and polished look.
Starting with the Sides
Use a shorter guard for the sides and move the clippers upward.
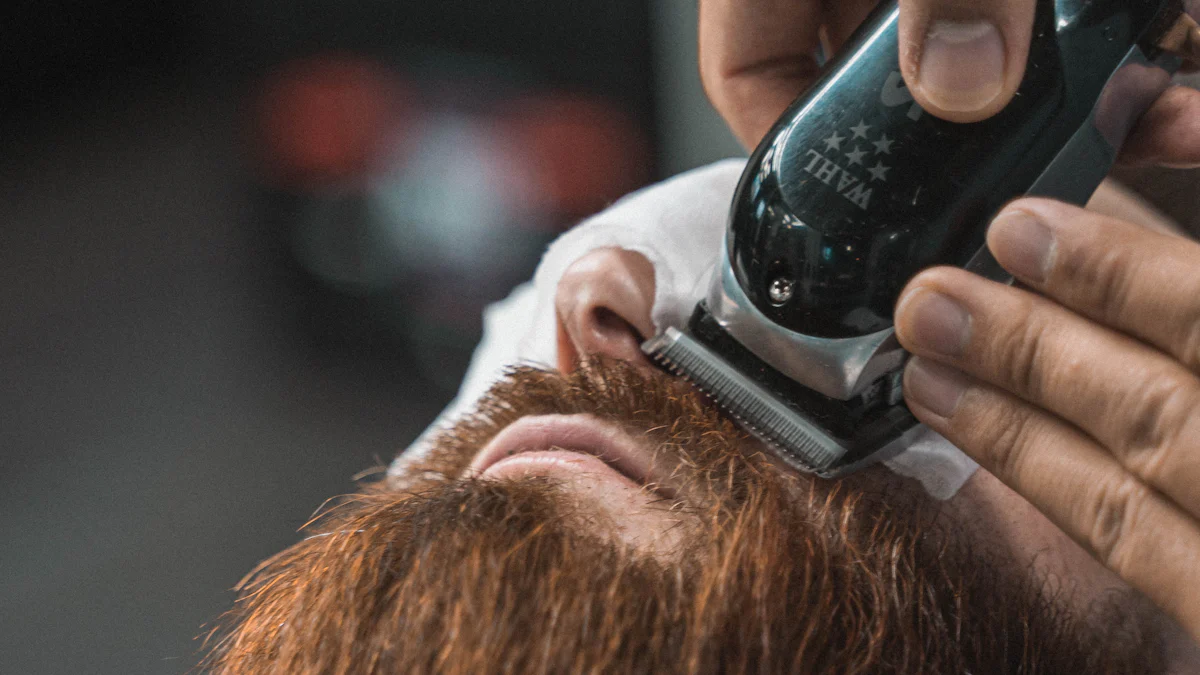
Begin with the sides of your head. Attach a shorter guard to your clippers, such as a #2 or #3, depending on how short you want the sides. Start at the bottom near your sideburns and move the clippers upward in smooth, controlled motions. Keep your wrist steady and avoid pressing too hard. This technique ensures an even cut and prevents patchy spots.
Pro Tip: Always move the clippers against the direction of hair growth for a cleaner cut.
Blend the sides into the top using a larger guard.
Switch to a larger guard, like a #4 or #5, to blend the sides into the top. Begin slightly above where you stopped with the shorter guard. Use a flicking motion as you move upward to create a seamless transition between the shorter and longer sections. Blending is key to achieving a professional look, so take your time with this step.
“Blending the sides into the top creates a natural flow and avoids harsh lines,” says Professional Barbers.
Moving to the Back
Use a handheld mirror to see the back of your head.
The back of your head can be tricky, but a handheld mirror makes it manageable. Stand with your back to a wall-mounted mirror and hold the handheld mirror in front of you. Adjust the angle until you can clearly see the back of your head. This setup gives you better visibility and control.
Work in small sections, blending as you go.
Start at the bottom of the back with the same shorter guard you used for the sides. Move the clippers upward in small sections, following the same upward motion. Switch to a larger guard to blend the back into the top, just as you did with the sides. Take your time and check your progress frequently in the mirror to ensure evenness.
Pro Tip: Use slow, deliberate strokes to avoid cutting too much hair at once.
Finishing with the Top
Use a longer guard for the top to maintain length.
For the top, attach a longer guard, such as a #6 or #7, to maintain more length. Comb your hair forward or in the direction it naturally falls. Run the clippers over the top, starting at the front and moving toward the crown. Keep your strokes consistent to achieve an even cut.
“Cutting the top in horizontal sections helps maintain balance and symmetry,” advises Professional Barbers.
Comb and cut in the direction of hair growth.
After clipping, use a comb to smooth out the top and check for uneven areas. If you notice any longer strands, trim them with scissors for precision. Always cut in the direction of hair growth to maintain a natural look. This step refines the overall style and ensures a polished finish.
Pro Tip: If you’re unsure about the length, start with a longer guard and gradually work your way down.
By following these steps, you’ll gain confidence in how to cut your own hair with machine tools. Practice makes perfect, so don’t worry if your first attempt isn’t flawless. With time, you’ll master the technique and enjoy the convenience of self-haircuts.
Blending and Refining
Perfecting your haircut involves blending and refining the details. These steps help you achieve a polished, professional look by addressing uneven areas and tricky spots.
Use a comb and shears to blend uneven areas.
Blending ensures a smooth transition between different hair lengths. Grab a comb and a pair of sharp shears to tackle uneven sections. Start by combing through your hair to identify areas where the lengths don’t flow naturally. Hold the comb at an angle against your scalp and use the shears to trim small amounts of hair. This technique, often called the scissor-over-comb method, allows for precise control and helps you avoid cutting too much.
Professional Barbers recommend this method for creating a seamless blend. They emphasize that small, deliberate snips work best for achieving a natural look.
Work in sections, focusing on one area at a time. Check your progress frequently in the mirror to ensure consistency. If you’re new to this, take it slow. The goal is to refine the haircut, not rush through it.
Pay attention to cowlicks and tricky spots.
Cowlicks and other tricky areas can disrupt the flow of your haircut. These spots often require extra care and attention. Use the comb to lift the hair in these areas and observe the direction of growth. Instead of fighting against it, work with the natural pattern. Trim carefully, following the hair’s direction to maintain a balanced appearance.
For stubborn cowlicks, try using a slightly longer guard on your clippers. This approach prevents cutting the hair too short, which can make the cowlick stand out even more. If needed, use the shears to fine-tune the area for a smoother finish.
Pro Tip: Always double-check these spots under good lighting. A handheld mirror can help you spot any imperfections you might miss otherwise.
Blending and refining take your haircut to the next level. These steps ensure that your self-haircut looks clean and professional, even if you’re still learning how to cut your own hair with machine tools. With practice, you’ll gain confidence in handling uneven areas and tricky spots like a pro.
Adding the Finishing Touches to Your Self-Haircut
You’ve made it through the main steps of your self-haircut, but the finishing touches are what truly elevate your look. This part ensures your haircut appears clean, polished, and professional. Let’s focus on refining the edges and performing a final check.
Trimming the Edges
Clean edges make a huge difference in how your haircut looks. They frame your face and give your style a sharp, well-groomed appearance. Here’s how you can achieve that:
Use the clipper’s edge or a trimmer for clean lines around the ears and neckline.
Start by focusing on the areas around your ears. Use the edge of your clippers or a dedicated trimmer for precision. Hold the tool steady and follow the natural curve of your ear. Take your time to avoid cutting too much or creating uneven lines. If you’re unsure, make small adjustments and check your progress in the mirror frequently.
For the neckline, use a handheld mirror to see the back clearly. Begin at the base of your neck and work upward, creating a straight or slightly rounded line, depending on your preference. A trimmer works best for this step because it allows for more control. If you’re new to this, don’t worry about perfection. With practice, you’ll get better at creating clean, sharp edges.
Pro Tip: Use slow, deliberate movements when trimming the edges. Rushing can lead to mistakes that are hard to fix.
Final Check
Before you put away your tools, take a moment to inspect your work. This step helps you catch any missed spots or uneven areas.
Inspect your haircut in the mirror for any missed spots.
Stand in front of a large mirror and use a handheld mirror to check all angles of your head. Pay close attention to the back and sides, as these areas are easy to overlook. Look for uneven lengths, stray hairs, or spots that need additional blending. Good lighting is crucial here, so make sure your space is well-lit.
Make small adjustments as needed.
If you notice any imperfections, grab your clippers or shears and make small adjustments. For uneven areas, use a comb to lift the hair and trim carefully. If the blending between sections doesn’t look smooth, go over those areas again with the appropriate guard size. Remember, small tweaks can make a big difference in the overall look.
“The hardest part is learning to fade and blend, especially the back,” shared one self-haircut enthusiast. Mistakes happen, but they’re part of the learning process. If you mess up, don’t stress—hair grows back, giving you another chance to improve.
Once you’re satisfied with your haircut, clean up your tools and workspace. Admire your work and enjoy the confidence that comes with mastering how to cut your own hair with machine tools.
Maintaining Your Clippers for Long-Term Use
Taking care of your clippers ensures they stay in top condition and deliver consistent results. Proper maintenance also extends their lifespan, saving you money in the long run. Let’s explore how to clean, oil, and store your clippers effectively.
Cleaning Your Clippers
Keeping your clippers clean is essential for smooth performance. Hair clippings and debris can clog the blades, reducing efficiency and causing uneven cuts. Follow these steps to keep your clippers spotless:
Brush off hair clippings after each use.
After every haircut, use a small cleaning brush to remove hair clippings from the blades. Most clippers come with a brush designed for this purpose. Hold the clippers at an angle and gently sweep the brush across the blades. This quick step prevents buildup and keeps the blades running smoothly.
Pro Tip: If you don’t have a cleaning brush, a soft toothbrush works just as well for removing fine hair particles.
Wash detachable parts if the clippers are waterproof.
If your clippers are waterproof, detach the blade assembly and rinse it under warm water. Use mild soap to clean any stubborn residue. Make sure to dry the parts thoroughly with a soft cloth before reassembling. Water left on the blades can lead to rust, so don’t skip this step.
“Regular cleaning not only improves performance but also ensures hygiene, especially if multiple people use the same clippers.”
Oiling and Storing
Oiling and proper storage are just as important as cleaning. These steps keep your clippers sharp and ready for use whenever you need them.
Apply clipper oil to keep the blades sharp.
Blade oil reduces friction and prevents the blades from dulling over time. After cleaning, apply a drop of oil to the moving parts of the blade. Turn the clippers on for a few seconds to distribute the oil evenly. Wipe away any excess with a cloth to avoid mess. Regular oiling ensures a smoother cut and prolongs the life of your clippers.
Did you know? Oiling your clippers after every use can significantly reduce wear and tear, keeping them in peak condition for years.
Store the clippers in a dry, safe place.
Proper storage protects your clippers from damage and dust. Keep them in a protective case or pouch when not in use. Store them in a cool, dry area to prevent moisture from affecting the blades. Avoid leaving them in humid spaces like bathrooms, as this can lead to rust and corrosion.
Pro Tip: If your clippers came with a storage case, use it to keep all the accessories organized and within reach.
By following these maintenance tips, you’ll ensure your clippers remain reliable and efficient. Clean, oil, and store them properly after each use, and they’ll reward you with years of flawless performance. Taking care of your tools is just as important as mastering your haircutting technique!
Cutting your own hair with a machine is a skill you can master with time and effort. By following the steps outlined in this guide, you’ll gain the confidence to create a professional-looking haircut right at home. The right tools and preparation make all the difference, so invest in quality equipment and maintain it properly. Don’t hesitate to experiment with different techniques or styles as you improve. Mistakes are part of the process, and every attempt helps you refine your skills. Remember, practice makes perfect, and your hair will always grow back for another try!
FAQ
How do I avoid making mistakes when cutting my own hair?
Mistakes happen, especially when you're just starting out. To minimize them, start with a longer guard on your clippers. This approach gives you more control and prevents cutting off too much hair at once. Work slowly and check your progress frequently in the mirror. If you're unsure about a specific step, watch tutorial videos or practice on a small section of hair first. Remember, hair grows back, so don't stress over minor errors.
"I started cutting my own hair out of necessity and made plenty of mistakes at first. Over time, I learned to take it slow and trust the process," shared one self-haircut enthusiast.
What’s the best way to blend the sides and top of my hair?
Blending creates a seamless transition between different lengths. Use a larger guard after cutting the sides to blend into the top. A flicking motion with the clippers helps soften the line between sections. For extra precision, try the scissor-over-comb method. Hold the comb at an angle and trim small amounts of hair with shears. Take your time and check your work in the mirror to ensure a smooth finish.
Can I cut my hair if I’ve never done it before?
Absolutely! Cutting your own hair might feel intimidating, but it's a skill anyone can learn with practice. Start with simple styles and follow a step-by-step guide. Use quality tools like adjustable clippers and mirrors for better results. Many people begin cutting their hair to save money or avoid trips to the barber. "I was nervous at first, but now I save hundreds of dollars a year and actually enjoy the process," said one individual who embraced self-haircuts.
How often should I clean and oil my clippers?
Clean your clippers after every use to keep them in top condition. Use a small brush to remove hair clippings from the blades. If your clippers are waterproof, rinse detachable parts under warm water and dry them thoroughly. Apply clipper oil after each cleaning to keep the blades sharp and reduce friction. Regular maintenance ensures smooth performance and extends the life of your equipment.
Pro Tip: Oiling your clippers takes less than a minute but makes a huge difference in their longevity.
What if I can’t see the back of my head clearly?
Use a handheld mirror along with a wall-mounted mirror to get a clear view of the back of your head. Stand with your back to the wall-mounted mirror and hold the handheld mirror in front of you. Adjust the angle until you can see the back clearly. Work in small sections and take your time. Good lighting also helps you spot any missed areas or uneven cuts.
Should I cut my hair wet or dry?
Dry hair works best for cutting with clippers. Wet hair can stick to the blades, making it harder to achieve an even cut. Wash and dry your hair before starting to remove dirt and tangles. Combing your hair after drying ensures it’s smooth and ready for cutting. Dry hair also lets you see the natural direction of growth, which helps with blending and styling.
What tools do I need for a professional-looking self-haircut?
For a polished result, invest in these essentials:
- Clippers with adjustable guards for precise cutting.
- A comb and sharp shears for blending and refining details.
- Mirrors (both wall-mounted and handheld) for better visibility.
- Optional tools like a cape or towel to keep your workspace clean.
For a polished result, invest in these essentials: "Having the right tools made all the difference for me. It turned a stressful task into something enjoyable," shared one self-haircut enthusiast.
How can I deal with tricky spots like cowlicks?
Cowlicks and other tricky areas require extra care. Use a comb to lift the hair and observe its natural growth pattern. Trim carefully in the direction of growth to avoid cutting too short. For stubborn cowlicks, use a slightly longer guard to maintain balance. Check these spots under good lighting and make small adjustments as needed.
Is it worth cutting my own hair instead of going to a barber?
Cutting your own hair saves money and time. Many people switch to self-haircuts to avoid the hassle of scheduling appointments or waiting at the barber shop. "I started cutting your own hair to save money, but now I prefer the results over what I used to get at salons," said one individual.
What’s the best way to clean up after a haircut?
Lay down a towel or mat before you start to catch hair clippings. After finishing, shake out the towel or sweep up the hair with a broom. Use a vacuum for any remaining bits. Keeping your workspace clean makes the process more enjoyable and less stressful.
See Also
Comprehensive Instructions for Operating a Hair Clipper
Review of the Top Wahl Magic Clip Hair Clipper
Techniques for Manual Die Cutting Without Equipment
Understanding Cutting Machines: Costs and Varieties Explained