How to Cut Tiles Without Machine Using a Snap Cutter

Learning how to cut tiles without a machine is easier than you might think, thanks to the simplicity and efficiency of a snap cutter. This manual tool allows you to score the tile surface and snap it cleanly along the marked line. It’s an affordable solution, with basic models starting at just $15. Since it doesn’t require electricity or water, it’s a safer and more convenient alternative to power tools. Snap cutters are particularly effective for straight cuts on ceramic or porcelain tiles, delivering precise results. With some practice, you’ll quickly master how to cut tiles without a machine and tackle your tile-cutting projects like a pro.
Key Takeaways
- A snap cutter is an affordable and effective tool for cutting tiles without electricity or water, making it ideal for DIY projects.
- Always prioritize safety by wearing protective gear, including safety goggles and gloves, to prevent injuries while cutting tiles.
- Accurate measurements and clear markings are crucial; use a measuring tape and a pencil or marker to ensure precise cuts.
- Stability is key—work on a flat, sturdy surface and double-check the alignment of the tile with the snap cutter for clean cuts.
- Score the tile only once with firm, even pressure to create a clean groove; avoid multiple passes to prevent uneven breaks.
- After snapping the tile, smooth any rough edges with a tile file or sandpaper for a polished finish and to avoid injuries.
- Practice on spare tiles to build confidence and improve your technique before tackling your actual project.
Tools and Materials Needed
When cutting tiles without a machine, having the right tools and materials is essential.
Essential Tools
Snap Cutter
The snap cutter is your primary tool for this task. It’s lightweight, easy to use, and doesn’t require electricity or water. This manual tool features a scoring wheel, rails, and a handle to apply pressure. You can find basic models for as little as $15, making it an affordable option for DIY projects. It’s perfect for straight cuts and even diagonal ones, offering clean results with minimal mess.
Measuring Tape or Ruler
Accurate measurements are crucial when cutting tiles. A measuring tape or ruler helps you mark precise lines, ensuring your cuts fit perfectly into your design. Always double-check your measurements before scoring the tile.
Pencil or Marker for Marking Tiles
A pencil or marker is necessary for marking the cutting line on your tile. Use a pencil for lighter tiles and a marker for darker ones. Clear markings help you align the tile correctly on the snap cutter.
Safety Goggles and Gloves
Protective gear is non-negotiable. Safety goggles shield your eyes from tiny shards or debris, while gloves protect your hands from sharp edges and improve your grip on the tile. Prioritize safety to avoid injuries during the process.
Optional Tools
Tile File or Sandpaper for Smoothing Edges
After snapping the tile, the edges might feel rough or uneven. A tile file or sandpaper helps smooth these edges, giving your tile a polished finish. This step is especially important for visible cuts.
Straightedge or T-Square for Accurate Measurements
For perfectly straight lines, a straightedge or T-square can be a game-changer. These tools help you draw precise cutting lines, ensuring your tiles align seamlessly in your project.
Pro Tip: Investing in quality tools, even optional ones, can save you time and effort while improving the overall outcome of your tile-cutting project.
With these tools and materials, you’re well-equipped to start cutting tiles like a pro. The next step is preparing your workspace and tiles, which we’ll cover in the following section.
Preparing the Tile and Workspace
Creating a proper setup and preparing your tile are crucial steps for achieving clean and precise cuts. Let’s walk through how to get everything ready before you start cutting.
Setting Up Your Workspace
A well-organized workspace makes the process smoother and safer. Here’s how to set it up:
Choose a flat, stable surface to work on.
Pick a sturdy table or bench that won’t wobble while you’re working. Stability is key to keeping your tile in place and ensuring accurate cuts. Avoid uneven or soft surfaces, as they can lead to mistakes.
Ensure the area is well-lit and free of clutter.
Good lighting helps you see your markings clearly and align the tile properly. Clear away any unnecessary items from your workspace to avoid distractions or accidents. A tidy area keeps you focused and efficient.
Pro Tip: If you’re working indoors, use a portable lamp to eliminate shadows. For outdoor projects, choose a spot with natural light but avoid direct sunlight, which can make markings harder to see.
Preparing the Tile
Proper preparation of the tile ensures your cuts are precise and professional-looking. Follow these steps:
Measure the tile and mark the cutting line with a pencil or marker.
Use a measuring tape or ruler to determine the exact dimensions you need. Mark the cutting line clearly with a pencil for light-colored tiles or a marker for darker ones. Double-check your measurements to avoid errors.
Use a straightedge to ensure the line is straight and accurate.
Place a straightedge or T-square along the marked line and draw over it to refine the marking. This step ensures your line is perfectly straight, which is essential for a clean cut.
Imagine this: You’ve measured and marked your tile, but the line isn’t straight. When you cut, the tile doesn’t fit properly into your design. Taking a few extra seconds to use a straightedge saves you from this frustration.
Safety Preparation
Safety should always come first when working with tiles. Protect yourself by following these precautions:
Wear safety goggles to protect your eyes from debris.
Tiny shards of tile can fly off during scoring or snapping. Safety goggles shield your eyes from potential injuries. Don’t skip this step—it’s better to be safe than sorry.
Use gloves to prevent cuts and improve grip.
Tiles often have sharp edges, especially after cutting. Gloves protect your hands from accidental cuts and give you a better grip on the tile. Choose gloves that fit snugly for maximum control.
Quick Tip: Keep a small first-aid kit nearby, just in case. Even with precautions, minor accidents can happen.
By setting up your workspace, preparing your tile, and prioritizing safety, you’re setting yourself up for success. These steps might seem simple, but they make a big difference in the quality of your work. Once you’ve got everything ready, you’ll be all set to move on to the actual cutting process.
Step-by-Step Guide to Using a Snap Cutter
Cutting tiles without a machine becomes simple when you follow the right steps. This guide will walk you through the process of using a snap cutter effectively. By the end, you’ll feel confident tackling your tile-cutting projects.
Positioning the Tile
Place the tile on the snap cutter, aligning the cutting line with the scoring wheel.
Start by placing your tile on the snap cutter. Make sure the marked cutting line aligns perfectly with the scoring wheel. This alignment is crucial for achieving a clean and straight cut. Take your time to adjust the tile until it sits correctly.
Quick Tip: Double-check the alignment from both ends of the tile. A slight misalignment can lead to uneven cuts.
Ensure the tile is securely positioned against the cutter’s guide.
Push the tile gently but firmly against the cutter’s guide. This step ensures the tile stays stable while you score and snap it. A loose tile can shift during the process, ruining your cut. Stability is key here.
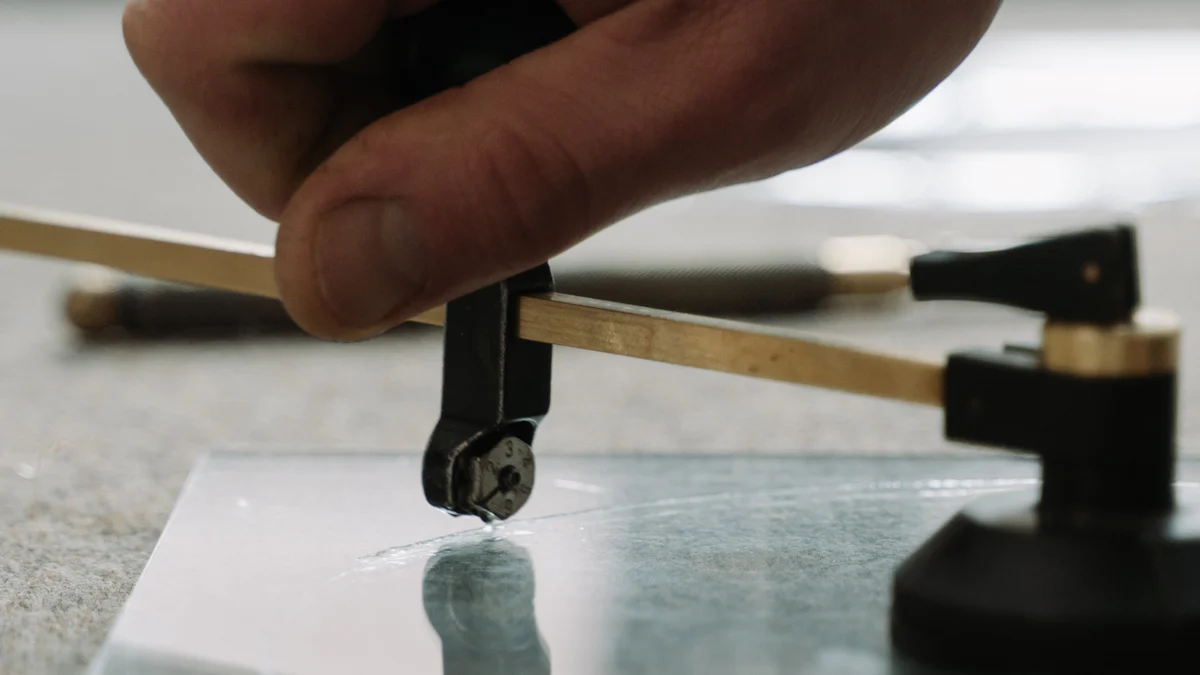
Scoring the Tile
Apply firm, even pressure to the scoring wheel and run it along the marked line.
Hold the snap cutter’s handle and press the scoring wheel onto the tile. Apply steady, even pressure as you move the wheel along the marked line. The goal is to create a visible groove or trench on the tile surface. This groove acts as the weak point where the tile will break.
Pro Tip: You don’t need to press too hard. Let the scoring wheel do the work. Excessive pressure can damage the tile or the cutter.
Avoid scoring the tile multiple times to prevent uneven cuts.
One clean pass with the scoring wheel is enough. Scoring the same line repeatedly can create uneven grooves, making it harder to snap the tile cleanly. Trust the process and resist the urge to go over the line again.
Snapping the Tile
Lower the snap cutter’s handle to apply pressure on the scored line.
Once you’ve scored the tile, it’s time to snap it. Lower the snap cutter’s handle slowly and apply pressure directly on the scored line. The handle’s mechanism distributes the force evenly, ensuring a precise break.
The tile should break cleanly along the scored line.
If you’ve followed the steps correctly, the tile will snap cleanly along the groove. Lift the handle and remove the two pieces of the tile. Inspect the edges to ensure they’re smooth and straight.
Expert Insight: As one expert explains, “Cracks form at the weakest point of a stressed surface, causing the tile to snap along the length of the score.” This principle is what makes the snap cutter so effective for straight cuts.
By mastering these steps, you’ll know exactly how to cut tiles without a machine. Practice a few times on spare tiles to build your confidence. With each attempt, you’ll get better at scoring and snapping tiles like a pro.
Finishing Touches
Use a tile file or sandpaper to smooth any rough edges.
After snapping the tile, you might notice sharp or uneven edges. These can be unsightly and even dangerous if left untreated. Smoothing them out is a simple yet essential step to give your tiles a polished, professional look.
Start by grabbing a tile file or a piece of sandpaper. A tile file is specifically designed for this task, making it the ideal choice. If you don’t have one, medium-grit sandpaper works as a good alternative. Hold the tile securely in one hand and gently run the file or sandpaper along the edges. Use steady, even strokes to remove any jagged bits or sharp corners.
Pro Tip: Always file or sand in one direction. This prevents the edges from chipping further and ensures a smoother finish.
Focus on the areas that will be visible once the tile is installed. For edges that will be hidden, you can spend less time perfecting them. However, smoothing all edges is still a good practice to avoid accidental cuts during handling or installation.
If you’re working with ceramic or porcelain tiles, you’ll find that they respond well to this process. These materials are softer and easier to refine. For harder tiles like stone, you may need to apply a bit more pressure or use a specialized stone file.
Expert Insight: As one expert explains, “Cracks form at the weakest point of a stressed surface, causing the tile to snap along the length of the score.” While this technique ensures clean cuts, minor imperfections can still occur, which is why finishing touches are so important.
Take your time during this step. Rushing can lead to uneven edges or even damage to the tile. Once you’ve smoothed the edges to your satisfaction, wipe the tile with a damp cloth to remove any dust or debris. This final touch leaves your tile ready for installation, ensuring it fits seamlessly into your project.
Safety Tips and Best Practices
When working with tiles, safety and precision should always be your top priorities. Following these tips will help you avoid injuries and achieve professional results.
General Safety Tips
Always wear protective gear, including goggles and gloves.
Protective gear is essential when cutting tiles. Tiny shards can fly off during scoring or snapping, posing a risk to your eyes. Always wear safety goggles to shield them. Gloves are equally important. They protect your hands from sharp edges and give you a better grip on the tile. Choose gloves that fit snugly for maximum control.
Quick Tip: Keep a spare pair of gloves and goggles nearby. If one gets damaged, you’ll have a backup ready.
Keep your hands away from the scoring wheel and snapping mechanism.
Your hands should never be near the scoring wheel or snapping mechanism while cutting. These parts apply significant pressure and can cause serious injuries if mishandled. Always hold the tile by its edges and keep your fingers clear of the cutter’s moving parts.
Pro Tip: Practice positioning your hands safely before you start cutting. This habit will make the process smoother and safer.
Best Practices for Clean Cuts
Score the tile only once with consistent pressure.
When scoring the tile, aim for a single, clean pass. Press the scoring wheel firmly but not excessively. Consistent pressure creates a precise groove, which ensures the tile snaps cleanly. Scoring multiple times can lead to uneven cuts or damage to the tile.
Expert Insight: A deep, even score weakens the tile along the marked line, making it easier to snap without breaking unevenly.
Ensure the tile is stable and properly aligned before snapping.
Stability is key to achieving clean cuts. Place the tile on a flat surface and align it carefully with the snap cutter’s guide. Double-check the alignment from both ends to ensure accuracy. A misaligned tile can result in crooked cuts or wasted material.
Quick Tip: If the edges feel rough after snapping, smooth them with a rubbing stone or sandpaper. This step gives your tile a polished finish and removes sharp edges.
By following these safety tips and best practices, you’ll not only protect yourself but also improve the quality of your work. Cutting tiles without a machine becomes much easier when you prioritize safety and precision.
Common Mistakes to Avoid
common mistakes to avoid will save you time, effort, and frustration.
Improper Scoring
Scoring too lightly or too heavily can result in uneven cuts.
When scoring a tile, applying the right amount of pressure is crucial. Pressing too lightly creates a shallow groove that won’t guide the snap properly. On the other hand, pressing too hard can damage the tile or even crack it prematurely. Aim for firm, steady pressure as you move the scoring wheel along the marked line.
Pro Tip: Think of scoring as creating a weak point, not cutting through the tile. A smooth, visible groove is all you need for a clean break.
Avoid scoring the same line multiple times.
Running the scoring wheel over the same line repeatedly might seem like a way to ensure accuracy, but it often backfires. Multiple passes can create uneven grooves, making the tile more likely to break unpredictably. Trust your first score and resist the urge to go over it again.
Imagine this: You’ve scored the tile once, but you’re tempted to go over the line again. Instead of improving the cut, you end up with jagged edges or a crooked break. One clean pass is always better.
Unstable Workspace
Cutting on an uneven or unstable surface can lead to inaccurate cuts.
A wobbly table or uneven surface can ruin your efforts, no matter how precise your scoring is. The instability causes the tile to shift, leading to misaligned cuts or even accidents. Always choose a flat, sturdy surface for your workspace. Stability ensures that your tile stays in place while you work.
Quick Tip: Test your workspace by pressing down on it before starting. If it moves or wobbles, find a more stable area or reinforce the surface.
Misaligned Tile
Failing to align the tile properly with the cutter’s guide can cause crooked cuts.
Proper alignment is the foundation of a straight, clean cut. If the tile isn’t lined up correctly with the snap cutter’s guide, the scoring wheel won’t follow the marked line. This misalignment results in crooked or uneven cuts that don’t fit your design. Take a moment to double-check the alignment before scoring.
Expert Insight: Gentle pressure and consistent alignment are key to achieving smooth, professional results. Rushing this step often leads to frustration and wasted materials.
By avoiding these common mistakes, you’ll improve your tile-cutting skills and achieve better results. Practice makes perfect, so don’t get discouraged if your first few attempts aren’t flawless. With time and attention to detail, you’ll master the art of cutting tiles without a machine.
Using a snap cutter gives you a simple and effective way to cut tiles without a machine. With the right tools and proper preparation, you can achieve clean, professional-looking cuts every time. Mistakes like shallow scoring or misaligned tiles can lead to uneven breaks, but practice helps you avoid these issues. Don’t rush the process—take your time to align the tile and score it correctly. Always prioritize safety by wearing goggles and gloves. By following these steps, you’ll master how to cut tiles without a machine and complete your projects with confidence.
FAQ
What is a snap cutter, and how does it work?
A snap cutter is a manual tool designed to cut tiles without the need for electricity or water. It works by scoring the surface of the tile with a sharp wheel and then applying pressure to snap the tile along the scored line. This method creates clean, straight cuts with minimal mess. Snap cutters are lightweight, easy to carry, and perfect for small projects or straight cuts. How does a snap cutter work?
Quick Tip: Snap cutters are ideal for ceramic and porcelain tiles but may struggle with intricate or curved cuts.
Can I use a snap cutter for all types of tiles?
Snap cutters work best on ceramic and porcelain tiles. They may not perform well on harder materials like natural stone or glass tiles. For these types, you might need a wet saw or a specialized cutting tool. Always check the types of tiles before deciding on the cutting method.
Pro Tip: If you're unsure about your tile type, consult the packaging or ask a professional for advice.
Are snap cutters suitable for large projects?
Snap cutters are great for small to medium-sized projects. However, they might not be the best choice for large-scale jobs due to the manual effort required. For extensive projects, consider using a wet saw or another power tool to save time and energy.
Imagine this: You're working on a large floor tiling project. A snap cutter could become tiring after a while, making a wet saw a more efficient option.
What’s the difference between push cutters and pull cutters?
Both push cutters and pull cutters are types of snap cutters. The main difference lies in how you operate them. With a push cutter, you push the scoring wheel across the tile, while with a pull cutter, you pull it. Both are equally effective, so the choice depends on your comfort and preference.
Expert Insight: Many DIYers find push cutters easier to control, but pull cutters can feel more natural for others. Try both to see which suits you better.
Can I make diagonal cuts with a snap cutter?
Yes, you can make diagonal cuts with a snap cutter. Align the tile at the desired angle on the cutter and score it as you would for a straight cut. Snap cutters are versatile tools that handle straight and diagonal cuts effectively, making them a great choice for creative tile designs.
Quick Tip: Use a T-square or straightedge to ensure your diagonal lines are accurate before scoring.
How do I ensure clean and precise cuts?
To achieve clean cuts, score the tile once with firm, even pressure. Avoid scoring the same line multiple times, as this can create uneven grooves. Make sure the tile is stable and properly aligned with the cutter’s guide before snapping.
Pro Tip: Practice on spare tiles to perfect your technique before working on your actual project.
Are snap cutters safe to use?
Snap cutters are a safer alternative to power tools since they don’t require electricity or water. However, you should still take precautions. Always wear safety goggles to protect your eyes from debris and gloves to prevent cuts. Keep your hands away from the scoring wheel and snapping mechanism during use.
Safety Reminder: A stable workspace reduces the risk of accidents. Ensure your work surface is flat and clutter-free.
What are the limitations of a snap cutter?
While snap cutters are versatile, they have some limitations. They aren’t ideal for curved cuts, bevels, or very intricate designs. They also struggle with certain materials like natural stone. For these tasks, you’ll need specialized tools like a wet saw or tile nippers.
Think of it this way: Snap cutters excel at straight and diagonal cuts but fall short when precision curves or unique shapes are required.
How do I smooth rough edges after cutting?
After snapping the tile, use a tile file or medium-grit sandpaper to smooth any rough edges. Hold the tile securely and file in one direction for the best results. This step ensures a polished finish and removes sharp edges that could cause injuries.
Quick Tip: Focus on visible edges for a professional look. Hidden edges don’t need as much attention.
Is a snap cutter a good investment for DIYers?
Absolutely! Snap cutters are affordable, starting at around $15, and they’re easy to use. They’re perfect for small projects, straight cuts, and even diagonal designs. If you’re a DIY enthusiast looking for a budget-friendly and effective tool, a snap cutter is a great choice.
Expert Insight: Snap cutters offer a balance of affordability, safety, and efficiency, making them a must-have for tile-cutting beginners.
See Also
Creative Ways to Utilize Die Cuts Manually
Essential Tools for Effective Carpet Cutting
Manual Techniques for Die Cutting Without Equipment