How to Cut Tiles Without a Machine Easily


Cutting tiles without a machine might seem tricky, but it’s easier than you think. If you're wondering how to cut tiles without a machine, the right tools can help you achieve clean and precise cuts. Tools like tile nippers or scoring wheels are affordable and effective for most DIY projects. Manual methods don’t require electricity or water, making them convenient for small spaces. You’ll find that these tools work well on ceramic, porcelain, and even glass tiles. By using proper techniques, you can avoid rough edges and wasted materials. This approach saves money and gives you control over your project.
Key Takeaways
- Cutting tiles manually is achievable with the right tools like tile nippers, scoring wheels, and handheld tile cutters, which are affordable and effective for DIY projects.
- Always wear safety goggles and protective gear when cutting tiles to prevent injuries from flying fragments and dust.
- Accurate measurements and clear markings are crucial; remember the adage 'measure twice, cut once' to avoid wasting materials.
- Smoothing rough edges with sandpaper or rubbing stones enhances safety and gives your tiles a polished, professional look.
- Practice on spare tiles before making final cuts to build confidence and improve your technique.
- Address common issues like uneven cuts or tile breakage by using the right tools and applying consistent pressure during scoring and snapping.
- Experiment with different tools and methods to find what works best for your specific tile material and project needs.
Recommended Tools for Cutting Tiles Manually
Tile Nippers
Tile nippers are perfect for making small, precise cuts or shaping irregular edges. You can use them to trim tiles to fit around corners, pipes, or other tricky areas. These tools work best on ceramic and porcelain tiles. To use tile nippers, hold the tile firmly and apply steady pressure to chip away small sections. They’re lightweight, easy to handle, and ideal for detailed work. If you’re working on a mosaic or need to create curved cuts, tile nippers will quickly become your go-to tool.
Pro Tip: Always wear safety goggles when using tile nippers. Small tile fragments can fly off during use.
Scoring Wheels
A scoring wheel is a must-have for anyone cutting tiles manually. This tool helps you make clean, straight cuts with minimal effort. It works by scoring a line across the surface of the tile, which you can then snap along to create a precise break. Scoring wheels are versatile and can handle ceramic, porcelain, and even glass tiles. They’re also durable and cost-effective, making them a great investment for DIY projects.
To use a scoring wheel, place the tile on a flat surface and run the wheel firmly along your marked line. Apply consistent pressure to ensure a clear score. Once scored, snap the tile along the line for a clean cut.
Why Choose Scoring Wheels?
- They’re easy to use, even for beginners.
- They provide precision and efficiency.
- They’re affordable and long-lasting.
Handheld Tile Cutters
For straight cuts on ceramic or porcelain tiles, handheld tile cutters are a reliable choice. These tools combine a scoring wheel and a snapping mechanism in one device. You simply score the tile using the cutter’s wheel, then apply pressure to snap it along the scored line. This makes handheld tile cutters both efficient and user-friendly.
Handheld tile cutters are compact and portable, so you can use them in tight spaces or on smaller projects. They’re especially useful if you need to cut multiple tiles quickly without compromising accuracy.
Quick Tip: Practice on a spare tile before cutting your final piece. This helps you get comfortable with the tool and ensures better results.
By using these tools, you’ll find that cutting tiles manually is not only possible but also straightforward. Each tool offers unique benefits, so choose the one that best suits your project’s needs.
Glass Cutters
A glass cutter is a simple yet effective tool for cutting glass tiles. It features a small, rotating wheel designed to score the surface of the tile. This tool works best for straight cuts and is ideal for projects involving glass tiles or mosaics. You’ll appreciate its lightweight design and ease of use, especially if you’re new to tile cutting.
To use a glass cutter, place the tile on a flat surface. Mark the line where you want to cut, then firmly run the cutter along the line to score it. Once scored, apply gentle pressure to snap the tile along the scored line. This method ensures clean and precise cuts without requiring much effort.
Why Choose a Glass Cutter?
- It’s affordable and widely available.
- It’s perfect for delicate materials like glass tiles.
- It’s easy to handle, even for beginners.
If you’re working on intricate designs or small-scale projects, a glass cutter will quickly become one of your favorite tools.
Utility Knives
A utility knife might not be the first tool that comes to mind for cutting tiles, but it’s surprisingly versatile. This tool works well for scoring softer tiles, such as vinyl or thin ceramic tiles. It’s also handy for trimming edges or making minor adjustments to pre-cut tiles.
To use a utility knife, start by marking the tile with a pencil or marker. Place the tile on a stable surface, then score along the marked line using the knife. Apply steady pressure to create a deep score. Once scored, snap the tile along the line or use pliers to break it cleanly.
Pro Tip: Use a straightedge or ruler to guide your cuts. This helps you maintain accuracy and avoid uneven lines.
Utility knives are compact, inexpensive, and easy to find. They’re a great addition to your toolkit, especially for quick fixes or small adjustments.
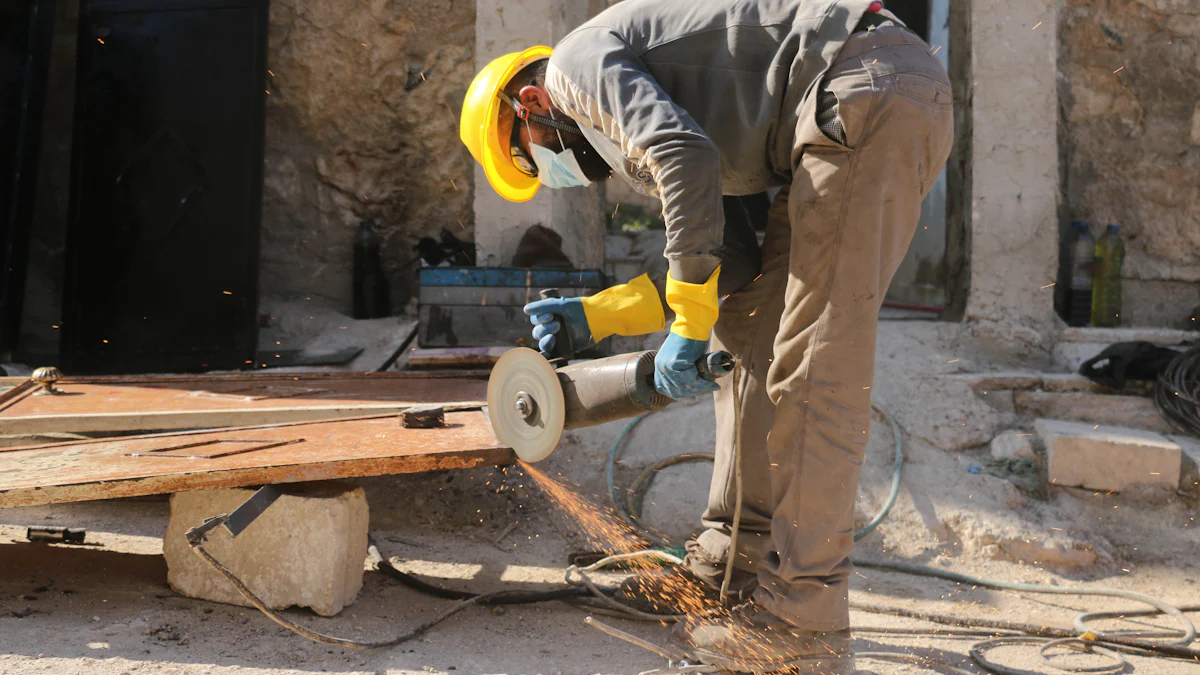
Angle Grinders with Diamond Blades
An angle grinder equipped with a diamond blade is a powerful option for cutting tiles. This tool is perfect for tougher materials like porcelain or natural stone. It’s also ideal for creating curved cuts or intricate shapes that other tools might struggle with.
To use an angle grinder, secure the tile on a stable surface. Mark the area you want to cut, then slowly guide the grinder along the line. Keep a firm grip on the tool and let the diamond blade do the work. For best results, use a steady hand and avoid applying too much pressure.
Safety First: Always wear safety goggles, gloves, and a dust mask when using an angle grinder. The tool generates dust and debris, so proper protection is essential.
Benefits of Using an Angle Grinder:
- It’s versatile and works on various tile materials.
- It’s excellent for detailed or curved cuts.
- It delivers professional-quality results.
While angle grinders require more skill and caution, they’re unmatched in their ability to handle challenging cuts. If you’re tackling a complex project, this tool will help you achieve precise and polished results.
Rotary Tools with Tile-Cutting Attachments
A rotary tool equipped with a tile-cutting attachment is a versatile option for cutting tiles manually. This tool works well for intricate designs, curved cuts, or small adjustments that require precision. It’s especially useful for materials like ceramic, porcelain, and even glass tiles. If you’re tackling a project with detailed patterns or tight spaces, a rotary tool can make your job much easier.
To use a rotary tool, secure the tile on a stable surface. Mark the area you want to cut, then attach the tile-cutting bit to your rotary tool. Slowly guide the tool along the marked line, applying steady pressure. Let the tool do the work instead of forcing it, as this ensures smoother cuts and reduces the risk of breakage.
Why Choose a Rotary Tool?
- It’s perfect for detailed or curved cuts.
- It’s lightweight and easy to handle.
- It offers precision and control for complex designs.
When using a rotary tool, always prioritize safety. Wear protective goggles and a dust mask to shield yourself from debris. Keep your workspace well-ventilated to avoid inhaling dust particles. With proper handling, a rotary tool can deliver professional-quality results for your DIY tile projects.
Sandpaper or Rubbing Stones for Smoothing Edges
After cutting tiles, the edges often feel rough or uneven. This is where sandpaper or rubbing stones come in handy. These tools help smooth out sharp edges, giving your tiles a polished and finished look. They’re essential for ensuring safety and enhancing the overall appearance of your project.
To smooth the edges, choose sandpaper with a fine grit or a rubbing stone designed for tile work. Hold the tile securely and gently rub the abrasive material along the edges. Move in a consistent direction to achieve an even finish. For curved cuts, use a rounded motion to follow the shape of the tile.
Benefits of Using Sandpaper or Rubbing Stones:
- They’re affordable and easy to find.
- They improve the safety of your tiles by removing sharp edges.
- They enhance the professional look of your finished project.
For best results, start with a coarser grit to remove larger imperfections, then switch to a finer grit for a smooth finish. If you’re working with delicate materials like glass tiles, use extra care to avoid chipping. By taking the time to smooth your tile edges, you’ll create a polished and professional result that elevates your DIY project.
Step-by-Step Guide on How to Cut Tiles Without a Machine
Cutting tiles manually might feel intimidating, but with the right steps, you can achieve professional results. Follow this guide to ensure your project goes smoothly.
Preparing Your Workspace
Before you start cutting tiles, set up a workspace that’s safe and efficient. A well-prepared area minimizes mistakes and keeps you focused.
- Choose a Stable Surface: Use a sturdy table or workbench to support your tiles. A flat surface ensures accuracy when scoring and snapping.
- Protect Your Work Area: Lay down a drop cloth or cardboard to catch debris and protect your surface from scratches.
- Gather Your Tools: Keep tools like tile nippers, scoring wheels, or manual tile cutters within reach. Having everything ready saves time and effort.
- Wear Safety Gear: Always wear safety goggles to shield your eyes from flying fragments. If you’re using tools like an angle grinder, add gloves and a dust mask for extra protection.
- Ensure Proper Lighting: Good lighting helps you see your markings clearly, reducing the chance of errors.
Pro Tip: Keep a small broom or vacuum nearby to clean up tile dust and fragments as you work. A tidy workspace improves efficiency.
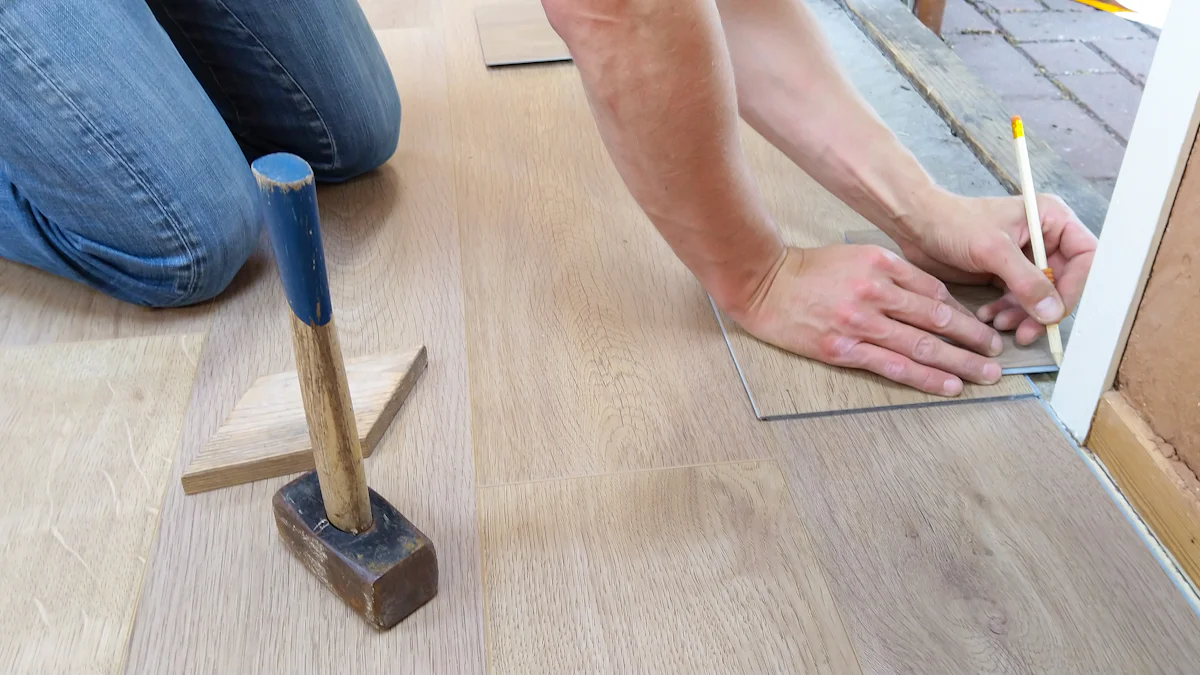
Marking and Measuring the Tile
Accurate measurements are the foundation of clean cuts. Take your time during this step to avoid wasting materials.
- Measure Twice, Cut Once: Use a measuring tape or ruler to determine the exact dimensions you need. Double-check your measurements to ensure precision.
- Mark the Tile Clearly: Use a pencil or marker to draw a line where you want to cut. For straight cuts, a straightedge or ruler helps you create a clean guide.
- Consider the Tile Material: Different tiles require different approaches. For example:
- Ceramic and porcelain tiles are easier to score and snap.
- Glass tiles may need a glass cutter for clean results.
- Thicker materials like natural stone might require an angle grinder.
- Plan for Adjustments: If your cut needs to fit around pipes or corners, mark the tile accordingly. Tools like tile nippers can help refine these shapes later.
Quick Tip: Use masking tape along the cutting line to prevent chipping, especially for delicate materials like glass tiles.
Cutting the Tile
Now it’s time to make the cut. The method you choose depends on the tools you have and the type of tile you’re working with.
Using a Manual Tile Cutter
A manual tile cutter is perfect for straight cuts on ceramic or porcelain tiles. Here’s how to use it:
- Place the tile on the cutter’s base, aligning the cutting wheel with your marked line.
- Score the tile by pulling or pushing the handle firmly across the surface.
- Apply pressure using the cutter’s snapping mechanism to break the tile along the scored line.
Why Use a Manual Tile Cutter? It’s quiet, clean, and effective for most DIY projects.
Using a Glass Cutter
For glass tiles, a glass cutter offers precision:
- Run the cutter along your marked line, applying steady pressure to score the surface.
- Snap the tile gently along the scored line for a clean break.
Using an Angle Grinder
An angle grinder with a diamond blade is ideal for tougher materials or curved cuts:
- Secure the tile on a stable surface.
- Slowly guide the grinder along your marked line, letting the blade do the work.
- Use a steady hand to maintain control and avoid overcutting.
Safety Reminder: Always wear protective gear when using an angle grinder. The tool generates dust and debris that can be hazardous.
Refining the Edges
After cutting, smooth the edges with sandpaper or a rubbing stone. This step removes sharpness and gives your tiles a polished finish.
Final Tip: Practice on spare tiles before cutting your final pieces. This helps you get comfortable with the tools and techniques.
By following these steps, you’ll master how to cut tiles without a machine. Whether you’re working on a backsplash, floor, or mosaic, these methods ensure clean, precise results.
Smoothing and Finishing
After cutting your tiles, the edges might feel rough or uneven. Smoothing and finishing these edges is essential for both safety and aesthetics. This step ensures your tiles look polished and professional, making your project stand out.
Tools for Smoothing Edges
To smooth tile edges effectively, you’ll need the right tools. Here are some options to consider:
- Sandpaper: Fine-grit sandpaper works well for soft materials like ceramic or porcelain tiles. It’s easy to use and gives you control over the smoothing process.
- Rubbing Stones: These are excellent for tougher materials like natural stone or thick porcelain. They’re durable and designed specifically for tile work.
- Angle Grinder with Diamond Blade: If you’ve already used an angle grinder for cutting, you can also use it for refining edges. The diamond blade helps achieve a clean finish on harder tiles.
Pro Tip: Always choose a tool that matches the material of your tile. For example, use rubbing stones for natural stone tiles and sandpaper for ceramic ones.
Steps to Smooth and Finish Tile Edges
Follow these steps to achieve smooth, safe, and polished tile edges:
- Secure the Tile: Place the tile on a stable surface. Hold it firmly to prevent movement while you work.
- Choose the Right Tool: Select sandpaper, a rubbing stone, or an angle grinder based on your tile material.
- Start with Coarse Abrasive: Begin with a coarser grit sandpaper or a rougher rubbing stone. This removes larger imperfections quickly.
- Work in One Direction: Move the tool along the edge in a consistent direction. Avoid back-and-forth motions, as they can create uneven results.
- Switch to Fine Abrasive: Once the edges feel smoother, switch to a finer grit. This step polishes the edges and gives them a finished look.
- Inspect Your Work: Run your fingers along the edge to check for sharp spots. Repeat the process if necessary.
Safety Tip: Wear gloves to protect your hands from sharp edges during this process. If you’re using an angle grinder, don’t forget safety goggles and a dust mask.
Why Smoothing Matters
Smoothing and finishing aren’t just about looks. Rough edges can cause injuries or damage surrounding materials. Polished edges also make your tiles fit seamlessly into your design, whether it’s a backsplash, floor, or mosaic. Taking the time to smooth your tiles ensures a professional result that you’ll be proud to show off.
By following these steps, you’ll master how to cut tiles without a machine and finish them like a pro. This final touch transforms your DIY project into a polished masterpiece.
Troubleshooting Common Issues
Even with the right tools and techniques, cutting tiles manually can sometimes lead to common issues. Don’t worry—these common issues have simple solutions. Let’s tackle them one by one.
Uneven Cuts
Uneven cuts can ruin the look of your project. They often happen when the scoring or snapping process isn’t done correctly. Here’s how you can fix and prevent this issue:
- Check Your Tools: Ensure your scoring wheel or manual tile cutter is sharp and in good condition. Dull tools can cause jagged or uneven lines.
- Use a Straightedge: Align a ruler or straightedge along your marked line before scoring. This helps guide your tool for a clean, straight cut.
- Apply Consistent Pressure: When scoring, press firmly but evenly across the entire tile. Uneven pressure can result in an inconsistent score line.
- Practice First: Test your technique on a spare tile. This helps you get comfortable with the tool and ensures better results on your final piece.
Pro Tip: If the edges are slightly uneven after cutting, use sandpaper or a rubbing stone to smooth them out. This step can make a big difference in the final appearance.
Tile Breakage
Tile breakage is frustrating and can waste materials. It usually happens when too much force is applied or the tile isn’t properly supported. Follow these steps to avoid breaking your tiles:
- Support the Tile Fully: Place the tile on a stable, flat surface. If you’re using a manual tile cutter, ensure the tile is securely positioned within the cutter.
- Score Deeply Enough: A shallow score line makes it harder to snap the tile cleanly. Run your scoring tool firmly along the marked line to create a clear, deep score.
- Snap Gently: Apply steady, even pressure when snapping the tile. Avoid sudden or jerky movements, as these can cause the tile to crack in the wrong place.
- Choose the Right Tool: For tougher materials like porcelain or natural stone, consider using an angle grinder with a diamond blade. This tool provides more control and reduces the risk of breakage.
Quick Tip: If a tile does break, don’t throw it away immediately. You might be able to use the smaller pieces for mosaic designs or other creative elements in your project.
Difficulty in Scoring or Breaking
Sometimes, scoring or breaking tiles feels harder than it should. This issue often comes down to the type of tile or the tool you’re using. Here’s how to make the process easier:
- Match the Tool to the Tile: Different tiles require different tools. For example:
- Use a manual tile cutter for ceramic or porcelain tiles.
- Opt for a glass cutter when working with glass tiles.
- Choose an angle grinder for thicker or more durable materials like natural stone.
- Mark Clearly: Use a pencil or marker to draw a visible line on the tile. This ensures you know exactly where to score.
- Work Slowly: Rushing can lead to mistakes. Take your time to score the tile carefully and apply consistent pressure.
- Inspect Your Tools: A worn-out scoring wheel or dull blade can make the job harder. Replace these parts as needed to maintain efficiency.
Why It Matters: Using the right tool and technique not only makes the job easier but also ensures clean, professional-looking results.
By addressing these common issues, you’ll gain confidence in your tile-cutting skills. Remember, practice makes perfect. With a little patience and the right approach, you’ll overcome any challenges and achieve stunning results for your DIY project.
Cutting tiles without a machine is not only possible but also rewarding when you use the right tools and techniques. Tools like tile nippers, scoring wheels, and handheld cutters provide effective solutions for achieving clean, precise cuts. By following the step-by-step guide and addressing common challenges, you can confidently tackle any DIY tile project. Remember, practice and patience are key to mastering this skill. Don’t hesitate to experiment with different methods and tools to find what works best for you. With time, you’ll create professional-looking results that elevate your craftsmanship.
FAQ
How can I cut tiles without a machine?
You can cut tiles manually using tools like tile nippers, scoring wheels, handheld tile cutters, or even a glass cutter.
Expert Tip: According to Tile Factory Experts, precise tile cutting is essential for achieving a polished and professional look in your tiling projects. Accurate cuts help tiles fit perfectly, minimizing gaps and creating a seamless appearance.
What is the easiest tool for beginners to use?
A scoring wheel or a handheld tile cutter is the easiest tool for beginners. These tools allow you to score and snap tiles with minimal effort. They’re user-friendly and work well for straight cuts on ceramic or porcelain tiles.
Why Choose These Tools?
- They’re simple to operate.
- They provide clean, straight cuts.
- They’re affordable and widely available.
Can I cut glass tiles without specialized equipment?
Yes, you can cut glass tiles using a glass cutter. This tool features a small rotating wheel that scores the surface of the tile. Once scored, you can snap the tile along the line for a clean break. For smoother edges, use sandpaper or a rubbing stone.
Pro Tip: Use masking tape along the cutting line to prevent chipping when working with delicate glass tiles.
How do I avoid uneven cuts?
Uneven cuts often result from inconsistent scoring or snapping. To avoid this, use a straightedge to guide your scoring tool and apply steady pressure. Ensure your tools are sharp and in good condition. Practicing on spare tiles can also help you perfect your technique.
Quick Fix: If the edges are slightly uneven, smooth them out with sandpaper or a rubbing stone for a polished finish.
What safety precautions should I take when cutting tiles?
Always wear safety goggles to protect your eyes from flying fragments. If you’re using tools like an angle grinder, add gloves and a dust mask to shield yourself from dust and debris. Work in a well-ventilated area and keep your workspace tidy to avoid accidents.
Safety First: According to Rubi Experts, ensuring a clean and safe workspace is crucial for achieving professional results and avoiding injuries.
Can I use a utility knife to cut tiles?
Yes, a utility knife works well for scoring softer tiles like vinyl or thin ceramic tiles. It’s also useful for trimming edges or making minor adjustments. Use a straightedge to guide your cuts and apply steady pressure for a deep score.
Pro Tip: Snap the tile gently along the scored line or use pliers for a clean break.
How do I smooth rough edges after cutting?
You can smooth rough edges using sandpaper, a rubbing stone, or an angle grinder with a diamond blade. Start with a coarser grit to remove larger imperfections, then switch to a finer grit for a polished finish. This step ensures safety and enhances the professional look of your project.
Why It Matters: As noted by Rubi Experts, smoothing edges ensures a uniform and polished finish, which is key to a professional-looking tile installation.
What should I do if my tile breaks during cutting?
Tile breakage often happens due to improper scoring or snapping. To prevent this, ensure you score deeply enough and support the tile fully before snapping. If a tile does break, consider using the smaller pieces for mosaic designs or other creative elements in your project.
Quick Tip: Practice on spare tiles to refine your technique and reduce the risk of breakage.
Can I cut curved shapes without a machine?
Yes, you can cut curved shapes using tools like tile nippers, an angle grinder with a diamond blade, or a rotary tool with a tile-cutting attachment. These tools allow you to create intricate designs and curved cuts with precision.
Pro Tip: Take your time and work slowly when cutting curves to maintain control and avoid mistakes.
Is it possible to achieve professional results without a machine?
Absolutely! With the right tools and techniques, you can achieve professional results without a machine.
Expert Insight: According to Tile Factory Experts, accurate cuts and polished edges are key to creating a seamless and professional-looking tile installation.
See Also
A Comprehensive Approach To Gemstone Cutting Without Equipment
Techniques For Die Cutting Without Any Machinery
Utilizing Die Cuts Effectively Without Machine Assistance