Steps to Cut Hair with a Machine at Home

Cutting your hair at home with a machine isn’t just convenient—it’s a smart way to save money. On average, skipping salon visits can save you over $50 a month, which adds up to hundreds of dollars a year. Plus, you get the freedom to maintain your style whenever you want. If you're wondering how to cut hair with a machine, with the right tools and a little practice, you’ll feel confident shaping your look. Why not take control of your haircut and enjoy the satisfaction of doing it yourself?
Key Takeaways
- Cutting your hair at home can save you over $50 a month, adding up to significant savings over time. Invest in essential tools like hair clippers with adjustable guards, a comb, and sharp scissors for a professional-looking haircut.
- Set up a well-lit workspace and prepare your hair by washing and detangling it to ensure a smooth cutting process. Follow a step-by-step guide for cutting blending, and detailing to achieve a clean and polished look.
- Take your time and check your progress frequently to avoid mistakes and ensure even results.
- Practice regularly to improve your technique and gain confidence in your haircutting skills.
- Remember, every haircut is a learning experience—embrace mistakes as opportunities to enhance your skills.
Tools and Supplies for Cutting Hair with a Machine

Before you start learning how to cut hair with a machine, gathering the right tools is essential. The right equipment ensures a smooth process and professional-looking results. Let’s break down the must-haves and optional tools that can elevate your haircutting experience.
Essential Tools for Success
Hair clippers with adjustable guards
Invest in a reliable pair of hair clippers with adjustable guards. These guards let you control the length of the cut, making it easier to achieve your desired style. Look for clippers with a powerful motor, like the Wahl Elite Pro, which can handle both wet and dry hair effortlessly. Adjustable guards also help you avoid cutting too much hair at once, especially if you're a beginner.
Comb and scissors for precision
A sturdy comb and sharp scissors are non-negotiable. Use the comb to section and guide the hair while cutting. For scissors, opt for professional-grade ones like the ARC Professional Scissors. These are designed for precision and ensure clean cuts, which is crucial for maintaining healthy hair.
Hand mirror or wall mirror for visibility
A good mirror setup is key to seeing all angles of your head. A hand mirror or a wall-mounted mirror works well. For added convenience, consider a product like the *Self-Cut System Angel Lights Tripod 3 Way Mirror*. It provides a full view of your head, making it easier to check your progress and ensure an even cut.
Cape or towel to protect clothing
Keep your clothes clean by using a cape or a large towel. This simple step saves you from dealing with itchy hair clippings later. Draping a towel around your shoulders or using a barber cape creates a professional setup at home.
Optional Tools for a Professional Finish
Trimmer for detailing edges
For sharp edges and clean lines, a trimmer is your best friend. Use it to outline your neckline, sideburns, and around the ears. The Wahl Electric Razor is a great option for touch-ups and detailing, ensuring a polished finish.
Hair clips for sectioning
Hair clips help you work in smaller, manageable sections. They’re especially useful if you have longer hair or want to focus on specific areas without interference. Sectioning your hair makes the process more organized and less overwhelming.
Spray bottle with water for dampening hair
A spray bottle filled with water is handy for keeping your hair slightly damp. Damp hair is easier to manage and cut, as it stays in place better than dry hair. This tool is particularly useful when blending or shaping the top.
Pro Tip: Regularly oil your clippers to maintain their performance and longevity. This small step ensures your tools stay sharp and effective for every haircut.
Having the right tools not only simplifies the process but also boosts your confidence. With these essentials and optional add-ons, you’re well-equipped to master how to cut hair with a machine at home.
Preparing Your Hair and Workspace
Before diving into the actual haircut, setting up your space and prepping your hair are crucial steps. A well-organized environment and properly prepared hair make the process smoother and more enjoyable. Let’s get started.
Setting Up Your Workspace
Creating the right workspace ensures you stay comfortable and focused throughout the haircut. Here’s how you can set it up:
-
Choose a well-lit area with access to a large mirror.
Good lighting is essential for spotting uneven cuts and achieving a polished look. Natural light works best, but if that’s not an option, use bright artificial lighting. Position yourself near a large mirror, like the one in your bathroom or bedroom, to get a clear view of your progress. -
Lay down a towel or mat to catch hair clippings.
Cleaning up after a haircut can be a hassle, but this step makes it easier. Spread a towel, sheet, or mat on the floor to collect the clippings. If you’re cutting near a sink, you can also let the hair fall directly into it for quick disposal.
Pro Tip: Cutting hair near a bathroom sink gives you easy access to water for rinsing tools or washing off stray clippings.
By organizing your workspace, you’ll save time and avoid unnecessary distractions during the haircut.
Preparing Your Hair
Prepping your hair is just as important as setting up your space. Proper preparation helps you achieve a cleaner, more precise cut.
-
Wash and dry your hair to remove product buildup.
Start with freshly washed hair. Shampooing removes oils and styling products that can weigh your hair down or make it harder to cut. Dry your hair completely before cutting, as wet hair can appear longer and lead to uneven results. -
Comb through your hair to detangle and section it for easier cutting.
Use a sturdy comb to detangle your hair thoroughly. Knots and tangles can interfere with the clippers and scissors, leading to uneven cuts. Once detangled, section your hair using clips or your comb. This step helps you focus on one area at a time, ensuring a more organized and precise haircut.
Pro Tip: If you’re unsure about sectioning, start by parting your hair evenly down the middle. Use clips to secure each section, especially if you’re working with longer hair.
Taking the time to prepare your hair and workspace sets the stage for success. Whether you’re learning how to cut hair with a machine for the first time or refining your technique, these steps make the process more manageable and enjoyable.
How to Cut Hair with a Machine: Step-by-Step Guide
Cutting your hair at home might feel intimidating at first, but breaking it into simple steps makes it manageable. Follow this guide to achieve a clean, professional-looking haircut.
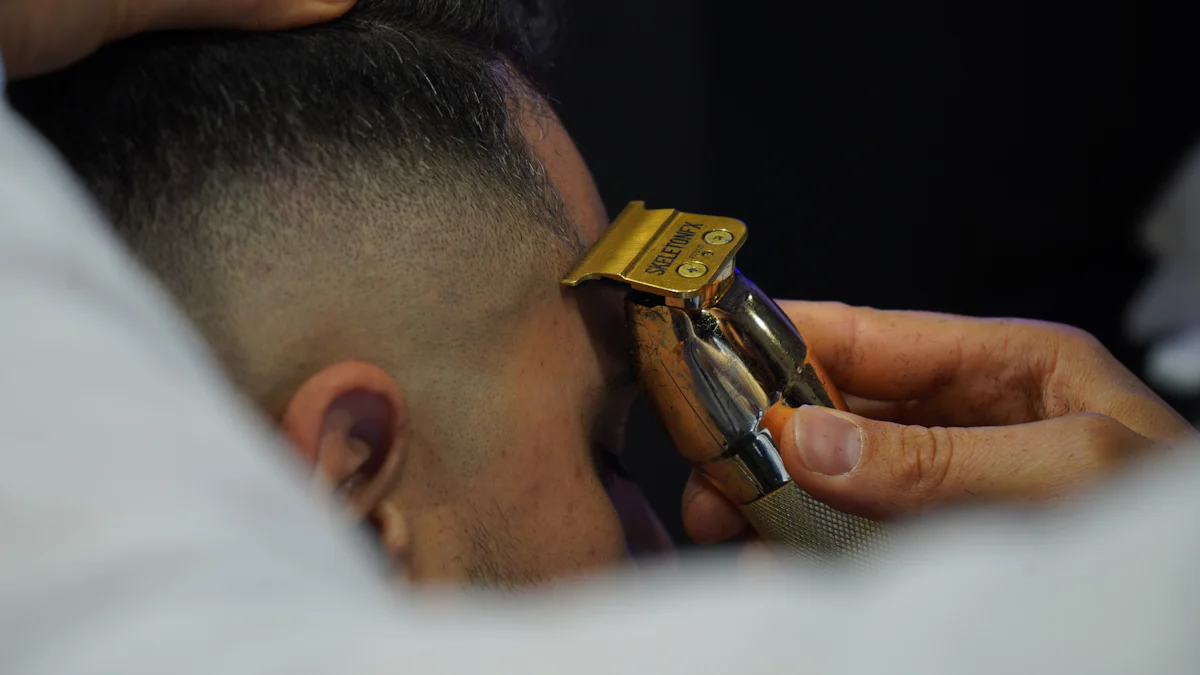
Cutting the Sides
-
Start with a longer guard length to avoid cutting too much hair.
Begin by attaching the longest guard to your clippers. This ensures you don’t accidentally cut more hair than intended. If you’re unsure, always start longer—you can always go shorter later. Many beginners find this step reassuring because it gives them room to adjust. -
Move the clippers upward in smooth, even strokes.
Hold the clippers firmly and start at the bottom of the sideburns. Move upward in a straight, controlled motion. Avoid rushing or pressing too hard. Smooth strokes help create an even cut and prevent patchy areas. -
Repeat on both sides, ensuring symmetry and consistency.
Once you’ve finished one side, move to the other. Use a mirror to check for balance. Symmetry is key to a polished look, so take your time to compare both sides as you go.
Fun Fact: Joshua Esnard, the inventor of The Cut Buddy, started cutting his own hair as a kid because he didn’t have access to a barber. His persistence paid off, and now his invention helps others perfect their at-home haircuts.
Blending the Hair
-
Use a higher guard setting to blend the sides into the top.
Switch to a slightly longer guard for blending. This step softens the transition between the shorter sides and the longer top. It’s what gives your haircut that seamless, professional finish. -
Work in small sections, using a flicking motion for a seamless transition.
Focus on one small section at a time. As you move the clippers upward, flick your wrist outward at the end of each stroke. This technique prevents harsh lines and creates a natural blend.
Pro Tip: Blending takes practice, so don’t worry if it’s not perfect the first time. The more you do it, the better you’ll get.
Shaping the Top
-
Use scissors or a higher guard setting to trim the top.
For the top, you can either use scissors or a clipper with a longer guard. Scissors offer more control, especially if you’re aiming for a specific style. Clippers, on the other hand, are quicker and easier for beginners. -
Comb the hair upward and cut small amounts at a time for precision.
Use a comb to lift sections of hair. Trim just a little at a time to avoid cutting too much. This method ensures precision and helps maintain the overall shape of your haircut.
Anecdote: One family decided to cut their kids’ hair at home to save money. Over time, they mastered the process and even started cutting the dad’s hair too. Now, they save hundreds of dollars every year while keeping everyone looking sharp.
Learning how to cut hair with a machine takes patience and practice. Start with these steps, and you’ll see improvement with each attempt. Remember, even professionals started somewhere!
Outlining and Detailing
Outlining and detailing are the final touches that transform a basic haircut into a polished masterpiece. These steps ensure your haircut looks clean, professional, and well-finished.
Use a trimmer or the clipper’s edge to clean up the neckline and around the ears.
Start by grabbing your trimmer or using the edge of your clippers. Focus on the neckline first. Stand in front of a mirror and tilt your head slightly forward. This position exposes the back of your neck, making it easier to see and trim. Use slow, steady movements to create a straight or slightly rounded neckline, depending on your preference. If you’re unsure, stick with a straight line—it’s easier to maintain symmetry.
Next, move to the area around your ears. Hold the trimmer at an angle and carefully follow the natural curve of your ear. Take your time here. Rushing can lead to uneven edges or accidental nicks. A hand mirror can help you check your progress and ensure both sides match.
Pro Tip: Use short, light strokes when trimming around sensitive areas like the ears. This technique gives you more control and reduces the risk of mistakes.
Check for uneven spots and make final adjustments for a polished look.
Once you’ve outlined the neckline and ears, it’s time to inspect your work. Use a hand mirror to check the back and sides of your head. Look for any uneven spots or stray hairs that might have been missed. If you find any, go over those areas with your clippers or scissors.
Pay special attention to the blending between the sides and the top. A smooth transition is key to a professional-looking haircut. If you notice harsh lines, use a higher guard setting and a flicking motion to soften them.
Anecdote: Joshua Esnard, the inventor of The Cut Buddy, started cutting his own hair as a kid because he didn’t have access to a barber. Over time, he perfected his technique, proving that practice and attention to detail can lead to impressive results.
Finally, step back and take a good look at your haircut under bright lighting. This perspective helps you spot anything you might have missed. Make small adjustments as needed, but avoid overworking the haircut. Sometimes, less is more.
Key Takeaway: Outlining and detailing require patience and precision. These steps elevate your haircut from good to great, leaving you with a clean and polished finish.
Learning how to cut hair with a machine involves mastering these final touches. With practice, you’ll gain confidence and develop an eye for detail, ensuring every haircut looks sharp and professional.
Tips for Achieving a Professional Finish
Take Your Time
Work slowly and methodically to avoid mistakes.
Rushing through a haircut often leads to uneven results or accidental slips. Take your time with each section of your hair. Focus on small, manageable areas instead of trying to tackle everything at once. This approach helps you stay in control and reduces the chances of making mistakes.
Pro Tip: Meri Kate O’Connor, a professional hairstylist, advises cutting less hair than you think, especially when working with wet hair. Hair stretches when wet, so trimming cautiously prevents cutting off too much.
Patience is your best tool. If you feel unsure about a step, pause and reassess. A slow, steady pace ensures a cleaner, more polished finish.
Check Your Progress Frequently
Use a hand mirror to inspect the back and sides for evenness.
Regularly checking your progress keeps your haircut on track. Use a hand mirror to view hard-to-see areas like the back of your head. Position yourself between two mirrors if possible—this setup gives you a full view of your haircut from all angles.
Expert Tip: Dora, a seasoned hairstylist, recommends working in small sections and using techniques like twisting the hair to ensure precision. This method helps you spot uneven layers before they become a problem.
Inspecting your work as you go saves time and effort. It’s easier to fix minor issues during the process than to correct major mistakes later. Don’t hesitate to make adjustments if something looks off.
Practice and Experiment
Don’t be discouraged by initial mistakes—improvement comes with practice.
Your first few attempts at cutting hair might not be perfect, and that’s okay. Every haircut you do builds your skills and confidence. Experiment with different techniques, like point cutting or blending, to find what works best for you.
Fun Fact: Many professional hairstylists started by practicing on themselves or family members. Over time, they honed their craft and developed their unique styles.
Mistakes are part of the learning process. Instead of feeling frustrated, view them as opportunities to improve. With consistent practice, you’ll notice your technique becoming smoother and your results looking more professional.
Key Takeaway: Patience, regular checks, and practice are the cornerstones of a great haircut. By following these tips, you’ll not only achieve a polished look but also enjoy the process of mastering this valuable skill.
Cutting your hair at home with a machine is a skill that grows with practice and patience. By using the right tools and following the steps in this guide, you can achieve a clean, professional look without stepping into a salon. Take your time, focus on small sections, and let the clippers do the work. Regular practice sharpens your technique and builds confidence. Remember, every haircut is a chance to improve. Enjoy the process, and soon, you’ll master this valuable skill while saving time and money.
FAQ
How do I choose the right clippers for home haircuts?
Look for clippers with adjustable guards and a powerful motor. These features give you control over the length and ensure smooth cutting. Brands like Wahl or Andis are popular for their reliability. If you're just starting, invest in a mid-range model that balances quality and affordability.
Pro Tip: Regularly oil your clippers to keep them sharp and extend their lifespan.
Can I cut my own hair if I’ve never done it before?
Absolutely! Many people start cutting their own hair out of necessity or curiosity. With the right tools and a step-by-step guide, you can achieve great results. Joshua Esnard, the creator of The Cut Buddy, began cutting his own hair as a kid because he didn’t have access to a barber. Over time, he mastered the skill and even turned it into a business.
Remember: Start with longer guard lengths to avoid cutting too much hair at once.
Should I cut my hair wet or dry?
Dry hair works best for beginners. Wet hair can appear longer, which might lead to cutting off more than intended. Dry hair shows its true length, making it easier to achieve an even cut. If you prefer damp hair for control, use a spray bottle to lightly mist it instead of soaking it.
How do I avoid uneven cuts?
Work in small sections and check your progress frequently. Use a hand mirror to inspect hard-to-see areas like the back of your head. Taking your time and using smooth, consistent strokes with the clippers helps maintain symmetry. If you’re blending, use a flicking motion to soften transitions between lengths.
Expert Tip: Practice makes perfect. Don’t get discouraged if your first few attempts aren’t flawless.
What’s the best way to clean up the neckline?
Use a trimmer or the edge of your clippers for precision. Tilt your head slightly forward to expose the back of your neck. Follow a straight or slightly rounded line, depending on your preference. A hand mirror can help you ensure symmetry. For sensitive areas like around the ears, use short, light strokes to avoid mistakes.
How often should I cut my hair at home?
It depends on your hair growth and style preference. Most people trim every 3–6 weeks to maintain a neat look. If you’re experimenting with a new style, you might need to cut more frequently to refine the shape.
Can I cut my children’s hair at home?
Yes, cutting your kids’ hair at home is a great way to save money. Many families, like the Flanders Family, have made this a regular practice. With patience and the right tools, you can create simple, stylish cuts for your children. Start with basic styles and gradually try more advanced techniques as you gain confidence.
Fun Fact: One family saved over $50 a month by learning to cut their kids’ hair themselves.
What if I make a mistake while cutting?
Mistakes happen, especially when you’re learning. If you cut too much, try blending the area with a longer guard to soften the look. For uneven spots, go back with scissors or clippers to even things out. Remember, hair grows back, so don’t stress too much about small errors.
Key Takeaway: Each haircut is a learning experience. Over time, you’ll improve and feel more confident.
How do I blend the sides and top for a seamless look?
Use a higher guard setting to transition between the shorter sides and the longer top. Work in small sections and use a flicking motion with the clippers. This technique prevents harsh lines and creates a natural blend. Blending takes practice, so don’t rush the process.
Is cutting hair at home really worth it?
Yes, cutting hair at home saves time and money. Many people, like the narrator from Make It Missoula, save over $50 a month by skipping salon visits. Beyond the financial benefits, you gain the flexibility to maintain your style whenever you want. Plus, there’s a sense of accomplishment in mastering this skill.
Final Thought: With the right tools and practice, cutting hair at home becomes a rewarding and cost-effective habit.
See Also
Comprehensive Instructions for Operating a Hair Clipper
Reviewing the Top Hair Clipper: Wahl Magic Clip
Guide to Metal Cutting Using a Desktop CNC