How to Cut a Machine Screw Perfectly Every Time

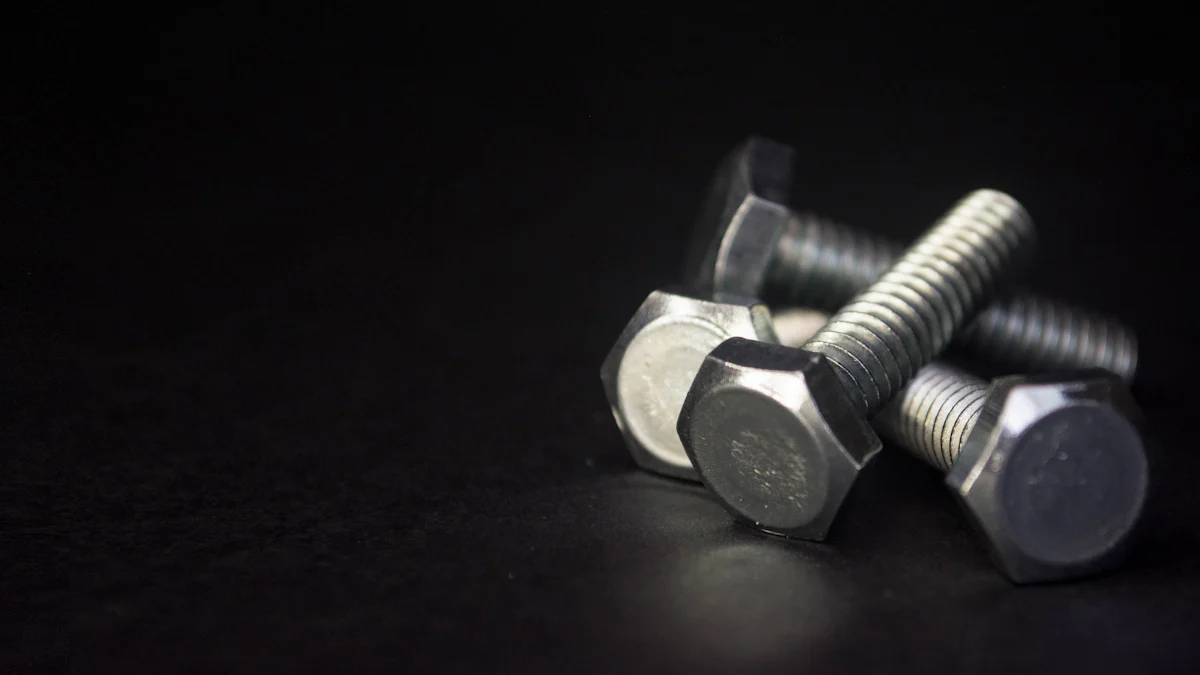
Cutting a machine screw requires precision and the right approach. A poorly cut screw can damage threads, making it unusable. You need to focus on accuracy to ensure the screw fits perfectly in its application. Tools like pliers or hacksaws help achieve clean cuts, but preparation is key. Marking the screw’s length beforehand ensures you avoid mistakes. For larger screws, protecting the threads with two nuts during cutting can prevent damage. Always smooth the edges after cutting to maintain functionality. With practice, you can master how to cut a machine screw without compromising its quality.
Key Takeaways
Always measure and mark the screw accurately before cutting to avoid mistakes and ensure a perfect fit. Use the right tools for the job: electricians pliers for small screws and hacksaws or bolt cutters for larger ones.
- Protect the threads of larger screws by using two nuts during cutting to prevent damage.
- Smooth the edges after cutting with a thread file or fine-grit sandpaper to ensure safety and functionality.
- Practice cutting on scrap screws to build confidence and refine your technique before working on important projects.
- Take your time while cutting; rushing can lead to uneven cuts and compromised thread integrity.
- If unsure about your skills or tools, consider seeking professional help for complex or high-precision projects.
Tools and Materials for Cutting Machine Screws
Essential Tools
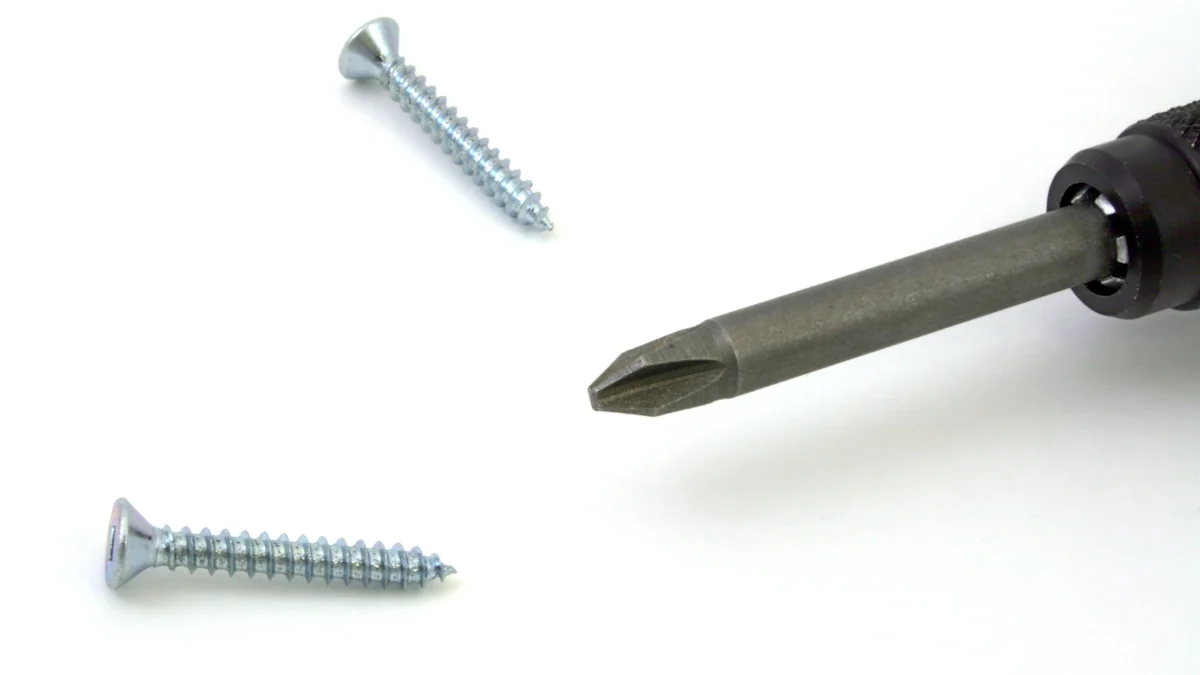
Hacksaw or Bolt Cutter for Larger Screws
A hacksaw is a versatile tool for cutting larger screws. Its sharp blade ensures precise cuts through metal. Choose a blade length that suits your project. For heavy-duty tasks, a 24-inch hacksaw provides better control and efficiency. If you need faster results, a bolt cutter can handle thick screws with ease. Its powerful jaws slice through metal cleanly, saving time and effort.
Electricians Pliers or End-Cutting Pliers for Smaller Screws
For smaller screws, electricians pliers or end-cutting pliers work best. These tools are compact and designed to cut screws up to 3 mm in diameter. They allow you to make clean cuts even when the screw protrudes from a surface. Their precision makes them ideal for delicate tasks where accuracy is critical.
Thread File or Sandpaper for Smoothing Edges
After cutting, the screw’s edges may have burrs or sharp points. A thread file helps smooth these imperfections, ensuring the threads remain functional. Alternatively, use fine-grit sandpaper to polish the edges. This step prevents damage to the threads and ensures the screw fits seamlessly into its application.
Measuring Tape or Ruler for Accurate Measurements
Accurate measurements are essential for a perfect cut. Use a measuring tape or ruler to determine the exact length you need. Double-check your measurements to avoid errors. Precision at this stage saves time and prevents waste.
Permanent Marker for Marking the Cut Point
A permanent marker is a simple yet vital tool. Use it to mark the exact point where you want to cut the screw. A clear, visible mark ensures you follow the correct line during cutting. This step minimizes mistakes and improves accuracy.
Vise or Clamp to Hold the Screw Securely
Stability is crucial when cutting a screw. A vise or clamp holds the screw firmly in place, preventing movement. This setup allows you to focus on making a clean, precise cut. Ensure the marked area is accessible and positioned correctly before you begin.
Optional Tools for Better Results
Thread Gauge to Verify Thread Size
A thread gauge helps you confirm the screw’s thread size before and after cutting. This tool ensures compatibility with the intended application. Verifying the thread size prevents issues like mismatched fittings or stripped threads.
Safety Gear Like Gloves and Goggles for Protection
Safety should always come first. Wear gloves to protect your hands from sharp edges and metal fragments. Use goggles to shield your eyes from flying debris. These precautions reduce the risk of injury and make the process safer.
Two Nuts to Protect Threads During Cutting
For larger screws, use two nuts to safeguard the threads. Jam the nuts together above the cut point. They act as a barrier, preventing damage to the threads while you cut. Once the screw is trimmed, remove the nuts to reveal clean, intact threads.
By gathering these tools and materials, you set yourself up for success. Each item plays a role in ensuring clean, accurate cuts. Whether you’re working on small screws or larger bolts, having the right equipment makes the process smoother and more efficient.
Step-by-Step Guide: How to Cut a Machine Screw
Step 1: Measure and Mark the Screw
Accurate measurement is the foundation of a clean cut. Start by using a measuring tape or ruler to determine the exact length you need for the screw. Hold the screw steady and align the measuring tool carefully to avoid errors. Once you have the desired length, take a permanent marker and make a clear, visible mark at the cut point. This mark will act as your guide during the cutting process.
Pro Tip: Double-check your measurements before marking. A small mistake here can lead to wasted screws or improper fits.
Step 2: Secure the Screw
Stability is essential when cutting a machine screw. Place the screw in a vise or use a clamp to hold it firmly in place. Ensure the marked area is positioned so that it is easily accessible for cutting. Tighten the vise or clamp enough to prevent movement, but avoid over-tightening, as this could deform the screw.
Expert Advice: Over-tightening can damage the screw’s threads, making it unusable. Apply just enough pressure to keep the screw stable.
Step 3: Cut the Screw
Now it’s time to cut the screw. Choose the appropriate tool based on the screw size. For smaller screws, use electricians pliers or end-cutting pliers. For larger screws, opt for a hacksaw or bolt cutter. Align the tool with the marked line and apply steady, even pressure as you cut. Avoid rushing, as this can lead to uneven cuts or stripped threads.
If you’re working with larger screws, jam two nuts together above the cut point. These nuts will protect the threads from damage during the cutting process. Once the cut is complete, remove the nuts to reveal clean, intact threads.
Safety Reminder: Always wear gloves and goggles while cutting. Gloves protect your hands from sharp edges, and goggles shield your eyes from flying debris.
Expert Tip: According to DIY experts, after cutting, check the edge of the screw. If it feels sharp or jagged, it could pose a safety risk. Use coarse-grit sandpaper to smooth it down and ensure it’s safe to handle.
By following these steps, you’ll master how to cut a machine screw with precision and efficiency. Each step builds on the previous one, ensuring that the screw remains functional and fits perfectly in its intended application.
Step 4: Smooth the Edges
After cutting the screw, you must smooth the edges to ensure safety and functionality. The cutting process often leaves burrs or sharp points that can damage threads or cause injury. Use a thread file to carefully remove these imperfections. Hold the screw steady and file along the cut edge in a consistent motion. This method preserves the integrity of the threads while creating a clean finish.
If you don’t have a thread file, fine-grit sandpaper works as an excellent alternative. Wrap the sandpaper around the cut edge and gently rub it back and forth. This action polishes the surface and eliminates any sharpness. According to DIY experts, coarse-grit sandpaper is particularly effective for honing down sharp edges that might still poke out. Always check the edge with your fingers to confirm it feels smooth and safe to handle.
Pro Tip: Take your time during this step. Rushing can leave behind rough spots that may interfere with the screw’s fit or usability.
Ensuring the threads are clean is equally important. After smoothing, inspect the threads for any debris or irregularities. A quick wipe with a cloth or a soft brush can remove any remaining metal shavings. Clean threads guarantee that the screw will function properly in its intended application.
Step 5: Test the Screw
Testing the screw is the final step in learning how to cut a machine screw effectively. Insert the screw into its intended application to check the fit. Ensure it threads smoothly without resistance. If the screw doesn’t fit properly, inspect the cut edge and threads again. Minor adjustments, such as additional filing or sanding, can resolve most issues.
Expert Advice: If the screw feels tight or difficult to turn, avoid forcing it. Forcing a poorly cut screw can strip the threads or damage the material it’s being inserted into.
In some cases, you may need to re-measure and trim the screw further. Use the same tools and techniques outlined earlier to make precise adjustments. Repeat the smoothing process after any additional cuts to maintain a clean edge.
Pro Tip: Testing the screw not only ensures functionality but also helps you refine your technique. Each test provides valuable feedback for future projects.
By completing these steps, you’ll achieve a perfectly cut machine screw that fits seamlessly into its application. This process ensures both safety and precision, giving you confidence in your DIY skills.
Common Mistakes and How to Avoid Them
Skipping the Measuring Step
Accurate measurement is the foundation of a successful cut. Skipping this step often leads to screws that are either too short or too long for their intended application. Always measure the screw’s length using a measuring tape or ruler. Mark the desired cut point with a permanent marker to ensure precision. This simple preparation saves time and prevents wasted materials.
Tip: Double-check your measurements before marking. A small error can result in a poorly fitting screw.
Using the Wrong Tool
Using the wrong tool can damage the screw or produce uneven cuts. Match the tool to the screw’s size and material. For smaller screws, electricians pliers or end-cutting pliers provide clean cuts. Larger screws require a hacksaw or bolt cutter for effective results. Selecting the right tool ensures a smooth cutting process and preserves the screw’s threads.
Did You Know? Square threads, as shown in biomechanical studies, experience less stress during use compared to V-shaped threads. Preserving thread integrity is crucial for maintaining the screw’s strength and functionality.
Neglecting to Smooth the Edges
Cutting often leaves sharp edges or burrs on the screw. Neglecting to smooth these edges can damage the threads or make the screw unusable. Use a thread file or fine-grit sandpaper to polish the cut edge. This step ensures the screw fits seamlessly into its application and prevents potential injuries from handling sharp edges.
Pro Tip: After smoothing, test the screw in its intended application. This ensures the threads remain functional and the screw fits perfectly.
By addressing these common mistakes, you can master how to cut a machine screw with precision and efficiency. Each step plays a vital role in achieving a clean, functional result.
Over-tightening in the Vise
Avoid deforming the screw by applying excessive pressure.
When securing a screw in a vise, applying too much pressure can deform its threads or shaft. This deformation compromises the screw’s functionality and makes it difficult to fit into its intended application. You must strike a balance between stability and pressure. Tighten the vise just enough to hold the screw firmly in place without distorting its shape.
Tip: Check the screw visually after securing it in the vise. If you notice any flattening or bending, loosen the grip and adjust the pressure.
Deformed threads reduce the screw’s pullout strength, which is its ability to resist being pulled out of a material. Research on thread profiles shows that square threads perform better under stress because they distribute force evenly. However, even these robust threads can fail if the screw is damaged during the cutting process. By avoiding over-tightening, you preserve the integrity of the threads and ensure the screw remains strong and reliable.
Cutting Too Quickly
Rushing can lead to uneven cuts or stripped threads.
Cutting a machine screw requires patience and precision. Rushing through the process often results in uneven cuts, which can strip the threads and render the screw unusable. Uneven cuts also create sharp edges that may damage the material the screw is intended for. To achieve a clean cut, you must apply steady, controlled pressure and follow the marked line carefully.
Pro Tip: Use slow, deliberate strokes when working with a hacksaw or pliers. This approach ensures a smoother cut and minimizes the risk of errors.
Stripped threads weaken the screw’s ability to hold securely in its application. Studies on thread performance highlight the importance of maintaining thread integrity. V-shaped threads, for example, offer higher pullout strength due to their design. However, this advantage diminishes if the threads are damaged during cutting. By taking your time and cutting slowly, you protect the threads and enhance the screw’s performance.
Safety Reminder: Always wear gloves and goggles while cutting. Gloves protect your hands from sharp edges, and goggles shield your eyes from flying debris.
Pro Tips for Achieving Precision
Practice on Scrap Screws
Build confidence by practicing on spare screws before working on important ones.
Before working on your actual project, practice cutting on scrap screws. This step allows you to refine your technique without risking valuable materials. By experimenting with different tools and methods, you can identify what works best for you. For example, try using a hacksaw on one screw and pliers on another to compare results.
Practicing on scrap screws helps you understand how much pressure to apply and how to maintain a steady hand. This experience builds confidence and ensures better results when working on important screws. achieving precision.
If you don’t have spare screws, consider purchasing inexpensive ones from a hardware store. These practice sessions will save you time and frustration in the long run.
Use Two Nuts for Thread Protection
Jam two nuts together above the cut point to protect threads during cutting.
Protecting the threads is crucial when cutting machine screws. One effective method involves using two nuts. Thread the nuts onto the screw and jam them tightly together just above the cut point. These nuts act as a barrier, shielding the threads from damage during the cutting process.
Pro Tip: After cutting, unscrew the nuts carefully. They will help realign any threads that may have shifted, ensuring the screw remains functional.
This technique works particularly well for larger screws. It’s a simple yet highly effective way to maintain thread integrity. If you don’t have nuts on hand, consider purchasing a small pack from your local hardware store. They are inexpensive and can be reused for future projects.
Cut Slowly and Steadily
Take your time to ensure a clean, precise cut.
Rushing through the cutting process often leads to uneven edges and damaged threads. To achieve a clean cut, work slowly and apply steady pressure. Align your tool carefully with the marked line and follow it with precision. Whether you’re using a hacksaw or pliers, deliberate movements produce the best results.
Expert Advice: Avoid forcing the tool through the screw. Let the tool do the work. For example, when using a hacksaw, use smooth, consistent strokes rather than quick, jerky motions.
Cutting slowly also reduces the risk of injury. Sharp tools and flying debris can pose hazards, so wearing gloves and goggles is essential. By taking your time, you not only improve the quality of your work but also ensure your safety.
Did You Know? Some professionals recommend using a disc sander or bench grinder for faster results. These tools can create smooth edges quickly, but they require careful handling to avoid overheating the screw or damaging the threads.
By following these pro tips, you can achieve precision and confidence in your screw-cutting projects. Each tip enhances your skills and ensures that your screws fit perfectly into their intended applications.
Keep Tools Sharp and Clean
Dull tools can result in rough cuts and imprecise results.
Maintaining sharp and clean tools is essential for achieving precise cuts. Dull blades or worn-out pliers can create jagged edges, damage threads, or even make the cutting process more difficult. Regularly inspect your tools for signs of wear. If you notice a blade losing its edge or pliers struggling to cut cleanly, sharpen or replace them immediately.
Pro Tip: Use a sharpening stone or file to restore the edge of your hacksaw blade. For pliers, consider replacing them if sharpening isn’t an option.
Clean tools also play a significant role in precision. Metal shavings, dirt, or grease can accumulate on cutting surfaces, reducing their effectiveness. Wipe down your tools after each use with a clean cloth. This simple habit ensures they remain in optimal condition for your next project.
Expert Advice: Store your tools in a dry, organized space to prevent rust and damage. Rusty tools not only perform poorly but can also compromise the safety of your work.
Investing in high-quality tools can save you time and effort in the long run. For example, some professionals recommend brands like Gardner Bender for bolt cutters or crimpers. These tools, while slightly more expensive, offer durability and precision that cheaper alternatives often lack. A well-maintained, high-quality toolset ensures consistent results and enhances your overall experience.
Verify Thread Size
Use a thread gauge to check the thread size before and after cutting.
Verifying the thread size is a critical step in ensuring your screw fits perfectly into its application. A thread gauge allows you to measure the screw’s thread size accurately, both before and after cutting. This tool helps you avoid mismatched fittings, which can lead to stripped threads or loose connections.
Did You Know? Thread gauges are inexpensive and widely available at hardware stores. They come in various sizes to accommodate different types of screws.
Before cutting, use the thread gauge to confirm the screw’s compatibility with its intended application. After cutting, recheck the threads to ensure they remain intact and functional. This step is especially important if you’re working on high-precision projects where even minor thread damage can cause issues.
Pro Tip: If you don’t have a thread gauge, take the screw to your local hardware store. Many stores have thread-checking stations that you can use for free.
For larger screws, using two nuts during the cutting process can help protect the threads. Thread the nuts onto the screw and jam them together above the cut point. After cutting, unscrew the nuts carefully. This method not only shields the threads but also helps realign them if they shift during cutting.
By keeping your tools sharp and verifying thread sizes, you ensure clean, accurate cuts every time. These practices enhance the quality of your work and reduce the likelihood of errors, saving you time and frustration.
When to Seek Professional Help
Complex or High-Precision Projects
For critical applications, consider consulting a professional.
Some projects demand an exceptional level of precision. For example, if you’re working on machinery or equipment where even a minor error could lead to malfunction, seeking professional help is the best choice. Professionals possess the expertise and tools to handle intricate tasks with accuracy. They understand how to preserve thread integrity and ensure the screw fits perfectly into its application.
Tip: If your project involves high-stress environments, such as automotive or aerospace applications, professional assistance ensures safety and reliability.
Attempting to cut screws for complex projects without the necessary skills can result in costly mistakes. A poorly cut screw may compromise the entire assembly. By consulting an expert, you save time and avoid potential risks. Their experience guarantees that the job gets done right the first time.
Lack of Proper Tools
If you don’t have the right tools, a professional can ensure quality results.
Cutting machine screws requires specific tools like hacksaws, pliers, or thread files. Without these, achieving clean and precise cuts becomes challenging. Using makeshift tools often leads to uneven edges, stripped threads, or damaged screws. These issues can render the screw unusable and waste your effort.
Did You Know? Over-tightening or rushing with improper tools can damage both the screw and the material it’s being used on.
Professionals have access to high-quality tools designed for precision. They also know how to use these tools effectively, ensuring smooth edges and intact threads. If you lack the proper equipment, hiring a professional saves you from investing in tools you may only use occasionally. It also ensures the final result meets the required standards.
Pro Tip: Before starting any project, evaluate your toolset. If you find gaps, consider whether it’s worth purchasing new tools or consulting a professional for assistance.
By recognizing when to seek professional help, you ensure your project’s success. Whether it’s due to the complexity of the task or the lack of proper tools, professionals provide the expertise and resources needed to achieve flawless results.
Cutting a machine screw perfectly every time becomes simple when you use the right tools and follow a clear process. By preparing carefully, measuring accurately, and cutting with precision, you can achieve clean results without damaging the threads. Practice on scrap screws to build confidence and refine your technique. Tools like grinders or Dremel tools can also enhance precision for advanced projects. Remember, every step matters—from marking the screw to smoothing the edges. With consistent effort, you’ll master how to cut a machine screw and complete your projects with professional-level results.
FAQ
How do I choose the right tool for cutting a machine screw?
Selecting the right tool depends on the size and material of the screw. For smaller screws, use electricians pliers or end-cutting pliers. These tools provide clean cuts for screws up to 3 mm in diameter. For larger screws, opt for a hacksaw or bolt cutter. A hacksaw offers precision, while a bolt cutter delivers speed and efficiency. Always match the tool to the task for the best results.
Tip: If you’re unsure, test the tool on a scrap screw to see how it performs.
Why is it important to smooth the edges after cutting?
Smoothing the edges ensures the screw fits properly and remains safe to handle. Use a smoothing the edges or fine-grit sandpaper to polish the cut edge.
Pro Tip: Always check the edge with your fingers after smoothing. It should feel smooth and free of sharp points.
Can I protect the threads while cutting a screw?
Yes, you can protect the threads by using two nuts. Thread the nuts onto the screw and jam them tightly together just above the cut point. These nuts act as a barrier, shielding the threads from damage during the cutting process. After cutting, unscrew the nuts carefully to reveal clean, intact threads.
Did You Know? This method not only protects the threads but also helps realign them if they shift during cutting.
What should I do if the screw doesn’t fit after cutting?
If the screw doesn’t fit, inspect the cut edge and threads. Look for burrs or irregularities that might interfere with the fit. Use a thread file or sandpaper to make adjustments. If necessary, re-measure and trim the screw further. Always test the screw again after making adjustments to ensure proper fit.
Expert Advice: Avoid forcing a poorly cut screw into place. This can strip the threads or damage the material it’s being inserted into.
How can I ensure accurate measurements before cutting?
Use a measuring tape or ruler to determine the exact length you need. Hold the screw steady and align the measuring tool carefully. Mark the cut point with a permanent marker for clarity. Double-check your measurements to avoid errors.
Tip: Accurate measurements save time and prevent wasted screws.
What are the risks of over-tightening a screw in a vise?
Over-tightening a screw in a vise can deform its threads or shaft. This deformation compromises the screw’s functionality and makes it difficult to fit into its application. Tighten the vise just enough to hold the screw firmly without distorting its shape.
Pro Tip: Check the screw visually after securing it in the vise. If you notice flattening or bending, loosen the grip and adjust the pressure.
Why is cutting slowly and steadily important?
Cutting slowly and steadily ensures a clean, precise cut. Rushing can lead to uneven edges, stripped threads, or damaged screws. Apply steady pressure and follow the marked line carefully. This approach minimizes errors and enhances the quality of your work.
Safety Reminder: Always wear gloves and goggles while cutting to protect yourself from sharp edges and flying debris.
What is the difference between thread types, and does it matter when cutting screws?
Thread types affect the screw’s performance in different applications. For example, reverse buttress threads offer superior pullout strength compared to buttress threads and barb threads. However, trapezoidal fluted threads outperform reverse buttress threads in certain high-stress environments. When cutting screws, preserving the thread integrity is crucial to maintain their strength and functionality.
Did You Know? Damaged threads reduce pullout strength, which is the screw’s ability to resist being pulled out of a material.
Should I practice before cutting important screws?
Yes, practicing on scrap screws helps you refine your technique. It allows you to experiment with different tools and methods without risking valuable materials. By practicing, you gain confidence and improve your precision.
Tip: Purchase inexpensive screws from a hardware store for practice. This small investment saves time and frustration in the long run.
When should I seek professional help for cutting screws?
Seek professional help for complex or high-precision projects. If you lack the proper tools or experience, a professional ensures quality results. They have the expertise and equipment to handle intricate tasks with accuracy. For critical applications, such as automotive or aerospace projects, consulting an expert guarantees safety and reliability.
Pro Tip: Evaluate your toolset before starting any project. If you find gaps, consider whether it’s worth purchasing new tools or hiring a professional.
See Also
Simple Techniques for Cutting Thread on Sewing Machines
Guide to Metal Cutting Using a Desktop CNC Machine
Beginner's Guide to Understanding Die Cutting Machines