Why Bread Machine Bread Texture Affects Slicing Quality

The texture of bread plays a crucial role in determining how well it slices. A dense loaf often cuts more evenly, while a lighter, airy bread may crumble or collapse under the knife. Factors like crumb structure, moisture content, and crust hardness directly influence slicing quality. For instance, under-kneaded bread tends to produce more crumbs due to weak gluten formation. Proper hydration levels also matter—too much water can result in a gummy texture, making slicing difficult. Understanding these elements helps you master how to cut bread machine bread with precision and ease.
Key Takeaways
- Understanding gluten development is crucial; ensure your bread machine kneads the dough adequately for a strong gluten network to prevent crumbling.
- Hydration levels matter—experiment with a water-to-flour ratio of 60-65% to achieve a balance between softness and stability in your bread.
- Monitor proofing times closely; under-proofed dough leads to dense loaves that are hard to slice, while over-proofed dough can collapse. Use a serrated knife for slicing; its saw-like motion minimizes pressure on the loaf, ensuring clean, even cuts.
- Allow your bread to cool completely before slicing to stabilize the crumb structure and avoid a gummy texture. Adjust your bread machine settings based on your recipe; fine-tuning kneading, proofing, and baking times can significantly improve texture and slicing quality.
- Experiment with different ingredients and additives, like bread flour or fats, to enhance the texture and achieve bakery-quality results at home.
Key Factors That Influence Bread Texture in a Bread Machine
Gluten Development
Gluten plays a vital role in shaping the texture of your bread. When you mix wheat flour with water, two proteins—glutenin and gliadin—combine to form gluten. This network gives the dough its elasticity and strength, allowing it to trap gas during fermentation. Without proper gluten development, your bread may lack structure and crumble when sliced. Overworking or underworking the dough can disrupt this balance. For optimal results, ensure your bread machine kneads the dough adequately to develop a strong gluten network.
Scientific Insight: According to Modernist Cuisine, gluten development is essential for gas retention and crumb texture, which directly impacts slicing quality.
Hydration Levels
The amount of water in your dough significantly affects its texture. High hydration levels create a softer crumb with larger air pockets, while low hydration results in a denser loaf. Striking the right balance is key. Too much water can lead to a gummy texture that sticks to your knife, making slicing difficult. On the other hand, insufficient water can produce a dry, crumbly loaf that falls apart.
Pro Tip: Experiment with hydration levels to find the sweet spot for your bread machine. A hydration level of 60–65% often works well for most recipes.
Kneading and Mixing
Kneading ensures that gluten develops evenly throughout the dough. Bread machines automate this process, but improper settings can lead to uneven mixing. If the dough isn’t kneaded enough, the gluten network remains weak, resulting in a dense or uneven crumb. Over-kneading, however, can break down the gluten structure, leading to a tough texture.
To achieve the best results, monitor the kneading cycle in your bread machine. Adjust the settings if necessary to ensure the dough reaches the right consistency. A well-kneaded dough should feel smooth and elastic, not sticky or overly firm.
Did You Know? The Adv Food Rheol Appl journal highlights that dough formulation and kneading directly influence the physical traits of baked goods, including texture and slicing quality.
Proofing and Rising
Proofing and rising are critical steps in bread-making that directly influence the texture of your bread. During proofing, yeast ferments the dough, producing carbon dioxide that creates air pockets. These air pockets determine the crumb structure and overall softness of the bread. If the dough doesn’t rise enough, the bread will have a tight, dense crumb, making it harder to slice cleanly. Over-proofing, however, can weaken the dough structure, causing it to collapse and result in uneven slices.
To achieve the ideal proofing, monitor the dough closely. Bread machines often have pre-set proofing times, but environmental factors like room temperature and humidity can affect the process. Adjust the settings or timing if necessary to ensure the dough rises properly. A well-proofed dough should double in size and feel slightly springy when pressed gently.
Scientific Insight: According to Adv Food Rheol Appl, the formulation and handling of dough during proofing significantly impact the physical traits of baked bread, including its texture and slicing quality.
Ingredients and Additives
The ingredients you use play a pivotal role in shaping the texture of your bread. Flour type, yeast, sugar, and fats all contribute to the final product. For instance, bread flour, which has a higher protein content, promotes better gluten development, resulting in a more elastic dough and a stable crumb. All-purpose flour, on the other hand, may produce a softer loaf but with less structural integrity.
Additives like milk, eggs, or butter can enhance the texture by softening the crumb and adding richness. However, too much fat or sugar can interfere with gluten formation, leading to a denser loaf. Salt is another key ingredient that strengthens gluten and improves dough elasticity. Without it, the bread may turn out weak and prone to crumbling.
Pro Tip: Experiment with different flours and additives to find the perfect balance for your bread machine recipes. For gluten-free options, consider using xanthan gum or psyllium husk to mimic the elasticity of gluten.
Did You Know? The AZoM journal highlights that dough formulation, including the choice of ingredients, directly affects the behavior and quality of baked goods.
How Bread Texture Impacts Slicing Quality
Crumb Structure and Stability
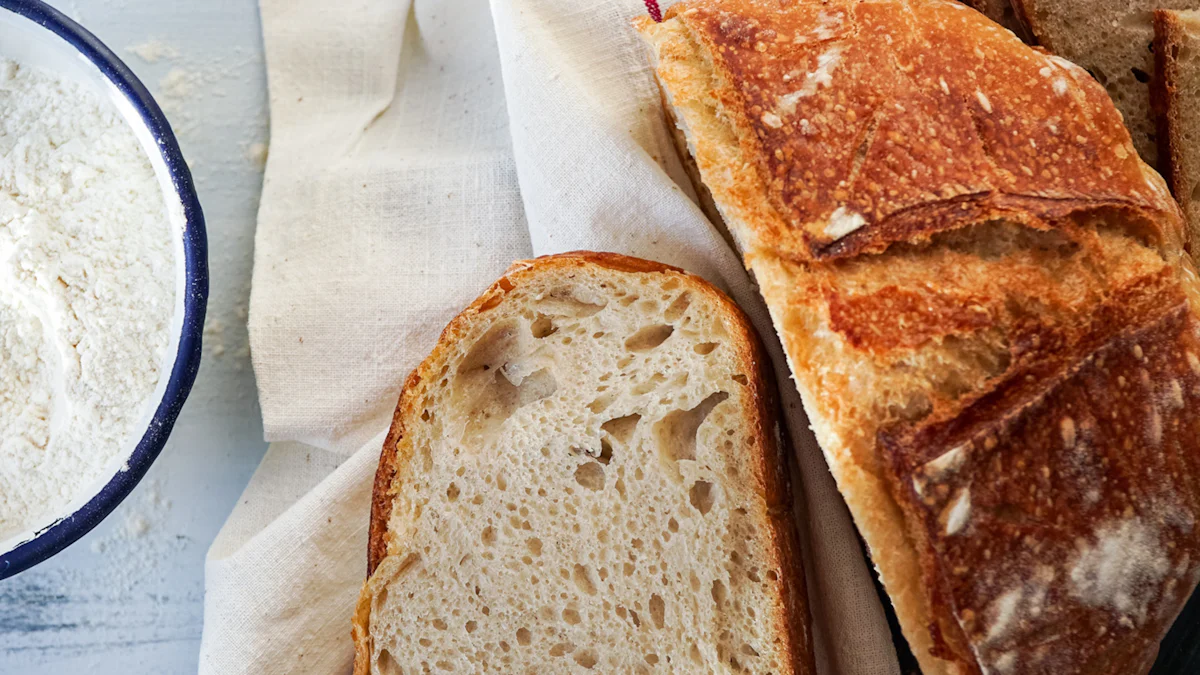
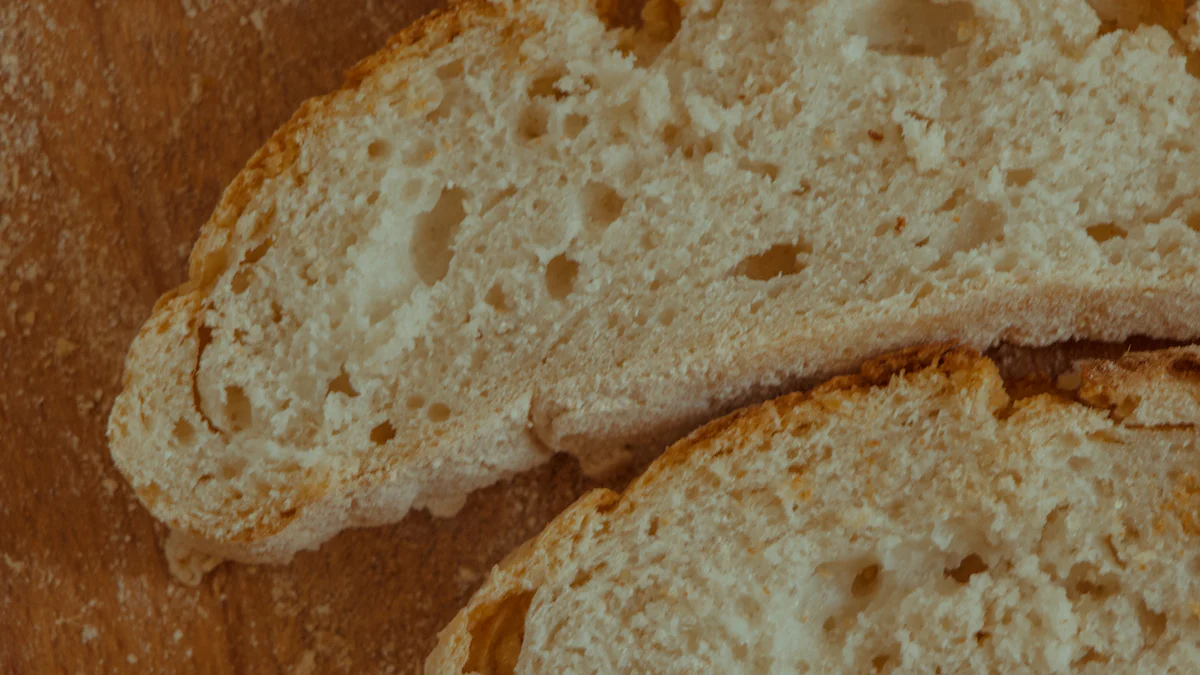
The crumb structure of bread determines how well it holds together during slicing. A stable crumb with evenly distributed air pockets ensures clean, precise cuts. When the crumb lacks uniformity, you may notice tearing or crumbling as you slice. This issue often arises from improper gluten development or uneven proofing. A weak crumb structure can also result from insufficient kneading, which prevents the gluten network from forming properly.
Moisture content plays a significant role in crumb stability. Bread with higher moisture levels tends to have a softer crumb, which may stick to the knife during slicing. On the other hand, a dry crumb can crumble easily, making it difficult to achieve smooth slices. According to sensory evaluation methods for bread, properties like chewiness and hardness directly influence the crumb's behavior during slicing. Striking the right balance in your dough preparation ensures a crumb that is both soft and stable.
Pro Tip: Allow your bread to cool completely before slicing. Warm bread often has a fragile crumb that can collapse under the pressure of a knife.
Bread Density
Bread density significantly affects slicing quality. Dense bread provides more resistance to the knife, resulting in cleaner cuts. However, overly dense bread can feel heavy and unappealing. Bread density depends on factors like hydration levels, proofing time, and ingredient ratios. For example, under-proofed dough often leads to a dense loaf with a tight crumb, making slicing more challenging.
Lighter, airy bread may seem appealing, but it often collapses when sliced. This happens because the crumb lacks the structural integrity to withstand the pressure of the knife. Research on oral processing and texture perception highlights that bread with higher moisture content and faster hydration rates tends to have a softer texture, which can complicate slicing. Adjusting your bread machine settings to achieve the right density ensures a loaf that slices easily and maintains its shape.
Did You Know? Bread flour, with its higher protein content, helps create a denser, more stable loaf compared to all-purpose flour.
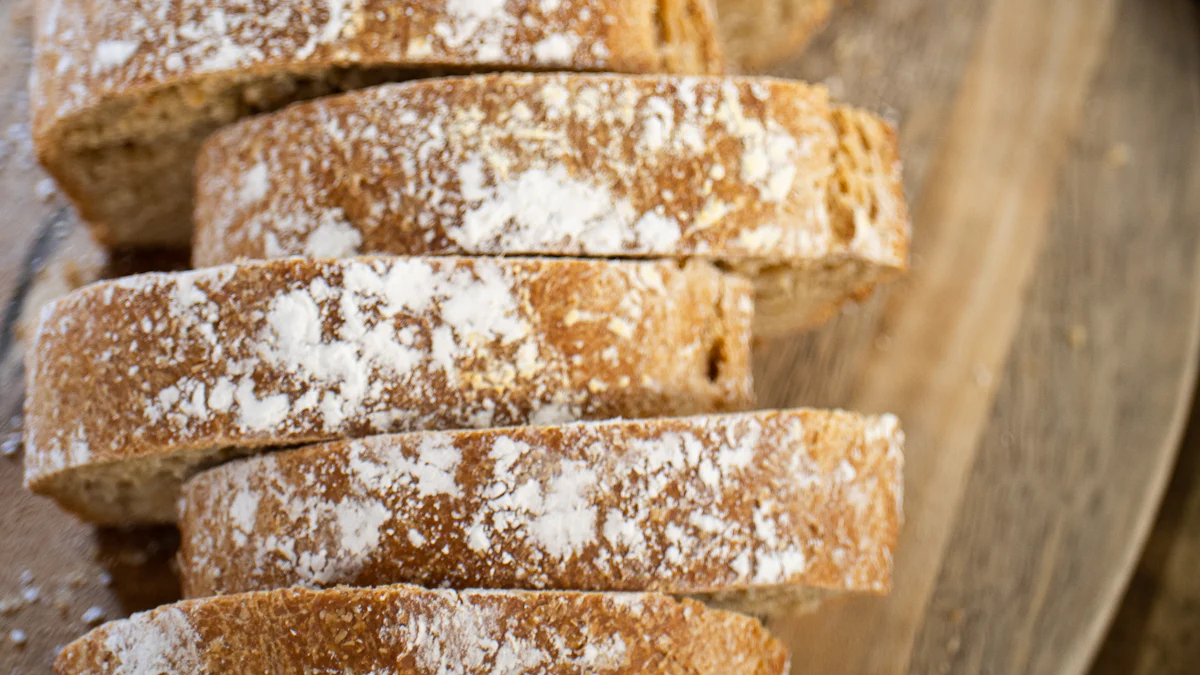
Crust Hardness
The hardness of the crust directly impacts how easily you can slice your bread. A crust that is too hard may require excessive force, causing the loaf to compress or tear. Conversely, a crust that is too soft may not provide enough resistance, leading to uneven slices. Achieving the ideal crust hardness involves balancing baking time and temperature. Overbaking can result in a tough, brittle crust, while underbaking leaves the crust too soft.
Crust hardness also influences the overall texture perception of the bread. Sensory evaluation methods reveal that consumers often associate a slightly firm crust with better quality and flavor. To achieve this balance, monitor your bread machine's baking cycle closely. Adjusting the crust color setting can help you control the hardness and ensure a loaf that slices cleanly.
Pro Tip: Use a serrated knife for slicing bread with a firm crust. The saw-like motion reduces the risk of crushing the loaf and ensures even slices.
Moisture Content
Moisture content plays a critical role in determining the texture and slicing quality of bread. Bread with higher moisture levels often feels softer and more tender, but it can also stick to your knife, making clean slices difficult. On the other hand, bread with low moisture content may crumble easily, leading to uneven cuts. Striking the right balance ensures a loaf that is both easy to slice and enjoyable to eat.
Moisture affects how the crumb holds together. A well-balanced moisture level creates a stable crumb structure, which resists tearing during slicing. Research on bread texture highlights that moisture content directly influences chewiness and crumb stability. For example, bread with faster hydration rates tends to feel softer but may lack the firmness needed for precise slicing.
Scientific Insight: Studies on oral processing reveal that bread with higher moisture content exhibits faster hydration during chewing, which impacts its texture and slicing behavior.
Proper cooling after baking also impacts moisture retention. Slicing warm bread can lead to a gummy texture, as the moisture inside hasn’t fully redistributed. Allowing the bread to cool completely helps stabilize the crumb and prevents sticking. This simple step can significantly improve slicing results.
To manage moisture content effectively, consider these tips:
- Adjust hydration levels: Experiment with the water-to-flour ratio in your recipe. A hydration level of 60–65% often works well for most bread machine recipes.
- Monitor baking time: Overbaking can dry out the loaf, while underbaking leaves excess moisture, resulting in a gummy texture.
- Store bread properly: Use airtight containers to maintain moisture balance and prevent the loaf from drying out.
Pro Tip: If your bread feels too moist or sticky, try toasting the slices lightly before serving. This can improve texture and make slicing easier.
By understanding and controlling moisture content, you can achieve a loaf with the perfect balance of softness and stability, ensuring clean, even slices every time.
Practical Tips for How to Cut Bread Machine Bread and Improve Texture
Adjusting Ingredients
The ingredients you choose can significantly impact the texture of your bread and, ultimately, how well it slices. Start by selecting the right type of flour. Bread flour, with its higher protein content, promotes better gluten development, resulting in a more elastic dough and a stable crumb. This stability ensures cleaner slices. If you prefer a softer loaf, consider using all-purpose flour, but be aware that it may produce more crumbs during slicing.
Adding fats like butter or oils can soften the crumb and improve slicing quality. However, excessive fat can interfere with gluten formation, leading to a denser loaf. Similarly, sugar enhances flavor and browning but should be used in moderation to avoid altering the bread's structure. Salt strengthens gluten and improves elasticity, making it an essential ingredient for a loaf that holds together well when sliced.
Pro Tip: Experiment with small adjustments to your recipe. For example, try adding milk or eggs to enrich the texture or use honey instead of sugar for a softer crumb.
Monitoring Proofing and Rising
Proofing and rising are critical steps in achieving the ideal bread texture. Proper proofing allows the dough to develop air pockets, creating a soft yet stable crumb. Under-proofed dough results in a dense loaf that is difficult to slice evenly. Over-proofed dough, on the other hand, can collapse, leading to uneven slices.
To monitor proofing effectively, pay attention to the dough's size and texture. A well-proofed dough should double in size and feel slightly springy when pressed. Bread machines often have pre-set proofing times, but environmental factors like room temperature and humidity can affect the process. Adjust the timing if necessary to ensure optimal results.
Did You Know? Rapid bake settings in bread machines often produce denser loaves, which are easier to slice evenly. However, these settings may compromise the bread's overall texture.
Optimizing Bread Machine Settings
Your bread machine's settings play a crucial role in determining the texture and slicing quality of your bread. Most machines allow you to adjust kneading, proofing, and baking times. Use these options to fine-tune the process based on your recipe and preferences.
For example, if your bread tends to crumble during slicing, check the kneading cycle. Insufficient kneading can weaken the gluten network, while over-kneading can make the bread tough. Adjust the kneading time to achieve a smooth, elastic dough. Similarly, experiment with the crust color setting to control crust hardness. A medium crust setting often provides the best balance for slicing.
Pro Tip: Use the delay timer feature to align the baking cycle with your schedule. Freshly baked bread slices better after it has cooled completely, so plan accordingly.
To further improve slicing quality, consider the type of knife you use. A serrated knife with a flexible stainless steel blade works best for cutting bread machine bread. The saw-like motion minimizes crumbs and ensures neat slices.
Quick Tip: If your bread has a crusty exterior, try the tilt technique while slicing. Hold the loaf at a slight angle and use gentle, even strokes for cleaner cuts.
By adjusting ingredients, monitoring proofing, and optimizing your bread machine settings, you can master how to cut bread machine bread with ease. These small changes can make a big difference in both texture and slicing quality, helping you achieve bakery-level results at home.
Slicing Techniques
Mastering the right slicing techniques can significantly improve the quality of your bread slices. The way you cut bread machine bread affects not only its appearance but also its texture and usability for meals. Here are some practical methods to ensure clean, even slices every time:
-
Use the Right Knife
A serrated knife with a flexible stainless steel blade works best for slicing bread. The saw-like motion of a serrated knife reduces pressure on the loaf, preventing it from compressing or tearing. Avoid using straight-edged knives, as they tend to crush the bread rather than slice through it cleanly.Pro Tip: Keep your serrated knife sharp. A dull blade can tear the crust and create uneven slices.
-
Let the Bread Cool Completely
Always allow your bread to cool fully before slicing. Warm bread has a softer crumb that can stick to the knife, resulting in messy cuts. Cooling stabilizes the crumb structure, making it easier to achieve neat slices. For bread machine loaves, wait at least an hour after baking before cutting.Quick Tip: If you're in a hurry, place the bread on a wire rack to speed up the cooling process.
-
Apply the Tilt Technique
For crusty bread, hold the loaf at a slight angle while slicing. This tilt technique minimizes crumbs and ensures cleaner cuts. Start at one end of the loaf and use gentle, even strokes to work your way through. This method works particularly well for bread with a firm crust. -
Slice with Consistent Pressure
Apply steady, even pressure as you slice. Avoid pressing down too hard, as this can compress the loaf and distort the shape of the slices. Instead, let the knife do the work by moving it back and forth in a smooth motion. -
Cut to Desired Thickness
Decide on the thickness of your slices before you begin. Thicker slices work well for toast or sandwiches, while thinner slices are ideal for serving with soups or salads. Use a bread slicing guide if you want uniform slices every time. -
Store Bread Properly After Slicing
Once you've sliced your bread, store it in an airtight container to maintain its freshness. Proper storage prevents the loaf from drying out or becoming stale. If you plan to freeze the bread, slice it beforehand so you can easily thaw individual pieces as needed.Did You Know? Bread with higher moisture content tends to stay fresher longer, but it may require extra care during slicing to avoid sticking.
By following these slicing techniques, you can enhance the presentation and usability of your bread. Whether you're learning how to cut bread machine bread for the first time or refining your skills, these methods will help you achieve bakery-quality results at home.
Common Mistakes That Affect Bread Texture and Slicing
Overloading the Bread Machine
Overloading your bread machine can lead to poor results. When you exceed the recommended capacity, the machine struggles to mix and knead the dough evenly. This uneven mixing prevents proper gluten development, resulting in a loaf with a weak structure. A poorly structured loaf often crumbles or tears when sliced.
To avoid this mistake, always check your bread machine's manual for the maximum flour and ingredient limits. Stick to recipes designed for your machine's size. If you want to experiment with larger batches, consider dividing the dough and baking in smaller portions.
Pro Tip: Overloading also affects the machine's motor, potentially shortening its lifespan. Keeping within the recommended limits ensures both better bread and a longer-lasting appliance.
Ignoring Ingredient Measurements
Precise measurements are essential for achieving the right bread texture. Adding too much or too little of an ingredient can disrupt the balance of the dough. For example, too much water creates a gummy texture, while too little results in a dry, crumbly loaf. Similarly, excessive yeast can cause over-proofing, leading to a collapsed structure that slices unevenly.
Use a kitchen scale for accurate measurements, especially for flour. Measuring by volume can lead to inconsistencies, as flour density varies depending on how it’s scooped. Follow the recipe closely and avoid making substitutions unless you understand how they affect the dough.
Scientific Research Findings: Studies on bread texture highlight that moisture content significantly impacts chewiness and crumb stability. Precise hydration levels ensure a balanced texture, making slicing easier.
Skipping Cooling Time
Skipping the cooling time is one of the most common mistakes home bakers make. Cutting into warm bread may seem tempting, but it disrupts the crumb structure. Warm bread has a higher moisture content that hasn’t fully redistributed. This leads to a gummy texture and uneven slices.
Allow your bread to cool completely on a wire rack. Cooling stabilizes the crumb and firms up the crust, making slicing smoother. For most bread machine loaves, wait at least an hour before cutting. If you’re in a hurry, resist the urge to slice and instead focus on preparing other parts of your meal.
Quick Tip: Use a serrated knife for slicing cooled bread. The saw-like motion reduces pressure on the loaf, ensuring clean cuts without crushing the crumb.
Benefits of Improving Bread Texture for Slicing
Enhanced Presentation
Improving the texture of your bread directly enhances its visual appeal. A loaf with a stable crumb and uniform structure slices cleanly, creating neat and consistent pieces. These well-defined slices elevate the presentation of your meals, whether you're serving sandwiches, toast, or appetizers. Uneven or crumbled slices can detract from the overall appearance, making the dish look less appetizing.
Expert Insight: Various bread-making experts emphasize that proper proofing and balanced hydration levels contribute to a loaf with a smooth, even crumb. This ensures that each slice holds its shape and looks professional.
A well-textured loaf also allows you to experiment with creative plating. For example, you can cut thinner slices for elegant hors d'oeuvres or thicker ones for hearty sandwiches. The improved texture gives you the flexibility to tailor the bread to your culinary needs without worrying about it falling apart.
Pro Tip: Use a serrated knife to maintain the integrity of each slice. The saw-like motion prevents tearing and preserves the loaf's structure, ensuring a polished presentation.
Better Eating Experience
The texture of your bread significantly impacts how enjoyable it is to eat. A loaf with a soft yet stable crumb feels satisfying to bite into, while a dense or overly dry loaf can detract from the eating experience. When the bread slices cleanly, it retains its intended structure, making it easier to pair with spreads, fillings, or toppings.
Did You Know? Bread with balanced moisture content not only slices better but also tastes fresher. Proper hydration levels create a tender crumb that enhances the overall flavor and mouthfeel.
Improved texture also ensures that the bread complements the meal rather than overpowering it. For instance, a loaf with a balanced crust hardness pairs well with soups or stews, as it absorbs flavors without becoming soggy. Similarly, a loaf with a soft yet elastic crumb works perfectly for sandwiches, holding the fillings securely in place.
Expert Testimony: According to bread-making professionals, retarding the dough during its final proofing stage enhances both flavor and texture. This process slows down the rise, allowing the loaf to develop a more complex taste and a crumb that holds together beautifully when sliced.
By focusing on texture, you not only improve the slicing quality but also elevate the overall dining experience. Each bite becomes more enjoyable, leaving a lasting impression on anyone who shares your homemade bread.
Encouragement to Experiment with Bread Machine Settings
Why Experimentation Matters
Experimenting with your bread machine settings can transform your baking experience. Each loaf you bake offers an opportunity to refine your skills and discover what works best for your preferences. Bread machines come with various settings for kneading, proofing, and baking. Adjusting these can help you achieve the ideal texture and slicing quality.
For example, if your bread feels too dense, you might try increasing the proofing time. This allows the dough to rise more, creating a lighter crumb. On the other hand, if your bread collapses when sliced, reducing the proofing time could prevent over-proofing. Small changes like these can make a significant difference in the final result.
Expert Insight: Henk Drakulich, an expert baker, emphasizes the importance of control in bread preparation. He suggests flipping crusty bread onto its side for better grip and slicing precision. This principle of experimenting with techniques applies equally to bread machine settings.
Experimentation also allows you to tailor your bread to specific needs. Whether you prefer a softer crust for sandwiches or a firmer one for soups, tweaking the settings can help you achieve your desired outcome. By testing different combinations, you’ll gain a deeper understanding of how each setting impacts the bread’s texture and slicing quality.
Learning from Mistakes
Mistakes are an inevitable part of the learning process, especially when experimenting with bread machine settings. Instead of viewing them as failures, treat them as valuable lessons. Each misstep provides insight into what doesn’t work, guiding you closer to the perfect loaf.
For instance, if your bread turns out gummy, it might indicate excessive hydration or insufficient baking time. Adjusting the water-to-flour ratio or extending the baking cycle can resolve this issue. Similarly, uneven slices might suggest that the bread wasn’t cooled properly. Allowing the loaf to rest fully before slicing can stabilize the crumb and improve slicing results.
Pro Tip: Use a serrated bread knife for slicing. A sharp blade reduces tearing and ensures clean cuts, even if the bread’s texture isn’t perfect.
Many bakers find that tools like bread slicers can simplify the process. These devices help create even slices, enhancing both presentation and usability. As one user noted, a bread slicer can make all the effort of baking worthwhile by delivering consistent results.
“A bread slicer helps to make all that hard work of making bread, whether you did it by hand or machine, much better as you get even slices which are much more pleasant to eat.”
Embrace the trial-and-error process. Each loaf you bake brings you closer to mastering your bread machine. Over time, you’ll develop a personalized approach that consistently delivers bakery-quality bread at home.
Bread texture plays a crucial role in slicing quality. Factors like crumb structure, density, and crust hardness directly influence how well your bread holds up under the knife. By adjusting ingredients, proofing times, and bread machine settings, you can create loaves that slice cleanly and evenly. For example, using instant yeast in quick-cooking machines ensures proper rising, while avoiding excess flour prevents dry, crumbly bread. Embrace experimentation as part of your baking journey. Each loaf teaches you something new, helping you refine your process and achieve the perfect balance for your ideal bread.
FAQ
How does bread texture affect slicing quality?
Bread texture directly impacts how well it slices. A stable crumb with evenly distributed air pockets ensures clean cuts, while an uneven or weak crumb can lead to tearing or crumbling. The crust also plays a role. A crust that is too hard may require excessive force, compressing the loaf, while a soft crust may not provide enough resistance for precise slicing.
Tip: Allow your bread to cool completely before slicing. This stabilizes the crumb and makes slicing easier.
Why does gluten development matter for slicing?
Gluten provides the structure that holds the bread together. When gluten develops properly, it creates an elastic network that traps gases during fermentation. This results in a loaf with a stable crumb that slices cleanly. Weak gluten development can cause the bread to crumble or fall apart when cut.
Quick Fact: Bread flour, with its higher protein content, promotes better gluten development compared to all-purpose flour.
What role does hydration play in bread texture?
Hydration levels determine the softness and stability of the crumb. High hydration creates a softer crumb with larger air pockets, but it can also make the bread sticky and harder to slice. Low hydration produces a denser loaf, which may crumble during slicing.
Pro Tip: Aim for a hydration level of 60–65% for most bread machine recipes. This balance often yields the best slicing results.
Can proofing time affect slicing quality?
Yes, proofing time significantly influences the bread's texture. Under-proofed dough leads to a dense crumb, making slicing difficult. Over-proofed dough can collapse, resulting in uneven slices. Proper proofing creates a balanced crumb structure that holds up well under the knife.
Did You Know? Environmental factors like room temperature and humidity can affect proofing. Monitor your dough closely to ensure optimal results.
Why is it important to let bread cool before slicing?
Cutting warm bread disrupts the crumb structure. Warm bread has higher moisture content that hasn’t fully redistributed, leading to a gummy texture and uneven slices. Cooling allows the crumb to stabilize, ensuring cleaner cuts.
Tip: Wait at least an hour after baking before slicing your bread. Use a wire rack to speed up the cooling process.
What type of knife works best for slicing bread?
A serrated knife is ideal for slicing bread. Its saw-like motion reduces pressure on the loaf, preventing compression or tearing. Straight-edged knives often crush the bread rather than slicing through it cleanly.
Pro Tip: Keep your serrated knife sharp for the best results. A dull blade can tear the crust and create uneven slices.
How can I improve the texture of my bread for better slicing?
You can improve bread texture by adjusting ingredients, proofing times, and bread machine settings. Use bread flour for better gluten development, monitor hydration levels, and ensure proper proofing. Adding fats like butter or oils can soften the crumb, making slicing easier.
Quick Tip: Experiment with small changes to your recipe, such as adding milk or eggs, to enhance the texture.
What are common mistakes that affect slicing quality?
Some common mistakes include overloading the bread machine, ignoring ingredient measurements, and skipping cooling time. Overloading prevents even mixing and kneading, leading to poor texture. Inaccurate measurements can disrupt the dough’s balance, while slicing warm bread results in a gummy crumb.
Reminder: Always follow your bread machine’s capacity guidelines and use a kitchen scale for precise measurements.
Can modifying bread texture influence eating habits?
Yes, modifying bread texture can affect how you consume it. Softer bread with balanced moisture content tends to feel more satisfying and slows down eating. This can help prevent overconsumption and enhance the overall sensory experience.
Insight: Research shows that texture adjustments can influence eating rates and improve the sensory appeal of bread.
How does bread presentation benefit from improved slicing quality?
Clean, even slices enhance the visual appeal of your bread. A well-textured loaf allows for consistent cuts, making your meals look more professional. Whether you’re serving sandwiches or appetizers, neat slices elevate the presentation and create a better dining experience.
Pro Tip: Use a bread slicing guide for uniform slices every time. This tool ensures precision and improves the overall appearance of your bread.
See Also
Is The Cricut Cake Machine Good For Vinyl Cutting?
Are All Cricut Machines Capable Of Cutting Vinyl Well?
Essential Advice For Operating A Meat Cutting Machine