Step-by-Step Guide to Cut Laser in Laser Cutter

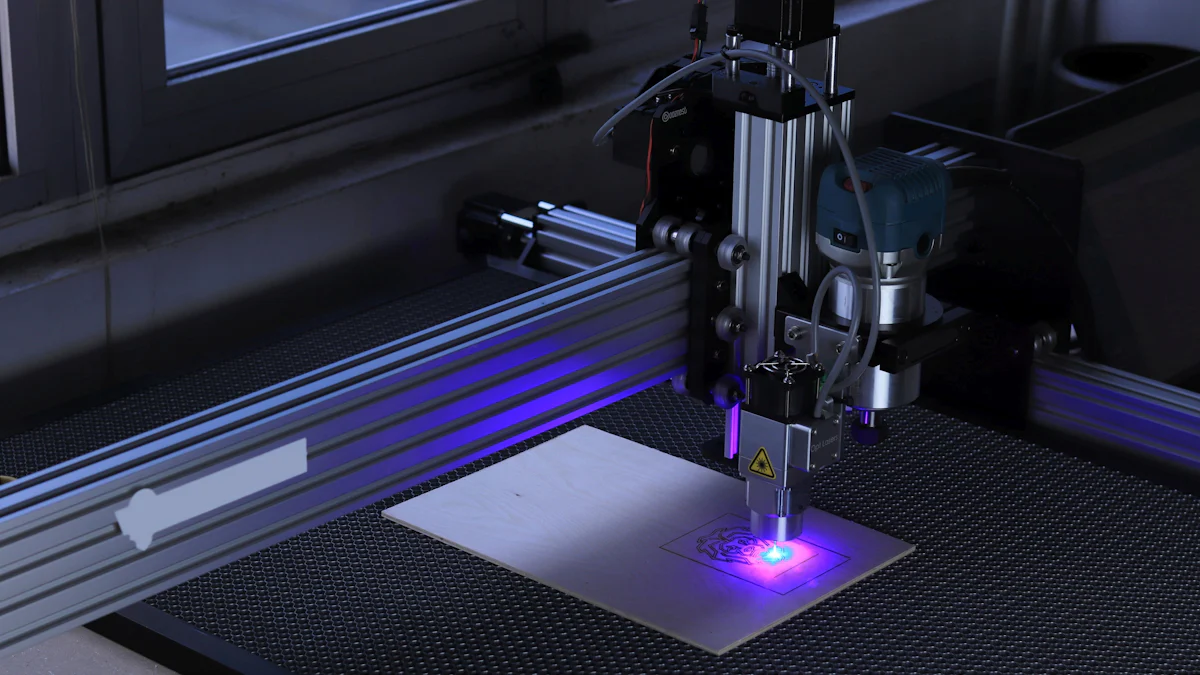
Understanding how to cut laser in laser cutter machine is essential for achieving precise and efficient results. Laser cutting basics involve using a high-energy beam to slice through materials with unmatched precision. This process has become a cornerstone in industries like automotive and aerospace due to its ability to reduce material wastage and ensure product quality. When using a laser cutter, you must grasp each step to harness its full potential. Mastering laser cutting basics not only enhances your skills but also ensures safety and consistency in your projects.
Safety Guidelines
Ensuring safety when operating a laser cutter is crucial. You must adhere to specific safety guidelines to protect yourself and your workspace. These guidelines help prevent accidents and ensure smooth operation.
Personal Protective Equipment (PPE)
Wearing the right personal protective equipment (PPE) is essential. You should always wear safety goggles to protect your eyes from laser beams. Gloves can shield your hands from sharp edges and hot surfaces. A lab coat or apron can protect your clothing from sparks and debris. Remember, PPE acts as your first line of defense against potential hazards.
Workspace Safety
Maintaining a safe workspace is vital. Keep your area clean and free of clutter. Ensure that flammable materials are stored away from the laser cutter. Proper ventilation is necessary to avoid inhaling harmful fumes. Conduct regular hazard assessments to identify and mitigate risks. As Safety Professional in laser cutting operations advises, "Conducting a thorough workplace hazard assessment is essential for ensuring the safety of operators."
Machine Safety Checks
Before using the laser cutter, perform machine safety checks. Inspect the machine for any visible damage. Ensure that all safety features, like emergency stop buttons, are functional. Check that the laser cutter is properly calibrated and aligned. Regular maintenance and checks prevent malfunctions and enhance safety. By following these safety guidelines, you create a secure environment for laser cutting.
Machine Setup
Setting up the machine correctly is crucial for optimal performance and safety. This process involves several steps that ensure your laser cutter operates efficiently and safely.
Unpacking and Assembling the Laser Cutter
When you first receive your laser cutter, carefully unpack it. Check all components against the manufacturer's checklist to ensure nothing is missing. Begin by assembling the machine according to the instructions provided in the manual. Most laser cutters come with detailed assembly guides. Follow these instructions closely to avoid any mistakes. Proper assembly is essential for the machine's functionality and safety.
Connecting Power and Software
Once assembled, you need to connect the laser cutter to a power source. Ensure that the power supply matches the specifications outlined in the manual. After connecting the power, install the necessary software on your computer. This software allows you to control the laser cutter and input your design files. Manufacturers often provide software installation guides. Follow these to ensure a smooth setup process. Once installed, test the software to confirm it communicates effectively with the laser cutter.
Calibration and Alignment
Calibration and alignment are critical steps in preparing the laser cutter. Start by calibrating the machine to ensure the laser beam is focused correctly. This involves adjusting the lens and mirrors to align the beam precisely. Proper calibration ensures accurate cuts and prolongs the life of the laser cutter. Next, align the material bed to ensure it is level. This step prevents uneven cuts and potential damage to the material. Regular calibration checks are recommended to maintain cutting precision.
"Proper training and adherence to best practices are vital for the safe and efficient operation of laser cutting machines." - Laser Cutter Operation Best Practices
By following these steps, you prepare the laser cutter for efficient and safe operation. Proper setup minimizes risks and enhances the quality of your laser cutting projects.
Material and Software Preparation
Before you start cutting with a laser cutter, you need to prepare both the material and the design software. This preparation ensures that the cutting process is smooth and efficient.
Selecting the Right Material
Choosing the right material is crucial for successful laser cutting. Different materials have unique properties and are suitable for various applications. Common materials include metals, plastics, wood, glass, and textiles. Each offers distinct advantages. For instance, metals provide durability, while wood offers versatility. You should consider the material's thickness and type to ensure compatibility with your laser cutter. Always check the manufacturer's guidelines to select material preset options that match your project needs.
Preparing the Design File
Creating a precise design file is essential for accurate laser cutting. You should use design software to craft your design. Popular options include vector graphics software, which allows for detailed and scalable designs. Ensure your design file is in a format compatible with your laser cutter. Pay attention to the dimensions and details of your design. This step is vital for achieving the desired outcome. Once your design is ready, save it in a format that your laser cutter can read.
Importing Design into Laser Cutting Software
After preparing your design file, you need to import it into the laser cutting software. This software acts as a bridge between your design and the laser cutter. Load material into the machine and ensure it is securely placed. The software will guide you through the process of setting up and cutting a file. Follow the prompts to adjust settings like power and speed. These adjustments depend on the materials needed for your project. Once everything is set, you can proceed with the cutting process.
"The choice of materials for laser cutting spans a wide spectrum, including metals, plastics, wood, glass, and textiles. Each material has its own properties that make it suitable for specific applications."
By carefully selecting materials and preparing your design file, you set the stage for a successful laser cutting experience. Proper preparation minimizes errors and enhances the quality of your final product.
Detailed Cutting Steps
Understanding the detailed steps in laser cutting is crucial for achieving precise results. This section will guide you through setting the right parameters, conducting test cuts, and executing the final cut.
Setting Cutting Parameters
To achieve optimal results, you must set your cutting parameters correctly. This involves adjusting both power and speed settings to match the material's properties.
Adjusting Power and Speed
The choice of laser power is fundamental. It determines the machine's ability to cut through different thicknesses and types of materials. You should adjust the power settings based on the material's thickness and thermal conductivity. For instance, thicker materials require higher power settings. Speed settings also play a vital role. Slower speeds allow the laser cutter to penetrate deeper, while faster speeds are suitable for thinner materials. Balancing these settings ensures clean and precise cuts.
Choosing the Right Focus
Focusing the laser is essential for accuracy. You need to focus the laser beam precisely on the material's surface. This involves adjusting the lens to ensure the beam is concentrated at the right point. Proper focus laser settings prevent incomplete cuts and reduce the risk of burn marks. Regularly check and adjust the focus to maintain cutting precision.
Running Test Cuts
Before executing the final cut, running a test cut is advisable. This step helps you evaluate the effectiveness of your settings and make necessary adjustments.
Evaluating Test Results
After running a test cut, closely examine the results. Look for signs of incomplete cuts or burn marks. These indicate that adjustments are needed. Evaluate the edges for smoothness and precision. If the test cut meets your expectations, you can proceed to the final cut. If not, further adjustments are necessary.
Making Necessary Adjustments
Based on the test results, make the necessary adjustments to your laser cutter settings. This may involve tweaking the power or speed settings. Ensure that the focus remains accurate. Adjustments help refine the cutting process and improve the quality of the final product.
Executing the Final Cut
Once satisfied with the test cut, you can execute the final cut. This step requires careful monitoring to ensure success.
Monitoring the Cutting Process
While running a file, monitor the cutting process closely. Watch for any signs of malfunction or errors. Ensure that the laser cutter operates smoothly and that the material remains securely in place. Monitoring helps prevent accidents and ensures the quality of the cut.
Post-Cut Cleanup
After completing the cut, perform a post-cut cleanup. Remove any debris or residue from the material. Clean the laser cutter's lens with rubbing alcohol to maintain optimal performance. Proper cleanup enhances the appearance of the final product and prolongs the life of the laser cutter.
By following these detailed cutting steps, you can achieve precise and high-quality results. Proper settings and careful monitoring are key to successful laser cutting.
Troubleshooting Common Issues
When working with a laser cutter, you might encounter some common issues. Understanding these problems and knowing how to address them can save you time and frustration. Here are some typical challenges you may face during laser cutting and how to troubleshoot them effectively.
Incomplete Cuts
Incomplete cuts can be frustrating, especially when you expect a clean finish. This issue often arises from incorrect settings or material problems. To resolve this, first check the power and speed settings on your laser cutter. Ensure they match the material's requirements. If the settings are correct, inspect the focus of the laser. An improperly focused laser can lead to incomplete cuts. Adjust the lens to ensure the beam is concentrated on the material's surface. Regular maintenance and calibration of your laser cutter can prevent this issue from recurring.
Burn Marks on Material
Burn marks can ruin the appearance of your finished product. They usually occur when the laser cutter's power is too high or the speed is too slow. To avoid burn marks, adjust the power settings to a lower level and increase the cutting speed. This combination reduces the amount of heat applied to the material. Additionally, ensure the material is suitable for laser cutting. Some materials are more prone to burning than others. Always test a small piece before proceeding with the full cut. Proper ventilation in your workspace can also help dissipate heat and reduce burn marks.
Software Errors
Software errors can disrupt the laser cutting process. These errors often stem from incompatible design files or outdated software. To troubleshoot, ensure your design file is in a format compatible with your laser cutter's software. Update the software regularly to benefit from the latest features and bug fixes. If errors persist, consult the manufacturer's support resources or forums for guidance. Sometimes, reinstalling the software can resolve persistent issues. Keeping your software up-to-date and compatible with your design files ensures a smoother laser cutting experience.
"Understanding common problems in laser cutting and the importance of selecting the right service providers for maintenance can significantly enhance your workflow." - Users
By addressing these common issues, you can improve the efficiency and quality of your laser cutting projects. Regular maintenance and careful attention to settings play a crucial role in preventing these problems.
Mastering the use of a laser cutter involves understanding key steps and practicing regularly. You should focus on setting up the machine correctly, selecting appropriate materials, and adjusting cutting parameters. These actions ensure precision and quality in your projects. Practicing these skills will refine your technique and boost your confidence. Remember, safety is paramount. Always wear protective gear and maintain a clean workspace to prevent accidents. Proper training and awareness of potential risks are essential for safe operation. By following these tips for success, you can achieve excellent results with your laser cutter.
FAQ
What materials can I cut with a laser cutter?
You can cut a variety of materials with a laser cutter. Common options include wood, acrylic, leather, fabric, and certain metals. Always check the manufacturer's guidelines to ensure compatibility with your specific laser cutter model.
How do I choose the right power and speed settings?
To choose the right power and speed settings, consider the material's thickness and type. Thicker materials require higher power and slower speeds. Conduct test cuts to fine-tune these settings for optimal results.
Why are my cuts incomplete?
Incomplete cuts often result from incorrect power or speed settings. Ensure your laser is properly focused on the material. Regularly calibrate your machine to maintain cutting precision.
How can I prevent burn marks on my material?
To prevent burn marks, adjust the power to a lower setting and increase the cutting speed. Ensure proper ventilation in your workspace to dissipate heat. Test a small piece of material before proceeding with the full cut.
What should I do if I encounter software errors?
If you encounter software errors, check that your design file is compatible with your laser cutter's software. Update the software regularly. Consult the manufacturer's support resources for additional guidance.
How often should I perform maintenance on my laser cutter?
Perform regular maintenance on your laser cutter to ensure optimal performance. Clean the lens after each use and check for any visible damage. Follow the manufacturer's maintenance schedule for more detailed guidance.
Can I cut PVC with a laser cutter?
Avoid cutting PVC with a laser cutter. PVC releases harmful gases when cut, which can damage the machine and pose health risks. Always choose materials that are safe for laser cutting.
How do I ensure my design file is ready for cutting?
Ensure your design file is in a format compatible with your laser cutter. Use vector graphics software for detailed designs. Double-check dimensions and details before importing the file into the laser cutting software.
What safety precautions should I take when using a laser cutter?
Always wear personal protective equipment, such as safety goggles and gloves. Maintain a clean workspace and ensure proper ventilation. Regularly inspect the machine for any safety hazards.
How can I improve my laser cutting skills?
Practice regularly to refine your technique. Experiment with different materials and settings. Stay informed about best practices and safety guidelines. Engaging with online communities can also provide valuable insights and tips.
See Also
Acrylic Cutting Techniques Using Your Cricut Maker
Maximizing Efficiency with Your Laser Cutting Machine
Comprehensive Instructions for Hair Cutting Machines