Guide to Engraving Wood Letters for Beginners

Are you eager to learn how to engrave wood letters? You're in the right place! Engraving wood letters offers a rewarding experience, especially for beginners. You don't need to be an expert to start. With the right tools and a bit of patience, you can create beautiful designs. Wondering what machine cuts wood letters? We'll explore that too. This craft is accessible and satisfying, allowing you to express creativity in a tangible way. Dive in and discover the joy of transforming plain wood into personalized art.
Key Takeaways
- Engraving wood letters is an accessible craft that allows for personal expression and creativity, making it perfect for beginners.
- Choosing the right wood, such as maple or basswood, is crucial for achieving clean and precise engravings.
- Familiarize yourself with various engraving tools, from hand carving tools to laser engravers, to find the method that suits your style.
- Start with simple projects like personalized gifts or decorative signs to build confidence and improve your skills.
- Always prioritize safety by wearing protective gear and maintaining your tools in good condition to prevent accidents.
- Experiment with different engraving techniques, such as hand carving and wood burning, to discover your unique artistic voice.
- Practice patience and enjoy the process; each engraving project is an opportunity to learn and grow as a craftsman.
Understanding Wood Engraving
What is Wood Engraving?
Wood engraving is a fascinating craft that lets you carve intricate designs into wood. You use various tools to create patterns, letters, or images on the surface. This art form has been around for centuries and continues to captivate people with its beauty and versatility. When you engrave wood, you can experiment with different depths and speeds to achieve the effects you desire. The choice of wood plays a crucial role in the outcome. Some woods are better suited for clean and precise engravings, so selecting the right type is essential.
Applications of Engraved Wood Letters
Engraved wood letters have a wide range of applications. You can use them to personalize gifts, create decorative signs, or even craft unique home decor. Businesses often use engraved wood signs for branding purposes, adding a touch of elegance and professionalism. In modern times, laser engraving has become popular due to its precision and efficiency. This technique allows for intricate designs and permanent results, making it ideal for detailed projects. Whether you're crafting a personalized gift or designing a sign for your business, engraved wood letters offer endless possibilities.
Choosing the Right Materials and Tools
Selecting the Right Wood
Choosing the right wood is crucial for successful engraving. You want to pick a wood that complements your design and enhances the final product.
Types of Wood Suitable for Engraving
Certain woods are better suited for engraving due to their grain patterns and density. Maple and cherry are popular choices because they have consistent grain patterns, which help achieve clean and precise engravings. These woods allow for intricate designs without the interference of irregular grains or knots. If you're looking for a lighter wood, basswood is also a great option. It’s soft and easy to carve, making it ideal for beginners.
Factors to Consider When Choosing Wood
When selecting wood, consider the grain pattern and density. A consistent grain pattern ensures that your engravings appear smooth and even. Avoid woods with excessive knots or irregular grains, as they can disrupt the engraving process. Also, think about the color contrast you want to achieve. Lighter woods will show darker engravings, while darker woods might require deeper cuts for visibility. Always test your design on a scrap piece of wood to see how it reacts to your tools.
Essential Tools for Engraving
Having the right tools makes all the difference in wood engraving. Whether you prefer traditional methods or modern technology, there are tools to suit every style.
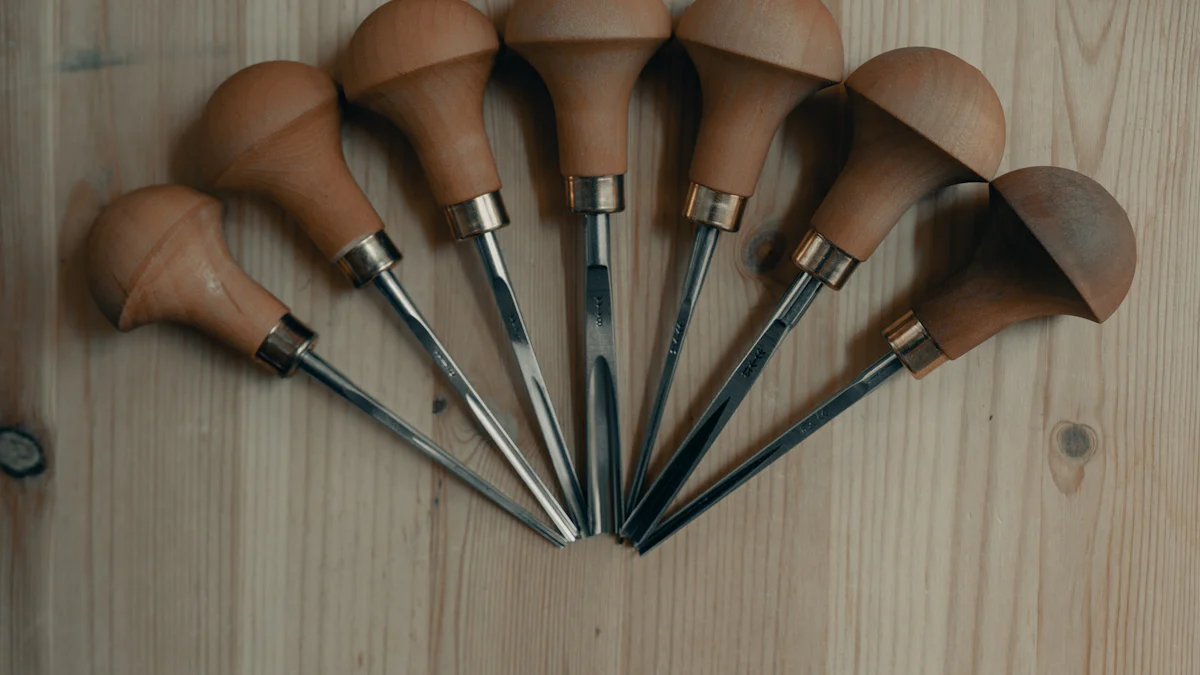
Hand Carving Tools
For those who enjoy the tactile experience of carving, hand tools are essential. Chisels, gouges, and knives are the primary tools you'll need. They allow you to create detailed designs by cutting lines into the wood's surface. Keeping these tools sharp is vital for effective carving. Hand carving offers a personal touch and is perfect for those who appreciate traditional craftsmanship.
Power Tools (Dremel, CNC Router)
Power tools like the Dremel and CNC routers provide precision and speed. A Dremel is versatile and allows for detailed work, making it a favorite among hobbyists. CNC routers, on the other hand, are excellent for larger projects and can handle complex designs with ease. These tools are great for those who want to combine technology with creativity.
Laser Engraving Equipment
Laser engraving is a modern technique that offers unparalleled precision. It’s as simple as using a printer. A compact desktop laser cutter can create intricate designs with ease. This method is ideal for detailed projects and ensures permanent results. Laser engraving is perfect for those who want to explore advanced techniques and achieve professional-quality engravings.
Wood Burning Tools
Wood burning, or pyrography, involves using a heated tool to burn designs into the wood. This technique adds a unique texture and depth to your engravings. Wood burning tools come with various tips for different effects, allowing you to experiment with shading and line work. It’s a creative way to add character to your projects and is suitable for both beginners and experienced engravers.
By selecting the right materials and tools, you set the foundation for a successful engraving project. Whether you choose traditional hand tools or modern equipment, each option offers unique possibilities for creativity and expression.
What Machine Cuts Wood Letters?
When you're diving into the world of wood engraving, you might wonder what machine cuts wood letters with precision and ease. Let's explore some popular options that can help you achieve stunning results.
Laser Engraving Machines
Laser engraving machines are a fantastic choice for cutting wood letters. These machines use a focused laser beam to carve intricate designs into the wood. CO2 laser engraving machines are particularly popular due to their versatility and precision. They offer various power options, allowing you to adjust for different wood thicknesses and engraving depths. A model like the Wattsan 6090 LT is designed for both engraving and cutting, making it a versatile tool in your workshop. The Gweike Pro II is another excellent option, especially if you regularly work with thick wood. It combines a powerful 50W laser with an impressive engraving speed of 600mm/s, ensuring efficient and precise cuts.
Laser engraving setups are also known for their low operational costs and portability. They're easy to learn, making them ideal for beginners. With high precision and processing efficiency, laser engravers can help you create detailed and professional-quality wood letters.
CNC Routers
CNC routers are another powerful tool for cutting wood letters. These machines are typically used in industries for creating complex 3D carvings on wood. A CNC router requires a thorough understanding of its operation and tool bits, but once mastered, it offers incredible flexibility and precision. You can program the CNC router to follow specific designs, allowing for consistent and repeatable results. This makes it an excellent choice for larger projects or when you need to produce multiple copies of the same design.
Using a Dremel for Precision
If you're looking for a more hands-on approach, a Dremel tool might be just what you need. This rotary tool is perfect for precision work and allows you to have complete control over your designs. With various attachments and bits, a Dremel can handle detailed engraving tasks with ease. It's a favorite among hobbyists who enjoy the tactile experience of carving by hand. While it may not be as fast as a laser engraver or CNC router, the Dremel offers a personal touch and is great for smaller projects or when you want to experiment with different techniques.
Engraving Methods and Techniques
Exploring different engraving methods can open up a world of creativity for you. Each technique offers unique possibilities and challenges, allowing you to express your artistic vision in various ways. Let's dive into some popular methods and see how you can master them.
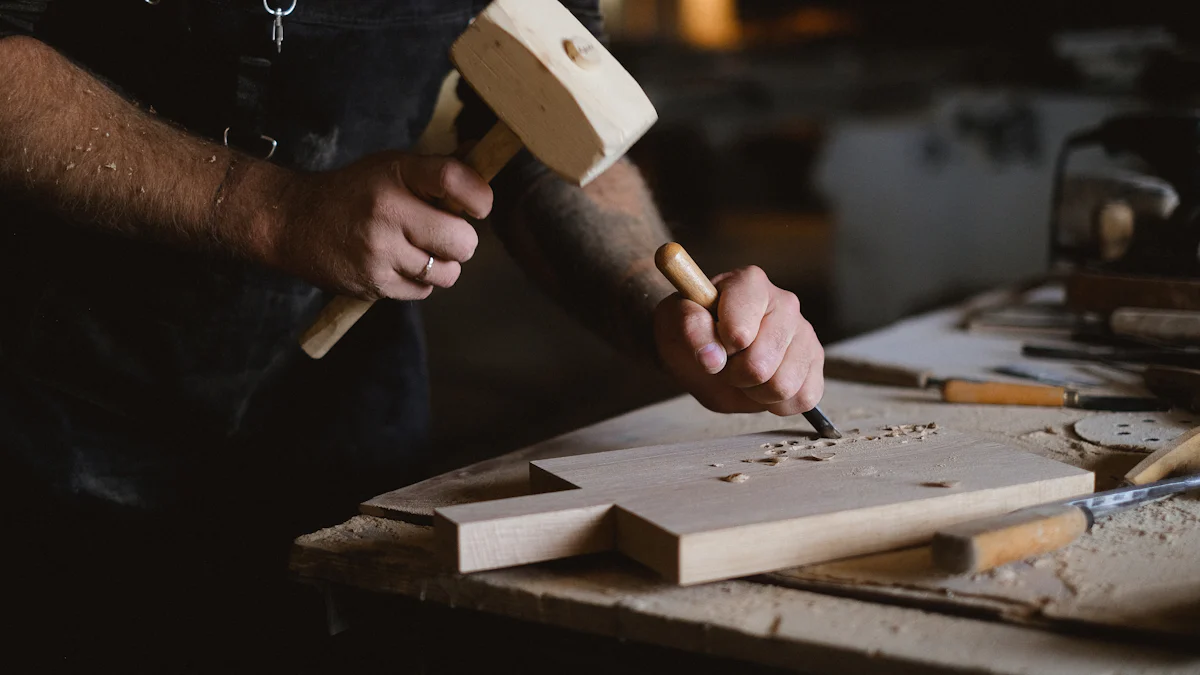
Hand Carving Techniques
Hand carving is a traditional method that connects you directly with the wood. You use tools like chisels, gouges, and knives to carve letters and designs. This technique requires patience and practice, but it offers a rewarding experience. Start by choosing a simple design and a soft wood like basswood. Keep your tools sharp to ensure clean cuts. As you gain confidence, experiment with more complex patterns and harder woods. Hand carving allows you to feel the texture of the wood and make adjustments as you go, giving your work a personal touch.
Laser Engraving Basics
Laser engraving is a modern technique that uses a focused laser beam to etch designs into wood. It's precise and efficient, making it ideal for detailed projects. To get started, you'll need a laser engraving machine. These machines vary in power and size, so choose one that fits your needs. For beginners, a compact desktop model works well. Before engraving, prepare your design using software that comes with the machine. Adjust the settings based on the wood type and desired depth. Laser engraving allows you to create intricate designs with ease, and it's perfect for personalized gifts or professional projects. Remember to maintain your equipment and experiment with different settings to achieve the best results.
Wood Burning Techniques
Wood burning, or pyrography, involves using a heated tool to burn designs into wood. This technique adds a unique texture and depth to your work. You can create anything from simple outlines to detailed images. Start with a basic wood burning tool and practice on scrap wood. Experiment with different tips to achieve various effects, such as shading and line work. Wood burning is versatile and allows you to add character to your projects. It's a great way to explore your creativity and develop your skills.
By exploring these engraving methods, you can find the one that resonates with you. Whether you prefer the tactile experience of hand carving or the precision of laser engraving, each technique offers endless possibilities for creativity and expression.
Step-by-Step Guide to Engraving Wood Letters
Embarking on your wood engraving journey can be both exciting and rewarding. This step-by-step guide will walk you through the process, ensuring you have a smooth and enjoyable experience.
Preparing Your Workspace
Creating a dedicated workspace is crucial for successful engraving. You want a clean, well-lit area where you can focus on your craft. Ensure your workbench is sturdy and at a comfortable height. Gather all your tools and materials before you start. This includes your chosen wood, engraving tools, and safety gear. Organizing your space helps you work efficiently and keeps distractions at bay.
Safety Tips and Best Practices
Safety should always be your top priority. Wear protective eyewear to shield your eyes from wood chips and dust. Use gloves to protect your hands, especially when handling sharp tools. Ensure your workspace is well-ventilated, particularly if you're using power tools or wood burning equipment. Keep your tools sharp and in good condition to prevent accidents. Always follow the manufacturer's instructions for any machines you use, such as laser engravers or CNC routers. Remember, a safe workspace is a productive one.
Engraving Process
Now that your workspace is ready and you're equipped with safety knowledge, it's time to dive into the engraving process.
Designing Your Letters
Start by sketching your design on paper. Consider the size and style of the letters you want to engrave. Simple block letters are great for beginners, while more intricate designs can challenge your skills. Use a ruler or stencil for precision. Once you're satisfied with your design, transfer it to your computer if you're using a machine like a laser engraver or CNC router. These machines can cut wood letters with incredible accuracy, making them ideal for detailed projects.
Transferring the Design to Wood
For hand carving, print your design and attach it to the wood using double-sided tape. Trace over the outline with a craft knife to create a guide. If you're using a machine, upload your design to the software and adjust the settings according to the wood type. Ensure the design is centered and aligned on the wood surface. This step is crucial for achieving a professional-looking result.
Engraving the Design
With your design in place, it's time to start engraving. For hand carving, use chisels and gouges to follow the traced lines. Take your time and make steady cuts. If you're using a Dremel, select the appropriate bit and work slowly to maintain control. Machines like laser engravers and CNC routers will follow the programmed design, cutting wood letters with precision. Monitor the process to ensure everything runs smoothly.
Finishing Touches
Once you've completed the engraving, it's time for the finishing touches. Sand the edges to remove any rough spots and achieve a smooth finish. Apply a wood finish or sealant to protect your work and enhance its appearance. This step adds a professional touch and ensures your engraved letters last for years to come.
By following these steps, you can create beautiful engraved wood letters that showcase your creativity and skill. Whether you're using traditional hand tools or modern machines, each project offers a chance to learn and grow as an engraver.
Beginner Projects to Practice Your Skills
Starting with simple projects can help you build confidence and hone your engraving skills. Here are some beginner-friendly ideas to get you started on your wood engraving journey.
Simple Lettering Projects
Creating simple lettering projects is a great way to practice your engraving skills. You can start by engraving your name or a favorite quote on a piece of wood. Choose a soft wood like basswood or pine, which is easier to work with. Use a stencil to outline the letters, then carefully carve along the lines with your chosen tool. This project helps you get comfortable with controlling your tools and understanding how different woods respond to engraving.
Decorative Signs
Decorative signs offer a fun and creative way to practice engraving. You can make signs for your home, such as "Welcome" or "Home Sweet Home." Select a piece of wood that complements your design. Sketch your design on paper first, then transfer it to the wood. Use a Dremel or hand tools to carve out the design. You can add embellishments like flowers or borders to enhance the sign's appearance. This project allows you to experiment with different styles and techniques, helping you develop your unique engraving style.
Personalized Gifts
Engraving personalized gifts is a rewarding project that lets you create meaningful items for friends and family. Consider engraving a cutting board with a special message or a set of coasters with initials. These projects not only improve your skills but also make cherished gifts. Use a laser engraver for precise and intricate designs, or try hand carving for a more rustic look. Personalized gifts showcase your creativity and thoughtfulness, making them perfect for any occasion.
"Engraving a chopping board is one of the first engraving ideas that come to mind. When we receive our wood laser engraving machine, we can't wait to engrave or cut some boards to test the machine's performance."
This quote highlights the excitement and satisfaction of creating personalized items. Engraving offers endless possibilities, from home decor to unique gifts. By starting with these beginner projects, you can explore your creativity and develop your skills in wood engraving.
Troubleshooting Common Issues
Even with the best preparation, you might encounter some challenges while engraving wood letters. Don't worry! Here are some common issues and how you can tackle them.
Uneven Engraving
Uneven engraving can be frustrating, but you can fix it with a few adjustments. First, check if your wood piece is level. An uneven surface can cause inconsistent engraving depths. Use clamps to secure the wood firmly on your workbench or machine bed. If you're using a CNC router, ensure the wood is perfectly level to prevent any inconsistencies. Also, choose the right tool for your design. For detailed engravings, V-bits work best, while straight bits suit broader cuts.
Another factor to consider is the pressure you apply when hand carving. Keep it consistent to avoid varying depths. If you're using a laser engraver, adjust the settings to match the wood type and thickness. Experiment with different speeds and power levels to achieve a uniform result.
Splintering Wood
Splintering can ruin the appearance of your engraved letters. To minimize this, select the right wood. Softer woods like basswood are less likely to splinter. When carving, always cut along the grain rather than against it. This reduces the risk of splintering and ensures smoother cuts.
If you're using power tools, make sure the bits or blades are sharp. Dull tools can tear the wood fibers, leading to splintering. For laser engraving, adjust the focus and speed settings to prevent burning or chipping the wood edges. Testing on a scrap piece can help you find the optimal settings.
Tool Maintenance
Maintaining your tools is crucial for successful engraving. Sharp tools make cleaner cuts and reduce the risk of accidents. Regularly sharpen your chisels, gouges, and knives. For power tools, check the bits and blades for wear and replace them as needed.
Keep your laser engraver and CNC router in good condition. Clean the lenses and mirrors regularly to ensure optimal performance. Monitor the machine closely during operation to catch any issues early. Never leave the machine unsupervised to ensure safe laser engraving.
By addressing these common issues, you can improve your engraving skills and create beautiful wood letters. Remember, practice makes perfect, and each project is an opportunity to learn and grow.
You've now explored the essentials of wood engraving, from selecting the right tools to mastering various techniques. Remember, practice and patience are your best friends in this craft. As you experiment with different methods, you'll gain confidence and skill. Don't hesitate to let your imagination run wild. Each project is a chance to learn and grow. So, grab your tools and start your engraving journey. The world of wood engraving awaits your creativity and passion. Dive in and enjoy the rewarding experience of transforming wood into art.
FAQ
What’s the best way to engrave wood?
The best way to engrave wood depends on your preferences and the tools you have. If you enjoy a hands-on approach, hand carving with chisels and gouges offers a traditional and tactile experience. For precision and speed, consider using a laser engraver or CNC router. These machines provide detailed results and are great for intricate designs. If you prefer a more artistic touch, wood burning tools can add unique textures to your projects. Each method has its charm, so try different techniques to find what suits you best.
Can beginners use a laser engraver?
Absolutely! Laser engravers are user-friendly and perfect for beginners. Many models come with intuitive software that guides you through the process. Start with simple designs to get the hang of it. As you gain confidence, experiment with more complex patterns. Remember to follow safety guidelines and maintain your equipment for the best results.
What type of wood is easiest to engrave?
Softwoods like basswood and pine are easiest to engrave. They have a smooth texture and are forgiving for beginners. Maple and cherry are also popular choices due to their consistent grain patterns. These woods allow for clean and precise engravings. Avoid woods with excessive knots or irregular grains, as they can complicate the engraving process.
How do I transfer my design onto wood?
Transferring your design onto wood is simple. For hand carving, print your design and attach it to the wood with double-sided tape. Use a craft knife to trace the outline. If you're using a machine, upload your design to the software and adjust the settings. Ensure your design is centered and aligned on the wood surface for a professional finish.
What safety precautions should I take when engraving wood?
Safety is crucial when engraving wood. Always wear protective eyewear to shield your eyes from wood chips and dust. Use gloves to protect your hands, especially when handling sharp tools. Ensure your workspace is well-ventilated, particularly if you're using power tools or wood burning equipment. Keep your tools sharp and in good condition to prevent accidents. Follow the manufacturer's instructions for any machines you use.
Can I engrave wood without any special tools?
Yes, you can engrave wood without special tools. A simple craft knife or utility knife can help you create basic designs. However, having the right tools, like chisels or a Dremel, makes the process easier and more enjoyable. Investing in quality tools can enhance your engraving experience and improve your results.
How do I prevent splintering when engraving?
To prevent splintering, choose the right wood. Softer woods like basswood are less likely to splinter. Always cut along the grain rather than against it. This reduces the risk of splintering and ensures smoother cuts. Keep your tools sharp, as dull tools can tear the wood fibers. For laser engraving, adjust the focus and speed settings to prevent burning or chipping the wood edges.
What projects are good for beginners?
Beginner projects include simple lettering, decorative signs, and personalized gifts. Start with engraving your name or a favorite quote on a piece of wood. Decorative signs for your home, like "Welcome" or "Home Sweet Home," offer a fun way to practice. Personalized gifts, such as engraved cutting boards or coasters, make cherished items for friends and family. These projects help you build confidence and hone your skills.
How do I maintain my engraving tools?
Maintaining your tools is essential for successful engraving. Regularly sharpen your chisels, gouges, and knives. For power tools, check the bits and blades for wear and replace them as needed. Clean your laser engraver and CNC router regularly to ensure optimal performance. Monitor the machine closely during operation to catch any issues early. Proper maintenance extends the life of your tools and improves your engraving results.
Can I use a Dremel for detailed work?
Yes, a Dremel is perfect for detailed work. This rotary tool offers precision and control, making it ideal for intricate designs. With various attachments and bits, a Dremel can handle detailed engraving tasks with ease. It's a favorite among hobbyists who enjoy the tactile experience of carving by hand. While it may not be as fast as a laser engraver or CNC router, the Dremel offers a personal touch and is great for smaller projects.
See Also
Essential Advice for Selecting the Best Wood Cutting Machine
Helpful Hints for Using Cricut Machines to Cut Wood
Comprehensive Instructions for Cutting Acrylic with Cricut Maker
A Complete Guide to Cutting Wood Using Cricut Machines
Do-It-Yourself Tips for Cork Cutting Machines for Wine Bottles