How to Build a Laser Cutting Machine Guide

How to build a laser cutting machine? This question might seem daunting, but understanding how to build a laser cutting machine can be incredibly rewarding. As the laser cutting machines market is projected to grow significantly, reaching USD 12.65 billion by 2032, building your own machine offers both economic and educational benefits. You will gain insights into the essential components and their assembly, which is crucial for troubleshooting and maintenance. By mastering how to build a laser cutting machine, you not only save costs but also enhance your technical skills, making you a part of this rapidly expanding industry.
Essential Components of Laser Cutting Machines
Understanding the essential components of laser cutting machines is crucial for building a functional and efficient machine. Each part plays a vital role in ensuring precision and quality in the laser cutting process. Let's delve into these components to help you make informed decisions.
Laser Source
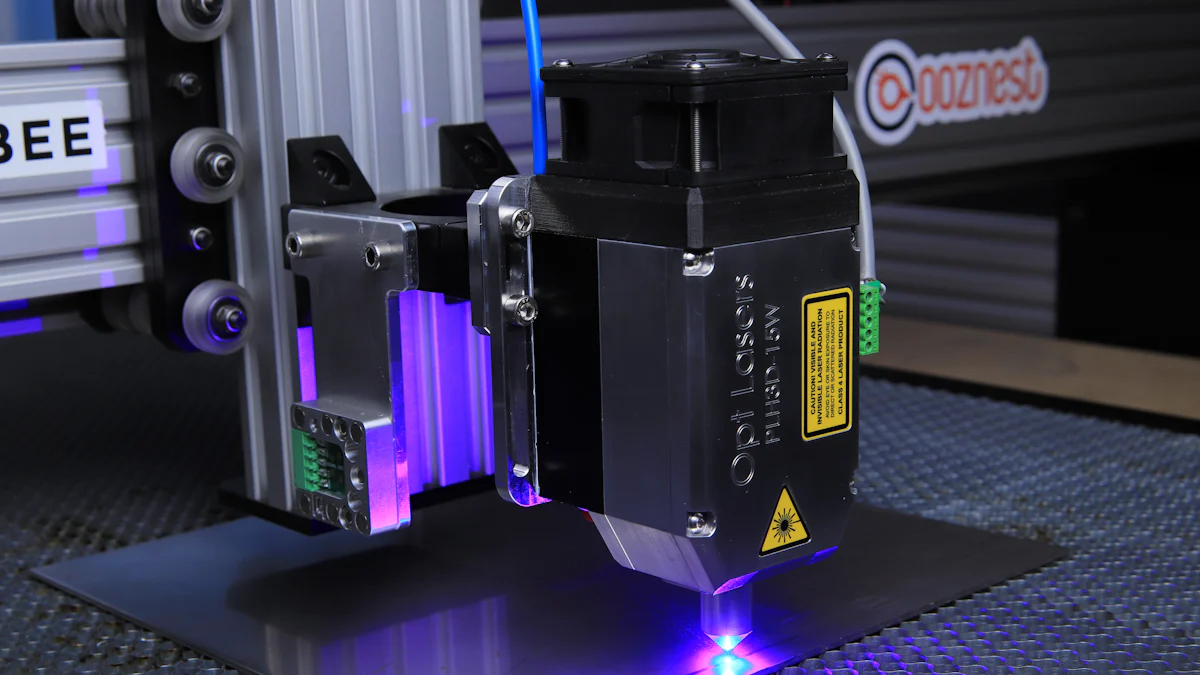
The laser source is the heart of any laser cutter. It generates the laser beam that performs the cutting.
Types of Laser Sources
There are several types of laser cutting technology, each with unique characteristics:
- Fiber Lasers: These use optical fibers doped with rare-earth elements. They are highly efficient and require minimal maintenance. Fiber lasers are particularly effective for cutting metal, such as steel, aluminum, and brass.
- CO2 Lasers: These are versatile and can cut a wide range of materials, including wood, acrylic, and some metals.
- Nd:YAG Lasers: Known for their high-power laser capabilities, they are suitable for tasks requiring high precision.
Choosing the Right Laser for Your Needs
Selecting the right laser depends on your specific requirements. Consider the materials you plan to cut and the precision needed. For instance, if you focus on cutting metal, fiber lasers might be the best choice due to their efficiency and effectiveness.
Optics
Optics play a crucial role in directing and focusing the laser beam onto the material.
Mirrors and Lenses
Mirrors and lenses guide the laser beam from the source to the cutting area. High-quality optics ensure that the beam remains focused and precise, which is essential for achieving clean cuts.
Aligning the Optics
Proper alignment of the optics is vital. Misalignment can lead to poor cutting performance and reduced precision. Regular checks and adjustments help maintain optimal alignment, ensuring the laser cutter operates efficiently.
Motion Control System
The motion control system determines the accuracy and speed of the laser cutting process.
Motors and Drivers
Motors and drivers move the laser head along the designated path. High-end laser cutting machines often use linear motors, which provide excellent positioning accuracy. This precision is crucial for intricate designs and patterns.
Software Integration
Software integration allows you to control the laser cutter using computer numerical control (CNC) or G-code. This integration ensures that the laser follows the exact path needed to cut the material, resulting in high-quality surface finishes.
By understanding these components, you can build a laser cutting machine that meets your needs and performs efficiently. Each part contributes to the overall functionality, making it essential to choose the right material and technology for your project.
Frame and Structure
The frame and structure of your laser cutting machine form the backbone of the entire setup. A well-designed frame ensures stability and precision during the cutting process. Let's explore how to select the right materials and assemble the frame effectively.
Material Selection
Choosing the right materials for your laser cutter's frame is crucial. The frame needs to be sturdy and durable to withstand the vibrations and forces during operation. Here are some materials you might consider:
- Aluminum: Lightweight yet strong, aluminum is a popular choice for laser cutter frames. It resists corrosion and provides excellent structural support.
- Steel: For heavy-duty applications, steel offers superior strength and durability. It can handle more stress but is heavier than aluminum.
- Acrylic or Wood: These materials are suitable for smaller, less powerful laser cutters. They are easier to work with but may not provide the same level of stability as metal frames.
When selecting materials, consider the size and power of your laser cutter. Larger machines with higher power outputs may require more robust materials like steel.
Assembling the Frame
Once you've selected the materials, it's time to assemble the frame. Follow these steps to ensure a solid and precise construction:
-
Cut the Materials: Use precise measurements to cut the frame components. Accuracy at this stage is vital for the overall alignment and functionality of the machine.
-
Join the Components: Assemble the frame using appropriate joining techniques. For metal frames, welding or bolting are common methods. Ensure all joints are secure to prevent any movement during operation.
-
Level the Frame: Place the assembled frame on a flat surface and check for levelness. Adjust as necessary to ensure the frame is perfectly horizontal. This step is crucial for maintaining the accuracy of the laser cutting process.
-
Reinforce the Structure: Add cross-braces or additional supports if needed. Reinforcements help distribute the load evenly and reduce vibrations, enhancing the precision of the cuts.
By carefully selecting materials and assembling the frame with precision, you lay a strong foundation for your laser cutting machine. A well-constructed frame not only supports the machine's components but also contributes to the overall accuracy and quality of the laser cutting process.
Step-by-Step Guide on How to Build a Laser Cutting Machine
Building a laser cutter involves several steps that require precision and attention to detail. This guide will walk you through the process, ensuring you have a functional and efficient machine by the end.
Preparing Your Workspace
Before you begin assembling your laser cutter, it's essential to prepare your workspace. A well-organized and safe environment will make the assembly process smoother and more efficient.
Tools and Equipment Needed
To build your laser cutter, gather the necessary tools and equipment. Here's a list to get you started:
- Screwdrivers: Various sizes for different screws.
- Wrenches: Adjustable wrenches for tightening bolts.
- Multimeter: For checking electrical connections.
- Wire Strippers: Essential for preparing wires.
- Safety Gear: Gloves and goggles for protection.
Having these tools at hand will streamline the assembly process and help you avoid unnecessary delays.
Setting Up a Safe Environment
Safety should be your top priority when building a laser cutter. Follow these steps to ensure a safe workspace:
- Ventilation: Ensure your workspace is well-ventilated to prevent the buildup of fumes during the cutting process.
- Fire Safety: Keep a fire extinguisher nearby in case of emergencies.
- Clear Space: Remove any clutter to prevent accidents and allow easy movement around the workspace.
By setting up a safe environment, you minimize risks and create a conducive space for assembling your laser cutter.
Installing the Laser Source
The laser source is the heart of your laser cutter. Proper installation is crucial for optimal performance.
Mounting the Laser
Begin by securely mounting the laser source onto the frame. Follow these steps:
- Position the Laser: Place the laser source in its designated spot on the frame.
- Secure the Mount: Use bolts or screws to fasten the laser source. Ensure it is stable and does not wobble.
A well-mounted laser source ensures precision during the cutting process.
Connecting Power and Control Wires
Next, connect the power and control wires to the laser source. Here's how:
- Identify Connections: Locate the power and control terminals on the laser source.
- Strip the Wires: Use wire strippers to remove insulation from the wire ends.
- Connect the Wires: Attach the wires to the appropriate terminals, ensuring a secure connection.
Proper wiring is essential for the laser cutter to function correctly and safely.
Setting Up the Optics
Optics play a vital role in directing the laser beam accurately during the cutting process. Proper setup ensures precision and quality.
Installing Mirrors and Lenses
Install the mirrors and lenses to guide the laser beam:
- Position the Mirrors: Place the mirrors in their designated holders along the optical path.
- Secure the Lenses: Insert the lenses into their mounts, ensuring they are clean and free from dust.
High-quality optics are crucial for achieving clean cuts in the laser cutting process.
Calibrating the Optical Path
Calibration ensures the laser beam is focused correctly. Follow these steps:
- Align the Mirrors: Adjust the mirrors to direct the laser beam precisely along the optical path.
- Focus the Beam: Use the lenses to focus the laser beam onto the cutting area.
Regular calibration helps maintain the efficiency and accuracy of your laser cutter.
By following these steps, you can successfully build and setup the laser cutter. Each stage of the process is crucial for ensuring the machine operates efficiently and safely. Remember to monitor the cutting process regularly to maintain optimal performance.
Integrating the Motion Control System
Integrating the motion control system is a critical step in building your laser cutter. This system ensures that the laser head moves accurately and efficiently along the designated paths, allowing for precise laser cutting.
Attaching Motors and Drivers
To begin, you need to attach the motors and drivers to your laser cutter. These components are responsible for moving the laser head and ensuring it follows the correct path during the cutting process. Follow these steps:
-
Select the Right Motors: Choose motors that match the size and power requirements of your laser cutter. High-quality motors provide better precision and reliability.
-
Mount the Motors: Securely attach the motors to the frame of your laser cutter. Ensure they are aligned properly to prevent any misalignment during operation.
-
Connect the Drivers: Attach the drivers to the motors. Drivers control the motor's movement, translating software commands into physical motion.
-
Test the Movement: Once attached, test the motors and drivers to ensure they move smoothly and accurately. Adjust as necessary to achieve optimal performance.
Properly attaching motors and drivers is essential for the smooth operation of your laser cutter, ensuring precise and efficient laser cutting.
Configuring Software Settings
After installing the hardware, configure the software settings to control the motion of your laser cutter. This step involves setting up the software to communicate with the motors and drivers effectively.
-
Install the Software: Use software compatible with your laser cutter's control system. Popular options include CNC software or G-code interpreters.
-
Calibrate the System: Calibrate the software to match the physical dimensions and capabilities of your laser cutter. This ensures accurate movement and cutting.
-
Set Cutting Parameters: Input the specific parameters for your laser cutting process, such as speed, power, and material type. These settings will vary based on the materials you plan to cut.
-
Run a Test Cut: Perform a test cut to verify that the software settings are correct. Adjust as needed to achieve the desired results.
Configuring the software settings is crucial for controlling the laser cutter's motion and ensuring precise laser cutting.
Final Assembly and Testing
With the motion control system integrated, you can proceed to the final assembly and testing of your laser cutter. This stage ensures that all components work together seamlessly.
Securing All Components
Before testing, secure all components of your laser cutter to ensure stability and safety during operation.
-
Check Connections: Verify that all electrical connections are secure and properly insulated. Loose connections can lead to malfunctions or safety hazards.
-
Tighten Fasteners: Ensure all screws, bolts, and fasteners are tightened. This prevents any movement or vibration during the cutting process.
-
Inspect the Frame: Double-check the frame for stability. Reinforce any weak points to maintain the integrity of the laser cutter.
Securing all components is vital for the safe and efficient operation of your laser cutter.
Running Initial Tests
Once everything is secure, run initial tests to ensure your laser cutter functions correctly.
-
Perform a Dry Run: Conduct a dry run without the laser activated. This checks the movement and alignment of the laser head.
-
Test with Material: Use a small piece of compatible material to test the laser cutting process. Observe the quality of the cut and make any necessary adjustments.
-
Monitor Performance: Pay attention to the laser cutter's performance during the test. Look for any signs of misalignment or irregularities.
Running initial tests helps identify any issues before full-scale operation, ensuring your laser cutter performs optimally.
By following these steps, you can successfully integrate the motion control system and complete the final assembly of your laser cutter. Each stage is crucial for ensuring the machine operates efficiently and safely, allowing you to achieve precise and high-quality laser cutting results.
Safety Measures During Laser Cutter Assembly
Ensuring safety during the assembly of a laser cutter is paramount. You must take specific precautions to protect yourself and maintain a secure environment. This section will guide you through essential safety measures, focusing on personal protective equipment, electrical safety, and general safety tips.
Personal Protective Equipment (PPE)
Wearing the right personal protective equipment (PPE) is crucial when working with laser cutters. It shields you from potential hazards and ensures a safer assembly process.
Eye Protection
Your eyes are particularly vulnerable when dealing with lasers. Always wear safety goggles designed to block laser radiation. These goggles protect your eyes from accidental exposure to laser beams, which can cause severe damage.
Handling Lasers Safely
Handling lasers requires caution. Never look directly into the laser beam, even if it seems inactive. Ensure that the laser is turned off when not in use. By following these precautions, you minimize the risk of accidents and injuries.
Electrical Safety
Electrical safety is another critical aspect of assembling a laser cutter. Proper handling of electrical components prevents hazards and ensures the machine operates safely.
Proper Wiring Techniques
Use proper wiring techniques to avoid electrical issues. Ensure all wires are correctly insulated and securely connected. Loose or exposed wires can lead to short circuits or electrical shocks. Regularly inspect the wiring to maintain safety standards.
Avoiding Electrical Hazards
Avoid electrical hazards by keeping your workspace dry and free from clutter. Water and electricity do not mix well, so ensure no liquids are near electrical components. By taking these precautions, you reduce the risk of electrical fires and other dangers.
General Safety Tips
General safety tips help create a secure environment for assembling your laser cutter. They ensure that you are prepared for any situation that might arise.
Keeping the Workspace Organized
An organized workspace enhances safety. Keep tools and materials neatly arranged to prevent accidents. A tidy area allows you to focus on the task without distractions, reducing the likelihood of mistakes.
Emergency Procedures
Prepare for emergencies by having a plan in place. Know the location of fire extinguishers and first aid kits. In case of a fire, act quickly and calmly to extinguish it or evacuate the area if necessary. Regularly review emergency procedures to ensure you are ready to respond effectively.
Paul Rochette, an expert in laser system integration, emphasizes the importance of health and safety during the assembly process. He suggests simplifying installation while maintaining security to prevent accidents.
By adhering to these safety precautions, you create a safer environment for assembling your laser cutter. Proper ventilation, fire safety measures, and organized workspaces contribute to a successful and secure assembly process.
Troubleshooting and Maintenance Tips for Laser Cutting Machines
Maintaining your laser cutting machine ensures it operates efficiently and lasts longer. Understanding common issues and regular maintenance practices can help you keep your machine in top condition.
Common Issues and Solutions
Laser cutting machines may encounter problems that affect their performance. Knowing how to identify and solve these issues is crucial.
Laser Not Cutting Properly
If your laser cutter isn't cutting as expected, several factors might be at play. First, check the laser power settings. Insufficient power can lead to incomplete cuts. Adjust the power settings to match the material you're working with. Next, inspect the focus of the laser beam. An unfocused beam can cause poor cutting quality. Adjust the focus lens to ensure the beam is sharp and precise. Lastly, examine the material itself. Some materials require specific settings for optimal cutting. Make sure you're using the correct parameters for the material type.
Alignment Problems
Alignment issues can significantly impact the laser cutting process. Misaligned optics can cause the laser beam to deviate from its intended path. To fix this, regularly check the alignment of mirrors and lenses. Use alignment tools to ensure the laser beam travels straight and hits the target accurately. If you notice any deviations, adjust the mirrors and lenses until the beam is perfectly aligned. Consistent alignment checks prevent cutting errors and improve the overall efficiency of the laser cutting process.
Regular Maintenance Practices
Regular maintenance keeps your laser cutting machine running smoothly. Implementing these practices can prevent issues and extend the machine's lifespan.
Cleaning Optics
Clean optics are essential for effective laser cutting. Dust and debris on mirrors and lenses can scatter the laser beam, reducing its power and precision. Use a soft, lint-free cloth to gently wipe the optics. Avoid using harsh chemicals that might damage the surfaces. Regular cleaning ensures the laser beam remains focused and powerful, enhancing the cutting process.
Checking Electrical Connections
Electrical connections play a vital role in the laser cutting process. Loose or faulty connections can lead to malfunctions or even damage the machine. Periodically inspect all electrical connections for signs of wear or looseness. Tighten any loose connections and replace damaged wires. Ensuring secure electrical connections helps maintain the machine's reliability and safety during operation.
By addressing common issues and following regular maintenance practices, you can ensure your laser cutting machine performs optimally. These steps not only enhance the cutting process but also contribute to the longevity of your equipment.
Building a laser cutting machine involves several key steps that ensure its functionality and efficiency. You start by understanding the essential components, such as the laser source, optics, and motion control system. As you assemble these parts, prioritize safety by wearing appropriate protective gear and maintaining a well-organized workspace. Regular maintenance, like cleaning optics and checking electrical connections, keeps your machine in top condition. By following this guide, you can successfully build a laser cutting machine that meets your needs and operates safely. Embrace the process to enhance your skills and join the growing laser cutting industry.
FAQ
What are the main advantages of building your own laser cutting machine?
Building your own laser cutting machine offers several advantages. You gain a deeper understanding of its components and functionality, which enhances your troubleshooting skills. Additionally, you save costs compared to purchasing a pre-assembled machine. DIY assembly also allows for customization to meet specific needs, providing flexibility in design and functionality.
What common problems might I encounter with a laser cutting machine?
You might face issues such as software glitches, maintenance challenges, and component replacements. Ensuring consistent power output can also be problematic. Regular maintenance and updates can help mitigate these issues, ensuring your machine operates smoothly.
How do I choose the right laser source for my machine?
Selecting the right laser source depends on the materials you plan to cut and the precision required. Fiber lasers are ideal for metals due to their efficiency, while CO2 lasers are versatile for various materials like wood and acrylic. Consider your specific needs to make an informed choice.
What safety measures should I take during assembly?
Safety is crucial when assembling a laser cutter. Wear appropriate personal protective equipment (PPE) like safety goggles to protect your eyes. Ensure proper ventilation in your workspace and keep a fire extinguisher nearby. Regularly check electrical connections to prevent hazards.
How can I maintain my laser cutting machine for optimal performance?
Regular maintenance is key. Clean the optics to ensure the laser beam remains focused. Check electrical connections for wear or looseness. Address any alignment issues promptly to maintain cutting precision. These practices extend the lifespan of your machine and enhance its performance.
What are the benefits of using a laser cutting machine?
Laser cutting machines offer energy efficiency, making them cost-effective for mass production. They provide automation capabilities, reducing manual labor. The precision of laser cutting ensures high-quality results, suitable for intricate designs and patterns.
How do I troubleshoot alignment problems?
To troubleshoot alignment issues, regularly check the mirrors and lenses. Use alignment tools to ensure the laser beam travels straight. Adjust the components as needed to achieve perfect alignment. Consistent checks prevent cutting errors and improve efficiency.
Can I automate my laser cutting machine?
Yes, you can automate your laser cutting machine. Software integration allows for computer numerical control (CNC), enabling precise and automated cutting processes. This capability enhances productivity and ensures consistent results.
What materials can I use with a laser cutting machine?
Laser cutting machines can handle a variety of materials. CO2 lasers are suitable for wood, acrylic, and some metals. Fiber lasers excel in cutting metals like steel and aluminum. Choose the appropriate laser type based on the materials you plan to work with.
How do I ensure my laser cutting machine is energy efficient?
To ensure energy efficiency, regularly maintain your machine. Clean optics and check electrical connections to prevent energy loss. Use the correct settings for each material to optimize power usage. Efficient machines reduce operational costs and environmental impact.
See Also
Comparative Guide to Laser Cutting Machine Prices
Maximizing Efficiency with Your Laser Cutting Machine
Understanding the Functionality of CNC Laser Cutters